2.2线性布局
文章目录
- 一、线性布局
- 1、常用属性
- 二、案例(线性布局属性)
- 1、创建安卓应用
- 2、主布局资源文件
- 3、字符串资源文件
- 4、预览效果
- 5、设置布局属性,查看效果
- (1)设置线性布局方向
- (2)设置线性布局内边距
- (3)设置线性布局对齐方式
- (4)设置线性布局背景
- (5)实现边框渐变色效果
- 三、线性布局嵌套
- 1、创建安卓应用
- 2、准备图片素材
- 3、主布局资源文件
- 4、字符串资源文件
- 5、查看预览效果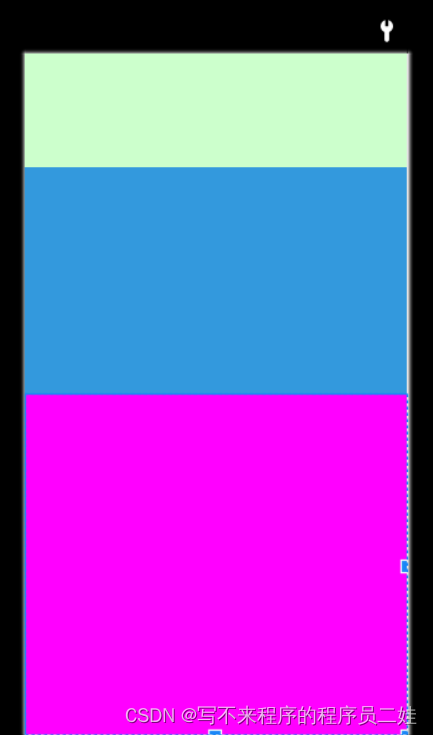
- 6、修改布局,查看效果
一、线性布局
- 线性布局(LinearLayout)是一种比较常用且简单的布局方式。在这种布局中,所有的子元素都是按照垂直或水平的顺序排列在界面上。如果是垂直排列,每个子元素占一行,如果是水平排列,则每个子元素占一列。线性布局可以支持布局样式嵌套实现复杂的布局样式。
1、常用属性
| 属性 | 含义 |
|---|---|
| layout_height | 高度,单位:dp (wrap_content(根据内容确定高度), match_parent |
| layout_weight | 宽度,单位:dp (wrap_content, match_parent) |
| orietation | 方向(vertical,horizontal) |
| gravity | 对齐方式(left, right, center, top, bottom…) |
| background | 背景(颜色[color]、图片[drawable]、选择器[selector]) |
| weight | 比重(用于瓜分手机屏幕) |
| padding | 内边距 (paddingLeft, paddingRight, paddingTop, paddingBottom) |
| margin | 外边距 (marginLeft, marginRight, marginTop, marginBottom) |
二、案例(线性布局属性)
1、创建安卓应用
- 基于Empty Activity模板创建安卓应用 - LinearLayoutDemo
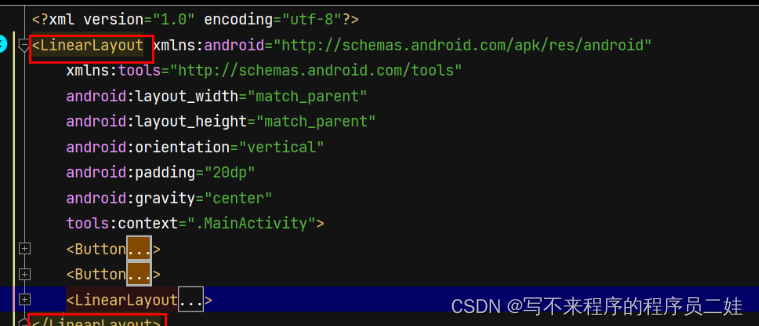
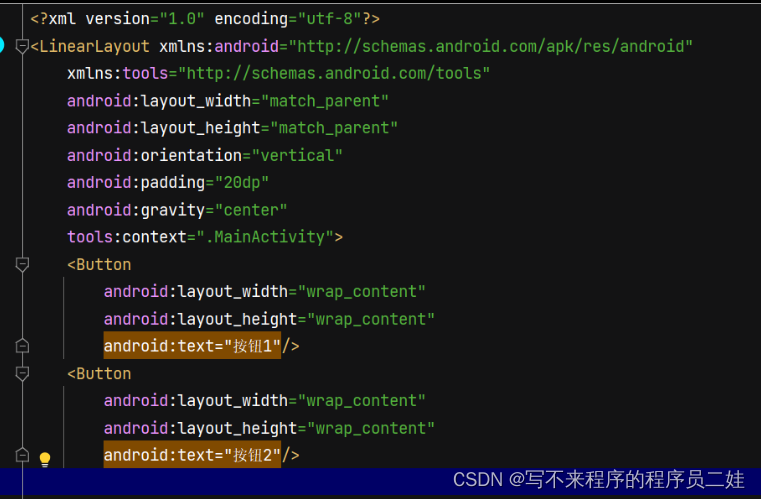
2、主布局资源文件
-
将约束布局改为线性布局,删掉默认的标签
-
添加两个按钮
<?xml version="1.0" encoding="utf-8"?>
<LinearLayout xmlns:android="http://schemas.android.com/apk/res/android"xmlns:tools="http://schemas.android.com/tools"android:layout_width="match_parent"android:layout_height="match_parent"tools:context=".MainActivity"><Buttonandroid:layout_width="wrap_content"android:layout_height="wrap_content"android:text="按钮1"/><Buttonandroid:layout_width="wrap_content"android:layout_height="wrap_content"android:text="按钮2"/>
</LinearLayout>
3、字符串资源文件
<resources><string name="app_name">线性布局演示</string>
</resources>
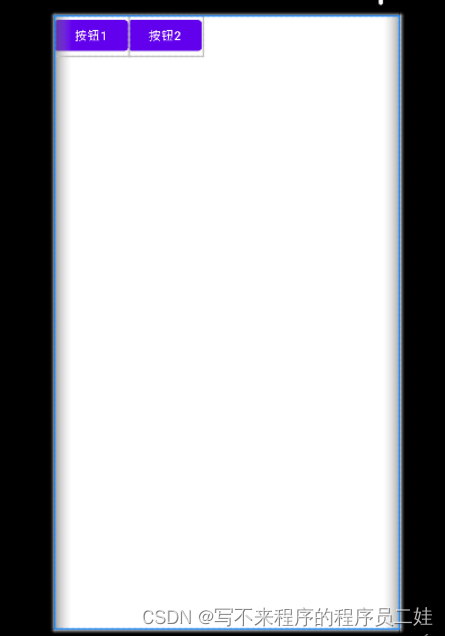
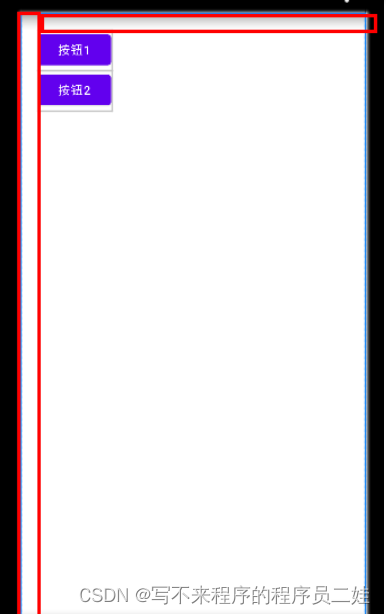
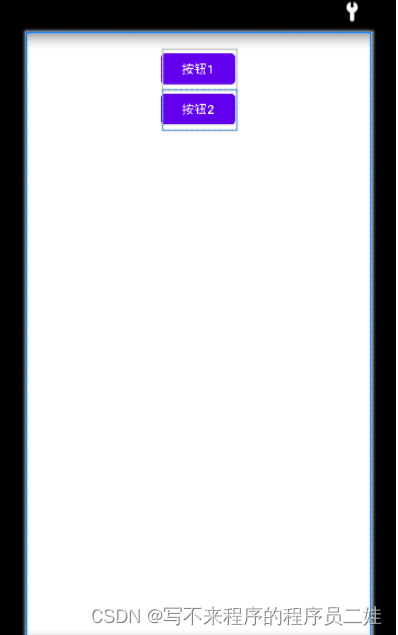
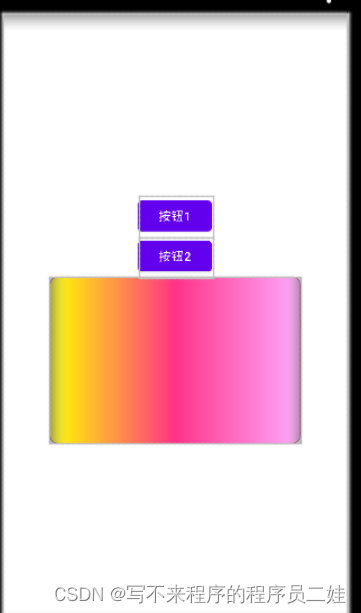
4、预览效果
- 查看效果,发现两个按钮水平摆放,在窗口左上角
5、设置布局属性,查看效果
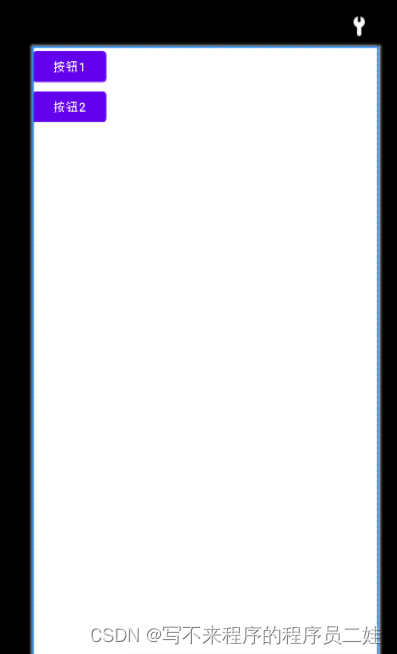
(1)设置线性布局方向
- orientation属性
<?xml version="1.0" encoding="utf-8"?>
<LinearLayout xmlns:android="http://schemas.android.com/apk/res/android"xmlns:tools="http://schemas.android.com/tools"android:layout_width="match_parent"android:layout_height="match_parent"android:orientation="vertical"tools:context=".MainActivity"><Buttonandroid:layout_width="wrap_content"android:layout_height="wrap_content"android:text="按钮1"/><Buttonandroid:layout_width="wrap_content"android:layout_height="wrap_content"android:text="按钮2"/></LinearLayout>
(2)设置线性布局内边距
- padding (paddingTop, paddingBottom, paddingLeft, paddingRight)

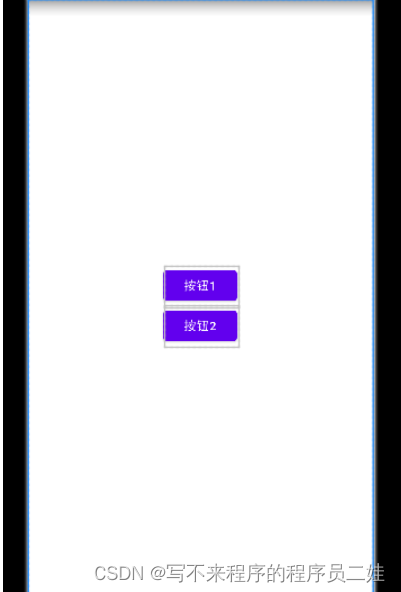
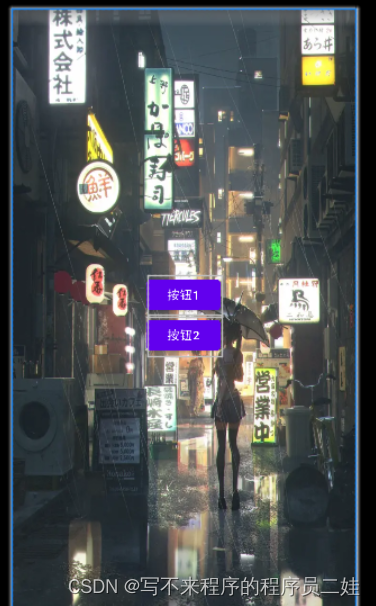
(3)设置线性布局对齐方式
-
gravity (left、center、right、top、bottom可以搭配形成很多种对齐方式)
例如:居中
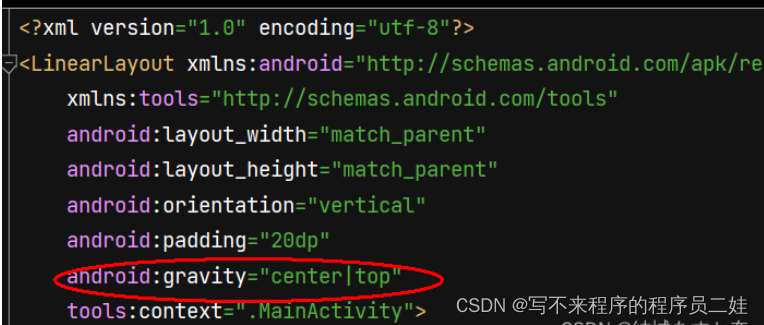
-
还可以设置联合对齐方式(如:gravity:“center|top” :上中)
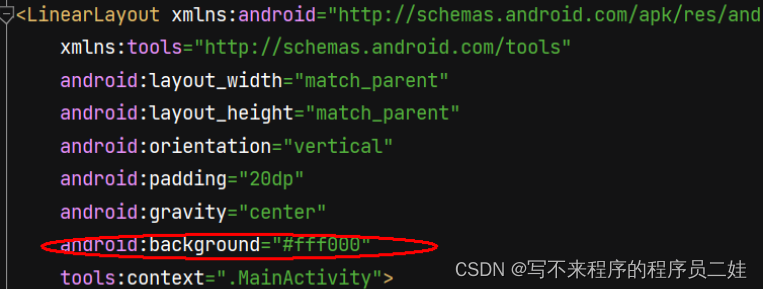
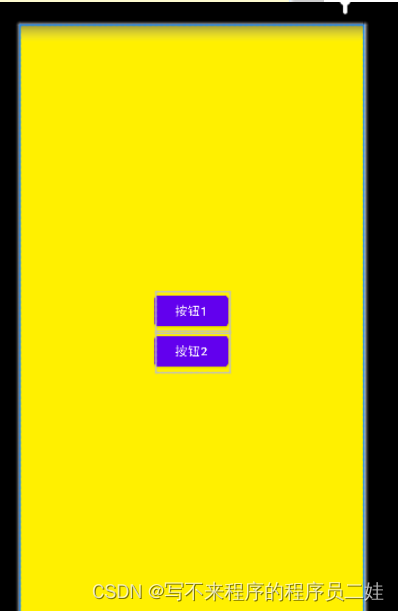
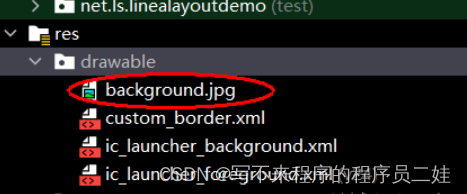
(4)设置线性布局背景
-
设置背景颜色
-
设置背景图片
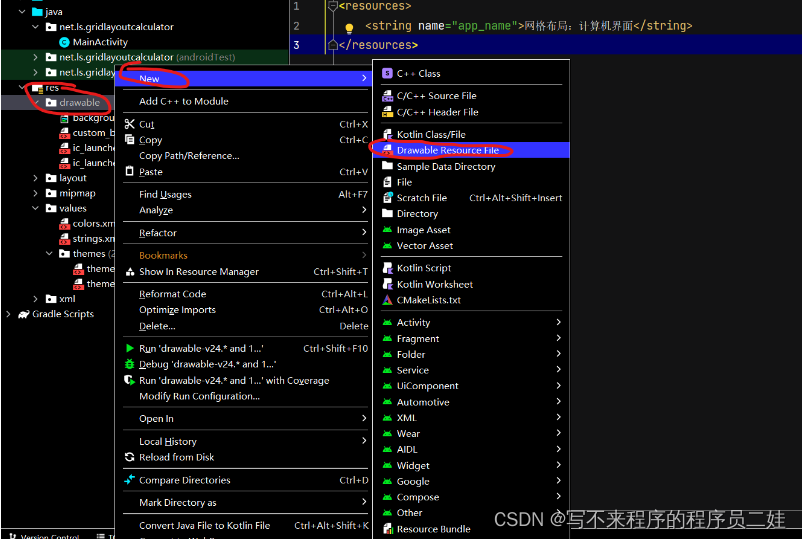
-
1、在drawable里添加图片
-
2、在布局资源中写入代码
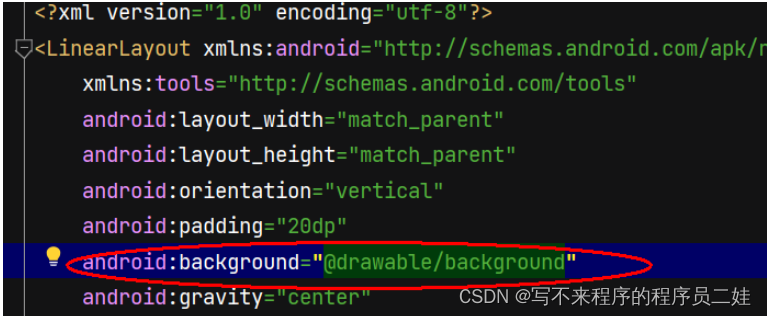
-
3、效果
(5)实现边框渐变色效果
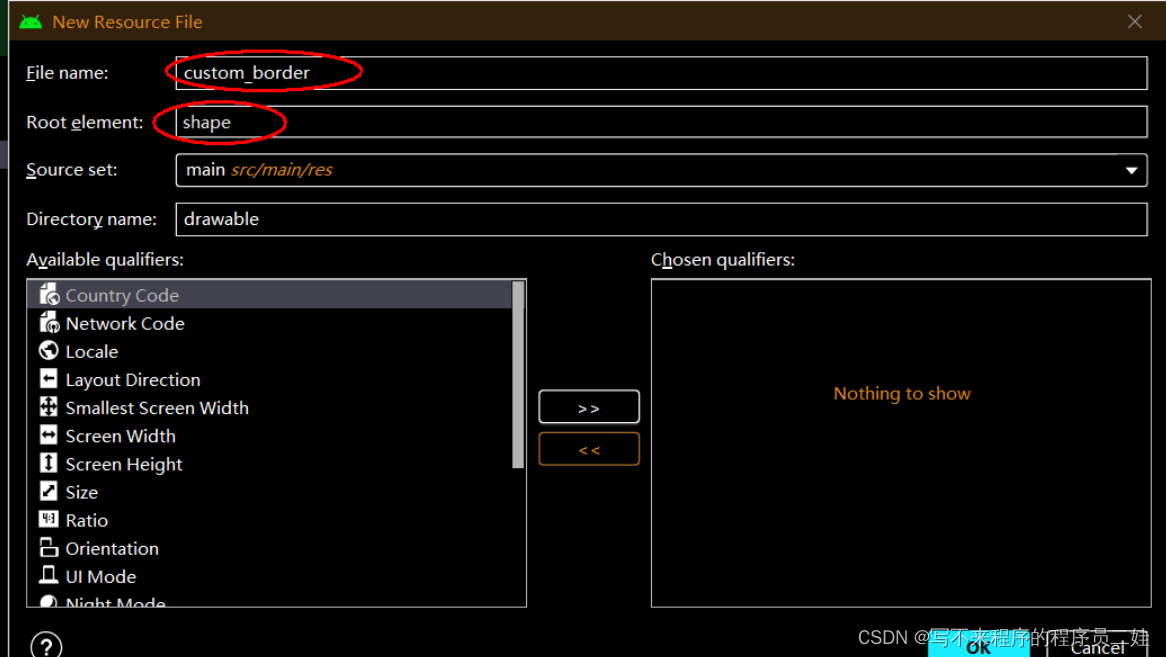
<?xml version="1.0" encoding="utf-8"?>
<shape xmlns:android="http://schemas.android.com/apk/res/android"android:shape="rectangle">//设置圆角<corners android:radius="10dp"/>//填充颜色<solid android:color="#ffaaff"/>//边框色、宽度<stroke android:width="1dp" android:color="#aa5555"/><gradient android:startColor="#ffff00"android:centerColor="#ff3388"android:endColor="#ffaaff"/>
</shape>
三、线性布局嵌套
1、创建安卓应用
- 基于Empty Activity创建安卓应用 - NestedLinearLayout
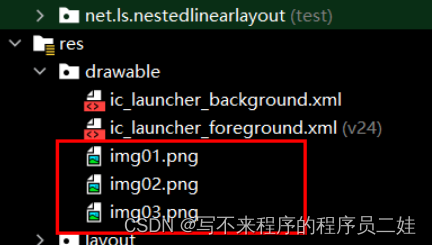
2、准备图片素材
- 将三张小图片拷贝到res/drawable目录
3、主布局资源文件
-
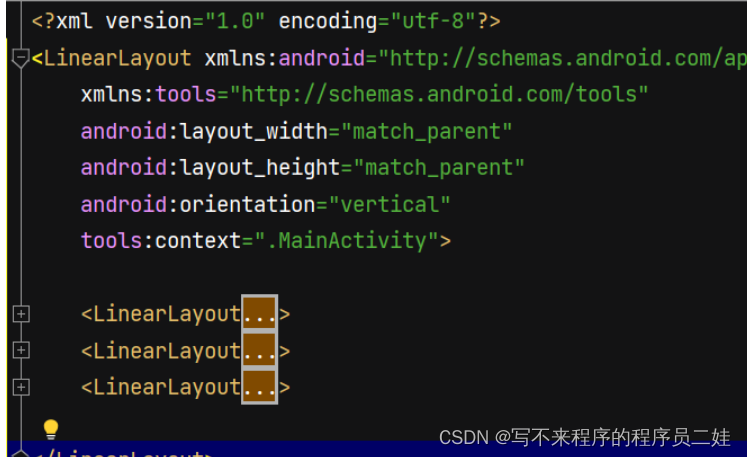
将约束布局改为线性布局
-
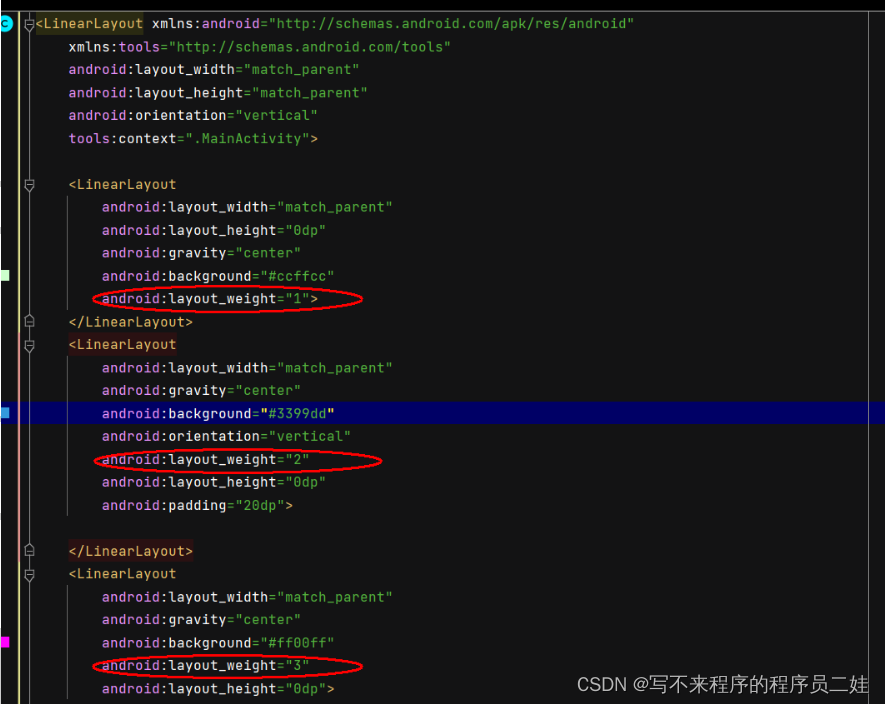
添加三个线性布局,按照1:2:3比例垂直瓜分手机屏幕
4、字符串资源文件
<resources><string name="app_name">线性布局嵌套演示</string>
</resources>
5、查看预览效果
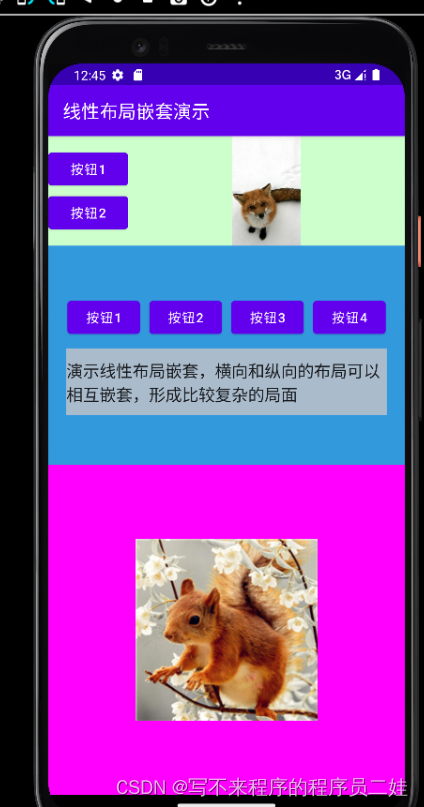
6、修改布局,查看效果
- 在第一个布局添加一张图片和两个按钮
- 在第二个布局里添加一个横向线性布局,里面添加四个按钮,以及在第二个布局里添加一个编辑框
- 在第三个布局中添加一个图片
<?xml version="1.0" encoding="utf-8"?>
<LinearLayout xmlns:android="http://schemas.android.com/apk/res/android"xmlns:tools="http://schemas.android.com/tools"android:layout_width="match_parent"android:layout_height="match_parent"android:orientation="vertical"tools:context=".MainActivity"><LinearLayoutandroid:layout_width="match_parent"android:layout_height="0dp"android:gravity="center"android:background="#ccffcc"android:layout_weight="1"><LinearLayoutandroid:layout_width="wrap_content"android:layout_height="wrap_content"android:orientation="vertical"><Buttonandroid:layout_width="wrap_content"android:layout_height="wrap_content"android:text="按钮1"/><Buttonandroid:layout_width="wrap_content"android:layout_height="wrap_content"android:text="按钮2"/></LinearLayout><ImageViewandroid:layout_width="wrap_content"android:layout_height="wrap_content"android:src="@drawable/img01"/></LinearLayout><LinearLayoutandroid:layout_width="match_parent"android:gravity="center"android:background="#3399dd"android:orientation="vertical"android:layout_weight="2"android:layout_height="0dp"android:padding="20dp"><LinearLayoutandroid:layout_width="match_parent"android:layout_height="wrap_content"android:gravity="center"><Buttonandroid:layout_width="80dp"android:layout_height="wrap_content"android:layout_marginRight="10dp"android:text="按钮1"/><Buttonandroid:layout_width="80dp"android:layout_height="wrap_content"android:layout_marginRight="10dp"android:text="按钮2"/><Buttonandroid:layout_width="80dp"android:layout_height="wrap_content"android:layout_marginRight="10dp"android:text="按钮3"/><Buttonandroid:layout_width="80dp"android:layout_height="wrap_content"android:text="按钮4"/></LinearLayout><EditTextandroid:layout_width="match_parent"android:layout_height="wrap_content"android:background="#aabbcc"android:lines="3"android:layout_marginTop="10dp"android:text="演示线性布局嵌套,横向和纵向的布局可以相互嵌套,形成比较复杂的局面" /></LinearLayout><LinearLayoutandroid:layout_width="match_parent"android:gravity="center"android:background="#ff00ff"android:layout_weight="3"android:layout_height="0dp"><ImageViewandroid:layout_width="wrap_content"android:layout_height="wrap_content"android:src="@drawable/img03"/></LinearLayout></LinearLayout>
- 效果
本文来自互联网用户投稿,文章观点仅代表作者本人,不代表本站立场,不承担相关法律责任。如若转载,请注明出处。 如若内容造成侵权/违法违规/事实不符,请点击【内容举报】进行投诉反馈!