电机专题3:舵机 stm32
舵机原理
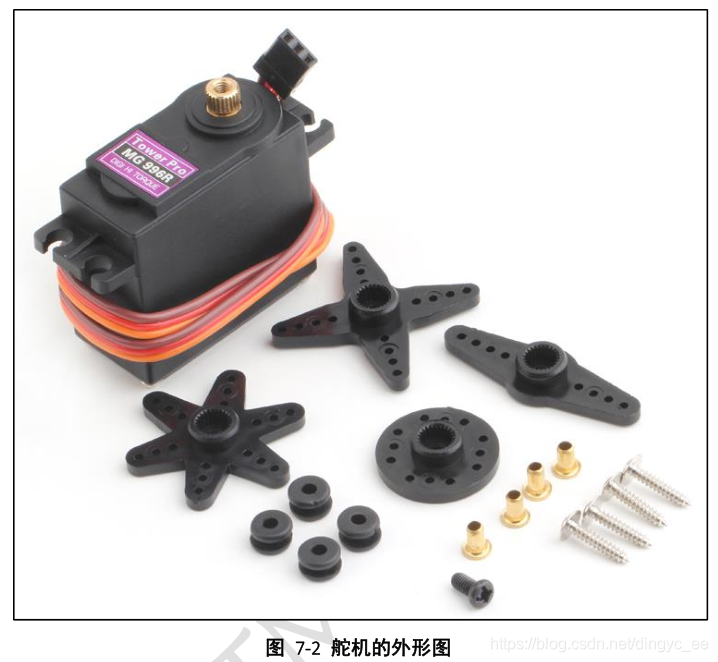
舵机的外形如下:
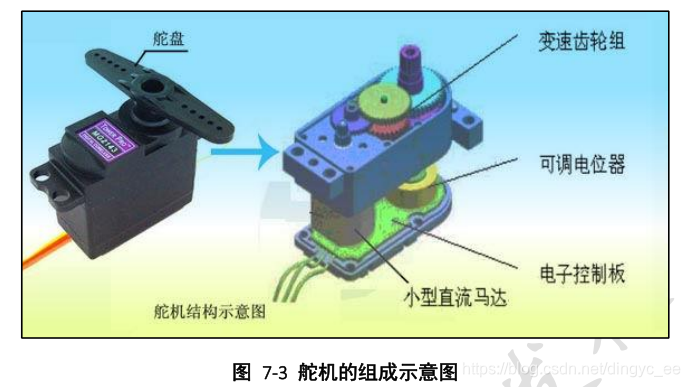
舵机的结构:
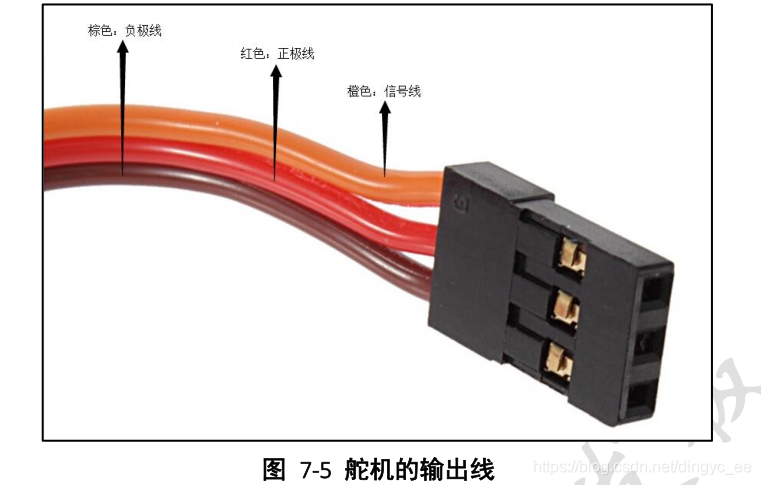
舵机的接线方式:
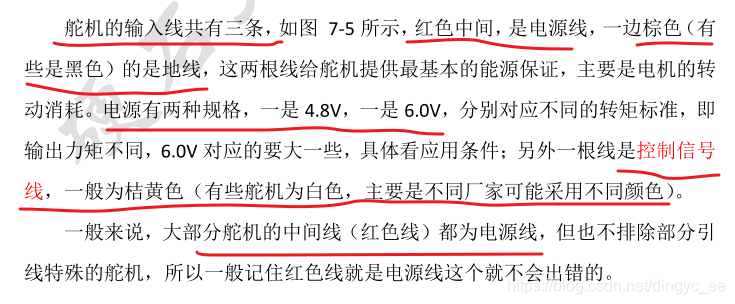
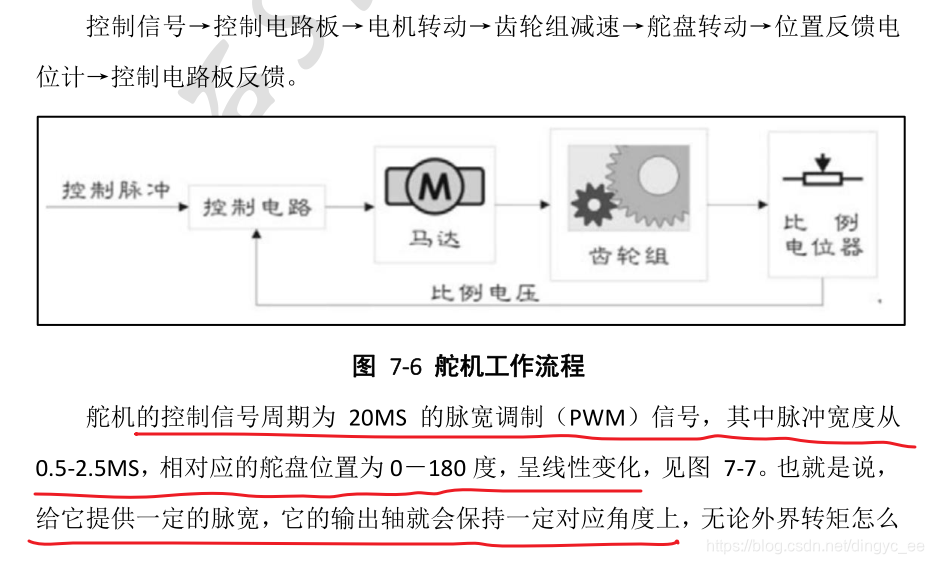
示意图:
舵机工作原理:
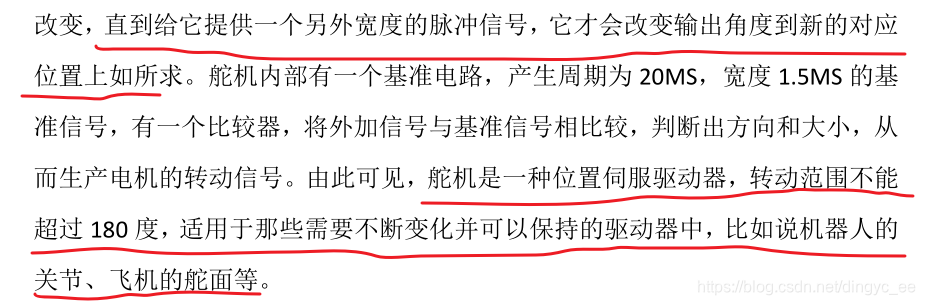
我们使用的舵机型号为 MG996R,由上面的舵机原理可知,只需要生成一个周期为20ms的PWM脉冲,通过调整PWM脉宽就可以对应的改变舵机的角度。以下是舵机参数:

舵机控制
接下来,我们通过stm32来生成PWM,控制电机,stm32cubeMX的配置如下:

这里,预分频PSC = 720,则定时器每10us计数一次,重装载值为2000,则PWM周期为2000 * 10(us) = 20ms,正好是舵机控制所需要的周期。脉宽为150*10/1000 = 1.5ms,对应初始角度为0的位置。
接下来是控制代码:
/*** @brief 调整舵机角度* @param angle 输入角度范围:-90 ~ 90*/
void MG996R_Set_Angle(int16_t angle)
{uint16_t CCR_value = 0;if ((-90 <= angle) && (angle <= 90)){CCR_value = (10. / 9) * angle + 150;		// 角度 to CCR值}else{CCR_value = 150;}__HAL_TIM_SET_COMPARE(&htim3, TIM_CHANNEL_1, CCR_value);
}
这个函数,用来将输入的角度值,转换成对应的定时器PWM的比较值CCR寄存器。angle = -90时,脉宽为0.5ms,对应的CCR为50,angle = 90时,脉宽为2.5ms,对应的CCR为250。由此可以得到这个关系式:
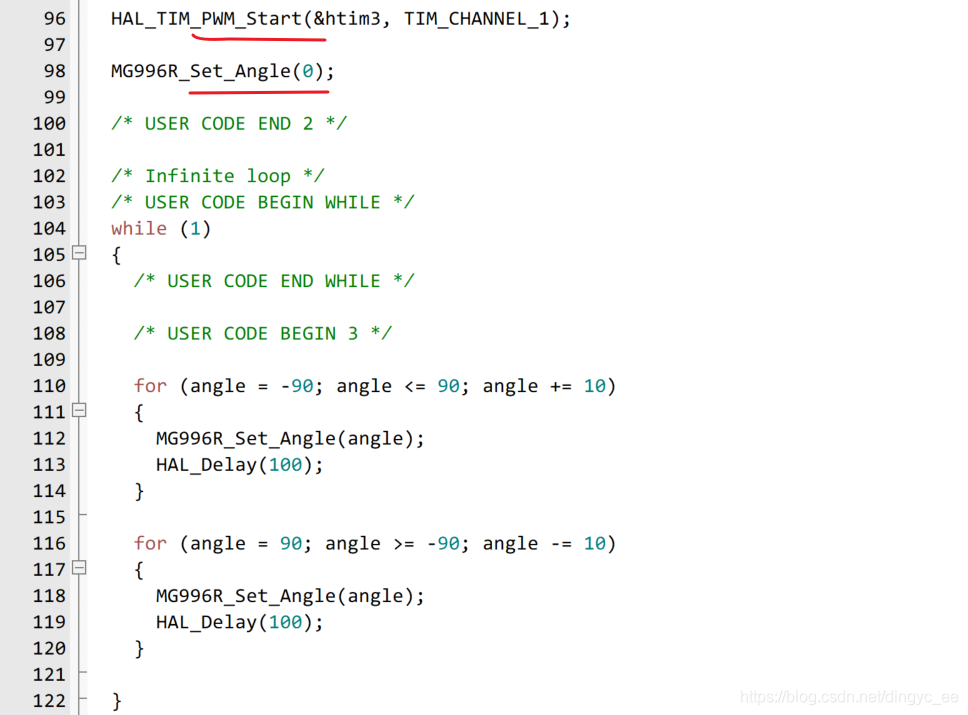
CCR_value = (10. / 9) * angle + 150; // 角度 to CCR值接下来,开启定时器,然后在主函数中进行测试:
完整的工程代码如下:
/* USER CODE BEGIN Header */
/********************************************************************************* @file : main.c* @brief : Main program body******************************************************************************* @attention** © Copyright (c) 2019 STMicroelectronics.* All rights reserved.
** This software component is licensed by ST under BSD 3-Clause license,* the "License"; You may not use this file except in compliance with the* License. You may obtain a copy of the License at:* opensource.org/licenses/BSD-3-Clause********************************************************************************/
/* USER CODE END Header *//* Includes ------------------------------------------------------------------*/
#include "main.h"
#include "tim.h"
#include "gpio.h"/* Private includes ----------------------------------------------------------*/
/* USER CODE BEGIN Includes *//* USER CODE END Includes *//* Private typedef -----------------------------------------------------------*/
/* USER CODE BEGIN PTD *//* USER CODE END PTD *//* Private define ------------------------------------------------------------*/
/* USER CODE BEGIN PD */
/* USER CODE END PD *//* Private macro -------------------------------------------------------------*/
/* USER CODE BEGIN PM *//* USER CODE END PM *//* Private variables ---------------------------------------------------------*//* USER CODE BEGIN PV *//* USER CODE END PV *//* Private function prototypes -----------------------------------------------*/
void SystemClock_Config(void);
/* USER CODE BEGIN PFP */
void MG996R_Set_Angle(int16_t angle);/* USER CODE END PFP *//* Private user code ---------------------------------------------------------*/
/* USER CODE BEGIN 0 *//* USER CODE END 0 *//*** @brief The application entry point.* @retval int*/
int main(void)
{/* USER CODE BEGIN 1 */int16_t angle = 0;/* USER CODE END 1 *//* MCU Configuration--------------------------------------------------------*//* Reset of all peripherals, Initializes the Flash interface and the Systick. */HAL_Init();/* USER CODE BEGIN Init *//* USER CODE END Init *//* Configure the system clock */SystemClock_Config();/* USER CODE BEGIN SysInit *//* USER CODE END SysInit *//* Initialize all configured peripherals */MX_GPIO_Init();MX_TIM3_Init();/* USER CODE BEGIN 2 */HAL_TIM_PWM_Start(&htim3, TIM_CHANNEL_1);MG996R_Set_Angle(0);/* USER CODE END 2 *//* Infinite loop *//* USER CODE BEGIN WHILE */while (1){/* USER CODE END WHILE *//* USER CODE BEGIN 3 */for (angle = -90; angle <= 90; angle += 10){MG996R_Set_Angle(angle);HAL_Delay(100);}for (angle = 90; angle >= -90; angle -= 10){MG996R_Set_Angle(angle);HAL_Delay(100);}}/* USER CODE END 3 */
}/*** @brief System Clock Configuration* @retval None*/
void SystemClock_Config(void)
{RCC_OscInitTypeDef RCC_OscInitStruct = {0};RCC_ClkInitTypeDef RCC_ClkInitStruct = {0};/** Initializes the CPU, AHB and APB busses clocks */RCC_OscInitStruct.OscillatorType = RCC_OSCILLATORTYPE_HSE;RCC_OscInitStruct.HSEState = RCC_HSE_ON;RCC_OscInitStruct.HSEPredivValue = RCC_HSE_PREDIV_DIV1;RCC_OscInitStruct.HSIState = RCC_HSI_ON;RCC_OscInitStruct.PLL.PLLState = RCC_PLL_ON;RCC_OscInitStruct.PLL.PLLSource = RCC_PLLSOURCE_HSE;RCC_OscInitStruct.PLL.PLLMUL = RCC_PLL_MUL9;if (HAL_RCC_OscConfig(&RCC_OscInitStruct) != HAL_OK){Error_Handler();}/** Initializes the CPU, AHB and APB busses clocks */RCC_ClkInitStruct.ClockType = RCC_CLOCKTYPE_HCLK|RCC_CLOCKTYPE_SYSCLK|RCC_CLOCKTYPE_PCLK1|RCC_CLOCKTYPE_PCLK2;RCC_ClkInitStruct.SYSCLKSource = RCC_SYSCLKSOURCE_PLLCLK;RCC_ClkInitStruct.AHBCLKDivider = RCC_SYSCLK_DIV1;RCC_ClkInitStruct.APB1CLKDivider = RCC_HCLK_DIV2;RCC_ClkInitStruct.APB2CLKDivider = RCC_HCLK_DIV1;if (HAL_RCC_ClockConfig(&RCC_ClkInitStruct, FLASH_LATENCY_2) != HAL_OK){Error_Handler();}
}/* USER CODE BEGIN 4 *//*** @brief 调整舵机角度* @param angle 输入角度范围:-90 ~ 90*/
void MG996R_Set_Angle(int16_t angle)
{uint16_t CCR_value = 0;if ((-90 <= angle) && (angle <= 90)){CCR_value = (10. / 9) * angle + 150; // 角度 to CCR值}else{CCR_value = 150;}__HAL_TIM_SET_COMPARE(&htim3, TIM_CHANNEL_1, CCR_value);
}/* USER CODE END 4 *//*** @brief This function is executed in case of error occurrence.* @retval None*/
void Error_Handler(void)
{/* USER CODE BEGIN Error_Handler_Debug *//* User can add his own implementation to report the HAL error return state *//* USER CODE END Error_Handler_Debug */
}#ifdef USE_FULL_ASSERT
/*** @brief Reports the name of the source file and the source line number* where the assert_param error has occurred.* @param file: pointer to the source file name* @param line: assert_param error line source number* @retval None*/
void assert_failed(uint8_t *file, uint32_t line)
{ /* USER CODE BEGIN 6 *//* User can add his own implementation to report the file name and line number,tex: printf("Wrong parameters value: file %s on line %d\r\n", file, line) *//* USER CODE END 6 */
}
#endif /* USE_FULL_ASSERT *//************************ (C) COPYRIGHT STMicroelectronics *****END OF FILE****/
本文来自互联网用户投稿,文章观点仅代表作者本人,不代表本站立场,不承担相关法律责任。如若转载,请注明出处。 如若内容造成侵权/违法违规/事实不符,请点击【内容举报】进行投诉反馈!