iOS中瀑布流布局详解
前段时间在逛淘宝的时候发现淘宝的商品界面的布局是瀑布流(我记得明明之前不是瀑布流的😑)。刚好手上活忙完了,写了一个瀑布流的布局,简单的封装了下,以便日后使用😏。其实说到底瀑布流也就是UICollectionView做的,只是修改了CollectionView的流式布局(FlowLayout),以后要用就直接把自定义的FlowLayout拿过来用就行了。
瀑布流
1.要有瀑布流首先得有colletionView,所以先在viewController中把我们的colletionView弄出来。因为没有做网络请求,所以现在我模拟了一份数据,都是在plist里面装着在呢。
plist数据
相关图片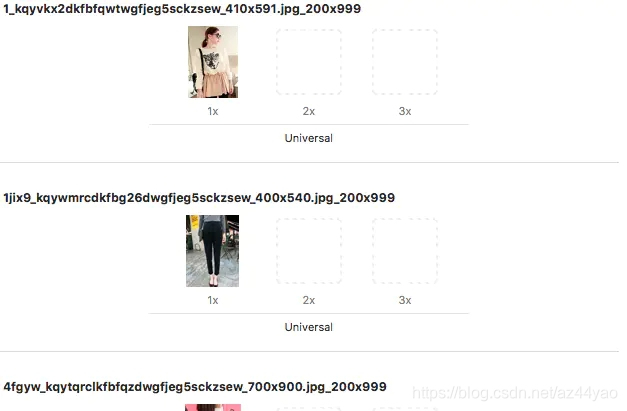
这里强调一下,因为我是直接用sb的方式加载的,所以代理啊,数据源啊都不用写了,包括后面自定义cell中的那些控件都是直接拉线连的。那这里我们就直接上数据源方法
#pragma mark 数据源 -(NSInteger) collectionView:(UICollectionView *)collectionView numberOfItemsInSection:(NSInteger)section{return self.dataArr.count;
}
-(UICollectionViewCell *)collectionView:(UICollectionView *)collectionView cellForItemAtIndexPath:(NSIndexPath *)indexPath{CYWCell *cell = [collectionView dequeueReusableCellWithReuseIdentifier:@"cell" forIndexPath:indexPath];cell.model = self.dataArr[indexPath.item];return cell;
}
用懒加载的方式去加载plist中的数据
@interface ViewController ()
//懒加载之后的数据数组
@property (nonatomic,strong) NSMutableArray *dataArr;
@end
#pragma mark 懒加载
-(NSMutableArray *)dataArr{if (_dataArr == nil) {NSArray *arr = [NSArray arrayWithContentsOfFile:[[NSBundle mainBundle] pathForResource:@"1.plist" ofType:nil]];  NSMutableArray *arrM = [NSMutableArray arrayWithCapacity:arr.count];for (NSDictionary *dict in arr) {CYWModel *model = [CYWModel modelWithDict:dict];[arrM addObject:model];}_dataArr = arrM;}return _dataArr;
}
用来接受数据的模型
记得.h中要引入UIKit框架,不然CGFloat是敲不出来的
#import @interface CYWModel : NSObject
//高
@property (nonatomic,assign) CGFloat height;
//宽
@property (nonatomic,assign) CGFloat width;
//图片
@property (nonatomic,copy) NSString *icon;
//价格
@property (nonatomic,copy) NSString *price;
+(instancetype) modelWithDict:(NSDictionary *)dict;@end
.m中最好实现下orUndefinedKey:方法,怕万一通过KVC没找到对应的key时候崩掉
#import "CYWModel.h"
@implementation CYWModel
+(instancetype)modelWithDict:(NSDictionary *)dict{id obj = [[self  alloc] init];[obj setValuesForKeysWithDictionary:dict];return obj;
}
-(void)setValue:(id)value forUndefinedKey:(NSString *)key{NSLog(@"%@ --- %@",value,key);
}
@end
接下来自定义的cell中引入模型属性,重写set方法就好了。
@interface CYWCell ()
@property (weak, nonatomic) IBOutlet UIImageView *imageView;
@property (weak, nonatomic) IBOutlet UILabel *priceLabel;
@end
@implementation CYWCell
-(void)setModel:(CYWModel *)model{_model = model;self.imageView.image = [UIImage imageNamed:model.icon];self.priceLabel.text = model.price;
}
接下来在模拟器中如果能运行出如下图的样子就行了
示例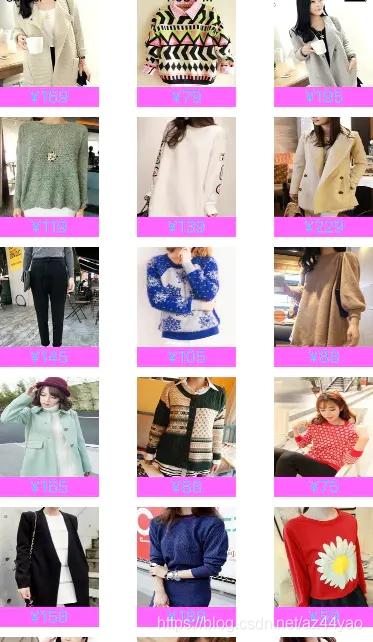
那么醉关键了位置就是接下来自定义我们的UICollectionViewFlowLayout
这是.h中留出来给控制器赋值的属性,到时候你还可以自己添加你需要的属性。
#import @interface CYWWaterFallLayout : UICollectionViewFlowLayout//列数
@property (nonatomic,assign) NSInteger colCount;//数据
@property (nonatomic,strong) NSArray *dataList;@end
这是.m文件,关键的地方的注释我也写上去了。
另外在插句嘴,其实瀑布流最主要就是限宽不限高去计算;另外,你以后在需要瀑布流布局的时候一定要记得找后台的哥们把图片的真实尺寸传过来,因为你需要计算长宽比。#######
#import "CYWWaterFallLayout.h"
#import "CYWModel.h"@interface CYWWaterFallLayout ()//用来返回布局的数组
@property (nonatomic,strong) NSMutableArray *dataArr;
// 用来保存每一列item当前的总高@property (nonatomic, strong) NSMutableArray *eachColumnMaxHight;@end@implementation CYWWaterFallLayout/** 准备开始布局 调用collectionView的 relodata方法也会调用这个方法 * 所以在这个方法里面自定义瀑布流的布局*/
-(void)prepareLayout{
//    获取collectionView中第0组的item个数NSInteger itemNum= [self.collectionView numberOfItemsInSection:0];for (NSInteger i = 0; i < itemNum; i++) {NSIndexPath *indexpath = [NSIndexPath indexPathForItem:i inSection:0];
//        布局UICollectionViewLayoutAttributes *attr = [UICollectionViewLayoutAttributes layoutAttributesForCellWithIndexPath:indexpath];//        总宽CGFloat contentW = self.collectionView.bounds.size.width - self.sectionInset.left - self.sectionInset.right;
//        item宽CGFloat itemW = (contentW - (self.colCount - 1) * self.minimumInteritemSpacing) / self.colCount;
//        获取item高CYWModel *model = self.dataList[i];CGFloat itemH = itemW * (model.height /model.width);//        itemXNSInteger colNum = i % self.colCount;CGFloat itemX = self.sectionInset.left + (itemW + self.minimumInteritemSpacing) * colNum;//        itemYCGFloat itemY = [self.eachColumnMaxHight[colNum] floatValue];attr.frame = CGRectMake(itemX, itemY, itemW, itemH);
//        重新给数组中的最高y赋值self.eachColumnMaxHight[colNum] = @(itemY + itemH + self.minimumLineSpacing);[self.dataArr addObject:attr];}}//返回collectioView的滚动范围
-(CGSize)collectionViewContentSize{NSInteger maxCol = [self calculateMaxHeightCol];return CGSizeMake(0, [self.eachColumnMaxHight[maxCol] floatValue] - self.minimumLineSpacing);
}-(NSInteger)calculateMaxHeightCol{NSInteger maxCol = 0;CGFloat maxHeight = 0;for (NSInteger i = 0; i < self.colCount; i++) {if (maxHeight < [self.eachColumnMaxHight[i] floatValue]) {maxHeight = [self.eachColumnMaxHight[i] floatValue];maxCol = i;}}return maxCol;
}//这个方法中可以返回collectionView上所用item的索引,rect
-(NSArray *)layoutAttributesForElementsInRect:(CGRect)rect{return self.dataArr;
}#pragma mark 懒加载
-(NSMutableArray *)dataArr{if (_dataArr == nil) {_dataArr = [NSMutableArray array];}return _dataArr;
}- (NSMutableArray *)eachColumnMaxHight {if (_eachColumnMaxHight == nil) {// 初始化可变数组_eachColumnMaxHight = [NSMutableArray arrayWithCapacity:self.colCount];// 给数组中的中赋值初始值for (NSInteger i = 0; i < self.colCount; i++) {// 让每一列当前的高度为一个组的顶部间距_eachColumnMaxHight[i] = @(self.sectionInset.top);}}return _eachColumnMaxHight;
}
@end
最后,我把这个demo放在了GitHub上,有兴趣的可以看看哈https://github.com/YWDrenched/C1
13人点赞
iOSer
作者:YW_Drenched
链接:https://www.jianshu.com/p/a5401b21391e
来源:简书
著作权归作者所有。商业转载请联系作者获得授权,非商业转载请注明出处。
本文来自互联网用户投稿,文章观点仅代表作者本人,不代表本站立场,不承担相关法律责任。如若转载,请注明出处。 如若内容造成侵权/违法违规/事实不符,请点击【内容举报】进行投诉反馈!