初探Web Components
前言:对于前端来说组件并不会陌生,React和Vue中组件经常被使用,浏览器的原生组件就是Web Components,原生组件相对于框架组件来说更加简单直接,符合直觉,不用加载任何外部模块,代码量小。最近我在做一个谷歌浏览器插件需求时候,发现往页面中插入元素可能会对当前页面产生影响,为了避免这种不必要的影响,我选择使用了自定义组件。
1、自定义组件封装
创建index.js文件,定义一个类继承自HTMLElement,借助template来快速创建元素。
class FoodCard extends HTMLElement {constructor() {super();const templateElem = document.getElementById('myFoodCard');const content = templateElem.content.cloneNode(true);this.appendChild(content);}
}
window.customElements.define('food-card', FoodCard);
2、自定义组件使用
创建index.html文件,直接在html文件中引入自定义标签即可。
DOCTYPE html>
<html lang="en"><head><meta charset="UTF-8" /><meta http-equiv="X-UA-Compatible" content="IE=edge" /><meta name="viewport" content="width=device-width, initial-scale=1.0" /><title>web componentstitle>head><body><template id="myFoodCard"><style>section {padding: 10px;box-sizing: border-box;display: flex;align-items: center;flex-direction: row;}section .left{background-color: aquamarine;min-width: 20px;height: 100%;}section .right {flex: 1;padding-left: 10px;}style><section><div class="left">图片div><div class="right"><div class="right-top">标题div><div class="right-bottom">描述div>div>section>template><food-card/><script src="./index.js">script>body>
html>
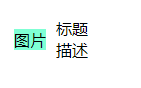
此时页面可以看到如下内容:
我们的自定义组件已经可以使用,不过缺少传参。因此,做出如下修改
index.js
class FoodCard extends HTMLElement {constructor() {super();const templateElem = document.getElementById('myFoodCard');const content = templateElem.content.cloneNode(true);content.querySelector('.image').setAttribute('src', this.getAttribute('src'));content.querySelector('.right-top').innerHTML=this.getAttribute('title');content.querySelector('.right-bottom').innerHTML=this.getAttribute('description');this.appendChild(content);}
}
window.customElements.define('food-card', FoodCard);
index.html文件
DOCTYPE html>
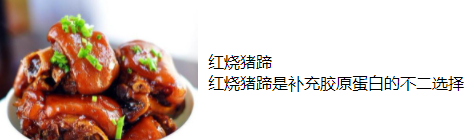
<html lang="en"><head><meta charset="UTF-8" /><meta http-equiv="X-UA-Compatible" content="IE=edge" /><meta name="viewport" content="width=device-width, initial-scale=1.0" /><title>web componentstitle>head><body><template id="myFoodCard"><style>section {padding: 10px;box-sizing: border-box;display: flex;align-items: center;flex-direction: row;}section .left{min-width: 20px;max-width: 200px;height: 100%;overflow: hidden;}.left img{width: 100%;}section .right {flex: 1;padding-left: 10px;}style><section><div class="left"><img src="" class="image"/>div><div class="right"><div class="right-top">标题div><div class="right-bottom">描述div>div>section>template><food-cardsrc="http://qianlingvip.cn:3300/uploads/2021-05-13-15-13-451546.jpg"title="红烧猪蹄"description="红烧猪蹄是补充胶原蛋白的不二选择"/><script src="./index.js">script>body>
html>此时,我们就可以改变属性动态改变自定义组件中的内容了。
3、Shadow DOM
我们不希望用户能够看到的内部代码,Web Component 允许内部代码隐藏起来,这叫做 Shadow DOM,即这部分 DOM 默认与外部 DOM 隔离,内部任何代码都无法影响外部。
自定义元素的this.attachShadow()方法开启 Shadow DOM,详见下面的代码。
class FoodCard extends HTMLElement {constructor() {super();const shadow = this.attachShadow( { mode: 'closed' } );const templateElem = document.getElementById('myFoodCard');const content = templateElem.content.cloneNode(true);content.querySelector('.image').setAttribute('src', this.getAttribute('src'));content.querySelector('.right-top').innerHTML=this.getAttribute('title');content.querySelector('.right-bottom').innerHTML=this.getAttribute('description');shadow.appendChild(content);}
}
window.customElements.define('food-card', FoodCard);
上面代码中,this.attachShadow()方法的参数{ mode: ‘closed’ },表示 Shadow DOM 是封闭的,不允许外部访问。
至此,这个 Web Component 组件就完成了。
4、事件
在上边基础上如果需要添加一些事件,可以进行如下改造。
class FoodCard extends HTMLElement {constructor() {super();const shadow = this.attachShadow( { mode: 'closed' } );const templateElem = document.getElementById('myFoodCard');const content = templateElem.content.cloneNode(true);const left = content.querySelector('.left');content.querySelector('.image').setAttribute('src', this.getAttribute('src'));content.querySelector('.right-top').innerHTML=this.getAttribute('title');content.querySelector('.right-bottom').innerHTML=this.getAttribute('description');// 事件添加left.addEventListener('click', ()=>{console.log('点击了');})shadow.appendChild(content);}
}
window.customElements.define('food-card', FoodCard);
5、生命周期回调
注意: 生命周期回调在构造方法之外使用
5.1、connectedCallback
每次将自定义元素附加到与文档连接的元素中时调用。这将在每次移动节点时发生,并且可能在元素的内容被完全解析之前发生。
class FoodCard extends HTMLElement {constructor() {super();const shadow = this.attachShadow( { mode: 'closed' } );const templateElem = document.getElementById('myFoodCard');const content = templateElem.content.cloneNode(true);const left = content.querySelector('.left');content.querySelector('.image').setAttribute('src', this.getAttribute('src'));content.querySelector('.right-top').innerHTML=this.getAttribute('title');content.querySelector('.right-bottom').innerHTML=this.getAttribute('description');left.addEventListener('click', ()=>{console.log('点击了');})shadow.appendChild(content);}connectedCallback(){console.log('触发');}
}
window.customElements.define('food-card', FoodCard);
5.2、disconnectedCallbac
每次自定义元素与文档的 DOM 断开连接时调用。
5.3、adoptedCallback
每次将自定义元素移动到新文档时调用。
5.4、attributeChangedCallback
每次添加、删除或更改自定义元素的属性之一时调用
6、组件单独抽离
由于上述封装时候还需要在index.html文件里写入模板内容,这样就会导致index.html增添了一些无用的DOM元素,因此,将template元素内容抽离到组件里边去。改动如下:
index.js
const templateElemList = `
![]() 标题描述
标题描述
index.html中将template部分内容去掉
DOCTYPE html>
<html lang="en"><head><meta charset="UTF-8" /><meta http-equiv="X-UA-Compatible" content="IE=edge" /><meta name="viewport" content="width=device-width, initial-scale=1.0" /><title>web componentstitle>head><body><food-cardsrc="http://qianlingvip.cn:3300/uploads/2021-05-13-15-13-451546.jpg"title="红烧猪蹄"description="红烧猪蹄是补充胶原蛋白的不二选择"/><script src="./index.js">script>body>
html>
本文来自互联网用户投稿,文章观点仅代表作者本人,不代表本站立场,不承担相关法律责任。如若转载,请注明出处。 如若内容造成侵权/违法违规/事实不符,请点击【内容举报】进行投诉反馈!