QT网络通信TCP UDP
在QT中高版本的支持lambada表达式,但是需要在“projectName.pro”的文件中添加"CONFIG += C++11"这行代码,下面就新和旧两种形式书写记录。
一、TCP
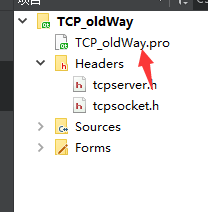
1.完整的工程
- 此工程中的tcpserver.cpp中的信号和槽函数的连接使用的connect()函数用的是大多数的旧版本也支持的形式,并且在此文件中都是手动连接的
- 在tcpsocket.cpp中的信号和槽函数的连接使用的是自动连接,即:从ui界面的器件中鼠标右键转到槽函数。也有手动连接的
- 手动连接时候注意需要在相应的头文件中的"private slots:"下面声明需要的函数
- connect(a,SIGNAL(b),c,SLOT(d));自己的理解记忆法:a接收一个b这样的信号之后需要让c去完成d这样的功能。相当于单片机中的中断:接收外部的一个信号,触发中断函数,在中断函数中完成相对应的任务。


==注意:此工程中使用的器件:IP输入框和Port输入框使用的是Input Widgets---->Line Edit;中间的两个框上面的是消息记录框,下面的是信息输入框,这两个框使用的是Input Widgets---->Text Edit;最下面的三个按钮使用的是Buttons---->Push Button

修改名字:
1:sIP
2:sPort
3:record
4:msg
5:openBt
6:closeBt
7:sendBt


下面来两个图能够截屏截到全面貌的


下面给出"tcpserver.cpp"此文件中的所有的代码
#include "tcpserver.h"
#include "ui_tcpserver.h"TCPServer::TCPServer(QWidget *parent) :QWidget(parent),ui(new Ui::TCPServer)
{ui->setupUi(this);ui->sIP->setText("127.0.0.1");ui->sPort->setText("8888");server = new QTcpServer(this);conn = new QTcpSocket(this);//侦听应该是全程都在侦听,和按钮的槽信号关联之后可能会导致点击一次侦听一次,//亦有可能不会,因为接收信息的是在里面写着的,接收信息只要正常,那么就可以写在里面server->listen(QHostAddress(ui->sIP->text()),ui->sPort->text().toInt());connect(server,SIGNAL(newConnection()),this,SLOT(conn_slot()));//服务器端全部手动关联,客户端全部自动关联//点击打开按钮,提示信息打开,接收信息//connect(ui->openBt,&QPushButton::clicked,this,SLOT("openBt_slot()"));//点击关闭按钮,断开连接//connect(ui->closeBt,&QPushButton::clicked,this,SLOT("closeBt_slot()"));connect(ui->closeBt,SIGNAL(clicked()),this,SLOT(closeBt_slot()));
}void TCPServer:: conn_slot(){conn = server->nextPendingConnection();connect(ui->openBt,SIGNAL(clicked()),this,SLOT(openBt_slot()));
}
void TCPServer::openBt_slot(){//关联接收信号connect(conn,SIGNAL(readyRead()),this,SLOT(readData_slot()));connect(ui->sendBt,SIGNAL(clicked()),this,SLOT(sendBt_slot()));QMessageBox::information(this,"提示","打开成功");
}
void TCPServer:: closeBt_slot(){conn->close();QMessageBox::information(this,"提示","关闭成功");
}void TCPServer:: readData_slot(){ui->record->append(conn->readAll());QMessageBox::information(this,"提示","读取数据成功");
}void TCPServer::sendBt_slot(){//发送信息conn->write(ui->msg->toPlainText().toUtf8());ui->record->append("server say:"+ui->msg->toPlainText());//QMessageBox::information(this,"提示","读取数据成功");
}TCPServer::~TCPServer()
{delete ui;
}
下面给出“tcpserver.h”中的所有代码
#ifndef TCPSERVER_H
#define TCPSERVER_H#include
#include
#include
#include namespace Ui {
class TCPServer;
}class TCPServer : public QWidget
{Q_OBJECTpublic:explicit TCPServer(QWidget *parent = nullptr);~TCPServer();private  slots:void openBt_slot();void sendBt_slot();void readData_slot();void closeBt_slot();void conn_slot();
private:Ui::TCPServer *ui;QTcpServer *server;//server用于监听QTcpSocket *conn;//conn用于通信
};#endif // TCPSERVER_H 


“tcpsocket.cpp”代码如下
#include "tcpsocket.h"
#include "ui_tcpsocket.h"TCPSocket::TCPSocket(QWidget *parent) :QWidget(parent),ui(new Ui::TCPSocket)
{ui->setupUi(this);ui->sIP->setText("127.0.0.1");ui->sPort->setText("8888");conn = new QTcpSocket(this);}TCPSocket::~TCPSocket()
{delete ui;}void TCPSocket::on_openBt_clicked()
{//连接服务器conn->connectToHost(ui->sIP->text(),ui->sPort->text().toInt());//打开客户端准备接收信息connect(conn,SIGNAL(readyRead()),this,SLOT(readyRead_slot()));}void TCPSocket::on_closeBt_clicked()
{}void TCPSocket::on_sendBt_clicked()
{conn->write(ui->msg->toPlainText().toUtf8());ui->record->append(ui->msg->toPlainText());
}void TCPSocket:: readyRead_slot(){ui->record->append(conn->readAll());
}
"tcpsocket.h"代码
#ifndef TCPSOCKET_H
#define TCPSOCKET_H#include
#include
#include namespace Ui {
class TCPSocket;
}class TCPSocket : public QWidget
{Q_OBJECTpublic:explicit TCPSocket(QWidget *parent = nullptr);~TCPSocket();private slots:void on_openBt_clicked();void on_closeBt_clicked();void on_sendBt_clicked();void readyRead_slot();private:Ui::TCPSocket *ui;QTcpSocket *conn;
};#endif // TCPSOCKET_H 
"main.cpp"代码如下
#include "tcpserver.h"
#include
#include "tcpsocket.h"int main(int argc, char *argv[])
{QApplication a(argc, argv);TCPServer s;s.setWindowTitle("server");s.show();TCPSocket c;c.setWindowTitle("client");c.show();return a.exec();
}
运行结果如下:

==2.支持lambada函数新形式的完整工程
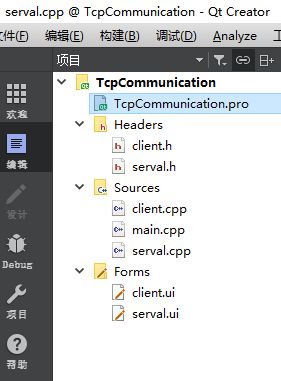


//server.cpp文件
#include "serval.h"
#include "ui_serval.h"
#include Serval::Serval(QWidget *parent) :QWidget(parent),ui(new Ui::Serval)
{ui->setupUi(this);//初始化ui->sIP->setText("127.0.0.1");ui->sPort->setText("8888");//实例化server = new QTcpServer;//监听server->listen(QHostAddress(ui->sIP->text()),ui->sPort->text().toInt());qDebug("server 11111111111111111111111111");//等待连接会有个newConnection()信号connect(server,&QTcpServer::newConnection,this,[=](){qDebug("server 222222222222222222222222222222");//获取套接字conn = server->nextPendingConnection();//返回的是对方的套接字信息,可以正常通信了ui->record->append("have a new link.....");qDebug("server 33333333333333333333333333333333");//接收信息connect(conn,&QTcpSocket::readyRead,this,[=](){qDebug("server 4444444444444444444444444444444");//接收信息QByteArray arry= conn->readAll();ui->record->append(arry);});qDebug("server 5555555555555555555555555555555555555555");});qDebug("server 6666666666666666666666666666666666");//发送connect(ui->sendBt,&QPushButton::pressed,this,[=](){qDebug("server 777777777777777777777777777777777777777");//发送信息conn->write(ui->msg->toPlainText().toUtf8());ui->record->append("sever say"+ui->msg->toPlainText());//发送框中信息清空ui->msg->clear();qDebug("server 88888888888888888888888888888888888888888888");});qDebug("server 9999999999999999999999999999999999999999");
}Serval::~Serval()
{delete ui;
} 
//server.h文件
#ifndef SERVAL_H
#define SERVAL_H#include
#include
#include
#include namespace Ui {
class Serval;
}class Serval : public QWidget
{Q_OBJECTpublic:explicit Serval(QWidget *parent = nullptr);~Serval();private:Ui::Serval *ui;QTcpServer  *server;//监听QTcpSocket *conn;//通信
};#endif // SERVAL_H 


//client.cpp文件
#include "client.h"
#include "ui_client.h"
#include Client::Client(QWidget *parent) :QWidget(parent),ui(new Ui::Client)
{ui->setupUi(this);client = new QTcpSocket;ui->sIP->setText("127.0.0.1");ui->sPort->setText("8888");qDebug("client 11111111111111111111111111");//连接服务器client->connectToHost(ui->sIP->text(),ui->sPort->text().toInt());qDebug("client 22222222222222222222222222222");connect(ui->sendBt,&QPushButton::pressed,this,[=](){qDebug("client 3333333333333333333333333333333");//发送client->write(ui->msg->toPlainText().toUtf8());ui->record->append("client say:"+ui->msg->toPlainText());qDebug("client 444444444444444444444444444");});qDebug("client 5555555555555555555555555555555");//接收信息connect(client,&QTcpSocket::readyRead,this,[=](){qDebug("client 6666666666666666666666666666666");QByteArray arry=client->readAll();ui->record->append(arry);qDebug("client 7777777777777777777777777777777777");});qDebug("client 8888888888888888888888888888888888");
}Client::~Client()
{delete ui;
} 
//client.h文件
#ifndef CLIENT_H
#define CLIENT_H#include
#include
#include namespace Ui {
class Client;
}class Client : public QWidget
{Q_OBJECTpublic:explicit Client(QWidget *parent = nullptr);~Client();private:Ui::Client *ui;QTcpSocket *client;};#endif // CLIENT_H 
//main.cpp文件
#include "serval.h"
#include #include "client.h"int main(int argc, char *argv[])
{QApplication a(argc, argv);Serval w;w.setWindowTitle("serval");w.show();Client c;c.setWindowTitle("client");c.show();return a.exec();
}
//运行结果如下

二、UDP
同上先用低版本的实现一下
- 注意:如下的代码是对照着哔哩哔哩上的一个视频做的


.cpp文件如下
#include "widget.h"
#include "ui_widget.h"
#include Widget::Widget(QWidget *parent) :QWidget(parent),ui(new Ui::Widget)
{ui->setupUi(this);udpSocket = new QUdpSocket(this);}Widget::~Widget()
{delete ui;
}void Widget::readyRead_slot(){while(udpSocket->hasPendingDatagrams()){QByteArray arry;arry.resize(udpSocket->hasPendingDatagrams());udpSocket->readDatagram(arry.data(),arry.size());QString buf;buf = arry.data();ui->recvEdit->appendPlainText(buf);ui->recvEdit->appendPlainText(buf);}
}void Widget::on_openBt_clicked()
{if(udpSocket->bind(ui->localPort->text().toUInt())==true){QMessageBox::information(this,"提示","成功");}else{QMessageBox::information(this,"提示","失败");}connect(udpSocket,SIGNAL(readyRead()),this,SLOT(readyRead_slot()));}void Widget::on_sendBt_clicked()
{quint16 port;QString sendbuff;QHostAddress address;address.setAddress(ui->aimIp->text());sendbuff = ui->sendEdit->text();port = ui->aimPort->text().toUInt();udpSocket->writeDatagram(sendbuff.toLocal8Bit().data(),sendbuff.length(),address,port);
}void Widget::on_closeBt_clicked()
{udpSocket->close();QMessageBox::information(this,"提示","关闭成功");
} 
//.h文件如下
#ifndef WIDGET_H
#define WIDGET_H#include
#include
#include
#include namespace Ui {
class Widget;
}class Widget : public QWidget
{Q_OBJECTpublic:explicit Widget(QWidget *parent = nullptr);~Widget();QUdpSocket *udpSocket;
private slots:void on_openBt_clicked();void readyRead_slot();void on_sendBt_clicked();void on_closeBt_clicked();private:Ui::Widget *ui;};#endif // WIDGET_H
//main.cpp
#include "widget.h"
#include int main(int argc, char *argv[])
{QApplication a(argc, argv);Widget w;w.show();return a.exec();
}
//运行结果如下
连接上网络测试机是可以通信的

2.支持lambada的写法


//server.cpp
#include "server.h"
#include "ui_server.h"Server::Server(QWidget *parent) :QWidget(parent),ui(new Ui::Server)
{ui->setupUi(this);udp1 = new QUdpSocket(this);//初始化IP和端口ui->cIP->setText("127.0.0.1");ui->cPort->setText("8888");ui->sPort->setText("6666");//绑定的是自己的端口udp1->bind(ui->sPort->text().toInt());connect(ui->sendBt,&QPushButton::pressed,this,[=](){/*发送信息在ui界面中信息框msg使用的是Input Widget--->Text Edit,转文本用的是toPlainText()方法,而cIP 和cPort使用的是Input Widget---->Line Edit,转文本用的是text()方法注意:绑定端口时是绑定的自己的端口,发送时候指定的是对方的IP地址和端口号*/udp1->writeDatagram(ui->msg->toPlainText().toUtf8(),QHostAddress(ui->cIP->text()),ui->cPort->text().toInt());ui->record->append("server say:"+ui->msg->toPlainText());// ui->record->clear();});//    connect(ui->openReceveBt,&QPushButton::clicked,this,[=](){
//       // QMessageBox::information(this,"提示","打开接收窗口成功");
//        qDebug("111111111111111111111111111111111111111");connect(udp1,&QUdpSocket::readyRead,this,[=](){
//qDebug("222222222222222222222222222222222");quint64 size = udp1->pendingDatagramSize();QByteArray array(size,0);udp1->readDatagram(array.data(),size);ui->record->append(array);});
//    });
}Server::~Server()
{delete ui;
}/*//加一个按钮的话就服务器接收信息就出问题了,connect(ui->openReceveBt,&QPushButton::clicked,this,[=](){// QMessageBox::information(this,"提示","打开接收窗口成功");qDebug("111111111111111111111111111111111111111");connect(udp1,&QUdpSocket::readyRead,this,[=](){
qDebug("222222222222222222222222222222222");quint64 size = udp1->pendingDatagramSize();QByteArray array(size,0);udp1->readDatagram(array.data(),size);ui->record->append(array);});});* /
//server.h
#ifndef SERVER_H
#define SERVER_H#include
#include
#include
#include namespace Ui {
class Server;
}class Server : public QWidget
{Q_OBJECTpublic:explicit Server(QWidget *parent = nullptr);~Server();private:Ui::Server *ui;QUdpSocket *udp1;
};#endif // SERVER_H 

//client.cpp
#include "client.h"
#include "ui_client.h"Client::Client(QWidget *parent) :QWidget(parent),ui(new Ui::Client)
{ui->setupUi(this);udp2 = new QUdpSocket(this);//初始化IP和端口ui->sIP->setText("127.0.0.1");ui->sPort->setText("6666");ui->cPort->setText("8888");//绑定的是自己的端口udp2->bind(ui->cPort->text().toInt());connect(ui->sendBt,&QPushButton::pressed,this,[=](){/*发送信息在ui界面中信息框msg使用的是Input Widget--->Text Edit,转文本用的是toPlainText()方法,而cIP 和cPort使用的是Input Widget---->Line Edit,转文本用的是text()方法注意:绑定端口时是绑定的自己的端口,发送时候指定的是对方的IP地址和端口号*/udp2->writeDatagram(ui->msg->toPlainText().toUtf8(),QHostAddress(ui->sIP->text()),ui->sPort->text().toInt());ui->record->append("client say:"+ui->msg->toPlainText());// ui->record->clear();});connect(udp2,&QUdpSocket::readyRead,this,[=](){quint64 size = udp2->pendingDatagramSize();QByteArray array(size,0);udp2->readDatagram(array.data(),size);ui->record->append(array);});
}Client::~Client()
{delete ui;
}
//server.h
#ifndef CLIENT_H
#define CLIENT_H#include
#includenamespace Ui {
class Client;
}class Client : public QWidget
{Q_OBJECTpublic:explicit Client(QWidget *parent = nullptr);~Client();private:Ui::Client *ui;QUdpSocket *udp2;
};#endif // CLIENT_H 
//main.cpp
#include "server.h"
#include
#include "client.h"
int main(int argc, char *argv[])
{QApplication a(argc, argv);Server s;s.setWindowTitle("sever");s.show();Client c;c.setWindowTitle("client");c.show();return a.exec();
}
//运行结果如下

本文来自互联网用户投稿,文章观点仅代表作者本人,不代表本站立场,不承担相关法律责任。如若转载,请注明出处。 如若内容造成侵权/违法违规/事实不符,请点击【内容举报】进行投诉反馈!