React Native Detox Andriod环境搭建(Genymotion版)
添加Android
建立
1.执行“入门指南”中描述的初始设置
- 需要配置初始化环境 参考这篇文章 入门
2.将detox Android项目添加为androidTestCompile依赖项
- 以下代码添加到您的
android/settings.gradle:
include ':detox'
project(':detox').projectDir = new File(rootProject.projectDir, '../node_modules/detox/android/detox')
如果您的项目的RN版本至少为0.46.0,请将oldOkhttp配置字符串更改为newOkhttp,在
app/build.gradle此处。
- 在
android/app/build.gradle需要添加dependencies section(依赖项部分):
androidTestCompile(project(path: ":detox", configuration: "newOkhttpDebug"), {exclude group: 'com.android.support', module: 'support-annotations'
})- 请注意,
minSdkVersion需要至少18。
3. jacoco-coverage在buildscript中添加依赖项
- 您需要将此添加
android/build.gradle到buildscript > dependencies:
classpath 'com.palantir:jacoco-coverage:0.4.0'- 在同一个文件中,您需要在以下位置添加
allprojects > repositories:
maven {url "https://maven.google.com"
}
4.介绍Espresso测试工具
- Detox 是标准的Android集成测试, 内部使用Espresso,使用AndroidJUnitRunner作为测试运行器(或其子类)。为此你需要修改你的
android/app/build.gradle:
android {defaultConfig {testBuildType System.getProperty('testBuildType', 'debug') //this will later be used to control the test apk build typetestInstrumentationRunner "android.support.test.runner.AndroidJUnitRunner"}
}
5.创建Android Test类
- 自己创建java文件
DetoxTest.java您需要添加文件android/app/src/androidTest/java/com/[your.package]/DetoxTest.java期望您需要将包更改为您的项目名称。例如此处我的为 /Users/guokai/Desktop/guokai/android/app/src/androidTest/java/com/guokai/DetoxTest.java
package com.example;import android.support.test.filters.LargeTest;
import android.support.test.rule.ActivityTestRule;
import android.support.test.runner.AndroidJUnit4;import com.wix.detox.Detox;import org.junit.Rule;
import org.junit.Test;
import org.junit.runner.RunWith;/*** Created by simonracz on 28/05/2017.*/@RunWith(AndroidJUnit4.class)
@LargeTest
public class DetoxTest {@Rulepublic ActivityTestRule mActivityRule = new ActivityTestRule<>(MainActivity.class, false, false);@Testpublic void runDetoxTests() throws InterruptedException {Detox.runTests(mActivityRule);}
}
6.添加Android配置
- 将此部分添加到您的
package.json:
"detox": {"configurations": {"android.emu.debug": {"binaryPath": "android/app/build/outputs/apk/app-debug.apk","build": "pushd android && ./gradlew assembleDebug assembleAndroidTest -DtestBuildType=debug && popd","type": "android.attached",     //  attached连接真机跟Genymotion"name": "192.168.56.101:5555"   //  Genymotion的ip 如果真机的话用 adb devices查出来的名字},"android.emu.release": {"binaryPath": "android/app/build/outputs/apk/app-debug.apk","build": "pushd android && ./gradlew assembleRelease assembleAndroidTest -DtestBuildType=release && popd","type": "android.emulator",     //  emulator 连接Avd"name": "Nexus_5X_API_25"       //  } }
}- 注意
DtestBuildType,设置为debug或release根据主apk类型。 - 以下设备类型可用于控制Android设备:
android.emulator。name例如,提供了启动库存SDK模拟器Nexus_5X_API_25。启动后连接到它。android.attached。连接到已经附加的Android设备。该设备应列在adb devices提供的命令输出中name。使用此类型连接到Genymotion模拟器。
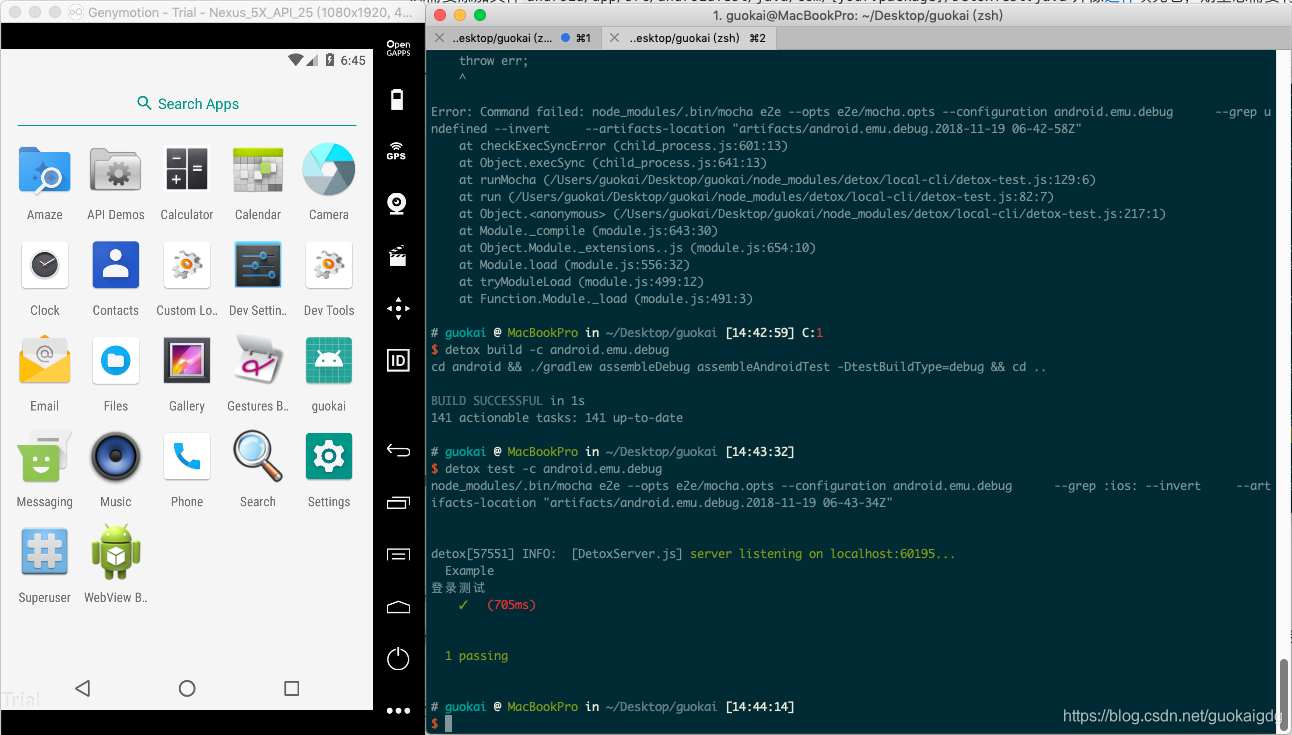
7.运行测试
- 使用
android.emu.debug上面的配置,您可以以标准方式调用它。
detox test -c android.emu.debug故障排除
- 如果你得到类似这样的错误:
Execution failed for task ':app:transformResourcesWithMergeJavaResForDebug'.
> com.android.build.api.transform.TransformException: com.android.builder.packaging.DuplicateFileException: Duplicate files copied in APK META-INF/LICENSE- 将以下代码添加到
android你的部分android/app/build.gradle:
packagingOptions {exclude 'META-INF/LICENSE'
}- 最后运行完成就是这样的
本文来自互联网用户投稿,文章观点仅代表作者本人,不代表本站立场,不承担相关法律责任。如若转载,请注明出处。 如若内容造成侵权/违法违规/事实不符,请点击【内容举报】进行投诉反馈!