Prettier Eslint Stylelint Husky lint-staged
关于代码格式的讨论数不胜数,个人认为没有绝对的对与错,代码只要始终遵守可读性,可拓展性强这两点我认为就是优秀的代码。
如果是个人项目那就没有什么问题,但是如果涉及到多人开发,就不可避免的遇到代码风格迥异,从而给组内其他成员增加阅读代码时的心智负担,所以需要指定编码格式,团队中的每个人都严格执行,且使用工具对代码进行检查,规范提交。
1.首先先创建一个示例vue3空项目
我这里使用pnpm ,注:pnpm最低支持node版本为16,所以使用前请先nvm切换至16版本及其以上。(如果没有安装请先npm i -g pnpm,mac电脑如果提示没有权限,即sudo npm i -g pnpm)
pnpm create vite test-vue3
接下来正常启动项目
cd test-vue3pnpm ipnpm dev2.Eslint+Prettier
vscode安装插件:
ESLint
Prettier
Prettier ESLint
配置vscode默认格式化程序为Prettier ESLint
npx eslint --init或者npm init @eslint/config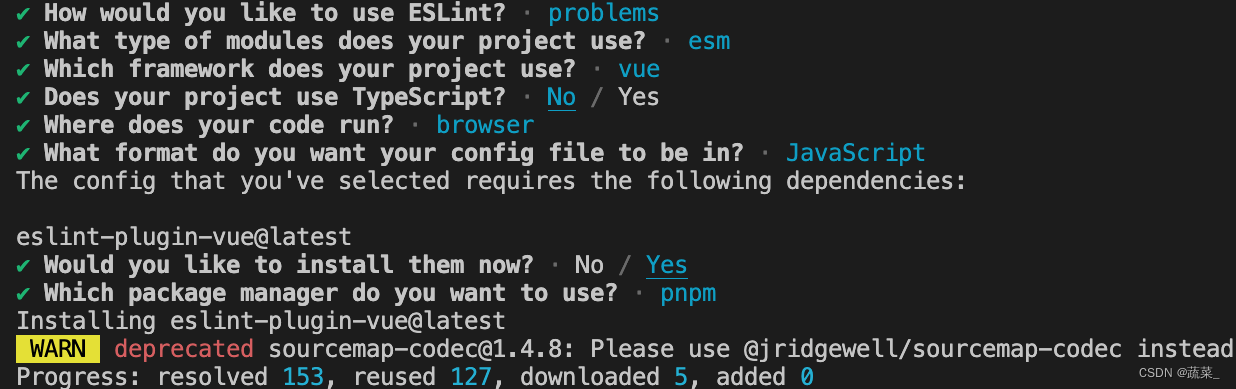
pnpm i prettier-eslint eslint-config-prettier eslint-plugin-prettier vue-eslint-parser --save-dev
根目录新增.eslintignore文件,忽略格式化文件夹:
node_modules
.vscode
.idea
dist
/public
到此Eslint就先告一段落
pnpm add prettier -D
项目根目录新建 .prettierrc.cjs
module.exports = {// 一行最多 80 字符printWidth: 80,// 使用 4 个空格缩进tabWidth: 4,// 不使用 tab 缩进,而使用空格useTabs: false,// 行尾需要有分号semi: true,// 使用单引号代替双引号singleQuote: false,// 对象的 key 仅在必要时用引号quoteProps: "as-needed",// jsx 不使用单引号,而使用双引号jsxSingleQuote: false,// 对象或者数组的最后一个元素后面不要加逗号trailingComma: "none",// 大括号内的首尾需要空格 { foo: bar }bracketSpacing: true,// jsx 标签的反尖括号需要换行jsxBracketSameLine: false,// 箭头函数,只有一个参数的时候,也需要括号arrowParens: "always",// 每个文件格式化的范围是文件的全部内容rangeStart: 0,rangeEnd: Infinity,// 不需要写文件开头的 @prettierrequirePragma: false,// 不需要自动在文件开头插入 @prettierinsertPragma: false,// 使用默认的折行标准proseWrap: "preserve",// 根据显示样式决定 html 要不要折行htmlWhitespaceSensitivity: "css",// 换行符使用 lfendOfLine: "auto",overrides: [{files: "*.html",options: {parser: "html"}}]
};
修改.eslintrc.cjs文件
module.exports = {env: {browser: true,es2021: true,node: true},globals: {// writable:可被重写。 readonly:只读。 off:禁用.// 系统框架级全局变量只能是readonly,// 如果vue3项目使用了auto-import插件 这里可以不用写,直接在extends字段里继承插件的globals。defineProps: "readonly",defineEmits: "readonly",defineExpose: "readonly",withDefaults: "readonly",ref: "readonly",onMounted: "readonly",reactive: "readonly",nextTick: "readonly"},extends: ["eslint:recommended","plugin:vue/vue3-essential",// prettier 必须放在最后面"prettier","plugin:prettier/recommended"],parser: "vue-eslint-parser",parserOptions: {ecmaVersion: "latest",sourceType: "module",ecmaFeatures: {jsx: false}},plugins: ["vue"],rules: {// 规则值:// "off" or 0 - 关闭规则,不启用该规则// "warn" or 1 - 将规则视为一个警告(不会影响退出码)// "error" or 2 - 将规则视为一个错误 (退出码为1)"prettier/prettier": "error",indent: ["error", 4, { SwitchCase: 1 }],"no-console": process.env.NODE_ENV === "production" ? 1 : 0,"no-debugger": process.env.NODE_ENV === "production" ? 1 : 0,"vue/multi-word-component-names": "off","consistent-return": 0, // 要求 return 语句要么总是指定返回的值,要么不指定camelcase: 0, // 强制使用骆驼拼写法命名约定"no-redeclare": 1, // 禁止多次声明同一变量"default-case": 1, // 要求 switch 语句中有 default 分支"no-fallthrough": 1, // 禁止 case 语句落空"no-lonely-if": 1, // 禁止 if 作为唯一的语句出现在 else 语句中.如果一个if陈述是该else块中唯一的陈述,那么使用一个else if表格通常会更清晰。"no-irregular-whitespace": 1, // 禁止在字符串和注释之外不规则的空白"prefer-const": 1, // 要求使用 const 声明那些声明后不再被修改的变量.如果一个变量从不重新分配,使用const声明更好。const 声明告诉读者,“这个变量永远不会被重新分配,”减少认知负荷并提高可维护性。"no-use-before-define": 2, // 禁止在变量定义之前使用它们"no-constant-condition": 2,"no-empty": 2,"vue/comment-directive": "off"}
};
3.Stylelint
pnpm add stylelint postcss postcss-less postcss-html stylelint-config-prettier stylelint-config-recommended-less stylelint-config-standard stylelint-config-standard-vue stylelint-less stylelint-order -D根目录新建.stylelintrc.cjs
// .stylelintrc.cjs
module.exports = {extends: ['stylelint-config-standard','stylelint-config-prettier','stylelint-config-recommended-less','stylelint-config-standard-vue'],plugins: ['stylelint-order'],// 不同格式的文件指定自定义语法overrides: [{files: ['**/*.(less|css|vue|html)'],customSyntax: 'postcss-less'},{files: ['**/*.(html|vue)'],customSyntax: 'postcss-html'}],ignoreFiles: ['**/*.js','**/*.jsx','**/*.tsx','**/*.ts','**/*.json','**/*.md','**/*.yaml'],rules: {'no-descending-specificity': null, // 禁止在具有较高优先级的选择器后出现被其覆盖的较低优先级的选择器'selector-pseudo-element-no-unknown': [true,{ignorePseudoElements: ['v-deep']}],'selector-pseudo-class-no-unknown': [true,{ignorePseudoClasses: ['deep']}],// 指定样式的排序'order/properties-order': ['position','top','right','bottom','left','z-index','display','justify-content','align-items','float','clear','overflow','overflow-x','overflow-y','padding','padding-top','padding-right','padding-bottom','padding-left','margin','margin-top','margin-right','margin-bottom','margin-left','width','min-width','max-width','height','min-height','max-height','font-size','font-family','text-align','text-justify','text-indent','text-overflow','text-decoration','white-space','color','background','background-position','background-repeat','background-size','background-color','background-clip','border','border-style','border-width','border-color','border-top-style','border-top-width','border-top-color','border-right-style','border-right-width','border-right-color','border-bottom-style','border-bottom-width','border-bottom-color','border-left-style','border-left-width','border-left-color','border-radius','opacity','filter','list-style','outline','visibility','box-shadow','text-shadow','resize','transition']}}
vscode安装Stylelint插件,至此,每次保存代码的时候编辑器都会自动格式&排序样式代码。
根目录增加.vscode/settings.josn文件,并写入如下内容:
{// 保存的时候自动格式化"editor.formatOnSave": true,// 配置该项,新建文件时默认就是space:2"editor.tabSize": 2,// 默认格式化工具选择prettier"editor.defaultFormatter": "esbenp.prettier-vscode",// 开启自动修复"editor.codeActionsOnSave": {"source.fixAll": false,"source.fixAll.eslint": true,"source.fixAll.stylelint": true},// stylelint校验的文件格式"stylelint.validate": ["css", "scss", "less", "vue", "html"],"[vue]": {"editor.defaultFormatter": "esbenp.prettier-vscode"}
}
重启编辑器,至此,所有人的代码编辑环境都处于一致
4.Husky+Lint-staged
虽然上面已经完成了eslint+prettier+stylelint的配置,可以在保存的时候自动格式化代码,但是可能会存在一些粗心的同学,编辑器没有安装上述插件,就不能很好的保证代码格式质量。
pnpm add husky lint-staged -D Husky 是一款管理 git hooks 的工具,可以让我们更方便的管理 git hooks 脚本。它将在我们提交代码时触发不同的钩子,执行不同脚本,帮忙我们自动化的处理一些任务,比如执行 eslint 命令等。
但它存在一个问题,就是每次git提交都会对整个项目src中的所有文件都进行检测,很多时候这是不需要的,最好的方法就是对新修改的代码进行检测。
而 lint-staged 工具就是基于此,只针对提交的代码文件进行检查处理。
package.json-->scripts增加命令
"scripts": {"dev": "vite","build": "vite build","preview": "vite preview",+"prepare": "husky install",+"eslint": "eslint . --ext .vue,.js,.ts,.jsx,.tsx --fix",+"prettier": "prettier --write ./**/*.{html,vue,ts,cjs,json,md}",+"stylelint": "stylelint ./**/*.{css,less,vue,html} --fix",+"format": "npm run eslint && npm run stylelint && npm run prettier"},
新增四条命令,从上至下分别是:
prepare:该命令会在instll后自动执行,用来配置项目husky环境
eslint:对js代码进行格式化处理
prettier:对代码进行格式化处理
stylelint:对样式代码进行格式化处理
format:依次运行以上三条格式化命令
因为我们前面已经执行了instll命令了,所以这里我们直接运行pnpm prepare
运行完毕后会发现根目录增加了一个.husky目录,执行命令:
npx husky add .husky/pre-commit "npx --no-install lint-staged"执行完命令后.husky文件夹生成pre-commit文件
package.json增加配置:
"lint-staged": {"*.{js,ts,jsx,tsx}": ["prettier --write","eslint --fix"],"*.{css,less,scss}": ["stylelint --fix"],"*.{html,vue}": ["prettier --write","stylelint --fix","eslint --fix"]},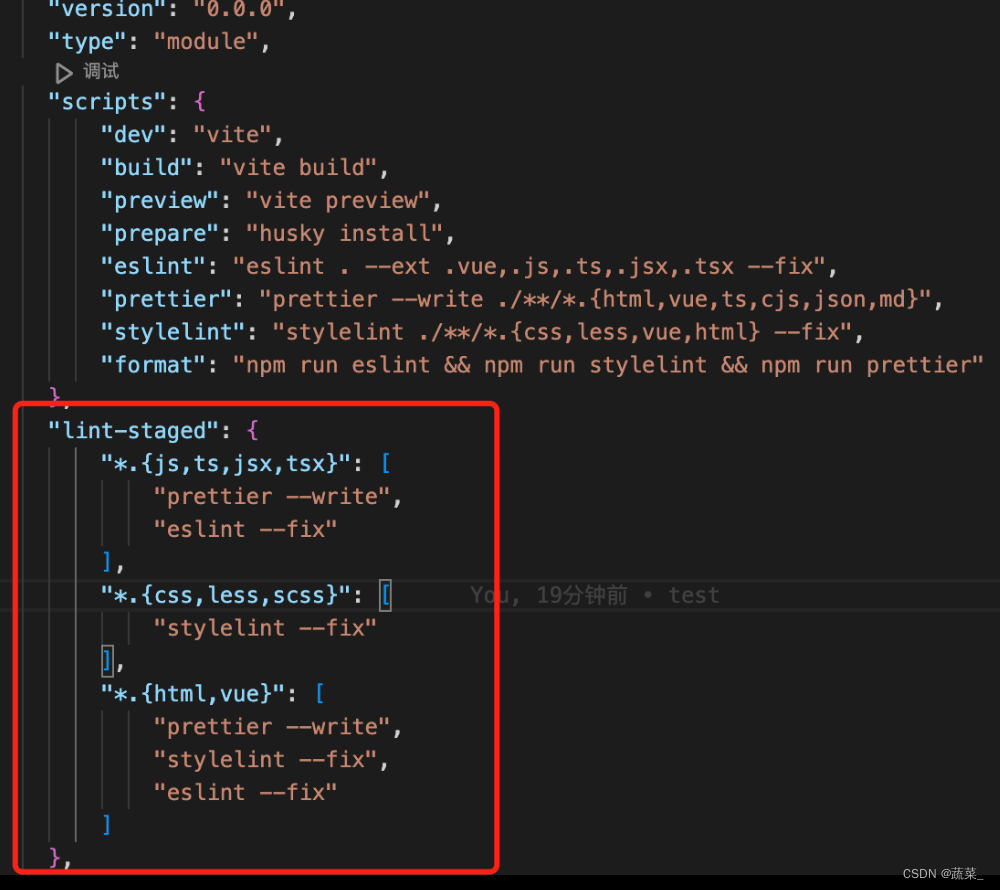
至此,我们在编写代码,以及提交代码的时候都会自动的检查&格式化代码。
结束~
本文来自互联网用户投稿,文章观点仅代表作者本人,不代表本站立场,不承担相关法律责任。如若转载,请注明出处。 如若内容造成侵权/违法违规/事实不符,请点击【内容举报】进行投诉反馈!