【Java愚公】axelor使用
axelor使用
- 目录结构介绍
- 配置文件介绍
- 搭建子模块
- 第1步:创建项目
- 第2步:创建模块
- 第3步:定义模型
- 第4步:定义视图
- 第5步:定义操作
- 第6步:配置
- 第7步:启动服务器
- 安装子模块
- 使用子模块
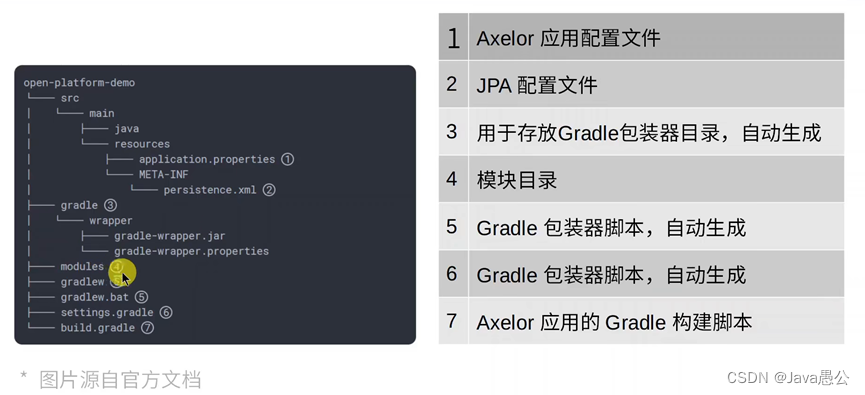
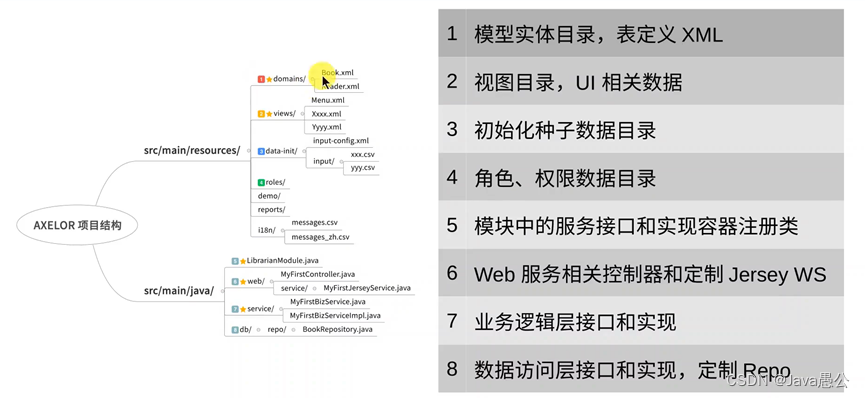
目录结构介绍
目录结构介绍可参考Axelor官网给的说明,参考地址:https://docs.axelor.com/adk/5.0/tutorial/step1.html
配置文件介绍
配置图文说明如下:
搭建子模块
搭建子模块参考官网地址:https://docs.axelor.com/adk/5.0/tutorial/step1.html
第1步:创建项目
参考地址:https://docs.axelor.com/adk/5.0/tutorial/step1.html
注意:基于我们前面已经创建gradle的项目,请翻阅我上文写的如何搭建axelor的文章。
第2步:创建模块
参考地址:https://docs.axelor.com/adk/5.0/tutorial/step2.html
在应用程序项目中创建一个新目录modules/contact并创建模块构建脚本
modules/contact/build.gradleapply plugin: 'com.axelor.app-module' axelor {title "Contact Address System"version "2.2.1"description "This is a contact address system. yoyoyo ~~ "removable = true }dependencies {}
将模块包含到settings.gradle应用程序项目中。
settings.gradlerootProject.name = 'axelor-example' include "modules:contact"
并且应用程序正在使用这个模块,所以build.gradle必须像这样更新
build.gradle…省略前面部分 dependencies {compile project(":modules:contact") } …省略后面部分
现在检查项目是否配置正确,再次构建它
$ ./gradlew build
第3步:定义模型
参考地址:https://docs.axelor.com/adk/5.0/tutorial/step3.html
在contact/src/main/resources/domains/Title.xml 新建Title.xml文件
<domain-models xmlns="http://axelor.com/xml/ns/domain-models"xmlns:xsi="http://www.w3.org/2001/XMLSchema-instance"xsi:schemaLocation="http://axelor.com/xml/ns/domain-modelshttp://axelor.com/xml/ns/domain-models/domain-models_5.4.xsd"><module name="contact" package="com.example.contact.db"/><entity name="Title" table="TITLE" repository="default" sequential="false"><string name="code" required="true" unique="true" min="2" title="标题编码"/><string name="name" required="true" unique="true" min="2" namecolumn="true" title="标题名称"/>entity>domain-models>在contact/src/main/resources/domains/Address.xml 新建Address.xml文件
<domain-models xmlns="http://axelor.com/xml/ns/domain-models"xmlns:xsi="http://www.w3.org/2001/XMLSchema-instance"xsi:schemaLocation="http://axelor.com/xml/ns/domain-modelshttp://axelor.com/xml/ns/domain-models/domain-models_5.4.xsd"><module name="contact" package="com.example.contact.db"/><entity name="Address" table="ADDRESS" repository="default" sequential="false"><many-to-one name="contact" ref="Contact" required="true"/><string name="street" required="true" max="255" title="街道"/><string name="area" max="255" title="区域"/><string name="city" title="城市"/><string name="zip" title="zip"/><string name="state" title="state"/><string name="country" title="国家"/>entity>domain-models>
在contact/src/main/resources/domains/Contact.xml 新建Contact.xml文件
<domain-models xmlns="http://axelor.com/xml/ns/domain-models"xmlns:xsi="http://www.w3.org/2001/XMLSchema-instance"xsi:schemaLocation="http://axelor.com/xml/ns/domain-modelshttp://axelor.com/xml/ns/domain-models/domain-models_5.4.xsd"><module name="contact" package="com.example.contact.db"/><entity name="Contact" table="CONTACT" repository="default" sequential="false"><many-to-one name="title" ref="Title" title="标题"/><string name="firstName" required="true" title="firstName"/><string name="lastName" required="true" title="lastName"/><string name="fullName" namecolumn="true" search="firstName,lastName" title="fullName">string><date name="dateOfBirth" title="出生日期"/><string name="email" required="true" unique="true" max="100" title="邮箱"/><string name="phone" max="20" massUpdate="true" title="手机号"/><string name="notes" large="true" title="备注"/><one-to-many name="addresses" ref="Address" mappedBy="contact" title="地址"/><finder-method name="findByName" using="fullName"/><finder-method name="findByEmail" using="email"/>entity>domain-models>
第4步:定义视图
参考地址:https://docs.axelor.com/adk/5.0/tutorial/step4.html
在contact/src/main/resources/views/Contact.xml 新建Contact.xml文件
<object-views xmlns="http://axelor.com/xml/ns/object-views"xmlns:xsi="http://www.w3.org/2001/XMLSchema-instance"xsi:schemaLocation="http://axelor.com/xml/ns/object-viewshttp://axelor.com/xml/ns/object-views/object-views_5.4.xsd"><grid name="contact-grid" title="通讯录列表" model="com.example.contact.db.Contact"><field name="fullName"/><field name="email"/><field name="phone"/><field name="dateOfBirth"/>grid><form name="contact-form" title="通讯录表单" model="com.example.contact.db.Contact"><panel name="overviewPanel" title="概述"><field name="fullName" readonly="false"><editor><field name="title" colSpan="3"/><field name="firstName" colSpan="4"/><field name="lastName" colSpan="5"/>editor>field><field name="dateOfBirth"/><field name="email"><viewer>]]>viewer>field><field name="phone"><viewer>]]>viewer>field>panel><panel name="aboutMePanel" title="备注"><field name="notes" showTitle="false" colSpan="12"/>panel><panel-related field="addresses" name="addressesPanel" form-view="address-form-popup"><field name="street"/><field name="area"/><field name="city"/><field name="state"/><field name="zip"/><field name="country"/>panel-related><panel name="sidePanel" sidebar="true" stacked="true"><field name="createdOn"/><field name="createdBy"/><field name="updatedOn"/><field name="updatedBy"/>panel>form><form name="address-form-popup" title="Address" model="com.example.contact.db.Address"><panel title="概述"><field name="street"/><field name="area"/><field name="city"/><field name="zip"/><field name="state"/><field name="country"/>panel>form>object-views>
第5步:定义操作
参考地址:https://docs.axelor.com/adk/5.0/tutorial/step5.html
在contact/src/main/resources/views/Menu.xml 新建Menu.xml文件
<object-views xmlns="http://axelor.com/xml/ns/object-views"xmlns:xsi="http://www.w3.org/2001/XMLSchema-instance"xsi:schemaLocation="http://axelor.com/xml/ns/object-viewshttp://axelor.com/xml/ns/object-views/object-views_5.4.xsd"><menuitem name="menu-contact-menu" title="通讯录"/><menuitem name="menu-contact"parent="menu-contact-menu"title="联系人"action="contact.all"/><action-view name="contact.all"title="联系人"model="com.example.contact.db.Contact"><view type="grid" name="contact-grid"/><view type="form" name="contact-form"/>action-view>object-views>第6步:配置
参考地址:https://docs.axelor.com/adk/5.0/tutorial/step6.html
在src/main/resources/application.properties 设置数据库配置
src/main/resources/application.properties
# Database settings
# ~~~~~
db.default.driver = org.postgresql.Driver
db.default.ddl = update
db.default.url = jdbc:postgresql://localhost:5432/axelor-demo
db.default.user = user
db.default.password = secret
第7步:启动服务器
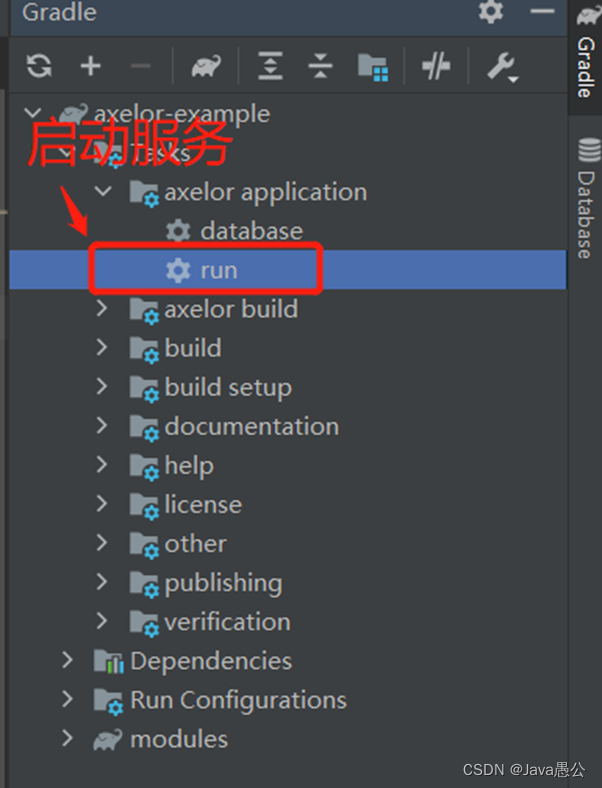
参考地址:https://docs.axelor.com/adk/5.0/tutorial/step7.html
可以在Gradle功能菜单栏中
Task --> axelor appplication中点击run
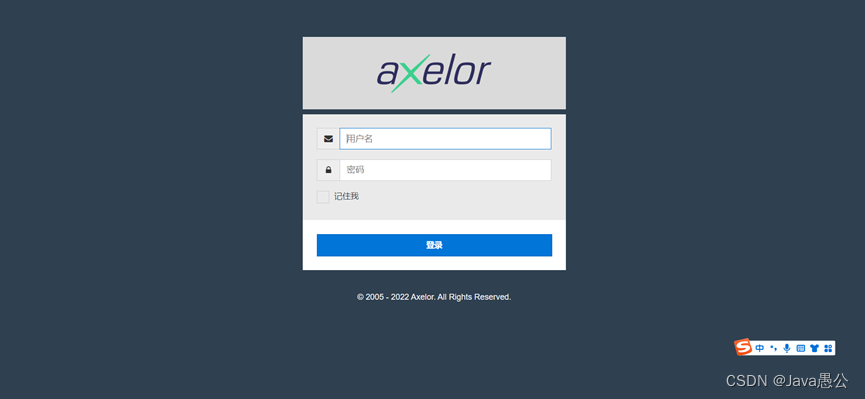
启动成功界面如下:
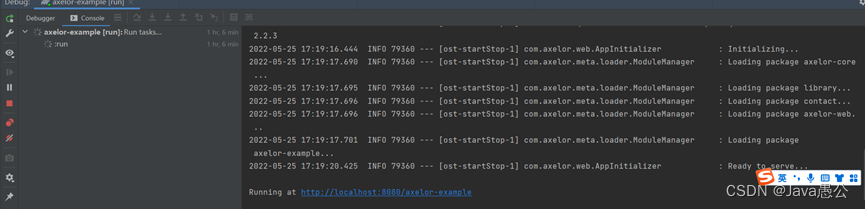
启动成功后会在控制台输出得到 Running at http://localhost:8080/axelor-example
在浏览器访问 http://localhost:8080/axelor-example
项目初始化的时候会默认新建两个用户,对应的数据库表(auth_user),可自己查看;
用户1:用户名:admin 密码:admin
用户2:用户名:demo 密码:demo
我们输入admin用户访问系统;
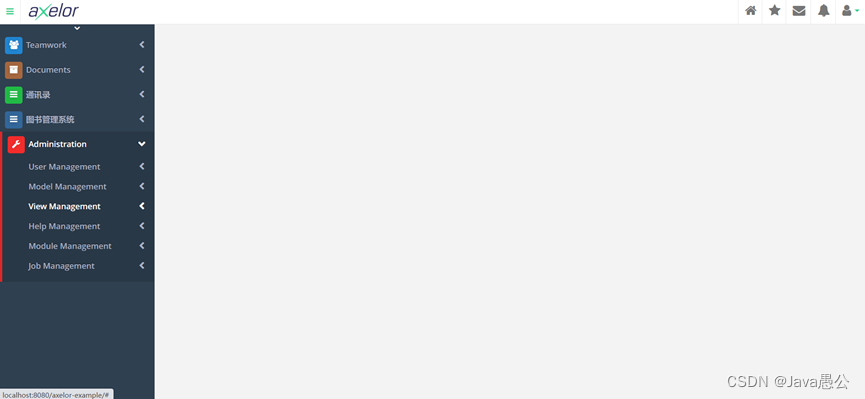
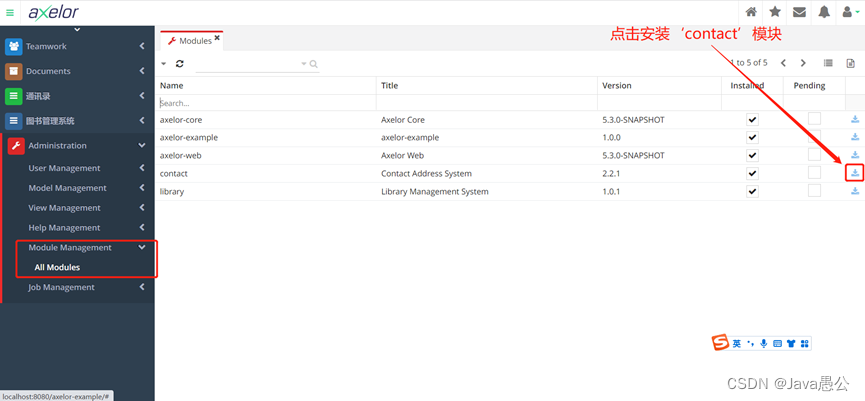
安装子模块
在Administration –-> Module Management --> All Modules中,
点击要安装的模块的Pending列的按钮,比如我这里要安装的是‘contact’模块,点击及安装;
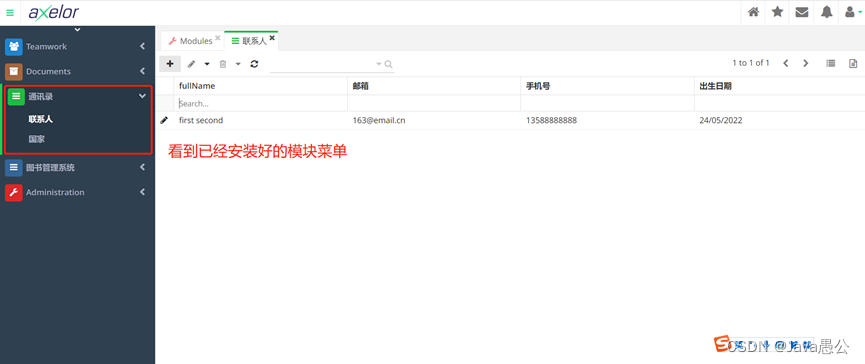
使用子模块
安装模块成功之后会在系统菜单栏看到新增加的模块菜单,比如我刚才安装的是‘contact’模块,这里能看到 ‘通讯录’ 的菜单栏,
本文来自互联网用户投稿,文章观点仅代表作者本人,不代表本站立场,不承担相关法律责任。如若转载,请注明出处。 如若内容造成侵权/违法违规/事实不符,请点击【内容举报】进行投诉反馈!