VueCli3.x全栈开发-微信朋友圈(node/express/mongodb/vuecli3.x)
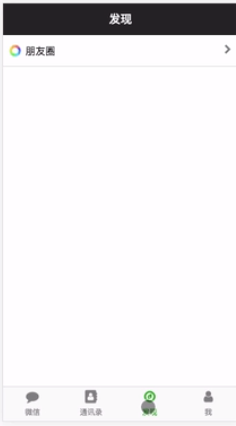
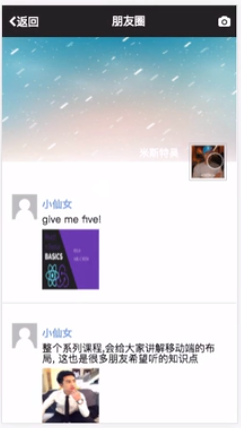
1.项目演示
2.express 搭建服务器
2.1.初始化项目
$ npm int
2.2.安装自动重启工具nodemon
$ npm install -g nodemon
2.3.修改package.json中的script:
"scripts": {"start":"node server.js", "server":"nodemon server.js"},这样意义:当 执行命令 npm run start 时相当于 执行node server,同理可知第二个
2.4安装 express
$ npm install --save express
2.5.创建 server.js
const express = require("express");
const app = express();app.get("/",(req,res)=>{res.send("Hello world");
});const port = process.env.PORT || 5000;app.listen(port,()=>{console.log(`服务器在端口${port}跑起来了`);
});
2.6. 执行命令 nodemon server.js

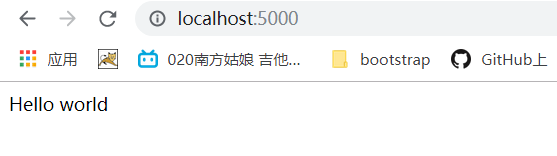
可见成功了。。
3.node接口搭建-连接mongodb数据库
3.1安装mongoose
$ npm install --save mongoose
3.2.引入mongoose,并连接数据库
const mongoose = require("mongoose");//连接数据库mongoose.connect('mongodb+srv://test:密码@cluster0-cjcbk.mongodb.net/test?retryWrites=true&w=majority', { useNewUrlParser: true } ).then(()=>{console.log("mongoDB连接上了");}).catch(err=>{console.log(err);});
4.搭建路由和数据模型
4.1.创建路由routes/api/user.js
const express = require("express");
const router = express.Router();router.get("text",(req,res)=>{res.json({msg:"测试成功"});
});module.exports = router;
并在serve.js中引入 users,并使用routes
const user = require("./routes/api/users");
//使用routes
app.use("/api/users",user);//使用api/users时找到user中的路由,
4.2.创建数据模型 model/User.js
const mongoose = require("mongoose");
const Schema = mongoose.Schema;const UserSchema = new Schema({name:{type:String,required:true},email:{type:String,required:true},password:{type:String,required:true},avatar:{type:String,},date:{type:Date,required:Date.now},
});module.exports = User = mongoose.model("users",UserSchema);
5.搭建注册接口并保存数据
5.1.先引入 body-parser,来解析请求的json;
$ npm install --save body-parser
在server.js 中 引入 并使用 body-parser的中间件
const bodyParser = require('body-parser');
// parse application/x-www-form-urlencoded
app.use(bodyParser.urlencoded({ extended: false }))// parse application/json
app.use(bodyParser.json())
5.2.要加密密码,用到bcrypt在users.js中引入
$ npm install --save bcryptusers.js中
const bcrypt = require("bcrypt");
安装时发生错误,于是改成安装bcryptjs
5.3.要用到全球公认头像gravatar,在users.js中引入
npm install --save gravatar
const gravatar = require("gravatar");
5.4.编写注册接口
/*** @route POST api/users/test* @desc 返回的请求的json数据* @access public*/
router.post("/register",(req,res)=>{User.findOne({email:req.body.email}).then((user)=>{if(user){res.status(400).json("该邮箱已经被注册");}else{const avatar = gravatar.url(req.body.email, {s: '200', r: 'pg', d: 'mm'});let newUSer = new User({name:req.body.name,email:req.body.email,password:req.body.password,date:new Date(),avatar});bcrypt.genSalt(10, function(err, salt) {bcrypt.hash(newUSer.password, salt, (err, hash)=> {if(err) throw err;newUSer.password = hash;newUSer.save().then(user=>{res.json(user)}).catch(()=>{console.log(err);})});});}})
});
6.搭建登陆接口
6.1 用jwt实现返回token
$ npm install jsonwebtoken --save
const jwt = require("jsonwebtoken");/**$登录接口* @route POST api/users/login* @desc 返回token* @access public*/
router.post("/login",(req,res)=>{const email = req.body.email;const password = req.body.password;User.findOne({email}).then(user =>{if(!user){return res.status(404).json({email:"用户不存在"});}bcrypt.compare(password,user.password).then(isMatch =>{if(isMatch){const rule = {id:user.id,name:user.name,avatar: user.avatar};jwt.sign(rule,"secret",{expiresIn:3600},(err,token)=>{if (err) throw err;res.json({success:true,token:"Bearer "+token})});// res.json({msg:"sucess"})}else{return res.status(400).json({password:"密码错误"});}})})});
7.使用passport-jwt 验证token
使用passport-jwt和passport中间件来验证token,passport-jwt是一个针对jsonwebtoken的插件,passport是express框架的一个针对密码的中间件
那么首先还是需要安装passport-jwt和possport
$ npm install passport-jwt
$ npm install passport
然后在入口文件server.js中引入passport
const passport = require("passport"); //引入passport插件
在入口文件中初始化passport
app.use(passport.initialize()); //passport初始化
app.use(passport.initialize()); //passport初始化
app.use(passport.initialize()); //passport初始化
接下来我们还需要对passport进行一些配置,所以在config下面新建一个passport.js文件。然后将此文件在入口文件中引入
require("./config/passport")(passport);
然后在passport文件中,我们需要使用passport-jwt中间件,所以我们需要在passport中引入passport-jwt、mongoose、keys.js、models/Users.js
const JwtStrategy = require('passport-jwt').Strategy,ExtractJwt = require('passport-jwt').ExtractJwt;const mongoose = require("mongoose");
const Users = mongoose.model("users");
// const keys = require("../config/keys");const opts = {};
opts.jwtFromRequest = ExtractJwt.fromAuthHeaderAsBearerToken();
opts.secretOrKey = "secret";module.exports = passport => {passport.use(new JwtStrategy(opts, (jwt_payload, done) => {Users.findById(jwt_payload.id).then(user => {if (user) {return done(null, user);}return done(null, false)}).catch(err => {console.log(err);})// console.log(jwt_payload);}));
随后在api/user.js中做密码的验证,首先在文件中引入passport
const passport = require("passport");     //引入passport中间件router.get("/current",passport.authenticate("jwt",{session:false}),(req,res)=>{res.json({id:req.user.id,name:req.user.name,email:req.user.email,avatar:req.user.avatar})
});
7.配置朋友圈信息接口,创建模型Profile(过程于User类似),创建profiles(过程与users类似);
8.创建朋友圈接口
/**$登录接口* @route POST api/profiles/add* @desc 创造朋友圈信息接口* @access private*/router.post("/add",passport.authenticate("jwt",{session:false}),(req,res)=>{const profilesFields = {};if(req.body.img) profilesFields.img = req.body.img;if(req.body.name) profilesFields.name = req.body.name;if(req.body.text) profilesFields.text = req.body.text;if(req.body.imgs) profilesFields.imgs = req.body.imgs.split("|");profilesFields.date=new Date();new Profile(profilesFields).save().then(profile=>{res.json(profile);})
});
9.搭建下拉刷新接口
/**$登录接口* @route POST api/profiles/add* @desc 创造朋友圈信息接口* @access private*/
router.get("/latest",passport.authenticate("jwt",{session:false}),(req,res)=>{Profile.find().sort({date:-1}).then(profiles=>{if(!profiles) return res.status(400).json("没有更多数据");let newProfiles = [];for (let i=0;i<3;i++){if (profiles[i]!==null){newProfiles.push(profiles[i]);}}res.json(newProfiles);})
});
10.搭建上拉刷新接口
router.get("/:page/:size",passport.authenticate("jwt",{session:false}),(req,res)=>{Profile.find().sort({date:-1}).then(profiles=>{if(!profiles) return res.status(400).json("没有更多数据");let newProfiles = [];let page = req.params.page;let size = req.params.size;let index = size * (page-1);for (let i=index;i<size*page;i++){if (profiles[i]!==null){newProfiles.push(profiles[i]);}}res.json(newProfiles);})
});
11.配置前后端连载
使用vue create client生成前端项目
11.1.安装concurrently模块
确保当前路径在node项目的package.json同目录下,执行
cnpm install concurrently
11.2.2.配置vue项目的package.json
"scripts": {"serve": "vue-cli-service serve","build": "vue-cli-service build","start": "npm run serve"`},
修改package.json文件如上,添加了 “start”: “npm run serve”
11.3.配置node项目的package.json
"scripts": {"client-install": "npm install --prefix client","client": "npm start --prefix client","start": "node server.js","server": "nodemon server.js","dev": "concurrently \"npm run server\" \"npm run client\""}
修改package.json文件如上,关键在于"dev": “concurrently “npm run server” “npm run client””。
[nodemon用来监视node.js应用程序中的任何更改并自动重启服务,非常适合用在开发环境中]
11.4.切换至node项目
执行
npm run dev
此时即可同时启动后端与前端项目
若报错,可删除node_module文件夹重新执行cnpm install
12.前端准备工作
12.1.1设置主页路由
{path: '/',name: 'index',component: () => import("./views/Index.vue")},
12.1.2创建主页组件
<template><div>主页</div>
</template><script>export default {name: "Index"}
</script><style scoped></style>
12.1.3设置基本样式
App.vue中
<style>
html,body,#app{width: 100%;height: 100%;background-color: blue;
}
</style>
index.html中引入reset.css
13.封装input和button组件
inputGroup.vue
<template><div class="input_group"><label :for="name">{{label}}</label><input:type="type":value="value":placeholder="placeholder":name="name"@input="$emit('input',$event.target.value)"></div>
</template><script>export default {name: "InputGroup",props:{type:{type:String,default:"text"},value:String,placeholder:String,name:String,label:String}}
</script><style scoped>.input_group {width: 100%;height: 60px;box-sizing: border-box;border-bottom: 1px solid #d9d9d9;padding: 10px 0;line-height: 60px;}.input_group label {display: inline-block;width: 30%;font-size: 16px;}.input_group input {display: inline-block;width: 65%;font-size: 16px;border: none;outline: none;}
</style>
YButton.vue
<template><buttonclass="y-button":class="{'is-disabled':disabled}":type="type":disabled="disabled"@click="$emit('click')"><slot></slot></button></template><script>export default {name: "YButton",props:{type:String,disabled:{type:Boolean,default:false}}}
</script><style scoped>.y-button {display: inline-block;line-height: 1;white-space: nowrap;cursor: pointer;color: #fff;background-color: #20af0e;border-color: #20af0e;text-align: center;box-sizing: border-box;outline: 0;padding: 12px 20px;font-size: 16px;border-radius: 4px;width: 100%;}.is-disabled,.is-disabled:focus,.is-disabled:hover {color: #fff;background-color: #75b56c;border-color: #75b56c;cursor: not-allowed;pointer-events: none;}
</style>
14.注册组件的设计和注册功能的实现
安装axios
封装axios
http.js
import axios from "axios";//响应拦截
axios.interceptors.request.use(config=>{if (localStorage.wxpyqToken){config.headers.Authorization = localStorage.wxpyqToken;}return config;
},error => {return Promise.reject(error)
});//请求拦截
axios.interceptors.response.use(response=>{return response;
},error => {const {status} = error.response;if(status==401){alert('tocken过期,请重新登陆')localStorage.removeItem("wxpyqToken")this.$router.push("/login");}else{alert("这里有错误:"+error.response.data);}return Promise.reject(error);
});
export default axios;
在入口文件中引入和全局使用http.js
import axios from "./http"
Vue.prototype.$axios = axios;
解决跨域问题
在client目录下创建文件 vue.config.js
module.exports = {devServer: {open: true,host: 'localhost',port: 8080,https: false,proxy: { // 配置跨域'/api': {target: 'http://localhost:5000/api/',ws: true,changOrigin: true,pathRewrite: {'^/api': ''}}}}
}
*到这里,记得要重启
注册组件Register.vue
<template><div class="register"><div class="header"><button @click="$router.go(-1)">取消button>div><div class="container"><div class="title">注册账户div><div class="content"><form action=""><InputGrouplabel="昵称"placeholder="例如:皮卡球"v-model="user.name"/><InputGrouplabel="邮箱"placeholder="请填写邮箱"v-model="user.email"/><InputGrouplabel="密码"placeholder="请填写密码"v-model="user.password"/><InputGrouplabel="密码"placeholder="确认密码"v-model="user.newpassword"/>form><div class="btn_wrap"><YButton :isdisabled="isDisabled" @click="registerClick">注册YButton>div>div>div>div>
template><script>import InputGroup from "./../components/InputGroup"import YButton from "./../components/YButton"export default {name: "Register",data(){return{user:{}}},components:{InputGroup,YButton},computed:{isDisabled(){if(this.user.email&&this.user.password&&this.user.password&&this.user.newpassword&&this.user.name) return falseelse return true}},methods:{registerClick(){let reg = /^([a-zA-Z0-9._-])+@([a-zA-Z0-9_-])+(\.[a-zA-Z0-9_-])+/;if (!reg.test(this.user.email)) {alert("请输入合法的邮箱地址!");return;}if(this.user.password!==this.user.newpassword){alert("两次密码不一致");return;}console.log(this.user);this.$axios.post("/api/users/register",this.user).then(res=>{alert("注册成功");this.$router.push("/login");})}}}
script><style scoped>.register {width: 100%;height: 100%;overflow: hidden;}.header {width: 100%;height: 50px;box-sizing: border-box;padding: 0 10px;line-height: 50px;}.header button {border: none;outline: none;background-color: transparent;font-size: 16px;color: #20af0e;}.container {width: 100%;padding: 16px;box-sizing: border-box;}.title {margin-top: 30px;font-size: 22px;text-align: center;}.content,.btn_wrap {margin-top: 30px;}
style>
15.实现登陆功能
先配置值路由守卫
在router.js中
router.beforeEach((to,from,next)=>{const isLogin=localStorage.wxpyqToken?true:false;if(to.path==="/login"||to.path==="/register"){next();}else{isLogin?next():next("/login")}
});
创建登陆组件并实现登陆功能
<template><div class="login"><div class="title">用户登陆div><div class="content"><form action=""><InputGrouplabel="账号"placeholder="请填写邮箱"v-model="user.email"/><InputGrouplabel="密码"placeholder="请填写密码"v-model="user.password"/>form>div><div class="btn_wrap"><YButton :isdisabled="isDisabled" @click="loginClick">登陆YButton>div><div class="footer_wrap"><button class="register" @click="$router.push('/register')">注册登陆button>div>div>
template><script>import InputGroup from "./../components/InputGroup"import YButton from "./../components/YButton"export default {name: "Login",data(){return{user: {}}},components:{InputGroup,YButton},computed:{isDisabled(){if(this.user.email&&this.user.password) return falseelse return true}},methods:{loginClick() {let reg = /^([a-zA-Z0-9._-])+@([a-zA-Z0-9_-])+(\.[a-zA-Z0-9_-])+/;if (!reg.test(this.user.email)) {alert("请输入合法的邮箱地址!");return;}this.$axios.post("/api/users/login", this.user).then(res => {// 登录成功const { token } = res.data;localStorage.setItem("wxpyqToken", token);// 页面跳转this.$router.push("/");});}}}
script><style scoped>.login {width: 100%;height: 100%;overflow: hidden;padding: 16px;box-sizing: border-box;}.title {margin-top: 80px;font-size: 22px;text-align: center;}.footer_wrap {position: absolute;left: 0;bottom: 16px;text-align: center;width: 100%;color: #888;}.footer_wrap .register {font-size: 16px;outline: none;border: none;background-color: transparent;color: #7b8ca9;}.content,.btn_wrap {margin-top: 30px;}
style>
16.实现底部tabbar显示
在index.html中引入
<link href="//netdna.bootstrapcdn.com/font-awesome/4.7.0/css/font-awesome.min.css" rel="stylesheet">
创建 四个界面组件
addressbook,Find,Wechat,Mine
配置路由
children: [{path: '',redirect: '/wchart'},{path: '/wchart',name: 'wchart',component: () => import('./views/Wchart.vue')},{path: '/abook',name: 'abook',component: () => import('./views/AddressBook.vue')},{path: '/find',name: 'find',component: () => import('./views/Find.vue')},{path: '/mine',name: 'mine', component: () => import('./views/Mine.vue')}]
封装TabBar组件
TabBar.vue
<template><div class="tabbar"><router-link class="tab-item"v-for="(item, index) in data":to='item.path':key="index"active-class='is-selected'><div class="tab-item-icon"><i :class="'fa fa-'+item.icon">i>div><div class="tab-item-label">{{item.title}}div>router-link>div>template><script>
export default {name: "tabbar",props: {data: Array}
};
script><style scoped>
.tabbar {height: 55px;box-sizing: border-box;width: 100%;position: fixed;bottom: 0;background-image: linear-gradient(180deg,#d9d9d9,#d9d9d9 50%,transparent 0);background-size: 100% 1px;background-repeat: no-repeat;background-position: 0 0;background-color: #fafafa;display: flex;text-align: center;
}
.tab-item {display: block;padding: 7px 0;flex: 1;
}
.tab-item-icon {width: 24px;height: 24px;margin: 0 auto 5px;
}
.tab-item-icon i {font-size: 1.3rem;
}
.tab-item-label {color: inherit;font-size: 12px;line-height: 1;
}
a {text-decoration: none;color: #888;
}
.is-selected {color: #20af0e;
}
style>
并在index.vue引入
<TabBar></TabBar>
import TabBar from "./../components/TabBar"data() {return {tabberData: [{ title: "微信", icon: "comment", path: "/wchart" },{ title: "通讯录", icon: "address-book", path: "/abook" },{ title: "发现", icon: "compass", path: "/find" },{ title: "我", icon: "user", path: "/mine" }]};},
17.封装Header头部组件
Header.vue
<template><header class="header"><div class="header-button is-left" v-show="isLeft"><i class="fa fa-chevron-left">i><button @click="$router.go(-1)">返回button>div><h1 class="header-title">{{title}}h1><div class="header-button is-right" v-show="btn_icon"><button @click="$emit('rightClick')"><i :class="'fa fa-'+ btn_icon">i>button>div>header>
template><script>
export default {name: "Hader",props: {title: String,isLeft: {type: Boolean,default: false},isRight: {type: Boolean,default: false},btn_icon: String}
};
script><style scoped>
.header {align-items: center;background-color: #272626;box-sizing: border-box;color: #fff;display: flex;font-size: 18px;height: 50px;line-height: 1;padding: 0 10px;position: relative;text-align: center;white-space: nowrap;position: fixed;width: 100%;top: 0;z-index: 99;
}.header-button button {background-color: transparent;border: 0;box-shadow: none;color: inherit;display: inline-block;padding: 0;font-size: inherit;outline: none;
}
.header-title {flex: 1;
}
.is-left {text-align: left;
}
.is-right {text-align: right;
}
style>
然后就可以引入四个页面组件中了
18.封装朋友圈Cell1组件
<template><router-link :to='path'><div class="cell-wrapper"><div class="cell-title"><img :src="getSrc" alt=""><span>{{title}}span>div><div class="cell-allow-right"><i class="fa fa-chevron-right">i>div>div>router-link>
template><script>
export default {name: "cell",props: {src: String,title: String,path: String},computed: {getSrc() {return require("../assets/" + this.src);}}
};
script><style scoped>
.cell-wrapper {background-color: #fff;box-sizing: border-box;color: inherit;min-height: 48px;display: flex;font-size: 16px;line-height: 1;overflow: hidden;padding: 0 10px;width: 100%;line-height: 48px;border-bottom: 1px solid #d9d9d9;
}
.cell-title {flex: 1;
}
.cell-title img {width: 1.2rem;height: 1.2rem;vertical-align: middle;margin-right: 0.4rem;
}
.cell-title span {display: inline-block;vertical-align: middle;
}
.cell-allow-right {color: #888;
}
a {text-decoration: none;color: inherit;
}
style>
并在Find组件中引入
Find.vue组件设计:
<template><div class="find"><Headertitle='发现'>Header><div class="content"><Cell :src='cellData.src' :title='cellData.title' :path='cellData.path'>Cell>div>div>
template><script>
import Header from "../components/Header";
import Cell from "../components/Cell1";export default {name: "find",data() {return {cellData: { src: "pyq.jpg", title: "朋友圈", path: "/circle" }};},components: {Header,Cell}
};
script>
<style scoped>
.find {width: 100%;height: calc(100% - 55px);position: relative;box-sizing: border-box;
}
.content {width: 100%;height: calc(100% - 50px);margin-top: 50px;
}
style>
19 封装朋友圈说说组件Cell2
<template><div class="cell_crilce"><div class="img_wrapper"><img :src="cricleObj.img" alt="">div><div class="content_wrapper"><div class="cell_name">{{cricleObj.name}}div><div class="cell_text" v-if="cricleObj.text">{{cricleObj.text}}div><div class="cell_img" v-if="cricleObj.imgs.length > 0"><img v-for="(item, index) in cricleObj.imgs":key="index":src="item" alt="">div>div>div>
template><script>
export default {name: "cell_crilce",props: {cricleObj: Object}
};
script>
<style scoped>
.cell_crilce {width: 100%;box-sizing: border-box;padding: 16px;border-bottom: 1px solid #d9d9d9;display: flex;flex-direction: row;
}
.img_wrapper {flex: 1;
}
.img_wrapper img {width: 40px;height: 40px;
}
.content_wrapper {flex: 9;padding-left: 8px;
}
.content_wrapper .cell_name {font-weight: bold;color: #8cafe6;
}
.content_wrapper div {margin-top: 8px;word-wrap: break-word;
}
.content_wrapper .cell_img {width: 100%;overflow: hidden;
}
.content_wrapper .cell_img img {width: 31%;height: 6rem;float: left;margin-right: 5px;margin-bottom: 5px;
}
style>
封装滚动组件Scroll.vue
<template><div class="scroll-wrap" ref="wrapper"><div class="container"><div class="pulldown" v-show="dragTip.showLoding"><div class="clear"><div class="fl"><img width="16" src="../assets/scroll_load.gif">div><div class="fl">{{dragTip.text}}div>div>div><slot>slot><div class="pullup"><div class="clear" v-if="!isDone"><div class="fl"><img width="16" src="../assets/scroll_load.gif">div><div class="fl">加载中.....div>div><div class="list-donetip" v-else><slot name="doneTip">没有更多数据slot>div>div>div>div>
template><script>
import BScroll from "better-scroll";export default {name: "scroll",props: {probeType: {type: Number,default: 1}},data() {return {dragTip: {text: "下拉刷新",showLoding: false},isDone: false};},mounted() {this.$nextTick(()=>{this._initScroll();});},methods: {_initScroll() {if (!this.$refs.wrapper) {// console.log("yes");return;}// console.log("no");// better-scroll的初始化this.scroll = new BScroll(this.$refs.wrapper, {probeType: 1,click:true,});// 派发顶部下拉事件,用于下拉刷新this.scroll.on("scroll", pos => {//显示下拉刷新loadingthis.dragTip.showLoding = true;if (pos.y > 50) {this.dragTip.text = "释放刷新";}});// 下拉刷新时,松手时触发pulldown事件,并注册刷新结束事件this.scroll.on("touchEnd", pos => {if (pos.y > 50) {// console.log("哈哈");this.dragTip.text = "刷新中...";console.log(this.dragTip.text);console.log("刷新");//重新初始化this.$on("pullrefresh.finishLoad", this.resetParams);this.$emit("pulldown", pos);}});// 派发滚动到底部事件,用于上拉加载this.scroll.on("scrollEnd", () => {if (this.scroll.y <= this.scroll.maxScrollY + 50) {//所有数据加载完毕后this.$on("infinitescroll.loadedDone", () => {this.isDone = true;});//重新初始化this.$on("infinitescroll.reInit", () => {this.isDone = false;});this.$emit("pullup"); // 触发pullup事件}});},resetParams() {this.isDone = false;setTimeout(() => {this.dragTip = {text: "下拉刷新",showLoding: false};}, 600);}}
};
script><style scoped>
.scroll-wrap {width: 100%;height: 100%;overflow: hidden;
}
.fl {display: inline-block;
}
.fl img {vertical-align: middle;margin-right: 0.2rem;
}
/* 下拉刷新 */
.pulldown,
.pullup {width: 100%;height: 50px;position: relative;color: #888;
}
.clear {padding: 10px 0px;font-size: 0.28rem;position: absolute;left: 50%;top: 5px;transform: translate(-50%, 0);
}
.list-donetip {text-align: center;line-height: 50px;font-size: 0.28rem;
}
style>
20.朋友圈组件
<template><div class="circle"><Headertitle='朋友圈':isLeft='true'btn_icon='camera'@rightClick="$router.push('/publish')">Header><div class="container"><div class="scroll-wrap"><Scrollref="pullrefresh"@pulldown="loadData"@pullup="loadMore"><div class="head_wrapper"><div class="user_head"><span>{{user.name}}span><div class="user_img"><img :src="user.avatar" alt="" class="head_img">div>div>div><div class="content_wrapper"><Cellv-for="(cricle, index) in cricleList":key="index":cricleObj='cricle'>Cell>div>Scroll>div>div>div>
template><script>import Header from "../components/Header";import jwt_decode from "jwt-decode";import Cell from "../components/Cell2";import Scroll from "../components/Scroll";export default {name: "fcircle",data() {return {cricleList: [],page: 2, // 加载更多从page2开始size: 3, // 每次请求3条数据loading: false};},components: {Header,Cell,Scroll},computed: {user() {const token = localStorage.wxpyqToken;// 解析tokenconst decode = jwt_decode(token);return decode;}},created() {this.getLatestData();},methods: {getLatestData() {// if (this.loading) return;// this.loading = true;this.$axios("/api/profiles/latest").then(res => {// this.loading = false;this.cricleList = [...res.data];this.$refs.pullrefresh.$emit("pullrefresh.finishLoad");});},loadData() {//下拉刷新重新初始化this.page = 2;this.getLatestData();},loadMore() {this.getMoreData();},getMoreData() {if (this.loading) return;// 发送axios请求this.loading = true;this.$axios(`/api/profiles/${this.page}/${this.size}`).then(res => {this.loading = false;const result = [...res.data];if (result.length > 0) {// 拿到结果数据进行遍历 push到列表数组中,并且page+1this.$refs.pullrefresh.$emit("infinitescroll.reInit");result.forEach(item => {this.cricleList.push(item);});this.page++;} else {// 数组为空,没有更多数据,page不再递增this.$refs.pullrefresh.$emit("infinitescroll.loadedDone");}});}}};
script>
<style scoped>.circle {width: 100%;height: 100%;box-sizing: border-box;}.container {width: 100%;height: calc(100% - 50px);padding-top: 50px;overflow: auto;}.scroll-wrap{height: 100%;width: 100%;}.head_wrapper {width: 100%;position: relative;height: 200px;background: url(../assets/cricle_bg.png) no-repeat;background-size: 100% 100%;}.head_wrapper .user_head {position: absolute;bottom: -30px;right: 16px;}.user_img {width: 60px;height: 60px;padding: 3px;border: 1px solid #c5c5c5;box-sizing: border-box;}.user_head img {width: 100%;height: 100%;}.user_head span {line-height: 30px;position: absolute;right: 76px;width: 200px;text-align: right;color: white;}.content_wrapper {padding-top: 20px;}
style>
21.发表组件
Publish 主组件
<template><div class="publish"><div class="header"><button @click="$router.go(-1)">取消button><button @click="publish">发表button>div><div class="content"><div class="text_wrap"><textarea placeholder="这一刻的想法..." v-model="text">textarea><Upload @getImgs='getImgs' :loading='loading'>Upload>div>div><Loading :loading='loading'>Loading>div>
template><script>
import Upload from "../components/Upload";
import jwt_decode from "jwt-decode";
import Loading from "../components/Loading";export default {name: "publish",data() {return {text: "",imgs: [],loading: false};},components: {Upload,Loading},computed: {user() {const token = localStorage.wxpyqToken;// 解析tokenconst decode = jwt_decode(token);return decode;}},methods: {publish() {this.loading = true;// 准备post数据const postData = {name: this.user.name,img: this.user.avatar,text: this.text,imgs: this.imgs.join("|")};this.$axios.post("/api/profiles/add", postData).then(res => {this.loading = false;// 发表成功跳转this.$router.push("circle");});},getImgs(imgs) {imgs.forEach(file => {this.uploadFile(file);});},uploadFile(file) {let reader = new FileReader();// 这里不能使用箭头函数,this指向问题 否则this.result获取不到const _this = this;reader.onload = function() {_this.imgs.push(this.result);};reader.readAsDataURL(file);}}
};
script>
<style scoped>
.publish {width: 100%;height: 100%;position: relative;overflow: hidden;
}
.header {width: 100%;height: 50px;box-sizing: border-box;display: flex;padding: 0 10px;line-height: 50px;justify-content: space-between;
}
.header button {border: none;outline: none;background-color: transparent;font-size: 16px;
}
.header button:nth-child(2) {color: #20af0e;
}
.content {width: 100%;box-sizing: border-box;padding: 16px;
}
.text_wrap textarea {width: 100%;font-size: 14px;min-height: 60px;border: none;outline: none;
}
.text_wrap {margin-bottom: 16px;
}
style>
Upload 添加图片及文字组件
<template><div class="img_wrap"><div class="isImg" v-if="showfileData.length > 0"v-for="(file_img, index) in showfileData" :key="index"><img :src="file_img" alt=""><buttonv-show="!loading" class="remove" @click='removeImg(file_img)'>xbutton>div><div class="isImg img_upload" v-if="showfileData.length < 9"><button class="btn_upload"><input type="file" ref="myFile" multiple="multiple" accept="img/*"@change='addFile' />button>div>div>
template><script>
export default {name: "upload",props: {loading: {type: Boolean,defalt: false}},data() {return {showfileData: [], // 存放图片的Url的数组allUploadFiles: [] // 文件上传file数组};},methods: {addFile() {let files = [...this.$refs.myFile.files];if (this.showfileData.length + files.length > 9) {alert("最多发表9张照片!");return;}files.forEach(file => {this.allUploadFiles.push(file);let objUrl = this.getObjectUrl(file);this.showfileData.push(objUrl);});this.$emit("getImgs", this.allUploadFiles);},getObjectUrl(file) {// 获取文件urllet url = null;if (window.createObjectURL != undefined)url = window.createObjectURL(file);else if (window.URL != undefined) url = window.URL.createObjectURL(file);else if (window.webkitURL != undefined)url = window.webkitURL.createObjectURL(url);return url;},removeImg(file_img) {// 删除this.showfileData.forEach((file, index) => {if (file == file_img) this.showfileData.splice(index, 1);});}}
};
script><style scoped>
.isImg {box-sizing: border-box;width: 30%;height: 6rem;float: left;margin-right: 8px;margin-bottom: 8px;position: relative;
}
.btn_upload {width: 100%;height: 100%;outline: none;border: none;background: url(../assets/upload.png) no-repeat;background-size: 100% 100%;
}
.btn_upload input {display: inline-block;width: 100%;height: 100%;opacity: 0;
}
.isImg img {width: 100%;height: 100%;
}
.isImg .remove {position: absolute;top: -8px;right: -5px;border: none;outline: none;width: 20px;height: 20px;padding: 0;text-align: center;color: white;background-color: #3baffd;line-height: 10px;border-radius: 50%;
}
style>
Loading组件
<template><div class="login"><div class="title">用户登陆div><div class="content"><form action=""><InputGrouplabel="账号"placeholder="请填写邮箱"v-model="user.email"/><InputGrouplabel="密码"type="password"placeholder="请填写密码"v-model="user.password"/>form>div><div class="btn_wrap"><YButton :isdisabled="isDisabled" @click="loginClick">登陆YButton>div><div class="footer_wrap"><button class="register" @click="$router.push('/register')">注册登陆button>div>div>
template><script>import InputGroup from "./../components/InputGroup"import YButton from "./../components/YButton"export default {name: "Login",data(){return{user: {}}},components:{InputGroup,YButton},computed:{isDisabled(){if(this.user.email&&this.user.password) return falseelse return true}},methods:{loginClick() {let reg = /^([a-zA-Z0-9._-])+@([a-zA-Z0-9_-])+(\.[a-zA-Z0-9_-])+/;if (!reg.test(this.user.email)) {alert("请输入合法的邮箱地址!");return;}this.$axios.post("/api/users/login", this.user).then(res => {// 登录成功const { token } = res.data;localStorage.setItem("wxpyqToken", token);// 页面跳转this.$router.push("/");});}}}
script><style scoped>.login {width: 100%;height: 100%;overflow: hidden;padding: 16px;box-sizing: border-box;}.title {margin-top: 80px;font-size: 22px;text-align: center;}.footer_wrap {position: absolute;left: 0;bottom: 16px;text-align: center;width: 100%;color: #888;}.footer_wrap .register {font-size: 16px;outline: none;border: none;background-color: transparent;color: #7b8ca9;}.content,.btn_wrap {margin-top: 30px;}
style>
本文来自互联网用户投稿,文章观点仅代表作者本人,不代表本站立场,不承担相关法律责任。如若转载,请注明出处。 如若内容造成侵权/违法违规/事实不符,请点击【内容举报】进行投诉反馈!