Recyclerview联动翻页

如上图所示,要想实现此类效果,第一联想到的就是viewpager了,因为它翻页啊,然后处理它的联动以及跟随翻页时效果展示,但是我们今天研究的是用两个Recyclerview去实现,有人就问了,这玩意不是列表么,我咋翻页啊,不会还要自己处理吧,别怕,了解的人都知道了谷歌有个PagerSnapHelper,完美贴合咱们的需求,完成翻页效果,代码大概如下:
PagerSnapHelper snapHelperContent=new PagerSnapHelper();
snapHelperContent.attachToRecyclerView(mRvContent);
ok,这样就实现了翻页效果,想要研究原理的,自行查看源代码,这里不做重点讲述。
接着我们简单进行布局:
<androidx.constraintlayout.widget.ConstraintLayout xmlns:android="http://schemas.android.com/apk/res/android"xmlns:app="http://schemas.android.com/apk/res-auto"xmlns:tools="http://schemas.android.com/tools"android:layout_width="match_parent"android:layout_height="match_parent"tools:context=".MainActivity"><androidx.recyclerview.widget.RecyclerViewandroid:id="@+id/rv_content"android:layout_width="match_parent"android:layout_height="wrap_content"app:layout_constraintBottom_toBottomOf="parent"app:layout_constraintLeft_toLeftOf="parent"app:layout_constraintRight_toRightOf="parent"app:layout_constraintTop_toTopOf="parent"/><androidx.recyclerview.widget.RecyclerViewandroid:id="@+id/rv_top"android:layout_width="match_parent"android:layout_height="wrap_content"app:layout_constraintLeft_toLeftOf="parent"app:layout_constraintRight_toRightOf="parent"app:layout_constraintTop_toTopOf="@+id/rv_content"android:translationY="-70dp"/>androidx.constraintlayout.widget.ConstraintLayout>
实现简单的上下两个列表的adapter数据填充后,大概效果如下:

要想实现理想中的效果,我们必须给列表添加分割线,这里只贴出下面列表的分割线代码:
public class TopItemDecoration extends RecyclerView.ItemDecoration {private int mLeftMargin;public TopItemDecoration(Context context) {mLeftMargin = (Globals.SCREEN_WIDTH - ScreenUtils.dp2px(context,100)) / 2;}@Overridepublic void getItemOffsets(Rect outRect, View view, RecyclerView parent, RecyclerView.State state) {int position = parent.getChildAdapterPosition(view);int itemCount = parent.getAdapter().getItemCount();int leftMargin;int rightMargin;if (position == 0) {leftMargin = mLeftMargin;} else {leftMargin = 0;}if (position == itemCount - 1) {rightMargin = mLeftMargin;} else {rightMargin = 0;}RecyclerView.LayoutParams layoutParams = (RecyclerView.LayoutParams) view.getLayoutParams();layoutParams.setMargins(leftMargin, 0, rightMargin, 0);super.getItemOffsets(outRect, view, parent, state);}
}
好了,我们再看下效果: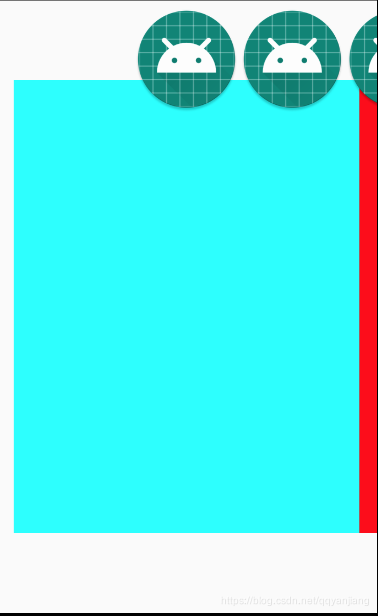
到这里翻页和大体布局已经完成了,下面就是核心的滑动过程处理了,以下举例下面recyclerview的监听:
@Overridepublic void onScrolled(RecyclerView recyclerView, int dx, int dy) {super.onScrolled(recyclerView, dx, dy);if (mRvContent.getChildCount() == 1) {View view = mRvContent.getChildAt(0);view.setScaleY(1);view.setScaleX(1);} else {for (int i = 0; i < mRvContent.getChildCount(); i++) {View view = mRvContent.getChildAt(i);float rate;int left = (view.getLeft() + view.getRight()) / 2;if (left <= mGalleryMiddle) {if (left < mGalleryMiddle - mGalleryMove) {rate = 1f;} else {rate = (mGalleryMiddle - left) * 1f / mGalleryMove;}view.setScaleY(1 - rate * mGalleryScaleY);view.setScaleX(1 - rate * mGalleryScaleY);view.setTranslationX(rate * mGalleryTranslation);} else {if (left > mGalleryMiddle + mGalleryMove) {rate = 0f;} else {rate = (mGalleryMiddle + mGalleryMove - left) * 1f / mGalleryMove;}view.setScaleY((1 - mGalleryScaleY) + rate * mGalleryScaleY);view.setScaleX((1 - mGalleryScaleY) + rate * mGalleryScaleY);view.setTranslationX((rate - 1) * mGalleryTranslation);}}}}
同理也可实现顶部列表的滚动变化,难度不大,详见源码。
重点是两个列表如何进行关联呢,肯定在下面列表滚动监听过程中,去触发上面列表的滚动,但是上下布局不一样大,所以我们要等比例进行滚动:
mRvTop.scrollBy(dx * 100 / 327, dy);
乍一看没啥问题,我们跑下代码试试,恩,感觉有那个意思了,不对啊,咋感觉怪怪的,为啥越往后滑,错位越大,不在正中央,这就尴尬了,而且当你缓慢滑动下面列表时,上面列表压根就不叼你。

这是因为public void scrollBy(int x, int y) 这个方法的参数只能传int值
这就导致了精度的丢失,那我们换scrooTo吧,直接一步到位,不就没有什么误差了么,
然而请看recyclerview中:
@Overridepublic void scrollTo(int x, int y) {Log.w(TAG, "RecyclerView does not support scrolling to an absolute position. "+ "Use scrollToPosition instead");}
这tm~,不好意思,没忍住,这还咋玩啊,既然recyclerview没有给我们实现,那我们就换个思路,自己去完成“一步到位”的滚动吧。
我们回看mRvTop.scrollBy(dx * 100 / 327, dy);这段代码,此处dx是下面列表每次滑动的距离,然后换算比例得出上面列表需要叠加滑动距离,然后调用scrollBy方法,但是这样误差会一直叠加,所以我们换种思路,下面的列表我们每次拿到总滑动距离,然后换算比例得出上面列表需要滑动的总距离,然后再减去上面列表当前滑动距离,得出来的数据不就是没有误差的滑动差么,这样我们就可以正大光明调用scrollBy方法了:
mTotalContentX += dx;
mRvTop.scrollBy(mTotalContentX * 100 / 327 - mTotalTopX, dy);
大功告成,我们看下最终实现效果:
源码下载
本文来自互联网用户投稿,文章观点仅代表作者本人,不代表本站立场,不承担相关法律责任。如若转载,请注明出处。 如若内容造成侵权/违法违规/事实不符,请点击【内容举报】进行投诉反馈!