【笔记】opencv的python使用 腐蚀模糊背景分割等处理图像
概括
从概念上讲,一个字节能表示0到255的整数。目前,对于所有的实时图像应用而言, 虽然有其他的表示形式,但一个像素通常由每个通道的一个字节表示。
一个OpenCV图像是.array类型的二维或三维数组。8位的灰度图像是一个含有字节值 的二维数组。一个24位的BGR图像是一个三维数组,它也包含了字节值。可使用表达式 访问这些值,例如image[0,0]或image[0, 0, 0]。第一个值代表像素的y坐标或行,0表示 顶部;第二个值是像素的x坐标或列,0表示最左边;第三个值(如果可用的话)表示颜色 通道。
C++接口:
1。处理图片
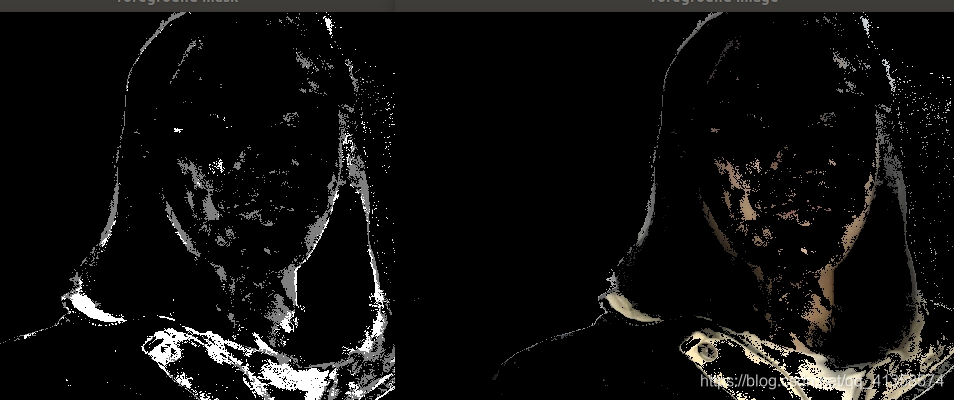
效果:(原图就不发了
 application_trace.cpp
#include background segmentation(来自官方示例
#include "opencv2/core.hpp"
#include "opencv2/imgproc.hpp"
#include "opencv2/video.hpp"
#include "opencv2/videoio.hpp"
#include "opencv2/highgui.hpp"
#include " : file) << "'" << endl;return 2;}Ptr<BackgroundSubtractor> model;if (method == "knn")model = createBackgroundSubtractorKNN();else if (method == "mog2")model = createBackgroundSubtractorMOG2();if (!model){cout << "Can not create background model using provided method: '" << method << "'" << endl;return 3;}cout << "Press to toggle background model update" << endl;cout << "Press 's' to toggle foreground mask smoothing" << endl;cout << "Press ESC or 'q' to exit" << endl;bool doUpdateModel = true;bool doSmoothMask = false;Mat inputFrame, frame, foregroundMask, foreground, background;for (;;){// prepare input framecap >> inputFrame;if (inputFrame.empty()){cout << "Finished reading: empty frame" << endl;break;}const Size scaledSize(640, 640 * inputFrame.rows / inputFrame.cols);resize(inputFrame, frame, scaledSize, 0, 0, INTER_LINEAR);// pass the frame to background modelmodel->apply(frame, foregroundMask, doUpdateModel ? -1 : 0);// show processed frameimshow("image", frame);// show foreground image and mask (with optional smoothing)if (doSmoothMask){GaussianBlur(foregroundMask, foregroundMask, Size(11, 11), 3.5, 3.5);threshold(foregroundMask, foregroundMask, 10, 255, THRESH_BINARY);}if (foreground.empty())foreground.create(scaledSize, frame.type());foreground = Scalar::all(0);frame.copyTo(foreground, foregroundMask);imshow("foreground mask", foregroundMask);imshow("foreground image", foreground);// show background imagemodel->getBackgroundImage(background);if (!background.empty())imshow("mean background image", background );// interact with userconst char key = (char)waitKey(30);if (key == 27 || key == 'q') // ESC{cout << "Exit requested" << endl;break;}else if (key == ' '){doUpdateModel = !doUpdateModel;cout << "Toggle background update: " << (doUpdateModel ? "ON" : "OFF") << endl;}else if (key == 's'){doSmoothMask = !doSmoothMask;cout << "Toggle foreground mask smoothing: " << (doSmoothMask ? "ON" : "OFF") << endl;}}return 0;}效果:
3。腐蚀
#include "opencv2/core.hpp"
#include "opencv2/imgproc.hpp"
#include "opencv2/video.hpp"
#include "opencv2/videoio.hpp"
#include "opencv2/highgui.hpp"
#include"opencv2/imgproc/imgproc.hpp"
#include 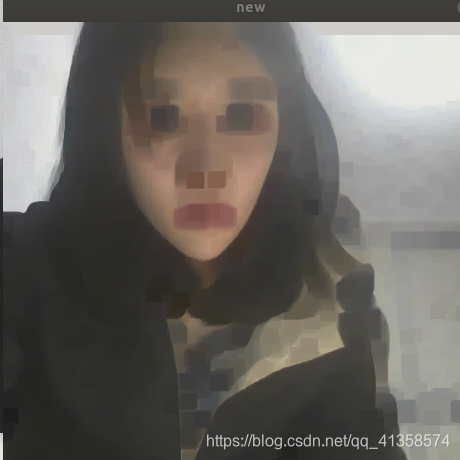
4。模糊:
int main()
{Mat img = imread("/home/heziyi/图片/6.jpg");imshow("old",img);Mat element = getStructuringElement(MORPH_RECT,Size(15,15));Mat dimg;blur(img,dimg,Size(1,1));imshow("new",dimg);waitKey(0);
}
5。边缘检测:
#include "opencv2/core.hpp"
#include "opencv2/imgproc.hpp"
#include "opencv2/video.hpp"
#include "opencv2/videoio.hpp"
#include "opencv2/highgui.hpp"
#include"opencv2/imgproc/imgproc.hpp"
#include 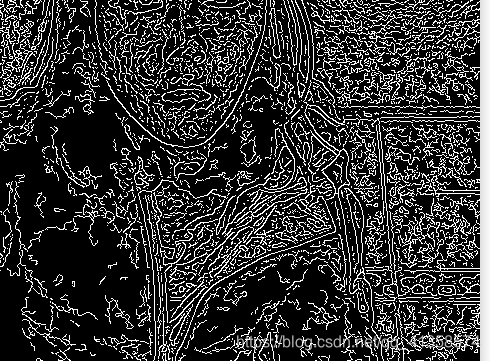
VideoCapture 提供了摄像机或视频文件捕获视频的C++接口,作用是从视频文件或摄像头捕获视频并显示出来。
//循环显示每一帧
while(1)
{
Mat frame;//用于存储每一帧图像
capture>>frame;
imshow("picture",frame)
waitKey(30);//延时30毫秒
}
python接口:
使用numpy.array访问图像数据
将BGR图像在(0,0)处的像素转化为白 像素。
img[0,0] = [255, 255, 255]
通过三元数组的索引将像素的颜色值设为0
下面的代码可将图像所有的G (绿色)值设为0:
img[:,:,1]=0cv2.imshow('ppp',img)cv2.waitKey(30000)

并将第一个区域的值分配给第二个区域(将图 像的一部分拷贝到该图像的另一个位置):
img[y,220]=[z,210,56]my_roi = img[0:200 , 0:200]img[300:500, 300:500] = my_roicv2.imshow('ppp',img)cv2.waitKey(30000)
结果:
视频文件的读写
OpenCV提供了 VideoCapture类和VideoWriter类来支持各种格式的视频文件。支持 的格式类型会因系统的不同而变化,但应该都支持AVI格式。在到达视频文件末尾之前, VideoCapture类可通过read()函数来获取新的帧,每帧是一幅基于BGR格式的图像。
可将一幅图像传递给VideoWriter类的write()函数,该函数会将这幅图像加到 VideoWriter类所指向的文件中。下面给出了一个示例,该示例读取AVI文件的帧,并采用 YUV颜色编码将其写入另一个帧中:
import cv2
videoCapture = cv2.VideoCapture(1 MyInputVid.avi1)
fps = videoCapture.get(cv2.CAP_PROP_FPS)
size = (int(videoCapture.get(cv2.CAP_PROP_FRAME_WIDTH)),
int(videoCapture.get(cv2.CAP_PROP_FRAME_HEIGHT)))
videoWriter = cv2.VideoWriter(
'MyOutputVid.avi', cv2.VideoWriter_fourcc('I','4','2','0'),fps,size)
success, frame = videoCapture.read()
while success: # Loop until there are no more frames.
videoWriter.write(frame)
success, frame = videoCapture.read()
本文来自互联网用户投稿,文章观点仅代表作者本人,不代表本站立场,不承担相关法律责任。如若转载,请注明出处。 如若内容造成侵权/违法违规/事实不符,请点击【内容举报】进行投诉反馈!