使用CImg实现A4纸矫正
图像分割
图像分割是一个聚类问题,将相似的点聚到一块。这里我采用了mean shift方法。主要分为三个部分:模点搜索,模点聚类(合并相似区域),合并小区域。
模点搜索
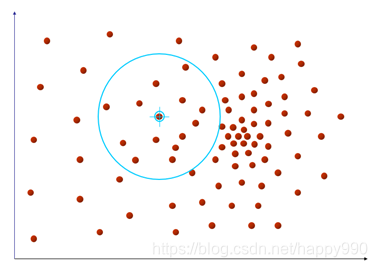
首先确定特征空间,这里选取了空间坐标x,y和色彩空间r,g,b,在实际计算时,是将RGB转换到Lab空间。然后对图像中的每一个点,进行如下操作,对与它位置空间距离小于hr,颜色空间距离小于hs的点求平均值,作为新的中心点。 重复这个步骤直到中心点不再移动或者到达最大迭代次数。此时的中心点就作为起始点的聚类中心,将中心点的像素值赋予初始点。
do {PtPrev = PtCur;										// Set the original point and previous onePtSum = Point5D(0, 0, 0, 0, 0);						// Initial Sum vectorNumPts = 0;											// Count number of points that satisfy the bandwidthsfor (int hx = Left; hx < Right; hx++) {for (int hy = Top; hy < Bottom; hy++) {// Set point in the spatial bandwidthPt = Point5D(hx, hy, (float)Img(hx, hy, 0), (float)Img(hx, hy, 1), (float)Img(hx, hy, 2));Pt.PointLab();// Check it satisfied color bandwidth or notif (Pt.MSPoint5DColorDistance(PtCur) < hr) {PtSum.MSPoint5DAccum(Pt);				// Accumulate the point to Sum vectorNumPts++;								// Count}}}PtSum.MSPoint5DScale(1.0 / NumPts);					// Scale Sum vector to average vectorPtCur = PtSum;										// Get new origin pointstep++;												// One time end
// filter iteration to end
} while ((PtCur.MSPoint5DColorDistance(PtPrev) > MS_MEAN_SHIFT_TOL_COLOR) &&
(PtCur.MSPoint5DSpatialDistance(PtPrev) > MS_MEAN_SHIFT_TOL_SPATIAL) && (step < MS_MAX_NUM_CONVERGENCE_STEPS));
模点聚类
基本上就是区域生长,从某一点出发,如果和它附近的点8邻域)的颜色值相似就合并,同时再从新合并的点出发继续合并下去,直到碰到不相似的点或者该点已经属于另一类了,此时,就退回来,直到退无可退(所有的8邻域搜索空间都已经搜索完毕)。
// Region Growing 8 Neighbours
vector<Point5D> NeighbourPoints;
NeighbourPoints.push_back(PtCur);
while (!NeighbourPoints.empty()) {Pt = NeighbourPoints.back();NeighbourPoints.pop_back();// Get 8 neighboursfor (int k = 0; k < 8; k++) {int hx = Pt.x + dxdy[k][0];int hy = Pt.y + dxdy[k][1];if ((hx > 0) && (hy > 0) && (hx < ROWS) && (hy < COLS) && (Labels[hx][hy] < 0)) {Point5D P(hx, hy, (float)Img(hx, hy, 0), (float)Img(hx, hy, 1), (float)Img(hx, hy, 2));P.PointLab();// Check the colorif (PtCur.MSPoint5DColorDistance(P) < hr) {// Satisfied the color bandwidthLabels[hx][hy] = label;				// Give the same label					NeighbourPoints.push_back(P);		// Push it into stackMemberModeCount[label]++;			// This region number plus one// Sum all color in same regionMode[label * 3 + 0] += P.l;Mode[label * 3 + 1] += P.a;Mode[label * 3 + 2] += P.b;}}}
}
MemberModeCount[label]++;							// Count the point itself
Mode[label * 3 + 0] /= MemberModeCount[label];		// Get average color
Mode[label * 3 + 1] /= MemberModeCount[label];
Mode[label * 3 + 2] /= MemberModeCount[label];
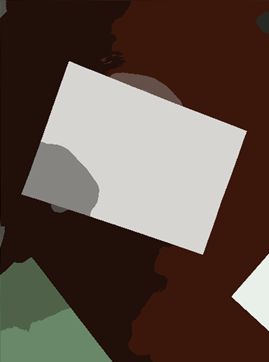
阶段效果:(右图对图像二值化)

A4纸矫正
获取角点
对每个像素,遍历它的8邻域,如果全为白色,就将它变为黑色,得到边缘图像。
auto res = grayscaled;CImg_3x3(I, uchar);cimg_for3x3(grayscaled, x, y,0,0,I,uchar) {if (Ipp==255 &&Icp == 255 &&Inp == 255 &&Ipc == 255 &&Icc == 255 &&Inc == 255 &&Ipn == 255 &&Icn == 255 &&Inn == 255) {res(x, y) = 0;}}
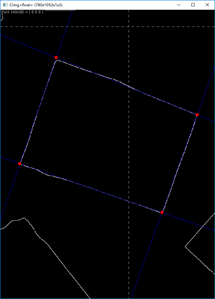
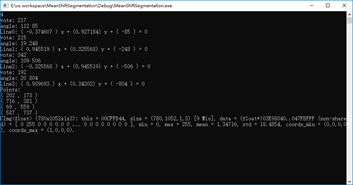
利用之前的霍夫变换,可以求出边缘的直线方程,并得到交点坐标。
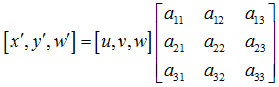
仿射变换
我们获得了角点的坐标,同时我们也知道它们对应矫正后矩形的四个顶点,利用仿射变换可以求出变换举证,然后我们根据结果图像的像素坐标利用插值获得原图对应像素值,并赋给结果图像就可以得到最终结果。

Hough hough("result/edge/2.bmp");PerspectiveTransform temp;PerspectiveTransform H = temp.quadrilateralToQuadrilateral(0, 0, 779, 0, 0, 1051, 779, 1051, hough.points[2].x, hough.points[2].y, hough.points[0].x, hough.points[0].y,hough.points[3].x, hough.points[3].y, hough.points[1].x, hough.points[1].y);/* Method 1: Projective Transforming */CImg<uchar> dest(780, 1052, 1, 3);cimg_forXY(dest, x, y){double denominator = H.a13 * x + H.a23 * y + H.a33;double tx = (H.a11 * x + H.a21 * y + H.a31) / denominator;double ty = (H.a12 * x + H.a22 * y + H.a32) / denominator;//cout << tx << " " << ty << endl;cimg_forC(dest,c)dest(x, y, c) = src.linear_atXYZC(tx, ty,c);}
最终结果


与canny算子的比较
对于较为简单和明显的边缘,比如A4纸,图像分割能够很好的获取到边缘,并且非常明确,干扰很少。但是canny算子能够获取到图像比较细腻的边缘,并且对于噪声有很好的抑制,计算也更快。
代码地址
Github
参考博客
http://www.voidcn.com/article/p-ukgueaom-th.html
https://bbbbyang.github.io/2018/03/19/Mean-Shift-Segmentation/
本文来自互联网用户投稿,文章观点仅代表作者本人,不代表本站立场,不承担相关法律责任。如若转载,请注明出处。 如若内容造成侵权/违法违规/事实不符,请点击【内容举报】进行投诉反馈!