Vue2 总结(开发)
title: Vue2 总结(开发)
date: 2022-03-30 16:53:37
tags:
- Vue
categories: - Vue
cover: https://cover.png
feature: false
文章目录
- 1. [Vue CLI](https://cli.vuejs.org/zh/) 脚手架
- 1.1 安装
- 1.2 升级
- 1.3 创建一个项目
- 1.4 目录结构
- 1.5 运行
- 2. Demo 案例
- 2.1 components
- 2.2 App.vue
- 2.3 main.js
- 2.4 index.html
- 3. render 函数
- 3.1 引入完整版的 vue.js
- 3.2 使用 render 函数
- 4. [配置](https://cli.vuejs.org/zh/config/)文件
- 5. ref 、props 与 mixin
- 5.1 ref
- 5.2 props
- 5.2.1 概念
- 5.2.2 使用
- 5.3 mixin(混入/合)
- 5.3.1 概念
- 5.3.2 使用
- 6. 插件
- 6.1 概念
- 6.2 使用
- 7. scoped 样式
- 8. 组件化案例
- 8.1 定义 components
- 8.2 App.vue
- 8.3 reduce 方法
- 9. webStorage 浏览器本地存储
- 9.1 概念
- 9.2 纯 HTML 使用
- 9.3 Vue 中使用
- 10. 组件自定义事件
- 10.1 概念
- 10.2 绑定
- 10.3 解绑和销毁
- 11. 全局事件总线(GlobalEventBus)
- 11.1 概念
- 11.2 使用
- 12. 消息订阅与发布(pubsub)
- 12.1 概念
- 12.2 使用
- 13. nextTick
- 14. Vue 封装的过度与动画 transition
- 14.1 概念
- 14.2 动画效果
- 14.3 过度效果
- 14.4 集成第三方库 [Animate.css](https://animate.style/)
- 15. Vue 中的 ajax
- 15.1 请求方式
- 15.2 解决 ajax 请求跨域问题
- 15.2.1 代理方式一
- 15.2.2 代理方式二
- 15.3 使用
- 15.4 请求携带参数
- 15.4.1 Get 请求
- 15.4.2 Post 请求
- 15.4.3 Put 请求
- 15.4.4 Delete 请求
- 15.5 vue-resource(插件库)
- 16. 插槽
- 16.1 默认插槽
- 16.2 具名插槽
- 16.3 作用域插槽
- 17. [Vuex](https://github.com/vuejs/vuex)
- 17.1 概念
- 17.2 Vuex 核心概念和 API
- 17.2.1 state
- 17.2.2 actions
- 17.2.3 mutations
- 17.2.4 getters
- 17.2.5 modules
- 17.3 搭建 Vuex 环境
- 17.3.1 安装
- 17.3.2 准备 store
- 17.3.3 在 main.js 引入 store
- 17.4 工作流程/原理
- 17.5 使用
- 17.6 map 方法
- 17.7 模块化+命名空间
- 18. vue-router 路由
- 18.1 SPA
- 18.2 路由分类
- 18.3 基础使用
- 18.4 多级(嵌套)路由
- 18.5 路由传参
- 18.5.1 路由的query参数
- 18.5.2 命名路由
- 18.5.2 路由的 params 参数
- 18.6 路由的 props 配置
- 18.7 \
的 replace 属性 - 18.8 编程式路由导航
- 18.9 缓存路由组件
- 18.10 路由组件的生命周期钩子
- 18.11 路由(导航)守卫
- 18.11.1 meta 路由元信息
- 18.11.2 全局守卫
- 18.11.3 独享守卫
- 18.11.4 组件内守卫
- 18.12 路由器的两种工作模式
- 19. Vue UI 组件库
- 19.1 移动端常用 UI 组件库
- 19.2 PC 端常用 UI 组件库
- 19.3 Element UI
1. Vue CLI 脚手架
1.1 安装
npm install -g @vue/cli
# OR
yarn global add @vue/cli
1.2 升级
npm update -g @vue/cli
# 或者
yarn global upgrade --latest @vue/cli
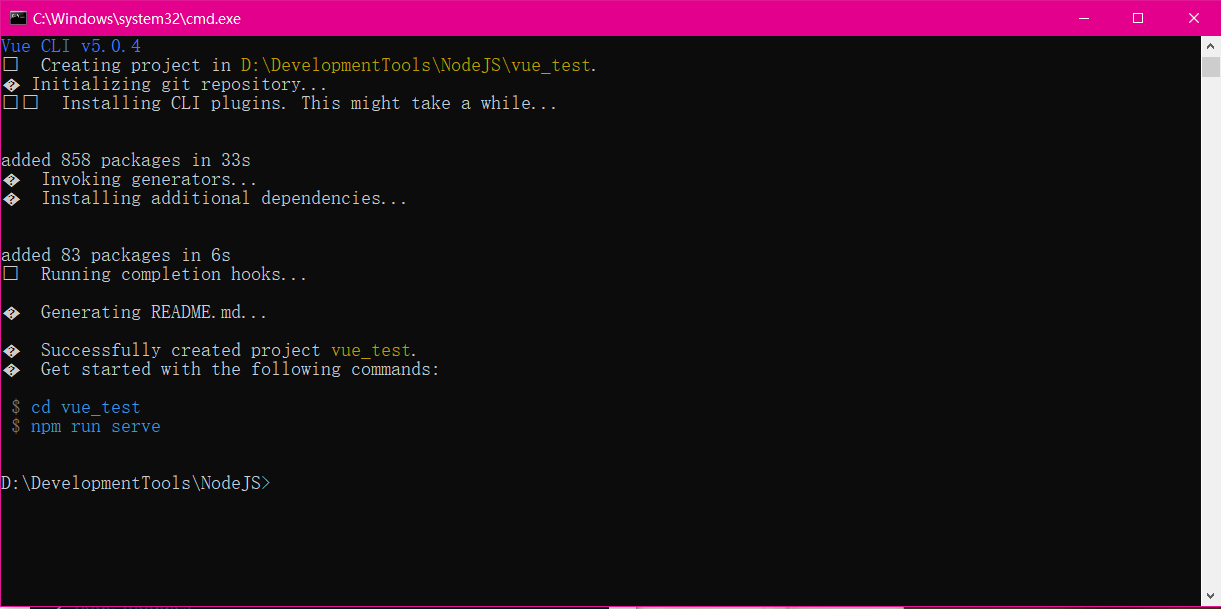
1.3 创建一个项目
vue create hello-world
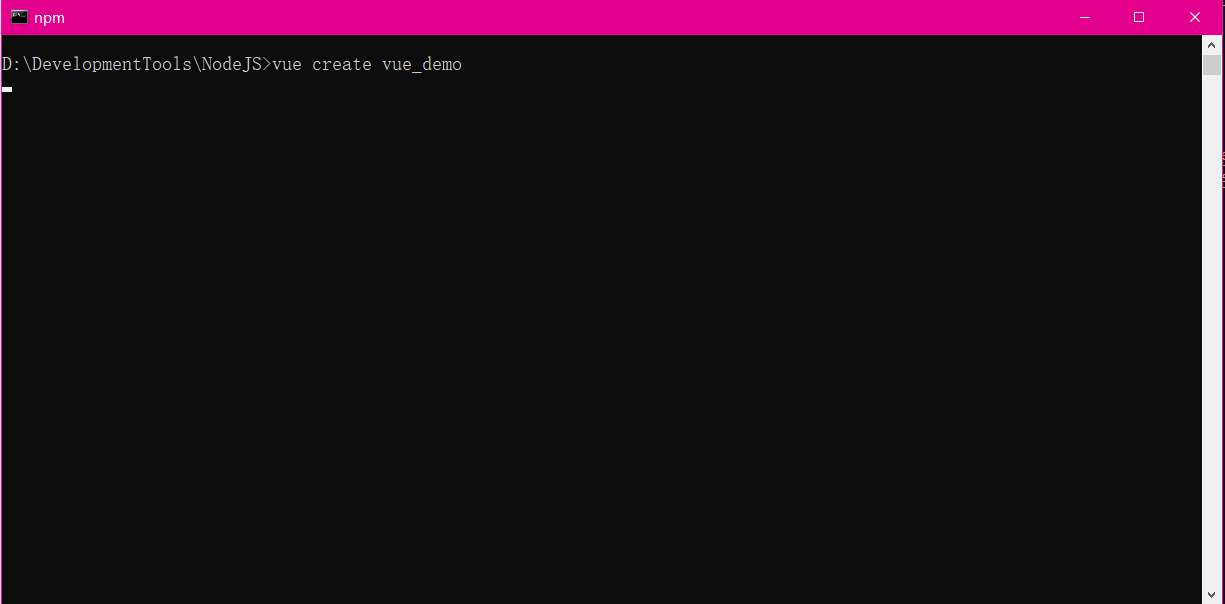
会被提示选取一个 preset。你可以选默认的包含了基本的 Babel + ESLint 设置的 preset,也可以选“手动选择特性”来选取需要的特性
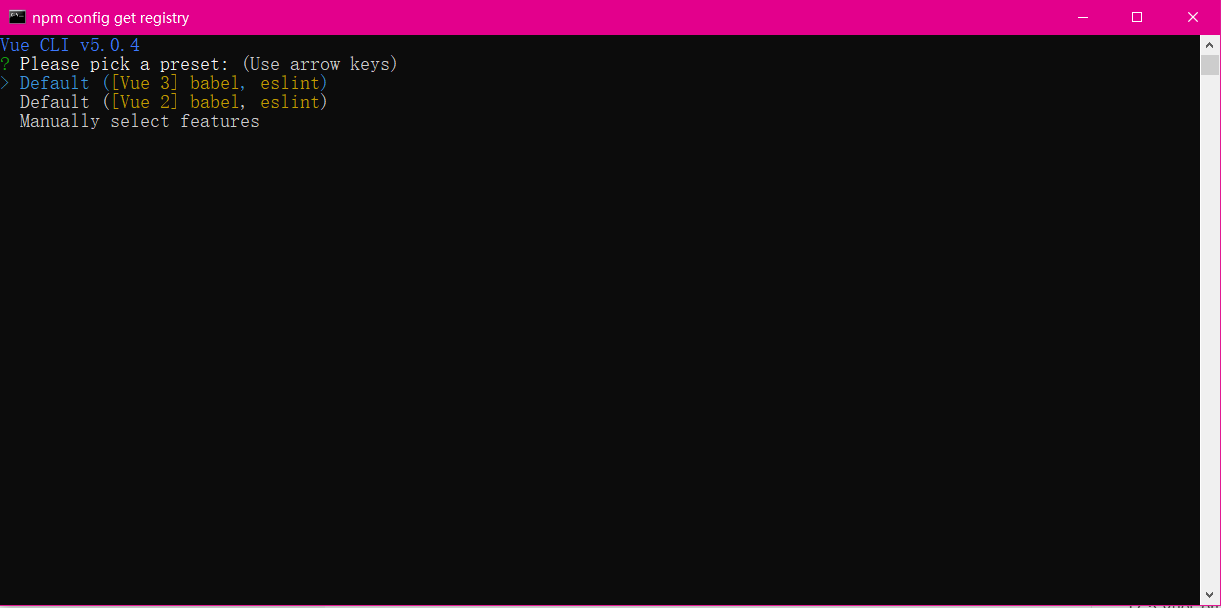
创建完成
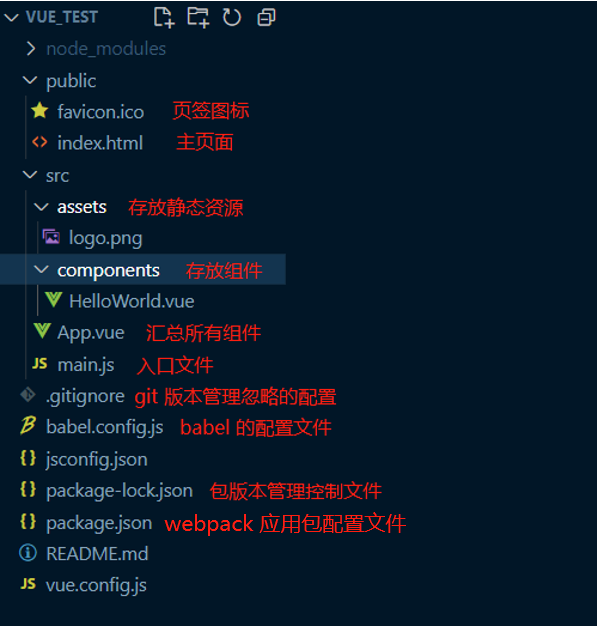
1.4 目录结构
1.5 运行
vue-cli2.0
"scripts": {"dev": "webpack-dev-server --inline --progress --config build/webpack.dev.conf.js","start": "npm run dev","build": "node build/build.js"
}
vue-cli3.0
"scripts": {"serve": "vue-cli-service serve", // 运行项目"build": "vue-cli-service build", // build"lint": "vue-cli-service lint" // 运行语法检查
},
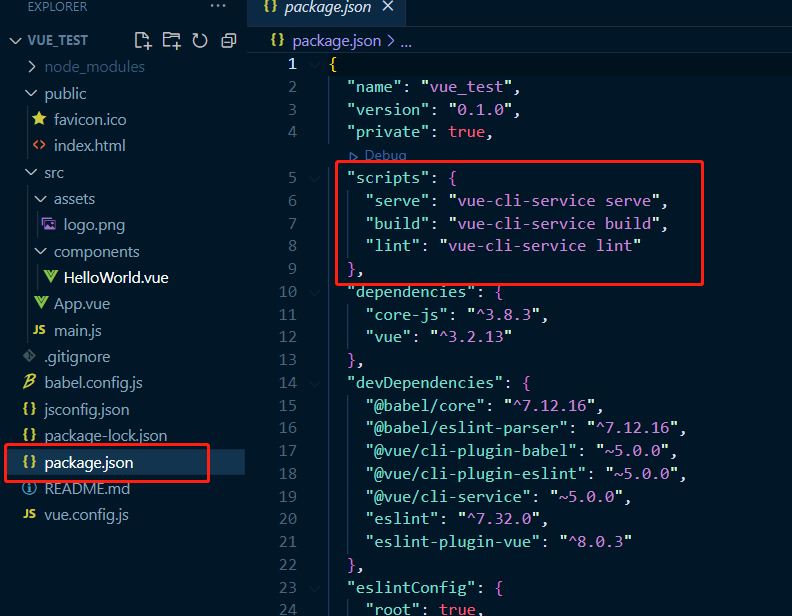
启动运行项目
npm run serve
npm run xxx 中的 xxx 可以理解为键值对的 key,实际上 run 的是在 package.json 里面 scripts 配置的 value。比如,npm run serve 实际运行的是 vue-cli-service serve,而放在 3.0 以前 npm run dev 运行的则是 node build/dev-server.js 文件
2. Demo 案例
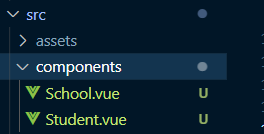
2.1 components
定义两个组件
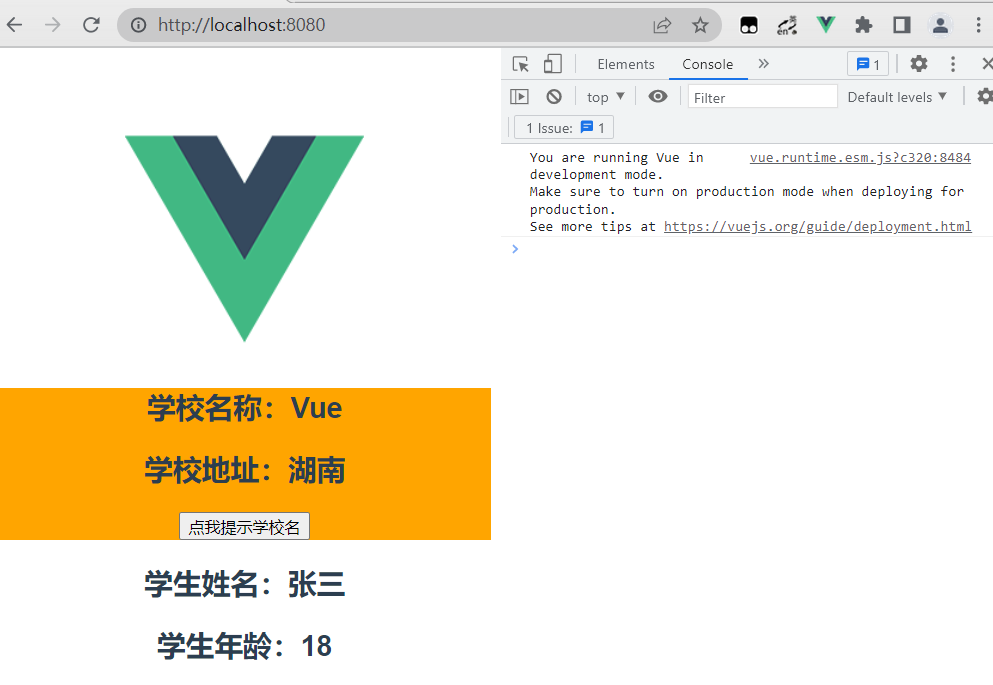
<template><div class="demo"><h2>学校名称:{{schoolName}}h2><h2>学校地址:{{schoolAddress}}h2><button @click="showName">点我提示学校名button>div>
template><script>
export default ({// eslint-disable-next-line vue/multi-word-component-namesname: 'School',data() {return {schoolName: 'Vue',schoolAddress: '湖南'}},methods: {showName() {alert(this.schoolName)},demo() { }},
});
script><style>
.demo {background-color: orange;
}
style>
<template><div><h2>学生姓名:{{name}} h2><h2>学生年龄:{{age}} h2>div>
template><script>
export default {// eslint-disable-next-line vue/multi-word-component-namesname: 'Student',data() {return {name: '张三',age: 18}},
}
script>
2.2 App.vue
管理所有的其他的组件
<template><div id="app"><img alt="Vue logo"src="./assets/logo.png"><School>School><Student>Student>div>
template><script>
import School from './components/School.vue'
import Student from './components/Student.vue'export default {name: 'App',components: {School,Student}
}
script><style>
#app {font-family: Avenir, Helvetica, Arial, sans-serif;-webkit-font-smoothing: antialiased;-moz-osx-font-smoothing: grayscale;text-align: center;color: #2c3e50;margin-top: 60px;
}
style>
2.3 main.js
// 项目入口文件
// 引入 Vue
import Vue from 'vue'
// 引入 App 组件
import App from './App.vue'// 关闭 Vue 的生产提示
Vue.config.productionTip = falsenew Vue({render: h => h(App),
}).$mount('#app')
2.4 index.html
DOCTYPE html>
<html lang=""><head><meta charset="utf-8"><meta http-equiv="X-UA-Compatible" content="IE=edge"><meta name="viewport" content="width=device-width,initial-scale=1.0"><link rel="icon" href="<%= BASE_URL %>favicon.ico"><title><%= htmlWebpackPlugin.options.title %>Fantitle>head><body><noscript><strong>We're sorry but <%= htmlWebpackPlugin.options.title %> doesn't work properly without JavaScript enabled. Please enable it to continue.strong>noscript><div id="app">div>body>
html>
3. render 函数
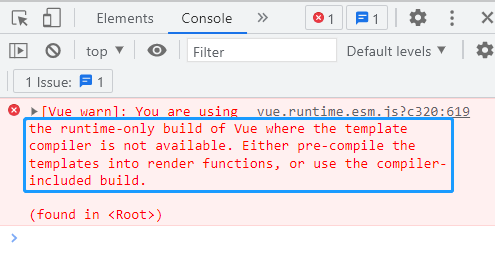
默认引入的 Vue 是一个不完整的 Vue(运行版的 vue),缺少模板解析器,此时使用 components 来注册组件会报错
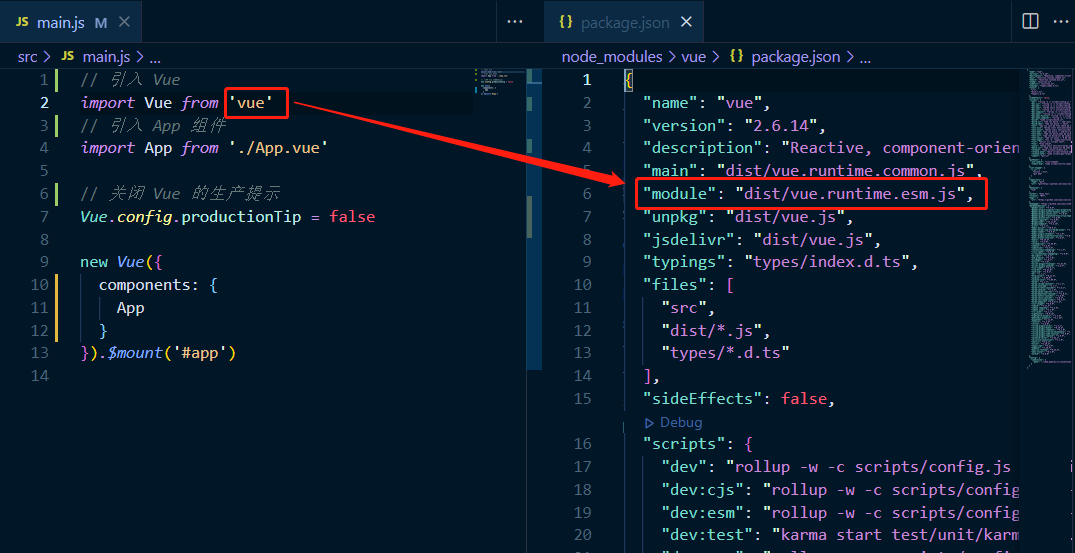
可以看到有两个解决方案,第一种引入完整的 vue.js,第二种使用 render 函数
3.1 引入完整版的 vue.js
完整版的 Vue 在 vue/dist 下的 vue.js
引入完整版的 vue.js
// 引入 Vue
import Vue from 'vue/dist/vue'
// 引入 App 组件
import App from './App.vue'// 关闭 Vue 的生产提示
Vue.config.productionTip = falsenew Vue({template: `此时运行成功
3.2 使用 render 函数
由于运行版的 vue 没有模板解析器,不能使用 template 配置项,需要使用 render 函数接收到的 createElement 函数去指定具体内容
// 引入 Vue
import Vue from 'vue'
// 引入 App 组件
import App from './App.vue'// 关闭 Vue 的生产提示
Vue.config.productionTip = falsenew Vue({// render(createElement) {//   return createElement(App);// },// render:h => h(App)
}).$mount('#app')
4. 配置文件
- 使用 vue inspect > output.js 可以查看到 Vue 脚手架的默认配置
- 使用 vue.config.js 可以对脚手架进行个性化定制,官网配置地址 https://cli.vuejs.org/zh/config/#vue-config-js
const { defineConfig } = require('@vue/cli-service')
module.exports = defineConfig({transpileDependencies: true,lintOnSave: false,pages: {index: {// page 的入口,默认 main.jsentry: 'src/aa.js'}}
})
5. ref 、props 与 mixin
5.1 ref
- 被用来给元素或子组件注册引用信息(id的替代者)
- 应用在 html 标签上获取的是真实 DOM 元素,应用在组件标签上是组件实例对象(vc)
- 使用方式:
- 打标识:
.....\
或 \\ - 获取:
this.$refs.xxx
- 打标识:
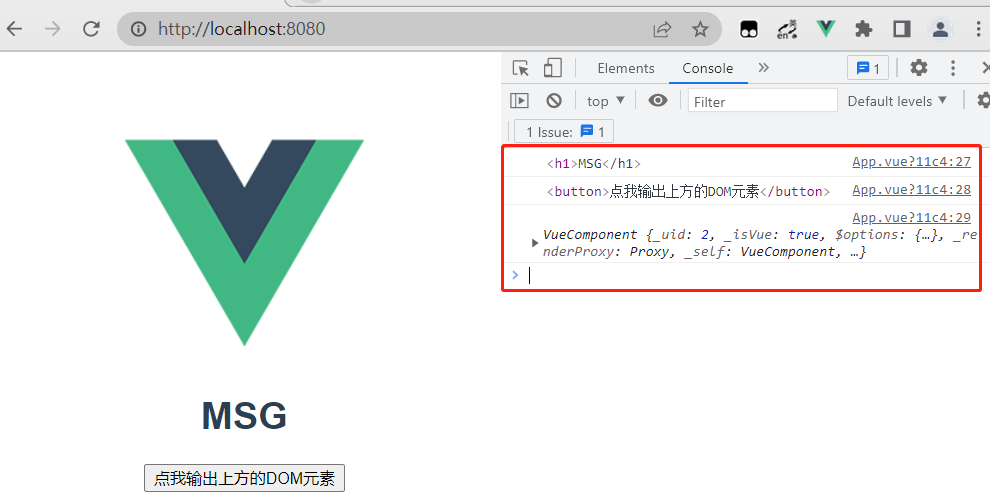
<template><div id="app"><img alt="Vue logo" src="./assets/logo.png"><h1 v-text="msg" ref="title">h1><button ref="btn" @click="showDOM">点我输出上方的DOM元素button><School ref="sch" /><Student>Student>div>
template><script>
import School from './components/School.vue'
import Student from './components/Student.vue'export default {name: 'App',data() {return {msg: 'MSG'}},methods: {showDOM() {console.log(this.$refs.title) // 真实DOM元素console.log(this.$refs.btn) // 真实DOM元素console.log(this.$refs.sch) // School组件的实例对象(vc)}},components: {School,Student}
}
script>
5.2 props
5.2.1 概念
让组件接收外部传过来的数据
- 传递数据:
- 接收数据:
- 第一种方式(只接收):
props:['name'] - 第二种方式(限制类型):
props:{name:String} - 第三种方式(限制类型、限制必要性、指定默认值):
props:{name:{type: String, // 类型required: true, // 必要性default: '老王' // 默认值}
}
- 第一种方式(只接收):
- props 是只读的,Vue 底层会监测你对 props 的修改,如果进行了修改,就会发出警告,若业务需求确实需要修改,那么需要复制 props 的内容到 data 中一份,然后去修改 data 中的数据
5.2.2 使用
App.vue,使用组件 School.vue 时传入数据
<template><div id="app"><img alt="Vue logo" src="./assets/logo.png"><!-- age 为数字类型,但传入的是一个字符串,此时需要用 v-vind 数据绑定,将 "" 里的看成一个表达式然后传入 --><School schoolName="Vue" schoolAddress="长沙" :age="18" /><Student /></div>
</template><script>
import School from './components/School.vue'
import Student from './components/Student.vue'export default {name: 'App',components: {School,Student}
}
</script>
School.vue,使用 props 接收传进来的数据
<template><div class="demo"><h2>{{info}}h2><h2>学校名称:{{schoolName}}h2><h2>学校地址:{{schoolAddress}}h2><h2> {{age + 1}} h2><button @click="showName">点我提示学校名button>div>
template><script>
export default ({// eslint-disable-next-line vue/multi-word-component-namesname: 'School',data() {return {info: '原生信息'}},// 接收数据// props: ['schoolName', 'schoolAddress', 'age'],props: {schoolName: {type: String, // 类型required: true, // 必要性default: 'Vue' // 默认值},schoolAddress: String,age: Number}
});
script>
展示将传进来的数据

5.3 mixin(混入/合)
5.3.1 概念
可以把多个组件共用的配置提取成一个混入对象
- 定义混入:
{data(){....},methods:{....}.... } - 使用混入:
全局混入:Vue.mixin(xxx),会给所有都加上混入
局部混入:mixins:[‘xxx’]
5.3.2 使用
定义混入,mixin.js
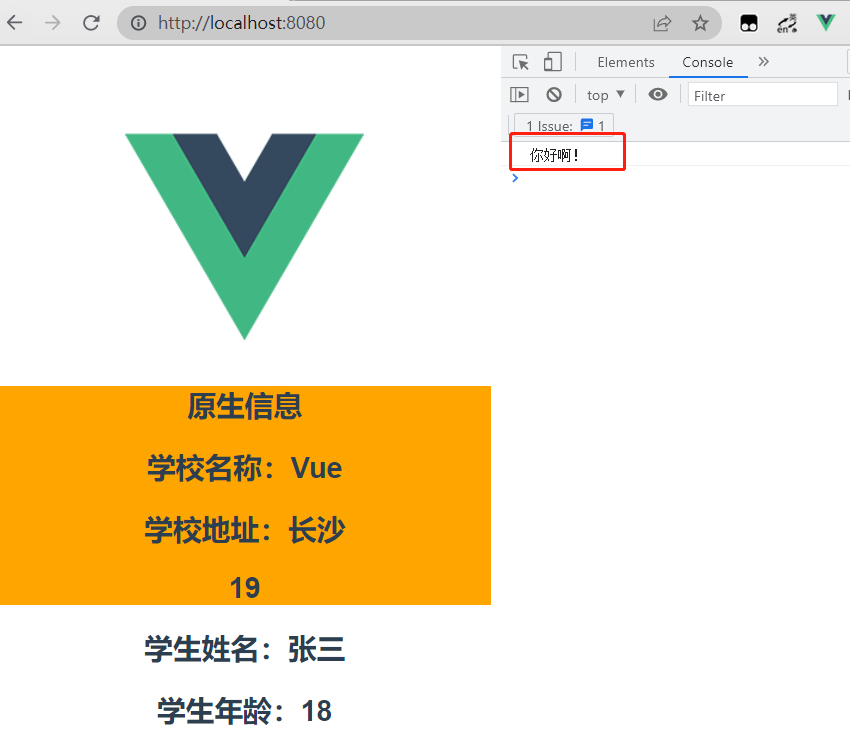
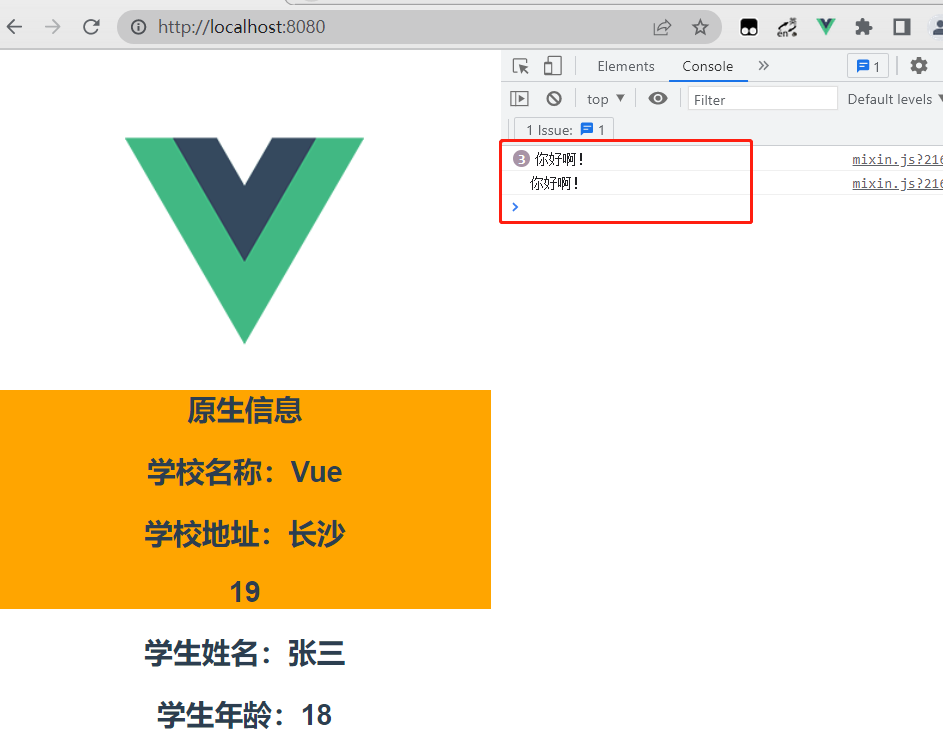
export const mixin1 = {methods: {showName(){alert(this.name)}},mounted() {console.log('你好啊!')},
}
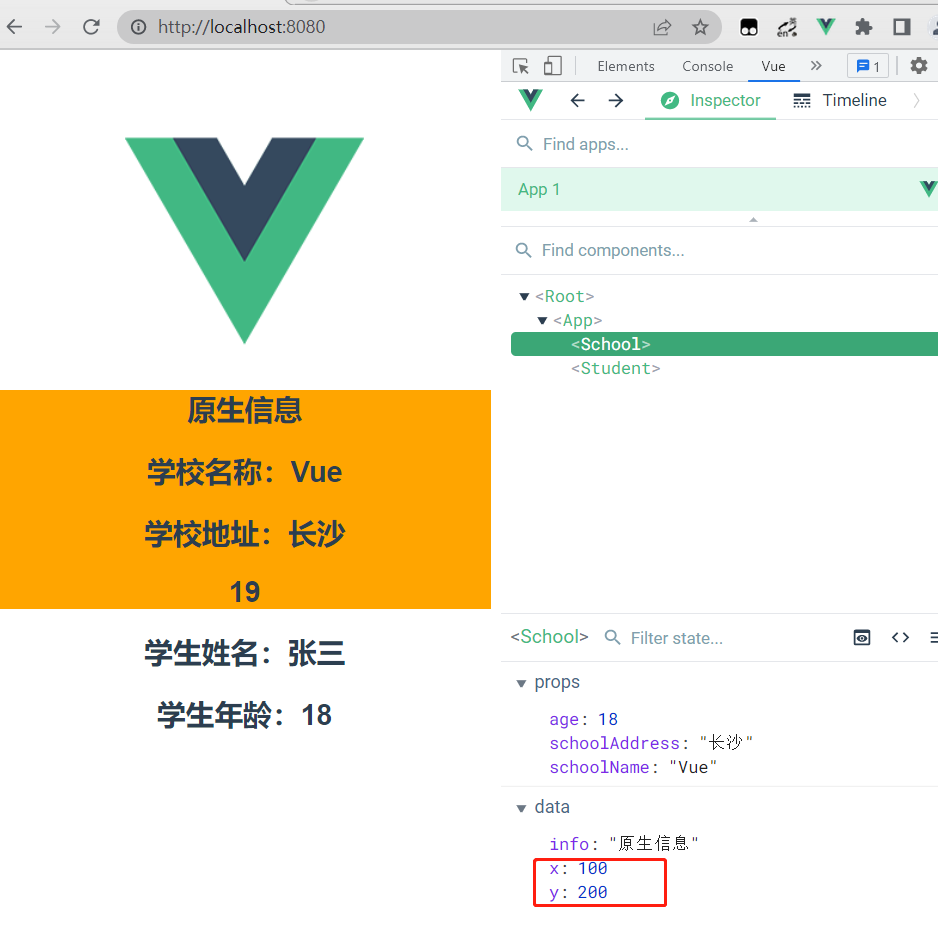
export const mixin2 = {data() {return {x:100,y:200}},
}
使用局部混入,School.vue
<script>
import { mixin1, mixin2 } from '../mixin.js';
export default ({// eslint-disable-next-line vue/multi-word-component-namesname: 'School',data() {return {info: '原生信息'}},// 使用局部混入mixins: [mixin1, mixin2],props: ['schoolName', 'schoolAddress', 'age'],
});
</script>
使用全局混入,main.js
// 引入 Vue
import Vue from 'vue'
// 引入 App 组件
import App from './App.vue'
import { mixin1, mixin2 } from './mixin'// 关闭 Vue 的生产提示
Vue.config.productionTip = false
// 全局混入
Vue.mixin(mixin1)
Vue.mixin(mixin2)new Vue({render:h => h(App)
}).$mount('#app')
6. 插件
6.1 概念
用于增强 Vue,包含 install 方法的一个对象,install 的第一个参数是 Vue,第二个以后的参数是插件使用者传递的数据
- 定义插件:
对象.install = function (Vue, options) {// 1. 添加全局过滤器Vue.filter(....)// 2. 添加全局指令Vue.directive(....)// 3. 配置全局混入(合)Vue.mixin(....)// 4. 添加实例方法Vue.prototype.$myMethod = function () {...}// 5. 给 Vue 原型上添加一个方法(vm 和 vc 都能用)Vue.prototype.$myProperty = xxxx } - 使用插件:Vue.use()
6.2 使用
定义一个插件 plugins.js
export default {install(Vue, x, y, z){console.log(Vue, x, y, z)//全局过滤器Vue.filter('mySlice',function(value){return value.slice(0,  4)})//定义全局指令Vue.directive('fbind',{//指令与元素成功绑定时(一上来)bind(element,binding){element.value = binding.value},//指令所在元素被插入页面时inserted(element){element.focus()},//指令所在的模板被重新解析时update(element,binding){element.value = binding.value}})//定义混入Vue.mixin({data() {return {x:100,y:200}},})// 给 Vue原型上添加一个方法(vm 和 vc 都能用)Vue.prototype.hello = ()=>{alert('你好啊')}}
}
使用插件,main.js
// 引入 Vue
import Vue from 'vue'
// 引入 App 组件
import App from './App.vue'
import plugins from './plugins';// 关闭 Vue 的生产提示
Vue.config.productionTip = false
// 使用插件,传入三个值
Vue.use(plugins, 1, 2, 3)new Vue({render:h => h(App)
}).$mount('#app')
7. scoped 样式
让样式在局部生效,防止冲突。写法: