petalinux程序开机zynq自己启动
版本:vivado2017.4,linux-xlnx-xilinx-v2017.4
1,环境变量
source /opt/Xilinx/Vivado/2017.4/settings64.sh
source /opt/pkg/petalinux/settings.sh
petalinux-create --type project --template zynq --name test_autostart
2.导入.hdf硬件
petalinux-config --get-hw-description ../linux_base.sdk
cd /test_autostart
3,(1)建立shell脚本文件的app工程:
petalinux-create -t apps --template install -n startup --enable
(2)进入 test_autostart/project-spec/meta-user/recipes-apps/startup中修改startup.bb文件
#
# This file is the startup recipe.
#
SUMMARY = "Simple startup application"
SECTION = "PETALINUX/apps"
LICENSE = "MIT"
LIC_FILES_CHKSUM = "file://${COMMON_LICENSE_DIR}/MIT;md5=0835ade698e0bcf8506ecda2f7b4f302"
SRC_URI = "file://startup \
"
S = "${WORKDIR}"
FILESEXTRAPATHS_prepend := "${THISDIR}/files:"
inherit update-rc.d
INITSCRIPT_NAME = "startup"
INITSCRIPT_PARAMS = "start 99 S ."
do_install() {
install -d ${D}/${sysconfdir}/init.d
install -m 0755 ${S}/startup ${D}/${sysconfdir}/init.d/startup
}
FILES_${PN} += "${sysconfdir}/*"
4,(1)建立c语言的应用程序工程:
petalinux-create -t apps --template c -n startup --enable
(2)进入 test_autostart/project-spec/meta-user/recipes-apps/startup中修改startup.bb文件
#
# This file is the startup recipe.
#
SUMMARY = "Simple startup application"
SECTION = "PETALINUX/apps"
LICENSE = "MIT"
LIC_FILES_CHKSUM = "file://${COMMON_LICENSE_DIR}/MIT;md5=0835ade698e0bcf8506ecda2f7b4f302"
SRC_URI = "file://startup \
file://Makefile \
"
S = "${WORKDIR}"
FILESEXTRAPATHS_prepend := "${THISDIR}/files:"
inherit update-rc.d
INITSCRIPT_NAME = "startup"
INITSCRIPT_PARAMS = "start 99 S ."
do_compile() {
oe_runmake
}
do_install() {
install -d ${D}/${sysconfdir}/init.d
install -m 0755 ${S}/startup ${D}/${sysconfdir}/init.d/startup
}
FILES_${PN} += "${sysconfdir}/*"
(3)进入 test_autostart/project-spec/meta-user/recipes-apps/startup/file中打开文件夹里的 startup 或 startup.c
shell脚本可以加入自己需要执行的脚本,运行程序
#!/bin/sh
echo "~~~~~~~~~~~~~~~~~~~~~~~~~~~~~"
ifconfig eth0 192.168.1.10
mount /dev/mmcblk0p1 /mnt/
cd /mnt
cp libtmControlClient.so /lib
./yourapplication
c语言的应用程序启动文件自启动代码
#include
int main(int argc, char **argv)
{
printf("Auto starting, Hello PetaLinux World!\n");
return 0;
}
5,在根文件系统配置的时候,在apps中startup选中为*
petalinux-config -c rootfs
6,编译启动文件:petalinux-build
petalinux-package --boot --fsbl ./images/linux/zynq_fsbl.elf --fpga --u-boot --force
以前开机自启动的办法:
一,如果是开机马上执行的脚本,,就是zynq的根文件系统自启动的时候,就是与rc相关的,可以将脚本写到rc.local中;
二,在AM335X里面,在/etc/profile.d里面放入脚本start.sh,加个权限,开机自启动会执行
三,开机自启动脚本,可以放任意位置,我放在/etc/init.d/xxx.sh
写完后,要给权限chmod 777 xxx.sh,chmod a+x xxx.sh
脚本内容如下:
#! /bin/sh
# Call all S??* scripts in /etc/rcS.d/ in numerical/alphabetical order
"#!/bin/sh"
echo "ROMTEK"
export LD_LIBRARY_PATH=/opt/zedboard/opencv-3.1.0/install/lib
ifconfig eth0 192.168.1.XX
export LC_ALL="C"
mount /dev/sda1 /mnt/u
touch test.txt
./wr
sync
四,如果是要任一用户后自动执行脚本,可以将脚本写到“/etc/profile”中。
for i in /etc/init.d/startup.sh;
for i in /etc/profile.d/*.sh;
vi ~/.bash_profile
五,操作系统下:
如果是用户登录过后自动执行脚本,可以将脚本写到相应的用户目录下“~/.bash_profile”,
若脚本“~/.bash_profile”不存在,可以直接拷贝“/etc/profile”命名为“~/.bash_profile”
然后打开该文件 vi ~/.bash_profile
修改为如下,主要是下面:
# /etc/profile: system-wide .profile file for the Bourne shell (sh(1))
# and Bourne compatible shells (bash(1), ksh(1), ash(1), ...).
if [ "$PS1" ]; then
if [ "$BASH" ] && [ "$BASH" != "/bin/sh" ]; then
# The file bash.bashrc already sets the default PS1.
# PS1='\h:\w\$ '
if [ -f /etc/bash.bashrc ]; then
. /etc/bash.bashrc
fi
else
if [ "`id -u`" -eq 0 ]; then
PS1='# '
else
PS1='$ '
fi
fi
fi
# The default umask is now handled by pam_umask.
# See pam_umask(8) and /etc/login.defs.
if [ -d /etc/profile.d ]; then
for i in /etc/init.d/xxx.sh;
do
if [ -r $i ]; then
. $i
fi
done
unset i
fi
六,petalinux监控程序崩了然后自己自动启动的配置
一,修改的位置
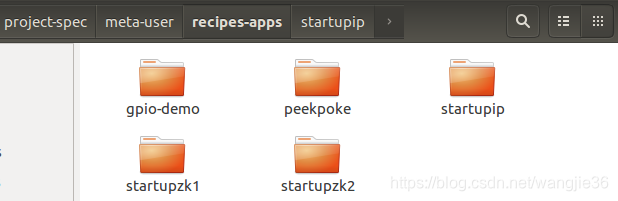
二,具体修改
only_read/ax_peta/project-spec/meta-user/recipes-apps/startupip$
startupip.bb内容如下:
#
# This file is the startupip recipe.
#SUMMARY = "Simple startupip application"
SECTION = "PETALINUX/apps"
LICENSE = "MIT"
LIC_FILES_CHKSUM = "file://${COMMON_LICENSE_DIR}/MIT;md5=0835ade698e0bcf8506ecda2f7b4f302"SRC_URI = "file://startupip \"S = "${WORKDIR}"FILESEXTRAPATHS_prepend := "${THISDIR}/files:"inherit update-rc.dINITSCRIPT_NAME = "startupip"
INITSCRIPT_PARAMS = "start 99 S ."do_install() {install -d ${D}/${sysconfdir}/init.dinstall -m 0755 ${S}/startupip ${D}/${sysconfdir}/init.d/startupip
}
FILES_${PN} += "${sysconfdir}/*"
files/startip脚本代码如下:
#!/bin/sh
echo "~~~~~~~~~~startupip~~~~~~~~"
ifconfig eth0 192.168.1.10
mount  /dev/mmcblk1p1 /mnt/
cd /mnt
./ip.sh
only_read/ax_peta/project-spec/meta-user/recipes-apps/startupzk1$
startupzk1.bb
#
# This file is the startupzk1 recipe.
#SUMMARY = "Simple startupzk1 application"
SECTION = "PETALINUX/apps"
LICENSE = "MIT"
LIC_FILES_CHKSUM = "file://${COMMON_LICENSE_DIR}/MIT;md5=0835ade698e0bcf8506ecda2f7b4f302"SRC_URI = "file://startupzk1 \"S = "${WORKDIR}"FILESEXTRAPATHS_prepend := "${THISDIR}/files:"inherit update-rc.dINITSCRIPT_NAME = "startupzk1"
INITSCRIPT_PARAMS = "start 98 S ."do_install() {install -d ${D}/${sysconfdir}/init.dinstall -m 0755 ${S}/startupzk1 ${D}/${sysconfdir}/init.d/startupzk1
}
FILES_${PN} += "${sysconfdir}/*"
files/startupzk1
#!/bin/sh
echo "~~~~~~~~~~startupzk1~~~~~~~~"
mount  /dev/mmcblk1p2 /tmp/
cd /tmp
./zk.sh
only_read/ax_peta/project-spec/meta-user/recipes-apps/startupzk2$
startupzk2.bb
#
# This file is the startupzk2 recipe.
#SUMMARY = "Simple startupzk2 application"
SECTION = "PETALINUX/apps"
LICENSE = "MIT"
LIC_FILES_CHKSUM = "file://${COMMON_LICENSE_DIR}/MIT;md5=0835ade698e0bcf8506ecda2f7b4f302"SRC_URI = "file://startupzk2 \"S = "${WORKDIR}"FILESEXTRAPATHS_prepend := "${THISDIR}/files:"inherit update-rc.dINITSCRIPT_NAME = "startupzk2"
INITSCRIPT_PARAMS = "start 97 S ."do_install() {install -d ${D}/${sysconfdir}/init.dinstall -m 0755 ${S}/startupzk2 ${D}/${sysconfdir}/init.d/startupzk2
}
FILES_${PN} += "${sysconfdir}/*"
files/startupzk2
#!/bin/sh
echo "~~~~~~~~~~startupzk2~~~~~~~~"
mount  /dev/mmcblk1p1 /mnt/
cd /mnt
./bf.sh
三,分区脚本
mnt下面的bf,sh
#!/bin/sh
./station.sh &
mnt下面的station.sh
#!/bin/sh
sleep 2
while true
docount=`ps -ef |grep transdata11-11 |grep -v "grep"|wc -l`#echo $countif [ 0 == $count ]then./poweroff_test./transdata11-11elsesleep 2fi
done
mnt下面的ip.sh
#!/bin/sh
ifconfig eth0 down
ifconfig eth0 hw ether 00:0A:35:00:1E:41
ifconfig eth0 down
ifconfig eth0 172.27.226.241 netmask 255.255.255.0
route add default gw 172.27.226.254
ifconfig eth0 up
while true
domount -o rw,remount /var/volatile/tmp/sleep 5
done
tmp下面的zk.sh
cp libtmControlClient.so /lib
./transdata11-11 &
本文来自互联网用户投稿,文章观点仅代表作者本人,不代表本站立场,不承担相关法律责任。如若转载,请注明出处。 如若内容造成侵权/违法违规/事实不符,请点击【内容举报】进行投诉反馈!