Mybatis源码解析之Mybatis初始化过程
一、搭建一个简单的Mybatis工程
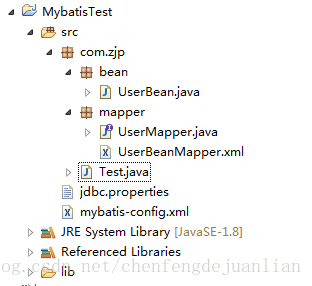
为了了解Mybatis的初始化过程,这里需要搭建一个简单的Mybatis工程操作数据库,工程结构如下:
一个UserBean.java
private int id;private String username;private String password;private int age;public UserBean(String username, String password, int age) {super();this.username = username;this.password = password;this.age = age;}操作数据库接口以及对应的Mapper
public interface UserMapper {void insertUser(UserBean user);}
<mapper namespace="com.zjp.mapper.UserMapper"><insert id="insertUser" parameterType="userBean">insert into user_t (id,user_name,password,age) values(#{id},#{username},#{password},#{age})insert>mapper>mybatis配置文件mybatis-config以及jdbc配置文件
<configuration><properties resource="jdbc.properties"><property name="dialect" value="mysql" />properties><settings><setting name="logImpl" value="LOG4J" />settings><typeAliases><typeAlias type="com.zjp.bean.UserBean" alias="userBean" />typeAliases><environments default="cybatis"><environment id="cybatis"><transactionManager type="JDBC" /><dataSource type="POOLED"><property name="driver" value="${driver}" /><property name="url" value="${url}" /><property name="username" value="${username}" /><property name="password" value="${password}" />dataSource>environment>environments><mappers><mapper resource="com/zjp/mapper/UserBeanMapper.xml" /> mappers>
configuration>
driver=com.mysql.jdbc.Driver
url=jdbc:mysql://localhost:3306/mybatis?useUnicode=true&characterEncoding=utf8
username=root
password=root
#\u5B9A\u4E49\u521D\u59CB\u8FDE\u63A5\u6570
initialSize=0
#\u5B9A\u4E49\u6700\u5927\u8FDE\u63A5\u6570
maxActive=20
#\u5B9A\u4E49\u6700\u5927\u7A7A\u95F2
maxIdle=20
#\u5B9A\u4E49\u6700\u5C0F\u7A7A\u95F2
minIdle=1
#\u5B9A\u4E49\u6700\u957F\u7B49\u5F85\u65F6\u95F4
maxWait=60000
这样就完成了一个简单的mybatis工程搭建,然后新建一个main方法对数据库进行操作
package com.zjp;import java.io.IOException;
import java.io.Reader;import org.apache.ibatis.io.Resources;
import org.apache.ibatis.session.SqlSession;
import org.apache.ibatis.session.SqlSessionFactory;
import org.apache.ibatis.session.SqlSessionFactoryBuilder;import com.zjp.bean.UserBean;
import com.zjp.mapper.UserMapper;public class Test {public static void main(String[] args) throws IOException {// 使用MyBatis提供的Resources类加载mybatis的配置文件Reader reader = Resources.getResourceAsReader("mybatis-config.xml");// 构建sqlSession的工厂SqlSessionFactory sqlSessionFactory = new SqlSessionFactoryBuilder().build(reader);SqlSession session = sqlSessionFactory.openSession();UserMapper mapper = session.getMapper(UserMapper.class);UserBean user = new UserBean("张三", "123456", 7);try {mapper.insertUser(user);System.out.println(user.toString());session.commit();} catch (Exception e) {e.printStackTrace();session.rollback();}}
}
二、Mybatis配置文件初始化过程
在Main方法中前面两行代码就是配置文件的初始化过程
1、创建SqlSessionFactoryBuilder对象
// 使用MyBatis提供的Resources类加载mybatis的配置文件
Reader reader = Resources.getResourceAsReader("mybatis-config.xml");
// 构建sqlSession的工厂
SqlSessionFactory sqlSessionFactory = new SqlSessionFactoryBuilder().build(reader);
第一步是获取配置文件的reader,然后获取SqlSessionFactory ,SqlSessionFactory是MyBatis的关键对象,它是个单个数据库映射关系经过编译后的内存镜像通过源码可知SqlSessionFactory 是接口,
public interface SqlSessionFactory {//8个方法可以用来创建SqlSession实例SqlSession openSession();//自动提交SqlSession openSession(boolean autoCommit);//连接SqlSession openSession(Connection connection);//事务隔离级别SqlSession openSession(TransactionIsolationLevel level);//执行器的类型SqlSession openSession(ExecutorType execType);SqlSession openSession(ExecutorType execType, boolean autoCommit);SqlSession openSession(ExecutorType execType, TransactionIsolationLevel level);SqlSession openSession(ExecutorType execType, Connection connection);Configuration getConfiguration();}SqlSessionFactoryBuilder就是创建,通过build方法对配置文件进行解析并初始化,通过源码可知build方法有很多重载,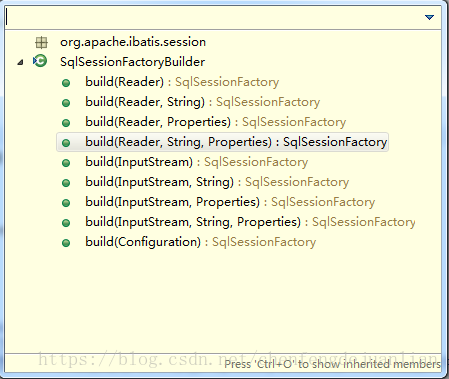
通过源码可知,所有的build方法最后都是通过
public SqlSessionFactory build(Reader reader, String environment, Properties properties)这方法来执行,所以SqlSessionFactoryBuilder的功能就是对输入的配置文件流进行解析最后生成SqlSessionFactory 。
2 创建SqlSessionFactory
进入最终都需要进入的build方法
/*** 第4种方法是最常用的,它使用了一个参照了XML文档或更特定的SqlMapConfig.xml文件的Reader实例。* 可选的参数是environment和properties。Environment决定加载哪种环境(开发环境/生产环境),包括数据源和事务管理器。* 如果使用properties,那么就会加载那些properties(属性配置文件),那些属性可以用${propName}语法形式多次用在配置文件中*/public SqlSessionFactory build(Reader reader, String environment, Properties properties) {try {// 委托XMLConfigBuilder来解析xml文件,并构建XMLConfigBuilder parser = new XMLConfigBuilder(reader, environment, properties);return build(parser.parse());} catch (Exception e) {// 这里是捕获异常,包装成自己的异常并抛出的idiom?,最后还要reset ErrorContextthrow ExceptionFactory.wrapException("Error building SqlSession.", e);} finally {ErrorContext.instance().reset();try {reader.close();} catch (IOException e) {// Intentionally ignore. Prefer previous error.}}}build函数首先会构造一个XMLConfigBuilder对象,从名字上可以看出来,该对象是用来解析XML配置文件的。通过XMLConfigBuilder将配置信息转换成paser
//构造函数,转换成XPathParser再去调用构造函数public XMLConfigBuilder(Reader reader, String environment, Properties props) {//构造一个需要验证,XMLMapperEntityResolver的XPathParserthis(new XPathParser(reader, true, props, new XMLMapperEntityResolver()), environment, props);} //上面6个构造函数最后都合流到这个函数,传入XPathParserprivate XMLConfigBuilder(XPathParser parser, String environment, Properties props) {//首先调用父类初始化Configurationsuper(new Configuration());//错误上下文设置成SQL Mapper Configuration(XML文件配置),以便后面出错了报错用吧ErrorContext.instance().resource("SQL Mapper Configuration");//将Properties全部设置到Configuration里面去this.configuration.setVariables(props);this.parsed = false;this.environment = environment;this.parser = parser;}在这里有一个很重要的类Configuration,最后所有的配置信息都会封装到这个类里面,这个里面拥有很多参数
//环境protected Environment environment;//---------以下都是节点------- protected boolean safeRowBoundsEnabled = false;protected boolean safeResultHandlerEnabled = true;protected boolean mapUnderscoreToCamelCase = false;protected boolean aggressiveLazyLoading = true;protected boolean multipleResultSetsEnabled = true;protected boolean useGeneratedKeys = false;protected boolean useColumnLabel = true;//默认启用缓存protected boolean cacheEnabled = true;protected boolean callSettersOnNulls = false;protected String logPrefix;protected Class logImpl;protected LocalCacheScope localCacheScope = LocalCacheScope.SESSION;protected JdbcType jdbcTypeForNull = JdbcType.OTHER;protected Set lazyLoadTriggerMethods = new HashSet(Arrays.asList(new String[] { "equals", "clone", "hashCode", "toString" }));protected Integer defaultStatementTimeout;//默认为简单执行器protected ExecutorType defaultExecutorType = ExecutorType.SIMPLE;protected AutoMappingBehavior autoMappingBehavior = AutoMappingBehavior.PARTIAL;//---------以上都是节点------- protected Properties variables = new Properties();//对象工厂和对象包装器工厂protected ObjectFactory objectFactory = new DefaultObjectFactory();protected ObjectWrapperFactory objectWrapperFactory = new DefaultObjectWrapperFactory();//映射注册机protected MapperRegistry mapperRegistry = new MapperRegistry(this);//默认禁用延迟加载protected boolean lazyLoadingEnabled = false;protected ProxyFactory proxyFactory = new JavassistProxyFactory(); // #224 Using internal Javassist instead of OGNLprotected String databaseId;/*** Configuration factory class.* Used to create Configuration for loading deserialized unread properties.** @see Issue 300 (google code)*/protected Class configurationFactory;protected final InterceptorChain interceptorChain = new InterceptorChain();//类型处理器注册机protected final TypeHandlerRegistry typeHandlerRegistry = new TypeHandlerRegistry();//类型别名注册机protected final TypeAliasRegistry typeAliasRegistry = new TypeAliasRegistry();protected final LanguageDriverRegistry languageRegistry = new LanguageDriverRegistry();//映射的语句,存在Map里protected final Map mappedStatements = new StrictMap("Mapped Statements collection");//缓存,存在Map里protected final Map caches = new StrictMap("Caches collection");//结果映射,存在Map里protected final Map resultMaps = new StrictMap("Result Maps collection");protected final Map parameterMaps = new StrictMap("Parameter Maps collection");protected final Map keyGenerators = new StrictMap("Key Generators collection");protected final Set loadedResources = new HashSet();protected final Map sqlFragments = new StrictMap("XML fragments parsed from previous mappers");//不完整的SQL语句protected final Collection incompleteStatements = new LinkedList();protected final Collection incompleteCacheRefs = new LinkedList();protected final Collection incompleteResultMaps = new LinkedList();protected final Collection incompleteMethods = new LinkedList();/** A map holds cache-ref relationship. The key is the namespace that* references a cache bound to another namespace and the value is the* namespace which the actual cache is bound to.*/protected final Map cacheRefMap = new HashMap();public Configuration(Environment environment) {this();this.environment = environment;} 3、解析配置文件
获取到了XMLConfigBuilder之后就可以对配置进行解析了
//解析配置public Configuration parse() {//如果已经解析过了,报错if (parsed) {throw new BuilderException("Each XMLConfigBuilder can only be used once.");}parsed = true;//根节点是configurationparseConfiguration(parser.evalNode("/configuration"));return configuration;}解析配置文件的重要逻辑
//解析配置private void parseConfiguration(XNode root) {try {//分步骤解析//issue #117 read properties first//1.propertiespropertiesElement(root.evalNode("properties"));//2.类型别名typeAliasesElement(root.evalNode("typeAliases"));//3.插件pluginElement(root.evalNode("plugins"));//4.对象工厂objectFactoryElement(root.evalNode("objectFactory"));//5.对象包装工厂objectWrapperFactoryElement(root.evalNode("objectWrapperFactory"));//6.设置settingsElement(root.evalNode("settings"));// read it after objectFactory and objectWrapperFactory issue #631//7.环境environmentsElement(root.evalNode("environments"));//8.databaseIdProviderdatabaseIdProviderElement(root.evalNode("databaseIdProvider"));//9.类型处理器typeHandlerElement(root.evalNode("typeHandlers"));//10.映射器mapperElement(root.evalNode("mappers"));} catch (Exception e) {throw new BuilderException("Error parsing SQL Mapper Configuration. Cause: " + e, e);}}通过上面的代码就可以明确的看出来,mybatis对配置文件的每个不同节点的解析过程,由于解析的节点太多,平时在开发接触较多的properties、typeAliases、environments、mappers
3.1properties的解析
假如有一个这样的节点需要解析
<properties resource="jdbc.properties"><property name="username" value="root"/><property name="password" value="root"/>properties>解析过程
private void propertiesElement(XNode context) throws Exception {if (context != null) {//传入方式是调用构造函数时传入,public XMLConfigBuilder(Reader reader, String environment, Properties props)//1.XNode.getChildrenAsProperties函数方便得到孩子所有PropertiesProperties defaults = context.getChildrenAsProperties();//2.然后查找resource或者url,加入前面的PropertiesString resource = context.getStringAttribute("resource");String url = context.getStringAttribute("url");// resource和url不能同时存在if (resource != null && url != null) {throw new BuilderException("The properties element cannot specify both a URL and a resource based property file reference. Please specify one or the other.");}if (resource != null) {// 将所有的配置信息加载到Properties中defaults.putAll(Resources.getResourceAsProperties(resource));} else if (url != null) {defaults.putAll(Resources.getUrlAsProperties(url));}//3.Variables也全部加入PropertiesProperties vars = configuration.getVariables();if (vars != null) {defaults.putAll(vars);}parser.setVariables(defaults);configuration.setVariables(defaults);}}- 获取到下面的所有子节点信息并将这些信息放到Properties 中;
- 然后读取resource或者url中的配置加入到Properties 中;
最后将所有的配置信息保存到configuration中
如果在这些地方,属性多于一个的话,MyBatis 按照如下的顺序加载它们:
1.在 properties 元素体内指定的属性首先被读取。
2.从类路径下资源或 properties 元素的 url 属性中加载的属性第二被读取,它会覆盖已经存在的完全一样的属性。
3.作为方法参数传递的属性最后被读取, 它也会覆盖任一已经存在的完全一样的属性,这些属性可能是从 properties 元素体内和资源/url 属性中加载的。
3.2 typeAliases的解析
别名的解析
private void typeAliasesElement(XNode parent) {if (parent != null) {for (XNode child : parent.getChildren()) {if ("package".equals(child.getName())) {//如果是packageString typeAliasPackage = child.getStringAttribute("name");//(一)调用TypeAliasRegistry.registerAliases,去包下找所有类,然后注册别名(有@Alias注解则用,没有则取类的simpleName)configuration.getTypeAliasRegistry().registerAliases(typeAliasPackage);} else {//如果是typeAliasString alias = child.getStringAttribute("alias");String type = child.getStringAttribute("type");try {Class clazz = Resources.classForName(type);//根据Class名字来注册类型别名//(二)调用TypeAliasRegistry.registerAliasif (alias == null) {//alias可以省略typeAliasRegistry.registerAlias(clazz);} else {typeAliasRegistry.registerAlias(alias, clazz);}} catch (ClassNotFoundException e) {throw new BuilderException("Error registering typeAlias for '" + alias + "'. Cause: " + e, e);}}}}}通过上面的代码可知,别名的配置方式有package和typeAlias两种。
<typeAliases><package name="com.zjp.bean"/>
typeAliases> <typeAliases><typeAlias type="com.zjp.bean.UserBean" alias="userBean" />
typeAliases>通过上面的两种方式之后就会为所有的类起一个别名,为类首字母小写。
最终这些别名都会注册到configuration的typeAliasRegistry中。
3.3 setting的解析
<settings><setting name="logImpl" value="LOG4J" />settings>通过源码可知,这个解析较为简单,就是将读取到的设置信息设置到configuration中
//显式定义用什么log框架,不定义则用默认的自动发现jar包机制
configuration.setLogImpl(resolveClass(props.getProperty("logImpl")));
3.4 mappers的解析
mappers节点解析是mybatis中比较重要,通过源码可以知道定义方式有如下四种:
private void mapperElement(XNode parent) throws Exception {if (parent != null) {for (XNode child : parent.getChildren()) {if ("package".equals(child.getName())) {//10.4自动扫描包下所有映射器String mapperPackage = child.getStringAttribute("name");configuration.addMappers(mapperPackage);} else {String resource = child.getStringAttribute("resource");String url = child.getStringAttribute("url");String mapperClass = child.getStringAttribute("class");if (resource != null && url == null && mapperClass == null) {//10.1使用类路径ErrorContext.instance().resource(resource);InputStream inputStream = Resources.getResourceAsStream(resource);//映射器比较复杂,调用XMLMapperBuilder//注意在for循环里每个mapper都重新new一个XMLMapperBuilder,来解析XMLMapperBuilder mapperParser = new XMLMapperBuilder(inputStream, configuration, resource, configuration.getSqlFragments());mapperParser.parse();} else if (resource == null && url != null && mapperClass == null) {//10.2使用绝对url路径ErrorContext.instance().resource(url);InputStream inputStream = Resources.getUrlAsStream(url);//映射器比较复杂,调用XMLMapperBuilderXMLMapperBuilder mapperParser = new XMLMapperBuilder(inputStream, configuration, url, configuration.getSqlFragments());mapperParser.parse();} else if (resource == null && url == null && mapperClass != null) {//10.3使用java类名Class mapperInterface = Resources.classForName(mapperClass);//直接把这个映射加入配置configuration.addMapper(mapperInterface);} else {throw new BuilderException("A mapper element may only specify a url, resource or class, but not more than one.");}}}}}通过上面的源码可以得出这四种分别是package、resource、url和class。
进入Mapper的解析首先会遍历所有的子节点,然后判断不同的方式对Mapper进行解析,解析之后的信息也是保存到configuration中。
其中package的解析方式较为简单,其他的解析方式会使用到一个映射器进行解析
//映射器比较复杂,调用XMLMapperBuilder
//注意在for循环里每个mapper都重新new一个XMLMapperBuilder,来解析
XMLMapperBuilder mapperParser = new XMLMapperBuilder(inputStream, configuration, resource, configuration.getSqlFragments());
mapperParser.parse();
首先在解析之前会创建一个XMLMapperBuilder ,获取到之后再进行解析
//解析public void parse() {//如果mapper文件没有加载过再加载,防止重复加载if (!configuration.isResourceLoaded(resource)) {//配置mapperconfigurationElement(parser.evalNode("/mapper"));//标记一下,已经加载过了configuration.addLoadedResource(resource);//绑定映射器到namespacebindMapperForNamespace();} parsePendingResultMaps();parsePendingChacheRefs();parsePendingStatements();}解析mapper
private void configurationElement(XNode context) {try {//1.配置namespaceString namespace = context.getStringAttribute("namespace");if (namespace.equals("")) {throw new BuilderException("Mapper's namespace cannot be empty");}builderAssistant.setCurrentNamespace(namespace);//2.配置cache-refcacheRefElement(context.evalNode("cache-ref"));//3.配置cachecacheElement(context.evalNode("cache"));//4.配置parameterMap(已经废弃,老式风格的参数映射)parameterMapElement(context.evalNodes("/mapper/parameterMap"));//5.配置resultMap(高级功能)resultMapElements(context.evalNodes("/mapper/resultMap"));//6.配置sql(定义可重用的 SQL 代码段)sqlElement(context.evalNodes("/mapper/sql"));//7.配置select|insert|update|delete TODObuildStatementFromContext(context.evalNodes("select|insert|update|delete"));} catch (Exception e) {throw new BuilderException("Error parsing Mapper XML. Cause: " + e, e);}}resultMapElements函数
该函数用于解析映射文件中所有的节点,这些节点会被解析成ResultMap对象,存储在Configuration对象的resultMaps容器中。
resultMap解析过程:
//5.1 配置resultMapprivate ResultMap resultMapElement(XNode resultMapNode, List<ResultMapping> additionalResultMappings) throws Exception {//错误上下文
//取得标示符 ("resultMap[userResultMap]")
// 解析完成之后ResultMapResolver将resultMap封装到configuration中,完成解析。
最后buildStatementFromContext构建sql语句
//7.1构建语句private void buildStatementFromContext(List list, String requiredDatabaseId) {for (XNode context : list) {//构建所有语句,一个mapper下可以有很多select//语句比较复杂,核心都在这里面,所以调用XMLStatementBuilderfinal XMLStatementBuilder statementParser = new XMLStatementBuilder(configuration, builderAssistant, context, requiredDatabaseId);try {//核心XMLStatementBuilder.parseStatementNodestatementParser.parseStatementNode();} catch (IncompleteElementException e) {//如果出现SQL语句不完整,把它记下来,塞到configuration去configuration.addIncompleteStatement(statementParser);}}} 最后将sql语句封装到configuration中。
4 SQLSessionFactory对象的创建
通过上面的一些列解析以及封装,把mybatis的配置信息全部都封装到configuration中了,所以mybatis中configuration是一个很重要的类
// 最后一个build方法使用了一个Configuration作为参数,并返回DefaultSqlSessionFactorypublic SqlSessionFactory build(Configuration config) {return new DefaultSqlSessionFactory(config);}
最终就获取到了SqlSessionFactory了,以上就是mybatis的初始化过程。
本文来自互联网用户投稿,文章观点仅代表作者本人,不代表本站立场,不承担相关法律责任。如若转载,请注明出处。 如若内容造成侵权/违法违规/事实不符,请点击【内容举报】进行投诉反馈!