音视频学习:RGB
音视频学习:RGB
- RGB
- 基本概念
- RGB几种常见的表示形式
- 16比特模式
- 24比特模式
- 32比特模式
- RGB_PARSER
- 1. 分离RGB24像素数据中的R、G、B分量
- 2. 将RGB格式像素数据封装为BMP图像
- BMP_FILE_HEADER
- BMP_INFO_HEADER
- color palette
- 代码
- 10. 将RGB24格式像素数据转换为YUV420P格式像素数据
- 4. 生成RGB24格式的彩条测试图
RGB
概念别问,问就是抄的Wikipedia,代码来自雷霄骅先生的博客。
基本概念
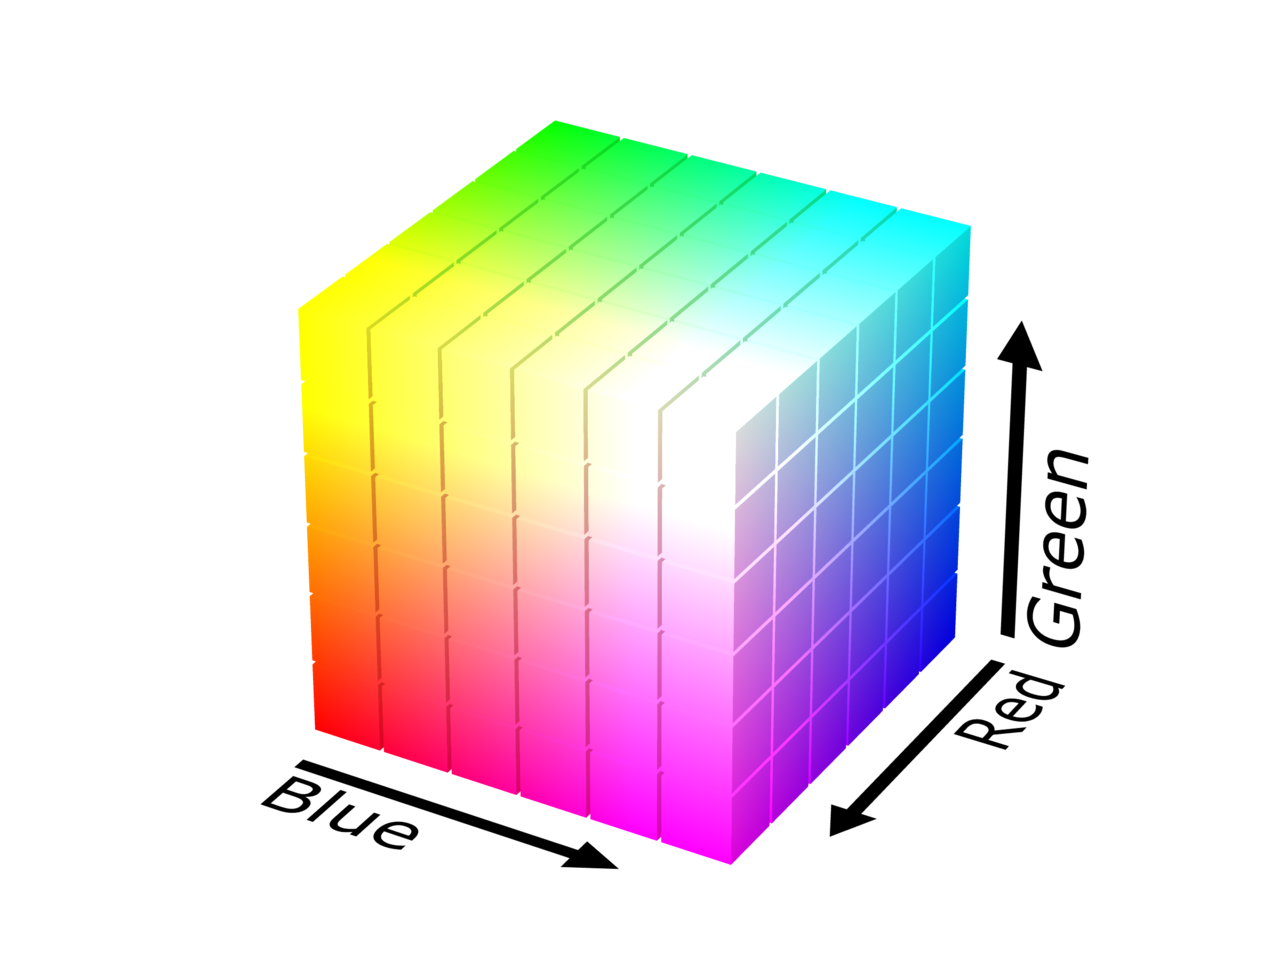
三原色光模式(RGB color model),又称RGB颜色模型或红绿蓝颜色模型,是一种加色模型,将红(Red)、绿(Green)、蓝(Blue)三原色的色光以不同的比例相加,以合成产生各种色彩光。
一个颜色显示的描述是由三个数值控制的,他分别为R、G、B。当三个数值位为最大时,显示为白色,当三个数值最小时,显示为黑色。
RGB可以和YUV互相转换:
R = Y + 1.13983 ∗ ( V − 128 ) R = Y + 1.13983 * (V - 128) R=Y+1.13983∗(V−128)
G = Y − 0.39465 ∗ ( U − 128 ) − 0.58060 ∗ ( V − 128 ) G = Y - 0.39465 * (U - 128) - 0.58060 * (V - 128) G=Y−0.39465∗(U−128)−0.58060∗(V−128)
B = Y + 2.03211 ∗ ( U − 128 ) B = Y + 2.03211 * (U - 128) B=Y+2.03211∗(U−128)
RGB几种常见的表示形式
16比特模式
16比特模式分配给每种原色各为5比特,其中绿色为6比特,因为人眼对绿色分辨的色调更精确。但某些情况下每种原色各占5比特,余下的1比特不使用。
24比特模式
每像素24位(比特s per pixel,bpp)编码的RGB值:使用三个8位无符号整数(0到255)表示红色、绿色和蓝色的强度。这是当前主流的标准表示方法,用于真彩色和JPEG或者TIFF等图像文件格式里的通用颜色交换。它可以产生一千六百万种颜色组合,对人类的眼睛来说,其中有许多颜色已经是无法确切的分辨。
说白了就是先存R(8bit),再存G(8bit),再存B(8bit),一共24bit,每个颜色256个梯度,交错地以RGBRGBRGB...这样的形式存在文件里面。
32比特模式
实际就是24比特模式,余下的8比特不分配到像素中,这种模式是为了提高数据输送的速度(32比特为一个DWORD,DWORD全称为Double Word,一般而言一个Word为16比特或2个字节,处理器可直接对其运算而不需额外的转换)。同样在一些特殊情况下,如DirectX、OpenGL等环境,余下的8比特用来表示象素的透明度(Alpha)。
RGB_PARSER
1. 分离RGB24像素数据中的R、G、B分量
bool RgbParser::rgb24_split(const std::string input_url, int width, int height, int frame_num)
{FILE *input_file = fopen(input_url.c_str(), "rb+");FILE *output_r = fopen("output_rgb_r.y", "wb+");FILE *output_g = fopen("output_rgb_g.y", "wb+");FILE *output_b = fopen("output_rgb_b.y", "wb+");unsigned char *picture = new unsigned char[width * height * 3];for (int i = 0; i < frame_num; i++) {fread(picture, 1, width * height * 3, input_file);for (int cur_pixel = 0; cur_pixel < width * height * 3; cur_pixel += 3) {// Read Rfwrite(picture + cur_pixel, 1, 1, output_r);// Read Gfwrite(picture + cur_pixel + 1, 1, 1, output_g);// Read Bfwrite(picture + cur_pixel + 2, 1, 1, output_b);}}delete[] picture;fclose(input_file);fclose(output_r);fclose(output_g);fclose(output_b);return true;
}
分离后查看图片用yuvplayer查看,选择500*500,Y分量查看。
RGB24的每个像素三个分量都是连续存储的,先存储第一个像素的R、G、B,再存第二个R、G、B,所以宽(width)和高(height)的RGB图片大小为 w i d t h ∗ h e i g h t ∗ 3 B y t e width * height * 3 Byte width∗height∗3Byte,这种存储方式成为Packed方式。
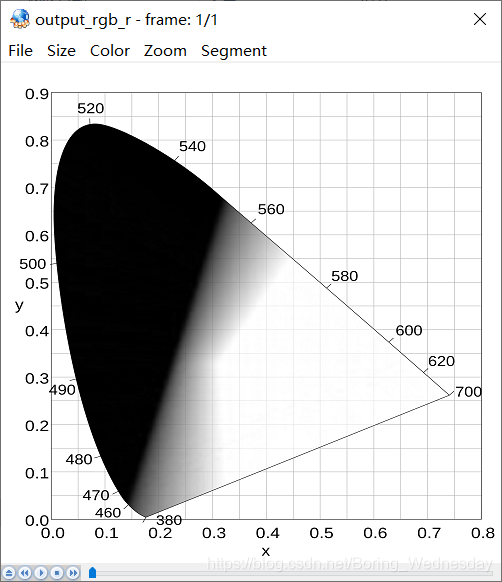
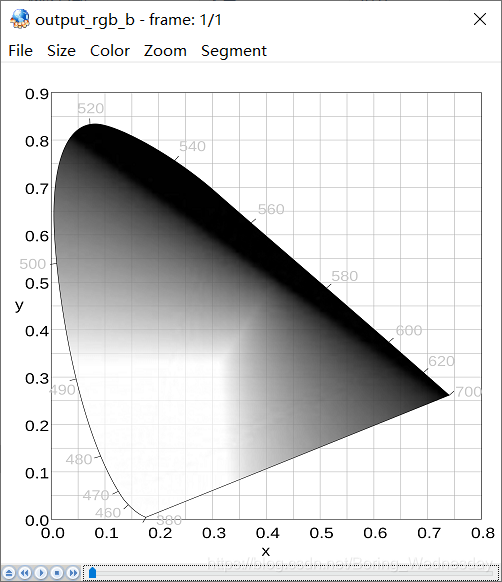
R、G、B三张图分辨率如下(此处有疑问。。没搞懂)
- output_rgb_r.y:R数据,分辨率256 *256
- output_rgb_g.y:G数据,分辨率256 *256
- output_rgb_b.y:B数据,分辨率256 *256
原图为雷神提供的CIE 1931标准图:
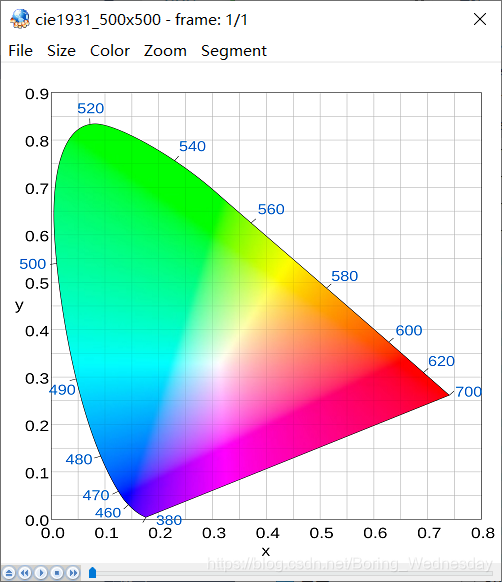
效果图如下:

2. 将RGB格式像素数据封装为BMP图像
将RGB转换为BMP图像,就可以使用Windows自带的图片查看器查看,对于BMP来说,如果是未压缩的格式,那么除了头部信息外,剩下的数据和RGB类似,只不过是以B、G、R的顺序存储,所以只需要加上头并且略加修改即可。
首先了解下BMP的格式:
BMP_FILE_HEADER
BMP文件有文件头,在Windows中定义如下:
typedef struct tagBITMAPFILEHEADER
{UINT16 bfType;DWORD  bfSize;UINT16 bfReserved1;UINT16 bfReserved2;DWORD  bfOffBits;
} BITMAPFILEHEADER;
| 变量名 | 地址偏移 | 大小 | 作用 |
|---|---|---|---|
| bfType | 0x0000H | 2 Byte | 一般为’BM’,在小端的机器时要注意字节序问题 |
| bfSize | 0x0002H | 4 Byte | 位图文件的大小,字节为单位 |
| bfReserverd1 | 0x0006H | 2 Byte | 保留,必须设置为0 |
| bfReserverd2 | 0x0008H | 2 Byte | 保留,必须设置为0 |
| bfbfOffBits | 0x000AH | 4 Byte | 说明从文件头开始到实际数据之间的偏移量 |
BMP_INFO_HEADER
typedef struct tagBITMAPINFOHEADER
{DWORD biSize;LONG  biWidth;LONG  biHeight;WORD  biPlanes;WORD  biBitCount;DWORD biCompression;DWORD biSizeImage;LONG  biXPelsPerMeter;LONG  biYPelsPerMeter;DWORD biClrUsed;DWORD biClrImportant;
} BITMAPINFOHEADER;
| 变量名 | 地址偏移 | 大小 | 作用 |
|---|---|---|---|
| biSize | 0x000EH | 4 Byte | BITMAPINFOHEADER结构需要的字数 |
| biWidth | 0x0012H | 4 Byte | 说明图像的宽度,以像素为单位 |
| biHeight | 0x0016H | 4 Byte | 说明图像的高度,以像素为单位。 若为正值,则图像为倒向; 若为负值,则图像为正向 |
| biPlanes | 0x001AH | 2 Byte | 为目标设备说明颜色平面数,一般为1 |
| biBitCount | 0x001CH | 2 Byte | 一像素需要的比特数,可以为1、4、8、16、24 |
| biCompression | 0x001EH | 4 Byte | 说明图像数据压缩类型,最常用为0,不压缩 |
| biSizeImage | 0x0022H | 4 Byte | 说明图像字节大小 |
| biXPelsPerMeter | 0x0026H | 4 Byte | 说明水平分辨率,可以设置为0 |
| biYPelsPerMeter | 0x002AH | 4 Byte | 说明垂直分辨率,可以设置为0 |
| biClrUsed | 0x002EH | 4 Byte | 说明位图使用的颜色索引数,为0表示所有调色板 |
| biClrImportant | 0x0032H | 4 Byte | 对图像显示有影响的颜色索引数目,0表示都重要 |
color palette
代码中没有用到调色板,不过可以有。
调色板其实是一张映射表,标识颜色索引号与其代表的颜色的对应关系。它在文件中的布局就像一个二维数组palette[N][4],其中N表示总的颜色索引数,每行的四个元素分别表示该索引对应的B、G、R和Alpha的值,每个分量占一个字节。如不设透明通道时,Alpha为0。
代码
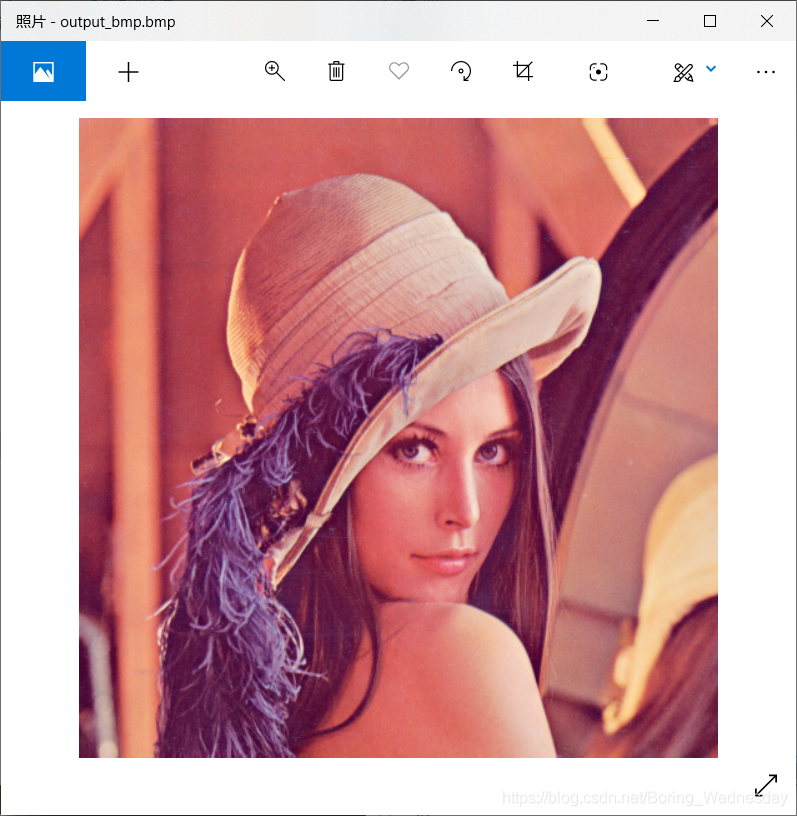
代码中有一个地方需要注意,那就是BITMAP_FILE_HEADER::bfType这个值,由于我的机器是小端的(应该所有Windows都是小端的吧),在赋值的时候我一开始写的是('B') << 8) + 'M',结果出问题了,windows图片查看器识别不出来文件格式,其实是图片查看器读到了MB导致的,所以正确的写法应该是('M') << 8) + 'B',这样在小端机器上是能跑成的。
bool RgbParser::rgb24_to_bmp(const std::string input_url, int width, int height)
{FILE *input_file = fopen(input_url.c_str(), "rb+");FILE *output_bmp = fopen("output_bmp.bmp", "wb+");unsigned char *picture = new unsigned char[width * height * 3];BMP::BIT_MAP_FILE_HEADER bmp_file_header;BMP::BIT_MAP_INFO_HEADER bmp_info_header;// Fill bit map file header// Note: the bfType is only useful in little endian machine.bmp_file_header.bfType = ((unsigned short int)('M') << 8) + 'B';bmp_file_header.bfSize = sizeof(bmp_file_header) + sizeof(bmp_info_header) + width * height * 3 ;bmp_file_header.bfReserverd1 = 0;bmp_file_header.bfReserverd2 = 0;bmp_file_header.bfbfOffBits = sizeof(bmp_file_header) + sizeof(bmp_info_header);// Fill bit map info headerbmp_info_header.biSize = sizeof(bmp_info_header);bmp_info_header.biWidth = width;bmp_info_header.biHeight = -height;bmp_info_header.biPlanes = 1;        // Must be 1bmp_info_header.biBitcount = 24;     // RGB24 need 24 bit to description one pixelbmp_info_header.biCompression = 0;   // 0 means without compressionbmp_info_header.biSizeImage = width * height * 3; // RGB24 can set it to 0bmp_info_header.biXPelsPermeter = 0; // Most time it set to 0bmp_info_header.biYPelsPermeter = 0; // Most time it set to 0bmp_info_header.biClrUsed = 0;       // 0 means use all palettebmp_info_header.biClrImportant = 0;  // 0 means all color is importantunsigned char temp_val = 0;fread(picture, 1, width * height * 3, input_file);for (int cur_pixel = 0; cur_pixel < width * height * 3; cur_pixel += 3) {temp_val = picture[cur_pixel];picture[cur_pixel] = picture[cur_pixel + 2];picture[cur_pixel + 2] = temp_val;}fwrite(&bmp_file_header, 1, sizeof(bmp_file_header), output_bmp);fwrite(&bmp_info_header, 1, sizeof(bmp_info_header), output_bmp);fwrite(picture, 1, width * height * 3, output_bmp);delete[] picture;fclose(input_file);fclose(output_bmp);return true;
}
使用lena512的rgb24图片生成bmp效果如下:
10. 将RGB24格式像素数据转换为YUV420P格式像素数据
调用下公式就行,回顾下公式:
Y = 0.299 ∗ R + 0.587 ∗ G + 0.114 ∗ B Y = 0.299 * R + 0.587 * G + 0.114 * B Y=0.299∗R+0.587∗G+0.114∗B
U = − 0.169 ∗ R − 0.331 ∗ G + 0.5 ∗ B + 128 U = -0.169 * R - 0.331 * G + 0.5 * B + 128 U=−0.169∗R−0.331∗G+0.5∗B+128
V = 0.5 ∗ R − 0.419 ∗ G − 0.081 ∗ B + 128 V = 0.5 * R - 0.419 * G - 0.081 * B + 128 V=0.5∗R−0.419∗G−0.081∗B+128
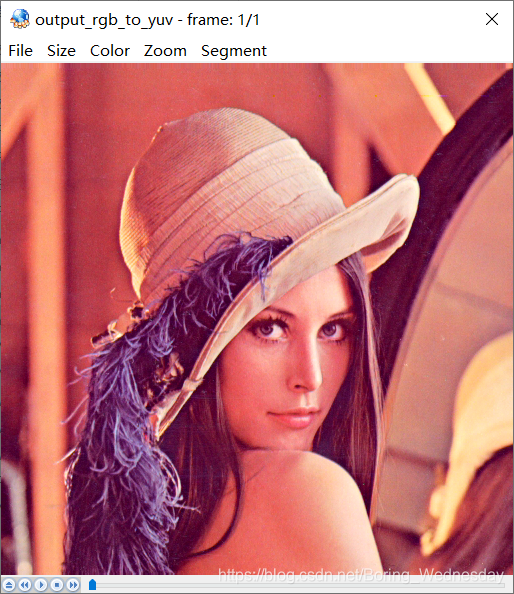
U取第1行第一个点,V取第一行第三个点,然后U再取第一行第5个点,然后V取第一行第七个点,以此类推,写出如下代码,雷神用的是整数去算的方式,其实也差不多,结果是一样的。
bool RgbParser::rgb24_to_yuv420p(const std::string input_url, int width, int height)
{FILE *input_file = fopen(input_url.c_str(), "rb+");FILE *output_yuv = fopen("output_rgb_to_yuv.yuv", "wb+");unsigned char *rgb_picture = new unsigned char[width * height * 3];unsigned char *yuv_picture = new unsigned char[width * height * 3 / 2];int cur_y = 0, cur_u = width * height, cur_v = width * height * 5 / 4;int cur_width = 0, cur_height = 0;unsigned char r = 0, g = 0, b = 0;fread(rgb_picture, 1, width * height * 3, input_file);for (int cur_pixel = 0; cur_pixel < width * height * 3; cur_pixel += 3) {r = rgb_picture[cur_pixel];g = rgb_picture[cur_pixel + 1];b = rgb_picture[cur_pixel + 2];yuv_picture[cur_y++] = (unsigned char)(0.299 * (double)r + 0.587 * (double)g + 0.114 * (double)b);cur_width = (cur_pixel / 3) % width;cur_height = (cur_pixel / 3) / width;// Every fourif (cur_width % 2 == 0 && cur_height % 2 == 0) {yuv_picture[cur_u++] = (unsigned char)(-0.169 * (double)r - 0.331 * (double)g + 0.5 * (double)b + 128);}else {if (cur_width % 2 == 0) {yuv_picture[cur_v++] = (unsigned char)(0.5 * (double)r - 0.419 * (double)g - 0.081 * (double)b + 128);}}}fwrite(yuv_picture, 1, width * height * 3 / 2, output_yuv);delete[] rgb_picture;delete[] yuv_picture;fclose(input_file);fclose(output_yuv);return true;
}
结果如下:
4. 生成RGB24格式的彩条测试图
彩条顺序”白黄青绿品红蓝黑“,RGB值如下:
| 颜色 | R | G | B |
|---|---|---|---|
| 白 | 255 | 255 | 255 |
| 黄 | 255 | 255 | 0 |
| 青 | 0 | 255 | 255 |
| 绿 | 0 | 255 | 0 |
| 品 | 255 | 0 | 255 |
| 红 | 255 | 0 | 0 |
| 蓝 | 0 | 0 | 255 |
| 黑 | 0 | 0 | 0 |
bool RgbParser::rgb24_colorbar(int width, int height)
{FILE *output_rgb = fopen("output_colorbar.rgb", "wb+");unsigned char *picture = new unsigned char[width * height * 3];int width_range = width / 8;int cur_width_max = width_range;char color[8][3] = {{ 255, 255, 255 }, { 255, 255, 0 }, { 0, 255, 255 },{ 0, 255, 0 }, { 255, 0, 255 }, { 255, 0, 0 },{ 0, 0, 255 }, { 0, 0, 0 }};for (int cur_width = 0; cur_width < width; cur_width++) {// NOTE: All the extra pixels in the end are in black.int cur_color_pos = cur_width / width_range == 8 ? 7 : cur_width / width_range;for (int cur_height = 0; cur_height < height; cur_height++) {int cur_pixel = width * cur_height * 3 + cur_width * 3;picture[cur_pixel] = color[cur_color_pos][0];picture[cur_pixel + 1] = color[cur_color_pos][1];picture[cur_pixel + 2] = color[cur_color_pos][2];}}fwrite(picture, 1, width * height * 3, output_rgb);delete[] picture;fclose(output_rgb);return true;
}
生成效果图如下:

本文来自互联网用户投稿,文章观点仅代表作者本人,不代表本站立场,不承担相关法律责任。如若转载,请注明出处。 如若内容造成侵权/违法违规/事实不符,请点击【内容举报】进行投诉反馈!