SpringBoot之SpringSecurity(安全)
SpringSecurity(安全)
Spring Security是针对Spring项目的安全框架,也是Spring Boot底层安全模块默认的技术选型,他可以实现强大的Web安全控制,对于安全控制,我们仅需要引入spring-boot-starter-security模块,进行少量的配置,即可实现强大的安全管理!
记住几个类:
- WebSecurityConfigurerAdapter:自定义Security策略
- AuthenticationManagerBuilder:自定义认证策略
- @EnableWebSecurity:开启WebSecurity模式
Spring Security的两个主要目标是 “认证” 和 “授权”(访问控制)。
“认证”(Authentication)
身份验证是关于验证您的凭据,如用户名/用户ID和密码,以验证您的身份。
身份验证通常通过用户名和密码完成,有时与身份验证因素结合使用。
“授权” (Authorization)
授权发生在系统成功验证您的身份后,最终会授予您访问资源(如信息,文件,数据库,资金,位置,几乎任何内容)的完全权限。
这个概念是通用的,而不是只在Spring Security 中存在。
实验环境搭建
-
新建一个项目
这里记得要选择thymeleaf
-
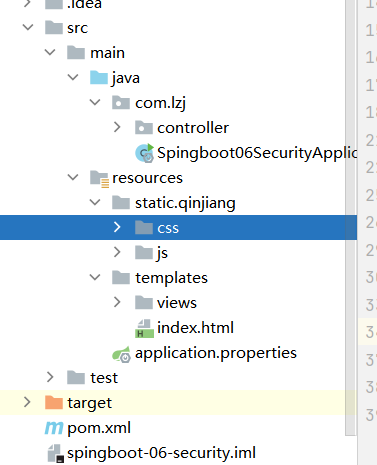
导入静态资源
-
静态资源获取:https://gitee.com/ENNRIAAA/spring-security-material
-
-
创建路由RouterController跳转测试静态资源是否能够访问
@Controller public class RouterController {@RequestMapping({"/","/index"})public String index(){return "index";}@RequestMapping("/toLogin")public String toLogin(){return "views/login";}@RequestMapping("/level1/{id}")public String level1(@PathVariable("id") int id){return "views/level1/"+id;}@RequestMapping("/level2/{id}")public String level2(@PathVariable("id") int id){return "views/level2/"+id;}@RequestMapping("/level3/{id}")public String level3(@PathVariable("id") int id){return "views/level3/"+id;}} -
运行项目进行测试
认证和授权
-
导入依赖
<dependency><groupId>org.springframework.bootgroupId><artifactId>spring-boot-starter-securityartifactId> dependency> -
编写SecurityConfig
@EnableWebSecurity public class SecurityConfig extends WebSecurityConfigurerAdapter {//授权@Overrideprotected void configure(HttpSecurity http) throws Exception {//首页所有人可以访问,功能页只有对应有权限的人才能访问http.authorizeHttpRequests().antMatchers("/").permitAll().antMatchers("/level1/**").hasRole("vip1").antMatchers("/level2/**").hasRole("vip2").antMatchers("/level3/**").hasRole("vip3");//没有权限会默认到登录页,需要开启登录的页面// /loginhttp.formLogin();//防止网站攻击: get,posthttp.csrf().disable();//关闭csrf功能,登出失败可能存在的原因//注销,开启了注销功能,跳到首页http.logout().logoutSuccessUrl("/");}//认证//密码编码:PasswordEncoder@Overrideprotected void configure(AuthenticationManagerBuilder auth) throws Exception {//这些数据正常应该从数据库中读auth.inMemoryAuthentication().passwordEncoder(new BCryptPasswordEncoder()).withUser("lzj").password(new BCryptPasswordEncoder().encode("123456")).roles("vip2","vip3").and().withUser("root").password(new BCryptPasswordEncoder().encode("123456")).roles("vip1","vip2","vip3").and().withUser("guest").password(new BCryptPasswordEncoder().encode("123456")).roles("vip1");} } -
测试
注销和权限控制
-
导入依赖
<dependency><groupId>org.thymeleaf.extrasgroupId><artifactId>thymeleaf-extras-springsecurity5artifactId><version>3.0.4.RELEASEversion>dependency> -
注入命名空间
xmlns:sec="http://www.thymeleaf.org/extras/spring-security" -
修改登录和注销按钮
实现用户未登录时只显示登录,用户登录后显示用户名、角色和注销
<div class="right menu"><div sec:authorize="!isAuthenticated()"><a class="item" th:href="@{/toLogin}"><i class="address card icon">i> 登录a>div> <div sec:authorize="isAuthenticated()"><a class="item">用户名:<span sec:authentication="name">span>角色:<span sec:authentication="authorities">span>a>div><div sec:authorize="isAuthenticated()"><a class="item" th:href="@{/logout}"><i class="sign-out icon">i> 注销a>div>div> -
修改用户的权限显示
<div class="column" sec:authorize="hasRole('vip1')"><div class="ui raised segment"><div class="ui"><div class="content"><h5 class="content">Level 1h5><hr><div><a th:href="@{/level1/1}"><i class="bullhorn icon">i> Level-1-1a>div><div><a th:href="@{/level1/2}"><i class="bullhorn icon">i> Level-1-2a>div><div><a th:href="@{/level1/3}"><i class="bullhorn icon">i> Level-1-3a>div>div>div>div>div><div class="column" sec:authorize="hasRole('vip2')"><div class="ui raised segment"><div class="ui"><div class="content"><h5 class="content">Level 2h5><hr><div><a th:href="@{/level2/1}"><i class="bullhorn icon">i> Level-2-1a>div><div><a th:href="@{/level2/2}"><i class="bullhorn icon">i> Level-2-2a>div><div><a th:href="@{/level2/3}"><i class="bullhorn icon">i> Level-2-3a>div>div>div>div>div><div class="column" sec:authorize="hasRole('vip3')"><div class="ui raised segment"><div class="ui"><div class="content"><h5 class="content">Level 3h5><hr><div><a th:href="@{/level3/1}"><i class="bullhorn icon">i> Level-3-1a>div><div><a th:href="@{/level3/2}"><i class="bullhorn icon">i> Level-3-2a>div><div><a th:href="@{/level3/3}"><i class="bullhorn icon">i> Level-3-3a>div>div>div>div>div> -
测试
记住我和首页定制
可以使用我们自己的登录页登录
-
编写SecurityConfig
@EnableWebSecurity public class SecurityConfig extends WebSecurityConfigurerAdapter {//授权@Overrideprotected void configure(HttpSecurity http) throws Exception {//首页所有人可以访问,功能页只有对应有权限的人才能访问http.authorizeHttpRequests().antMatchers("/").permitAll().antMatchers("/level1/**").hasRole("vip1").antMatchers("/level2/**").hasRole("vip2").antMatchers("/level3/**").hasRole("vip3");//没有权限会默认到登录页,需要开启登录的页面// /login//定制根页面,user为表单中username的name,pwd为表单中password的name//loginProcessingUrl为表单跳转路径,若无这个,则跳转路径为toLoginhttp.formLogin().loginPage("/toLogin").usernameParameter("user").passwordParameter("pwd").loginProcessingUrl("/login");//防止网站攻击: get,posthttp.csrf().disable();//关闭csrf功能,登出失败可能存在的原因//注销,开启了注销功能,跳到首页http.logout().logoutSuccessUrl("/");//开启记住我功能 cookie 默认保存时间14天//自定义接收前端参数,remember为表单中的名字http.rememberMe().rememberMeParameter("remember");}//认证//密码编码:PasswordEncoder@Overrideprotected void configure(AuthenticationManagerBuilder auth) throws Exception {//这些数据正常应该从数据库中读auth.inMemoryAuthentication().passwordEncoder(new BCryptPasswordEncoder()).withUser("lzj").password(new BCryptPasswordEncoder().encode("123456")).roles("vip2","vip3").and().withUser("root").password(new BCryptPasswordEncoder().encode("123456")).roles("vip1","vip2","vip3").and().withUser("guest").password(new BCryptPasswordEncoder().encode("123456")).roles("vip1");} } -
修改登录页面表单
<form th:action="@{/login}" method="post"><div class="field"><label>Usernamelabel><div class="ui left icon input"><input type="text" placeholder="Username" name="user"><i class="user icon">i>div>div><div class="field"><label>Passwordlabel><div class="ui left icon input"><input type="password" name="pwd"><i class="lock icon">i>div>div><div class="field"><input type="checkbox" name="remember">记住我div><input type="submit" class="ui blue submit button"/> form> -
测试
input type=“password” name=“pwd”>
记住我
``` -
测试
本文来自互联网用户投稿,文章观点仅代表作者本人,不代表本站立场,不承担相关法律责任。如若转载,请注明出处。 如若内容造成侵权/违法违规/事实不符,请点击【内容举报】进行投诉反馈!