weex开发历程
开发之前需要安装的依赖和工具,这里就不再赘述了,按照官方文档上一步步来都可以,如果出现问题网上搜一下都可以解决。这里主要讲在实际项目开发中所遇到的问题(偏向于web端)。
开发:
配置多页面入口:
在configs文件夹下,有一个webpack.common.conf.js,这个文件是所有环境的公共配置文件,里面设置了weex与web的出入口配置(webEntry 和 weexEntry),这边要改成多页,就意味着需要把入口文件改成多个配置的。
原始配置:
// weex的入口配置,但是这边是单页的配置
const weexEntry = {'index': helper.root('entry.js')
}// web的入口配置,但是这边是单页配置
const webEntry = getEntryFile();
const getEntryFile = () => {const entryFile = path.join(vueWebTemp, config.entryFilePath)const routerFile = path.join(vueWebTemp, config.routerFilePath)fs.outputFileSync(entryFile, getEntryFileContent(helper.root(config.entryFilePath), routerFile));fs.outputFileSync(routerFile, getRouterFileContent(helper.root(config.routerFilePath)));return {index: entryFile}
}
多页配置:
// weex入口配置多页面
const weexEntry = getWeexEntryFile()
/*** @function 获取weex的入口文件配置,这边是从src下entrys中的js做查询,如果存在对应js,则这边配置对应的入口,做成多页* @author eleven*/
function getWeexEntryFile () {// weex入口文件配置let weexEntry = {}// 获取到的文件列表let files = []try {files = fs.readdirSync(helper.resolve('src/entrys'))files.forEach((data) => {let fileName = data.split('.')[0]weexEntry[fileName] = helper.root(`entrys/${data}`)})} catch (err) {console.log('获取weexEntryFile读取文件夹报错', err)return }return weexEntry
}// web
const webEntry = getWebEntryFile();
/*** @function 获取web入口文件配置;这边也是遍历entrys中的入口文件,然后自动生成对应配置* @author eleven*/
const getWebEntryFile = () => {const routerFile = path.join(vueWebTemp, config.routerFilePath)fs.outputFileSync(routerFile, getRouterFileContent(helper.root(config.routerFilePath)));// weex入口文件配置let webEntry = {}// 获取到的文件列表let files = []try {files = fs.readdirSync(helper.resolve('src/entrys'))files.forEach((data) => {let fileType = data.split('.')[1]if (fileType === 'js') {let entryFilePath = `entrys/${data}`const entryPageFile = path.join(vueWebTemp, entryFilePath)fs.outputFileSync(entryPageFile, getEntryFileContent(helper.root(entryFilePath), routerFile))let fileName = data.split('.')[0]webEntry[fileName] = entryPageFile}})} catch (err) {console.log('获取webEntryFile读取文件夹报错', err)return }return webEntry
}
多页面入口条件下页面跳转:
// 封装的push方法,包含ios/android/h5
// 在iOS/Android上时,相当于我们把跳转路径传给原生,让原生发起跳转
push ({path,query}) {let bundleUrl = weex.config.bundleUrllet toUrl = ''let queryString = query ? '?' + querystring.stringify(query) : ''switch (WXEnvironment.platform) {case 'android':let obj = {url: 'dist/' + path + '.js'}if (queryString) {obj.params = queryString.split('?')[1]}let objStr = JSON.stringify(obj)toUrl = 'local://' + objStrbreakcase 'iOS':toUrl = bundleUrl.split('/').slice(0, -1).join('/') + '/' + path + '.js' + queryString // 将a.js的绝对地址转为b.js的绝对地址breakcase 'Web':let host = `localhost:8081`let matches = /\/\/([^/]+?)\//.exec(bundleUrl)if (matches && matches.length >= 2) {host = matches[1]}toUrl = `http://${host}/${path}.html${queryString}`breakdefault:break}navigator.push({url: toUrl,animated: 'true'})},// 封装的pop方法navPop (that) {if (platform().isIOS || platform().isAndroid) {navigator.pop({animated: 'true'})} else {that.$router.back()}},// 判断当前平台export const platform = () => {const pName = weex.config.env.platform.toLowerCase()const platform = {isWeb: true,isIOS: false,isAndroid: false}switch (pName) {case 'ios':platform.isIOS = truebreakcase 'android':platform.isAndroid = truebreak}return platform
}// 获取跳转路径中携带的参数(h5页面之间页面跳转,需要传递参数时,我们需要从页面路由中拿参数,iOS和Android有区分)/*** @function 获取当前url中的传参* @author eleven*/getUrlQuery () {let queryObj = {}let queryString = ''switch (WXEnvironment.platform) {case 'android':queryString = weex.config.paramsqueryObj = querystring.parse(queryString)breakcase 'iOS':queryString = weex.config.bundleUrlqueryObj = querystring.parse(queryString.split('?')[1])breakcase 'Web':breakdefault:break}return queryObj}
静态图片文件读取
weex加载图片方式:
1.src直接引用base64编码
2.加载网络图片
3.加载本地图片(三端分别放在项目目录)
前2种方式比较简单,主要来说第三种加载方式,由于三端加载方式不一样所以需要写一个工具函数方法来调用
在weex web项目下src/utils下新建index.js,添加如下方法:
/*** 配置图片在三端上不同的路径* @param {*} imgName 图片名称* h5: assets/images/xxx.png* android: file:///android_asset/images/xxx.png(实际读取路径assets/images/xxx.png)*/
export function ImgPath (imgName) {let platform = weex.config.env.platform.toLowerCase()let imgPath = ''if (platform === 'web') {imgPath = `assets/images/${imgName}`} else if (platform === 'android') {imgPath = `file:///android_asset/images/${imgName}`} else {// img_path = `../images/${img_name}`imgPath = `local:///${imgName}`}return imgPath
}
在需要使用页面script 中引入该方法
import { ImgPath } from '../utils/globalDefine'在 vue 文件中调用:
三端图片放置:
web端:图片放在src/assets/images
android端:图片放在打包后的dist文件同级目录里images下
ios端:同android
native配置:
Android端:
需要先接入相应的adapter
public class ImageAdapter implements IWXImgLoaderAdapter {public ImageAdapter() {}@Overridepublic void setImage(final String url, final ImageView view,WXImageQuality quality, final WXImageStrategy strategy) {WXSDKManager.getInstance().postOnUiThread(new Runnable() {@Overridepublic void run() {if (view == null || view.getLayoutParams() == null) {return;}if (TextUtils.isEmpty(url)) {view.setImageBitmap(null);return;}//fix by leeString temp = url;if (url.startsWith("//")) {temp = "http:" + url;}// if (temp.contains("/images/") && temp.startsWith("src")) {// temp = "file:///android_asset/images/" + url.substring(url.lastIndexOf("/")+1);// Log.d("ImageAdapter", "url:" + temp);// }// 重点部分Picasso.with(WXEnvironment.getApplication()).load(temp).into(view);}}, 0);}
}
IOS端:需要接入相应的handler
按照官网介绍配置:
https://weex.apache.org/zh/docs/api/ios-apis.html#handler-%E5%AF%B9%E5%BA%94%E4%BA%8E-android-%E7%9A%84-adapter-%E4%BB%8B%E7%BB%8D
配置完成之后图片依旧没有展示问题:
#weex开发#升级xcode12 ,升级到iOS 14后,本地图片不显示
解决一:
// 找到WXLayer.m文件中修改为下代码即可
- (void)display
{
if(@available(iOS 14.0, *)) {
[super display];
}
[self.wx_component _willDisplayLayer:self];
}
解决二:
// 将
((UIImageView *)strongSelf.view).image = image;
// 修改为
strongSelf.view.layer.contents = (__bridge id _Nullable)(image.CGImage);
图片即可显示
h5与native端交互
weex扩展
Model扩展
native注册Module paramsModule 并添加方法 printLog
h5调用model中的方法:
// 调用printLog来打印日志
weex.requireModule('paramsModule').printLog('打印信息')
Storage存取
其实质也是在原生端那边存在一个storageModule, 内部注册了get 和 set方法,对应的就是我们调用的
storage.getItem 和 storage.setItem web端可直接调用,可根据需要在原生端进行相应修改。
调试:
命令: weex debug,浏览器自动打开待调试的页面。

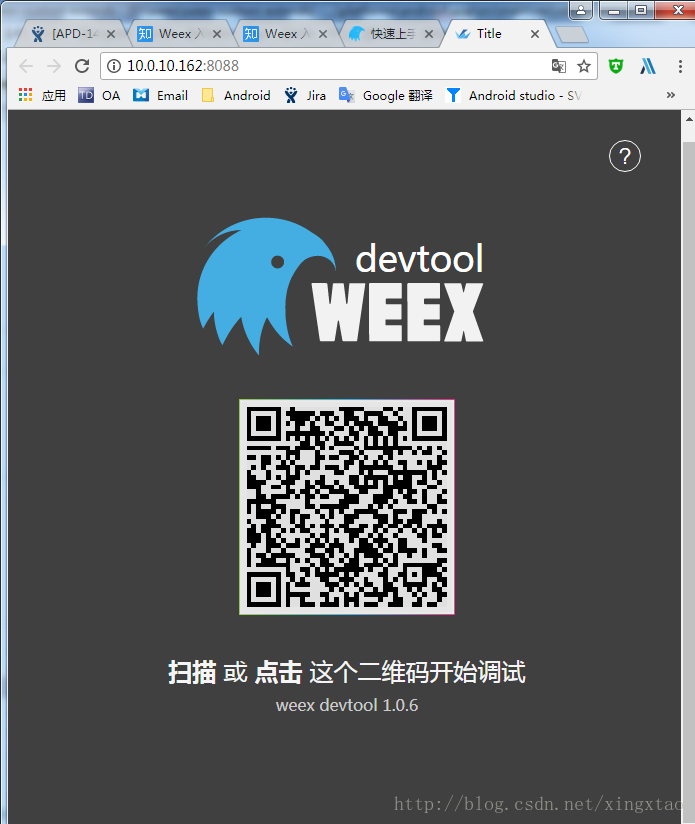
(2) 使用 weex playground app 扫描二维码,扫描成功后,浏览器自动跳转到下面页面,点击下图框中的二维码,并使用 weex playground app 扫描,即可开始调试待 debug 的页面。

(3) 扫描框中二位码成功后,即看到下面页面。

本文来自互联网用户投稿,文章观点仅代表作者本人,不代表本站立场,不承担相关法律责任。如若转载,请注明出处。 如若内容造成侵权/违法违规/事实不符,请点击【内容举报】进行投诉反馈!