TI AWR1642 评估板 77G行人检测雷达代码分析(1)-main函数分析(MSS工程)
TI AWR1642 评估板 77G行人检测雷达代码分析(1)-main函数分析(MSS工程)
大家好,这里是电子与数学方法专栏,今天带领大家一起来分析 TI AWR1642评估板的行人检测代码,考虑到本代码的结构比较复杂,因此会分为很多部分进行拆解,走读完一个例程,可以举一反三,别的例程也就基本会了。
那么下面我们就开始吧。
首先我选择的例程是mmwave_industrial_toolbox_2_2_0\labs\lab0011-pplcount。
在开始之前,我想大家应该能够自己配置好雷达,并能够实现开机演示,这些教程在这个例程的docs文档中都有说明,按照步骤一步一步地来应该不会有问题。
一、工程结构
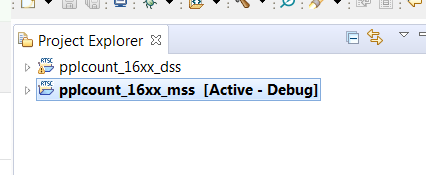
大家都知道AWR1642芯片是双核处理器,一个是DSP,另一个是AWR。所以工程也有两个,一个是DSS,在DSP处理器上运行,另一个是MSS,在AWR处理器上运行。如下图所示:
二、代码结构
1.main
int main (void)
{Task_Params     taskParams;int32_t         errCode;SOC_Cfg         socCfg;/* Initialize the ESM: */ESM_init(0U); //dont clear errors as TI RTOS does it/* Initialize and populate the demo MCB */memset ((void*)&gMmwMssMCB, 0, sizeof(MmwDemo_MCB));/* Initialize the SOC confiugration: */memset ((void *)&socCfg, 0, sizeof(SOC_Cfg));/* Populate the SOC configuration: */socCfg.clockCfg = SOC_SysClock_INIT;/* Initialize the SOC Module: This is done as soon as the application is started* to ensure that the MPU is correctly configured. */gMmwMssMCB.socHandle   = SOC_init (&socCfg, &errCode);if (gMmwMssMCB.socHandle  == NULL){System_printf ("Error: SOC Module Initialization failed [Error code %d]\n", errCode);return -1;}/* Initialize the DEMO configuration: */gMmwMssMCB.cfg.sysClockFrequency = MSS_SYS_VCLK;gMmwMssMCB.cfg.loggingBaudRate   = 921600;gMmwMssMCB.cfg.commandBaudRate   = 115200;gMmwMssMCB.pcEnable = 1;Cycleprofiler_init();/* Debug Message: */System_printf ("**********************************************\n");System_printf ("Debug: Launching the Millimeter Wave Demo\n");System_printf ("**********************************************\n");/* Initialize the Task Parameters. */Task_Params_init(&taskParams);taskParams.priority = 3;Task_create(MmwDemo_mssInitTask, &taskParams, NULL);/* Start BIOS */BIOS_start();return 0;
}
2.逐句分析:今天讲的是MSS部分
(1)
Task_Params taskParams;
这个是任务参数,在ccs中按F3可以进一步看到 :
#define Task_Params ti_sysbios_knl_Task_Params;
可以看到这是sysbios系统的一个参数,不知道什么意思,继续F3:
typedef struct ti_sysbios_knl_Task_Params ti_sysbios_knl_Task_Params;
同样不明白是什么意思,
继续F3,可以看到:
 * ======== PER-INSTANCE TYPES ========*/
/* Params */
struct ti_sysbios_knl_Task_Params {size_t __size;const void *__self;void *__fxns;xdc_runtime_IInstance_Params *instance;xdc_UArg arg0;xdc_UArg arg1;xdc_Int priority;xdc_Ptr stack;xdc_SizeT stackSize;xdc_runtime_IHeap_Handle stackHeap;xdc_Ptr env;xdc_Bool vitalTaskFlag;xdc_UInt affinity;xdc_runtime_IInstance_Params __iprms;
};
这里一个一个地看,大体上可以看出这些是后面操作系统执行任务所需要的一些参数,比如数据指针、堆栈、标志位、优先级等等。后面会有具体的解释,这里先暂时略过。我们继续返回mian往下看。
(2)
int32_t errCode;
这个就是简单地定义了一个参数,int型,32位的,这个参数的作用是用来接收后面函数执行的错误信息的,这暂时先不讲,后面详细说明。
(3)
SOC_Cfg socCfg;
这个是片上系统配置,CSS中按F3进一步细看。
typedef struct SOC_Cfg_t
{/*** @brief*  System clock configuration*/SOC_SysClock        clockCfg;
}SOC_Cfg;
可以看到这是一个结构体,包含了1个元素,是系统时钟。继续F3进一步:
typedef enum SOC_SysClock_e
{/*** @brief*  System Clocks need to be initialized*/SOC_SysClock_INIT           = 0x1,/*** @brief*  System Clocks initialization is bypassed*/SOC_SysClock_BYPASS_INIT
}SOC_SysClock;
可以看到又是一个结构体,这里包含了两个元素,第一个是系统时钟,这个main后面会用到,另一个是系统时钟初始化被绕过,意思就是不进行初始化。好了,知道这个参数是干啥的就行了,现在我们继续返回main往下走。
(4)
/* Initialize the ESM: */ESM_init(0U); //dont clear errors as TI RTOS does it
这个是初始化ESM驱动程序,参数为0是不清除错误,继续F3进一步:
/** @brief Function intializes the ESM driver
*
*    @param[in] bClearErrors: boolean value to indicate if old ESM pending errors should be cleared or not
*                             value = 0: do not clear
*                             value = 1: clear all ESM group errors
*                             hint: If you using TI RTOS, then ESM errors are cleared before
*                                   entering main and this flag can be set to 0. For any other RTOS, check the
*                                   the RTOS implementation or set this flag to 1
*
*    @return    Success -   Handle to the ESM Driver
*               Error   -   NULL
*
*/
extern ESM_Handle ESM_init(uint8_t bClearErrors);
这里的ESM是什么意思呢?
ESM驱动程序提供API,以配置和处理来自ESM硬件模块的错误。
ESM驱动程序需要在整个系统中初始化一次。 这是使用#ESM_init(0)函数完成, 未经调用,ESM 的API均无法使用。
不需要深刻理解ESM初始化是干啥的,知道他是为了处理错误或者配置硬件的就行了,一般驱动的主要作用都是和顶层硬件打交道。
(5)
/* Initialize and populate the demo MCB */memset ((void*)&gMmwMssMCB, 0, sizeof(MmwDemo_MCB));
这句话有大用,memset函数都知道是对申请的内存空间的内容初始化,所以这句话的目的就是对申请一个超大的内存空间,来存储MSS工程执行的所有结构体元素的参数信息,这里将内部的所有内容全部置零。而且这MSS和DSS工程里面都是这样的结构,所有参数全部在结构里走,外部函数只需要用结构体参数就行了,数据都是隐含在结构体里的,需要用的时候就拿出来,用完之后又存回去,这个思想需要了解。
选中MmwDemo_MCB ,F3进一步看,是一个很大的结构体:
typedef struct MmwDemo_MCB_t
{/*! @brief   Configuration which is used to execute the demo */MmwDemo_Cfg                 cfg;/*! * @brief   Handle to the SOC Module */SOC_Handle                  socHandle;/*! @brief   UART Logging Handle */UART_Handle                 loggingUartHandle;/*! @brief   UART Command Rx/Tx Handle */UART_Handle                 commandUartHandle;/*! @brief   This is the mmWave control handle which is used* to configure the BSS. */MMWave_Handle               ctrlHandle;/*!@brief   Handle to the peer Mailbox */// Mailbox_Handle              peerMailbox;Mbox_Handle              peerMailbox;/*! @brief   Semaphore handle for the mailbox communication */Semaphore_Handle            mboxSemHandle;/*! @brief   Semaphore handle for the application task */Semaphore_Handle                    appSemHandle;/*! @brief   Point Cloud */MmwDemo_output_message_pointCloud   *pointCloud;/*! @brief   Target Descriptors */MmwDemo_targetDescrHandle   *targetDescrHandle;/*! @brief   Tracker Handle */void     					        *gtrackHandle;/*! @brief   MSS system event handle */Event_Handle                eventHandle;/*! @brief   Handle to the SOC chirp interrupt listener Handle */SOC_SysIntListenerHandle    chirpIntHandle;/*! @brief   Handle to the SOC frame start interrupt listener Handle */SOC_SysIntListenerHandle    frameStartIntHandle;/*! @brief   Data Path object: currently only for receiving data from DSS. Potentially adding other block such as tracking here*/MmwDemo_MSS_DataPathObj     mssDataPathObj;/*! @brief   Has the mmWave module been opened? */bool                        isMMWaveOpen;/*! @brief   mmw Demo stats */MmwDemo_MSS_STATS           stats;/*! @brief Enable Sending Point cloud data */bool                        pcEnable;
} MmwDemo_MCB;
包含了系统配置、串口配置、数据参数等等,继续打开每一个结构体还有很多,这里我就不一一展开了,现在回到main继续往下走。
(6)
memset ((void *)&socCfg, 0, sizeof(SOC_Cfg));这句话与上一句一样,都是初始化ocCfg参数为0,不过这里参数不多。
(7)
/* Populate the SOC configuration: */socCfg.clockCfg = SOC_SysClock_INIT;
看到没,来了,系统时钟设定。
(8)
gMmwMssMCB.socHandle = SOC_init (&socCfg, &errCode);if (gMmwMssMCB.socHandle == NULL){System_printf ("Error: SOC Module Initialization failed [Error code %d]\n", errCode);return -1;}
这句话的意思是,初始化SOC模块,启动应用程序后立即完成,以确保正确配置MPU。
我们看这个函数的参数,是不是用到了之前的系统时钟socCfg和errCode,这里就把SOC系统给初试化了,然后还添加了校验。而且还要注意的是现在的参数全部都是包含在gMmwMssMCB这个大的结构体中。
(9)
/* Initialize the DEMO configuration: */gMmwMssMCB.cfg.sysClockFrequency = MSS_SYS_VCLK;gMmwMssMCB.cfg.loggingBaudRate = 921600;gMmwMssMCB.cfg.commandBaudRate = 115200;gMmwMssMCB.pcEnable = 1;Cycleprofiler_init();
这里是初始化DEMO配置,包含了MSS的系统时钟、串口的波特率,这里有两个串口,一个是数据、一个是控制。pc_Enable是启用发送点云数据,这里是和上位机有关系的,启动之后上位机可以接受到点云数据。
Cycleprofiler_init()这个函数的作用是:设置事件计数器的事件类型,并在计数器溢出时启用/禁用中断生成,此功能禁用/停止计数器,设置新的事件类型,启用/禁用中断生成,然后重新启用计数器(如果之前已启用)。就当他是一个计数器吧。
(10)
/* Debug Message: */System_printf ("**********************************************\n");System_printf ("Debug: Launching the Millimeter Wave Demo\n");System_printf ("**********************************************\n");
打印信息,略。
(11)
Task_Params_init(&taskParams);
taskParams.priority = 3;
task_create(MmwDemo_mssInitTask, &taskParams, NULL);
这的三个函数,第一个是任务参数初始化,初始化的结果存在之前最开头定义的taskParams参数中。
第二个函数是任务的优先级设置,目前是3。
第三个函数是创建一个任务,参数有三个。第一个是MmwDemo_mssInitTask,这个参数是后面程序执行的主任务,第二个参数是任务参数,第三个参数是NULL。
这里我们只需要知道main里面创建了一个主任务就行了,其余的地方按F3也进不去了,程序都封装死的。
(12)
/* Start BIOS */BIOS_start();
启动BIOS,便是启动SYS_BIOS操作系统 ,F3进不去,这里只要知道这是把操作系统启动就行了。真正的代码在MmwDemo_mssInitTask这个任务里面。
好了,MSS的main部分就讲完了,下期继续将MmwDemo_mssInitTask任务部分,敬请期待,有什么不明白的地方可以留言。
本文来自互联网用户投稿,文章观点仅代表作者本人,不代表本站立场,不承担相关法律责任。如若转载,请注明出处。 如若内容造成侵权/违法违规/事实不符,请点击【内容举报】进行投诉反馈!