typora自动编辑标题序号
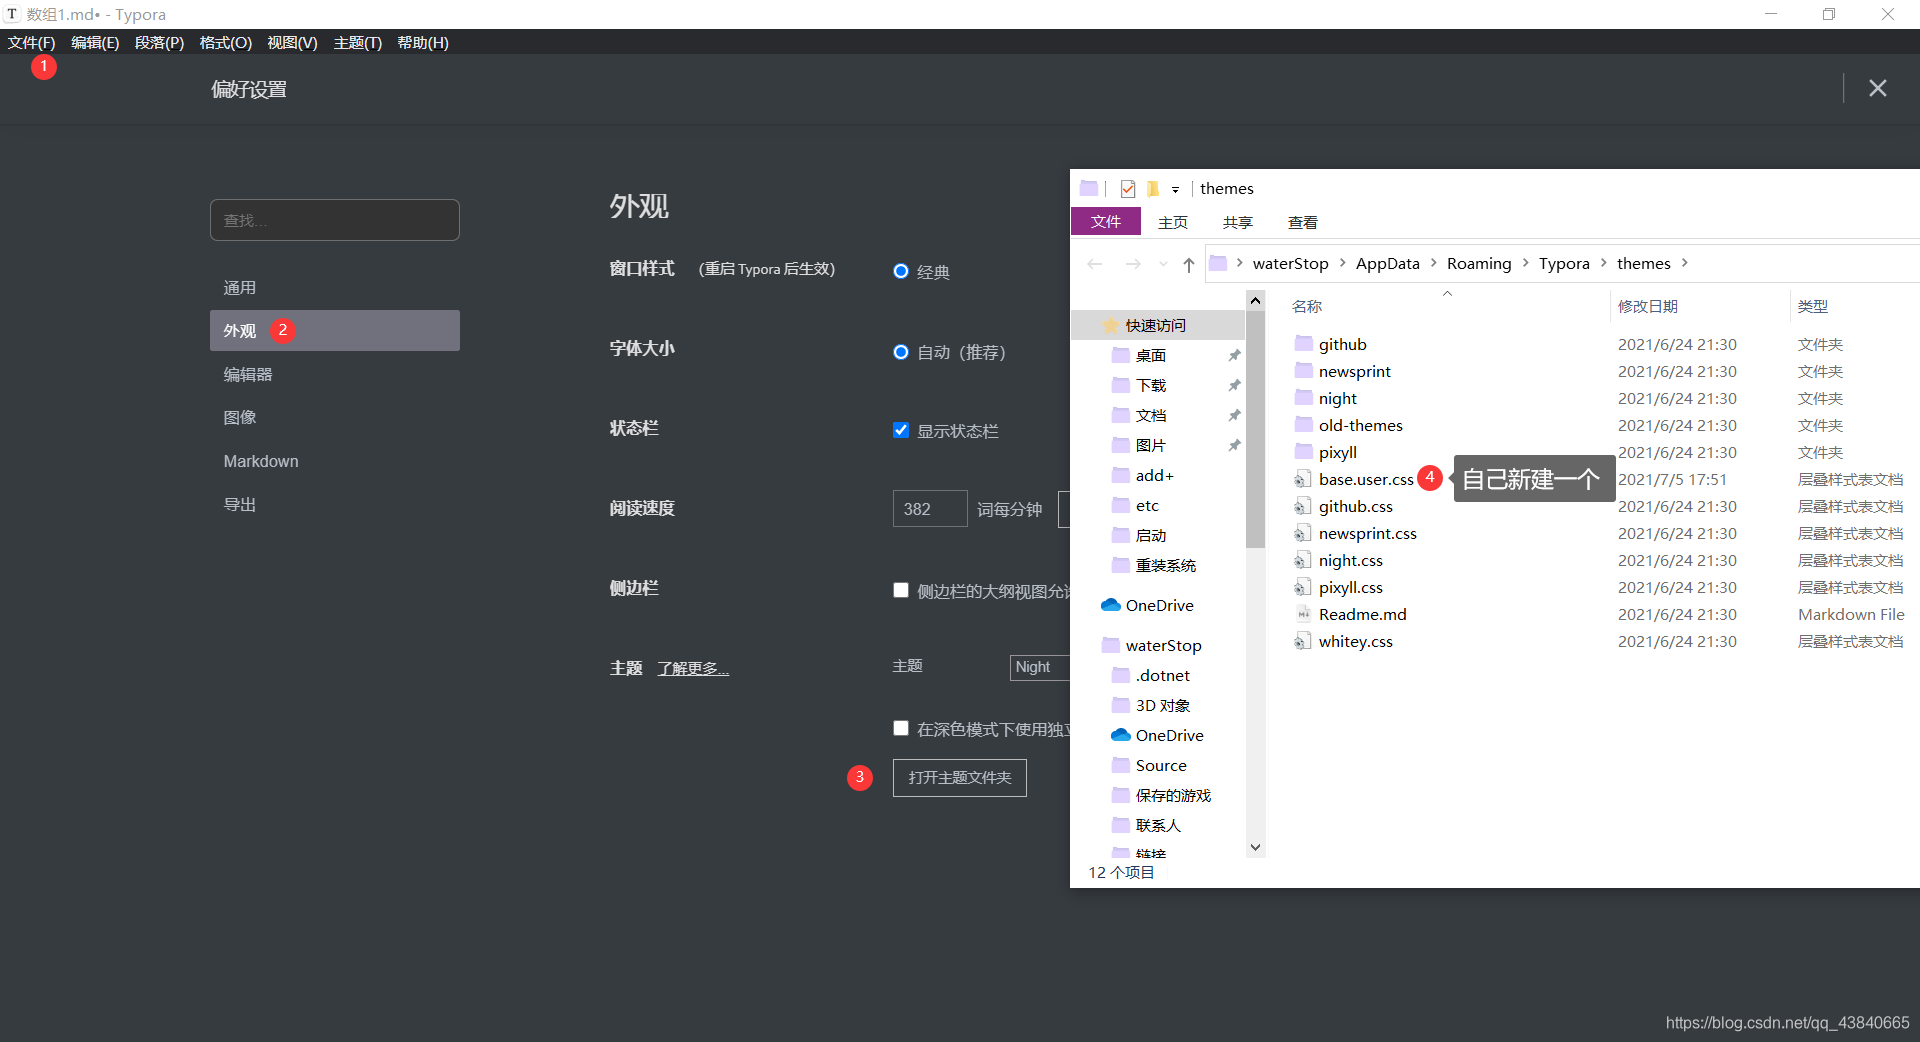
1. 打开步骤
2. css代码
这里我个人喜欢使用 **一、 二、**作为一级标题,如果需要调整可以修改一下,在代码中有注释的地方可以修改
/** initialize css counter */
#write,
.sidebar-content,.outline-h1,
h1 {counter-reset: h2;
}.outline-h2,
h2 {counter-reset: h3;
}.outline-h3,
h3 {counter-reset: h4;
}.outline-h4,
h4 {counter-reset: h5;
}.outline-h5,
h5 {counter-reset: h6;
}#write h2:before,
.outline-h2 > .outline-item > .outline-label:before {counter-increment: h2;content: counter(h2) ". ";
}#write h3:before,
h3.md-focus.md-heading:before, /** override the default style for focused headings */
.outline-h3 > .outline-item > .outline-label:before {counter-increment: h3;content: counter(h2) "." counter(h3) " ";
}#write h4:before,
h4.md-focus.md-heading:before,
.outline-h4 > .outline-item > .outline-label:before {counter-increment: h4;content: counter(h2) "." counter(h3) "." counter(h4) " ";
}#write h5:before,
h5.md-focus.md-heading:before,
.outline-h5 > .outline-item > .outline-label:before {counter-increment: h5;content: counter(h2) "." counter(h3) "." counter(h4) "." counter(h5) " ";
}#write h6:before,
h6.md-focus.md-heading:before,
.outline-h6 > .outline-item > .outline-label:before {counter-increment: h6;content: counter(h2) "." counter(h3) "." counter(h4) "." counter(h5) "." counter(h6) " ";
}/** override the default style for focused headings */
#write > h3.md-focus:before,
#write > h4.md-focus:before,
#write > h5.md-focus:before,
#write > h6.md-focus:before,
h3.md-focus:before,
h4.md-focus:before,
h5.md-focus:before,
h6.md-focus:before {color: inherit;border: inherit;border-radius: inherit;position: inherit;left: initial;float: none;top: initial;font-size: inherit;padding-left: inherit;padding-right: inherit;vertical-align: inherit;font-weight: inherit;font-family: "SimHei";line-height: inherit;
}
本文来自互联网用户投稿,文章观点仅代表作者本人,不代表本站立场,不承担相关法律责任。如若转载,请注明出处。 如若内容造成侵权/违法违规/事实不符,请点击【内容举报】进行投诉反馈!