安卓自定义dialog一篇文章搞定
在项目中我们经常会使用到自定义dialog,但是我们往往自定义了一个dialog,在show的时候,显示出来的效果却很奇葩,其显示出来的视图宽高,大小,里面控件大小等等属性都不对,甚至看起来效果惨不忍睹。 最近我也是被这问题搞的头大,在结合了网上一些文章案例,自己的实际操作后,终于总结出了怎么写好自定义dialog的方法,下面我们直接进入正题吧!
实现自定义dialog方式一
(1)先上布局:
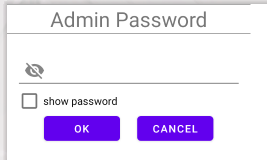
<LinearLayout xmlns:android="http://schemas.android.com/apk/res/android"android:orientation="vertical"android:layout_width="wrap_content"android:layout_height="wrap_content"><Viewandroid:layout_width="match_parent"android:layout_height="1dp"android:background="#aaa"/><TextViewandroid:layout_width="wrap_content"android:layout_height="wrap_content"android:text="Admin Password"android:textSize="24sp"android:layout_marginLeft="50dp"android:layout_marginRight="50dp"/><Viewandroid:layout_width="match_parent"android:layout_height="1dp"android:background="#aaa"/><EditTextandroid:id="@+id/et_text"android:layout_width="match_parent"android:layout_height="wrap_content"android:textSize="16sp"android:inputType="numberPassword"android:drawableLeft="@drawable/ic_hide_pwd"android:paddingLeft="10dp"android:layout_marginTop="20dp"android:layout_marginLeft="10dp"android:layout_marginRight="10dp"/><CheckBoxandroid:id="@+id/cb_forget"android:layout_width="wrap_content"android:layout_height="24dp"android:textSize="12sp"android:text="forget password"android:layout_marginLeft="10dp"/><LinearLayoutandroid:layout_width="match_parent"android:layout_height="wrap_content"android:gravity="center"><Buttonandroid:id="@+id/button_ok"android:layout_width="wrap_content"android:layout_height="40dp"android:text="OK"android:textSize="12sp"android:layout_marginRight="10dp"/><Buttonandroid:id="@+id/button_cancel"android:layout_width="wrap_content"android:layout_height="40dp"android:text="cancel"android:textSize="12sp"android:layout_marginLeft="10dp"/></LinearLayout></LinearLayout>
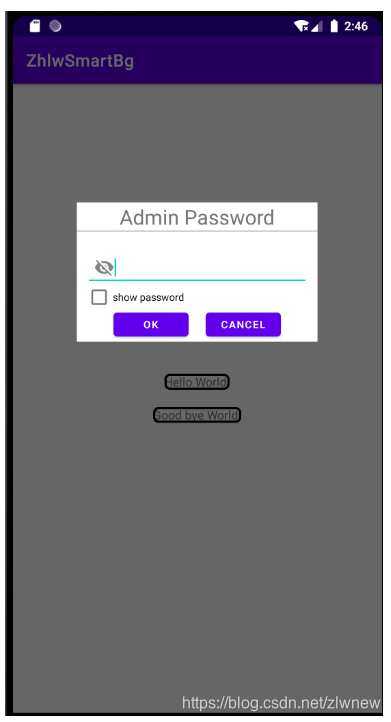
预览效果:
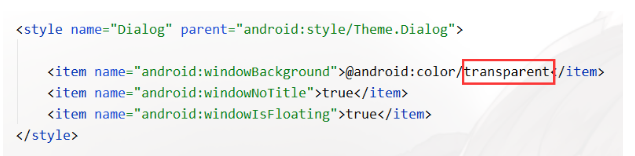
(2)编写style中的dialog style
<style name="Dialog" parent="android:style/Theme.Dialog"><item name="android:background">#ffffff</item><item name="android:windowBackground">@android:color/transparent</item><item name="android:windowNoTitle">true</item><item name="android:windowIsFloating">true</item>
</style>
在(1)(2)步中,有个小细节可能很多人都注意不到,就是我没有在布局文件中写 background,但我在dialog 的style中,加了#ffffff 这个属性。
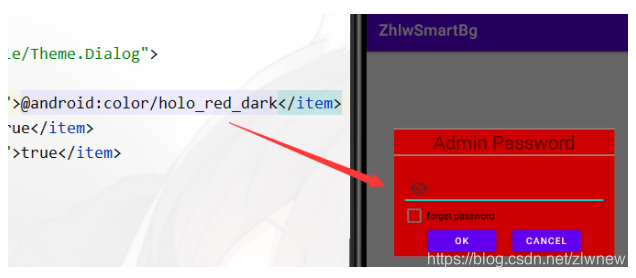
如果我把这个属性删掉,出来的弹窗的背景是透明的,就像下面这样:

此时的dialog style中样式为:
注意,没有了背景, 显示的是window的颜色,此时window为透明(因为android:windowBackground属性目前设的是透明)。 然后我将它换个颜色,那么window也会变颜色:
OK。 同理,如果我在布局文件中写了 background 。那么下面这两个属性忽略掉也可以(建议不要省略android:windowBackground属性,将它置为透明)。
(3)创建dialog
private Dialog dialog;private void createDialog(){if (dialog == null){View view = LayoutInflater.from(MainActivity.this).inflate(R.layout.custom_dialogview, null);dialog = new Dialog(MainActivity.this, R.style.Dialog);EditText editPwdText = view.findViewById(R.id.et_text);CheckBox checkBox = view.findViewById(R.id.cb_forget);Button ok = view.findViewById(R.id.button_ok);Button cancel = view.findViewById(R.id.button_cancel);checkBox.setOnCheckedChangeListener(new CompoundButton.OnCheckedChangeListener() {@Overridepublic void onCheckedChanged(CompoundButton buttonView, boolean isChecked) {if (isChecked) {//InputType.TYPE_TEXT_VARIATION_VISIBLE_PASSWORD|InputType.TYPE_CLASS_TEXTeditPwdText.setInputType(InputType.TYPE_NUMBER_VARIATION_NORMAL | InputType.TYPE_CLASS_NUMBER);} else {//InputType.TYPE_TEXT_VARIATION_PASSWORD|InputType.TYPE_CLASS_TEXTeditPwdText.setInputType(InputType.TYPE_NUMBER_VARIATION_PASSWORD | InputType.TYPE_CLASS_NUMBER);}}});ok.setOnClickListener(new View.OnClickListener() {@Overridepublic void onClick(View v) {dialog.dismiss();}});cancel.setOnClickListener(new View.OnClickListener() {@Overridepublic void onClick(View v) {dialog.dismiss();}});dialog.setContentView(view);//将显示的内容替换为我们的自定义viewsetLocation();//改变弹窗弹出位置,默认是在中央位置弹出dialog.show();} else {dialog.show();}}private void setLocation(){if (dialog != null){WindowManager.LayoutParams layoutParams = dialog.getWindow().getAttributes();//layoutParams.width = WindowManager.LayoutParams.WRAP_CONTENT;//此处可修改宽度//layoutParams.height = WindowManager.LayoutParams.WRAP_CONTENT;//此处可修改高度layoutParams.x = -100;layoutParams.y = -400;dialog.getWindow().setAttributes(layoutParams);}
}//写了个按钮  开关dialog
findViewById(R.id.text_main).setOnClickListener(new View.OnClickListener() {@Overridepublic void onClick(View v) {if (dialog == null || !dialog.isShowing()){createDialog();} else {dialog.dismiss();}}
});
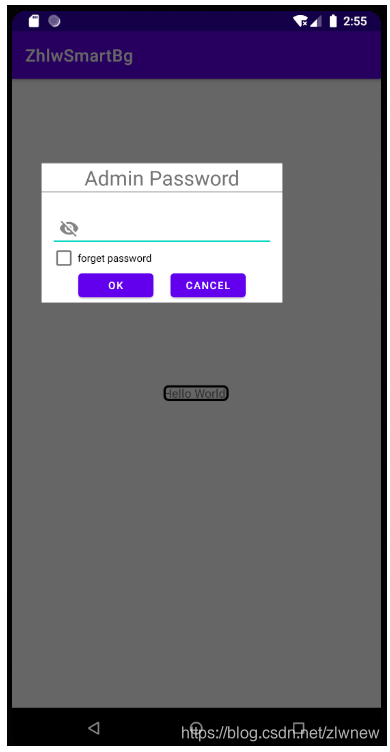
这样我们自定义的弹窗效果就实现了。
弹出效果:
实现自定义dialog方式二
(1)创建CustomDialog类,继承自dialog
public class CustomDialog extends Dialog {public CustomDialog(@NonNull Context context) {super(context);}public CustomDialog(@NonNull Context context, int themeResId) {super(context, themeResId);}protected CustomDialog(@NonNull Context context, boolean cancelable, @Nullable OnCancelListener cancelListener) {super(context, cancelable, cancelListener);}public static class Builder {private Context context;private View contentView;private String title;private String message;private int imageRes;//...public Builder(Context context){this.context = context;}public Builder setView(View layout){contentView = layout;return this;}public Builder setImageRes(int imageRes) {this.imageRes = imageRes;return this;}public Builder setTitle(String title){this.title = title;return this;}public CustomDialog build(){final CustomDialog dialog = new CustomDialog(context,R.style.Dialog);Button ok = contentView.findViewById(R.id.button_ok);Button cancel = contentView.findViewById(R.id.button_cancel);CheckBox checkBox = contentView.findViewById(R.id.cb_forget);EditText editPwdText = contentView.findViewById(R.id.et_text);checkBox.setOnCheckedChangeListener(new CompoundButton.OnCheckedChangeListener() {@Overridepublic void onCheckedChanged(CompoundButton buttonView, boolean isChecked) {if (isChecked) {//InputType.TYPE_TEXT_VARIATION_VISIBLE_PASSWORD|InputType.TYPE_CLASS_TEXTeditPwdText.setInputType(InputType.TYPE_NUMBER_VARIATION_NORMAL | InputType.TYPE_CLASS_NUMBER);} else {//InputType.TYPE_TEXT_VARIATION_PASSWORD|InputType.TYPE_CLASS_TEXTeditPwdText.setInputType(InputType.TYPE_NUMBER_VARIATION_PASSWORD | InputType.TYPE_CLASS_NUMBER);}}});ok.setOnClickListener(new View.OnClickListener() {@Overridepublic void onClick(View v) {dialog.dismiss();}});cancel.setOnClickListener(new View.OnClickListener() {@Overridepublic void onClick(View v) {dialog.dismiss();}});dialog.setContentView(contentView);dialog.setLocation();return dialog;}}//更改弹窗位置的private void setLocation(){WindowManager.LayoutParams layoutParams = this.getWindow().getAttributes();layoutParams.x = 0;layoutParams.y = -300;this.getWindow().setAttributes(layoutParams);}}
通过builder模式,创建自定义dialog对象。 这里我只简单的写了下, 你可以通过title,message等是否有值,在build的时候选择是否显示相关视图。
(2) 创建dialog
private Dialog dialog2;
private void createDialog2(){if (dialog2 == null){View view = LayoutInflater.from(MainActivity.this).inflate(R.layout.custom_dialogview, null);CustomDialog.Builder builder = new CustomDialog.Builder(MainActivity.this).setView(view);dialog2 = builder.build();dialog2.show();} else {dialog2.show();}
}findViewById(R.id.text_main2).setOnClickListener(new View.OnClickListener() {@Overridepublic void onClick(View v) {if (dialog2 == null || !dialog2.isShowing()){createDialog2();} else {dialog2.dismiss();}}
});
效果如下:
好了,这就是本文的全部内容了。如果项目中有很多处用到自定义dialog,建议使用方式二,设计一个强大的dialog,然后就可以愉快的使用了。
END
本文来自互联网用户投稿,文章观点仅代表作者本人,不代表本站立场,不承担相关法律责任。如若转载,请注明出处。 如若内容造成侵权/违法违规/事实不符,请点击【内容举报】进行投诉反馈!