Java快速搭建微服务
源代码:https://gitee.com/riccxie/spring-cloud-demo2
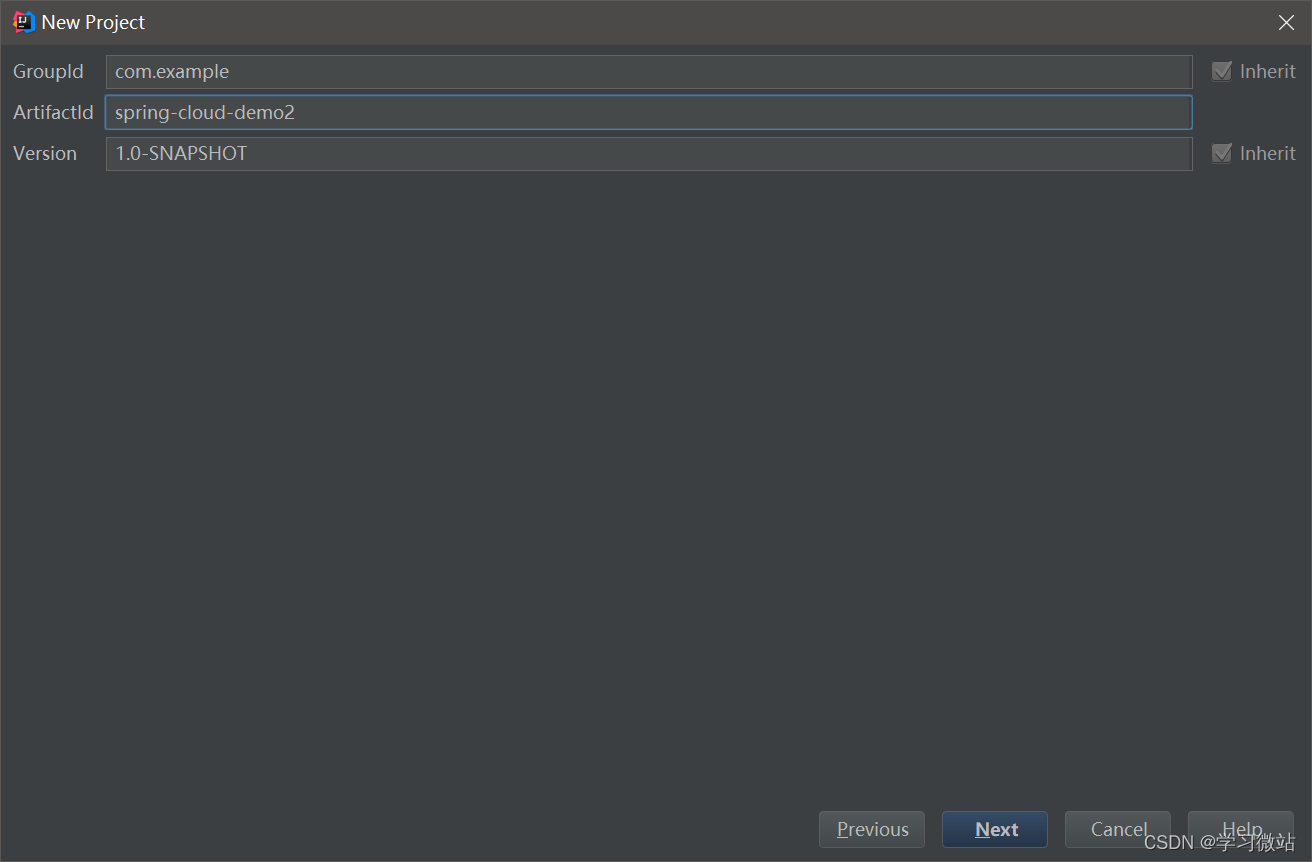
一、创建新工程
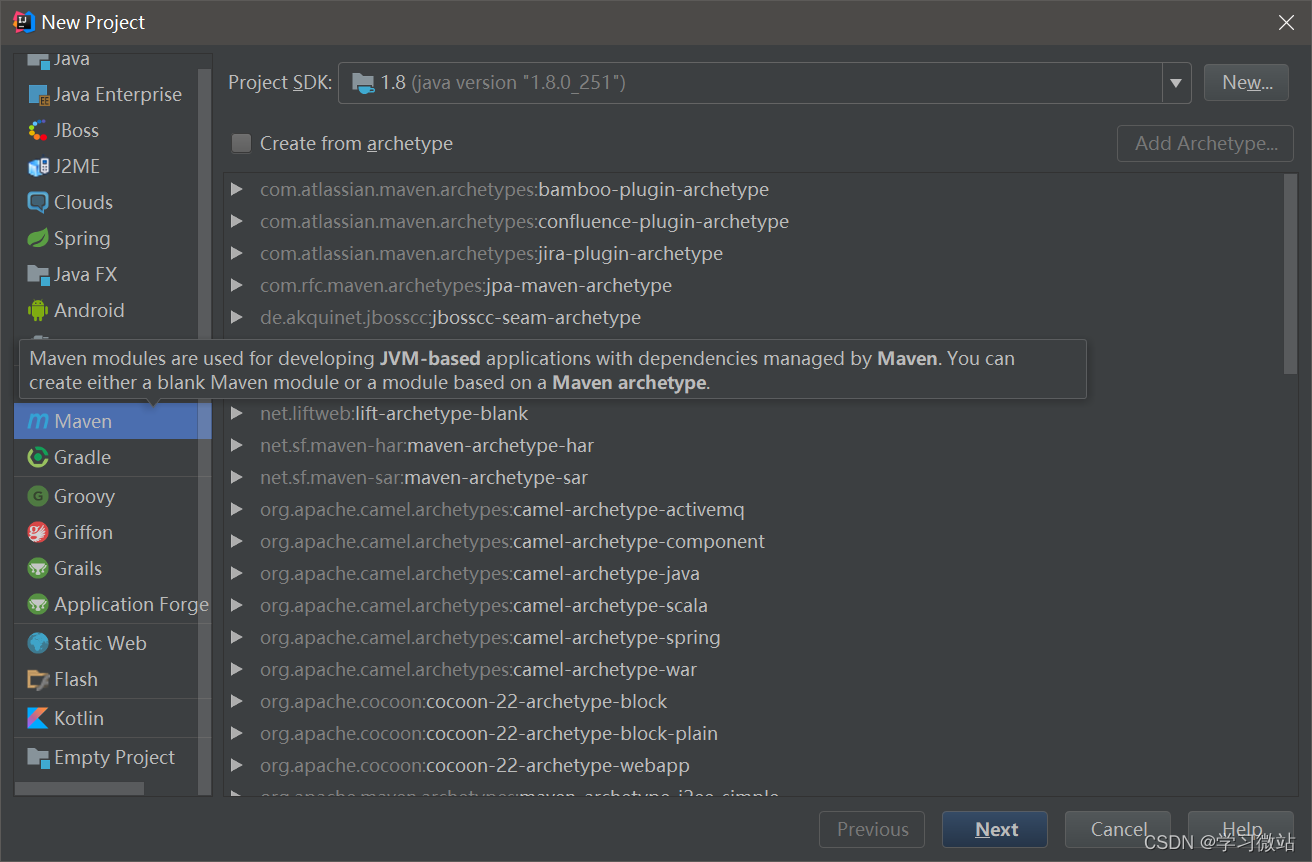
下一步
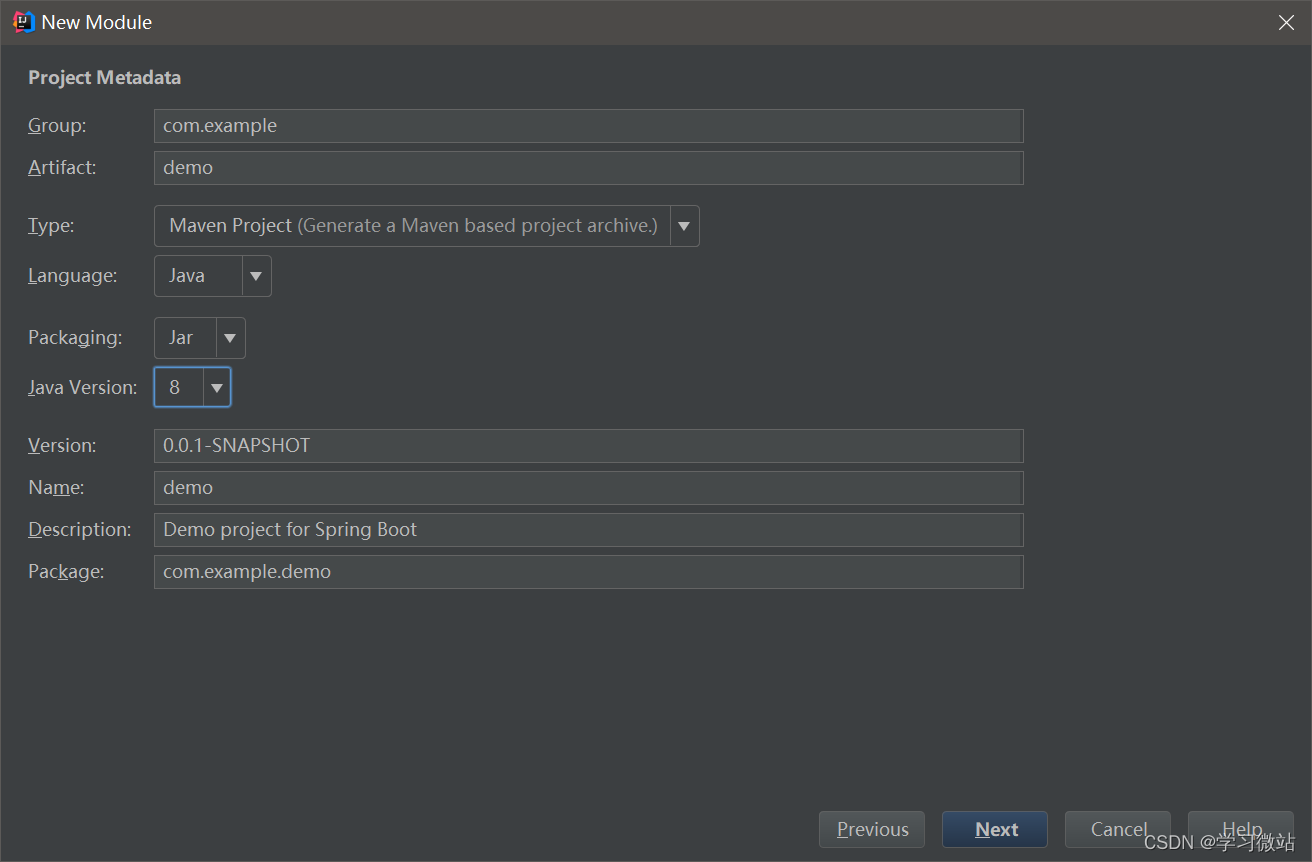
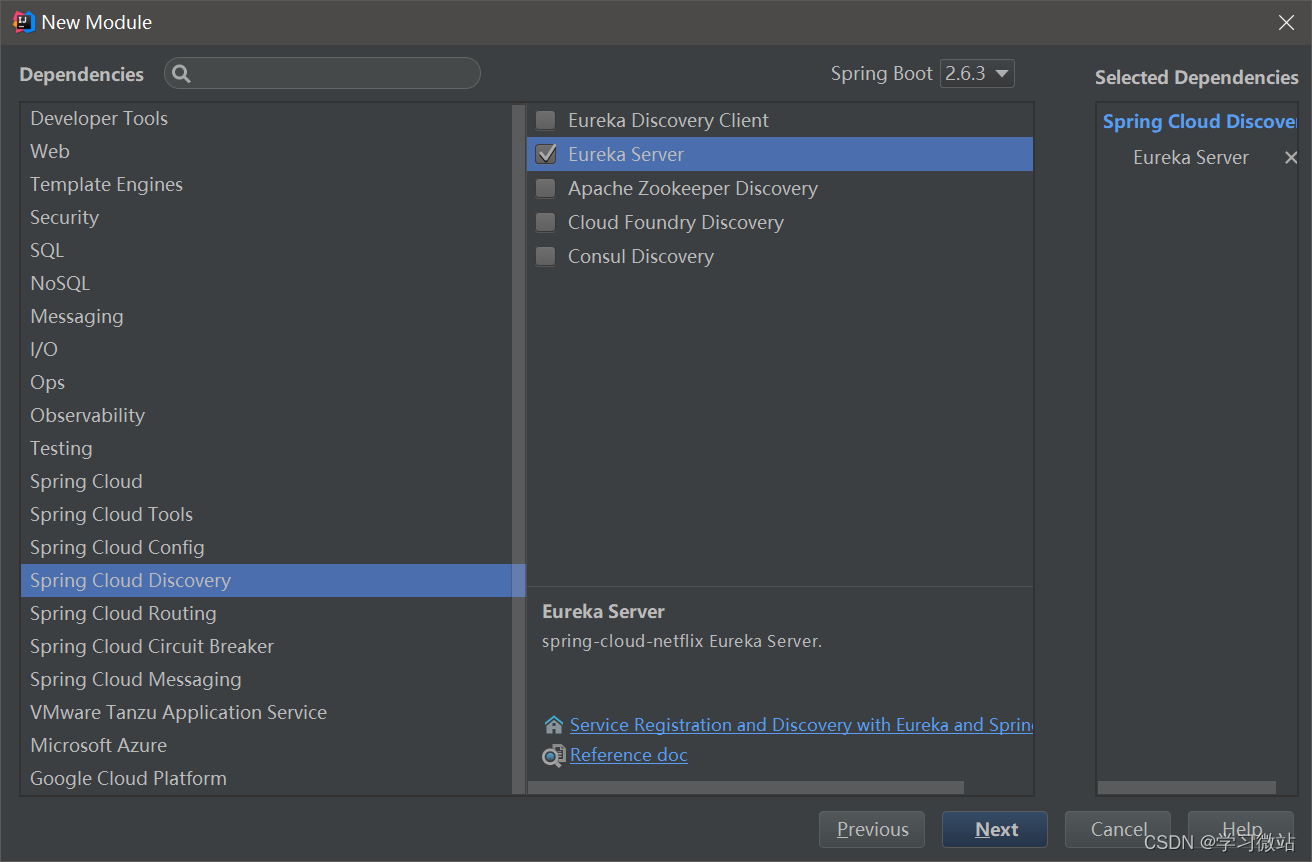
二、在这个项目New Module 添加EurekaServer 子项目
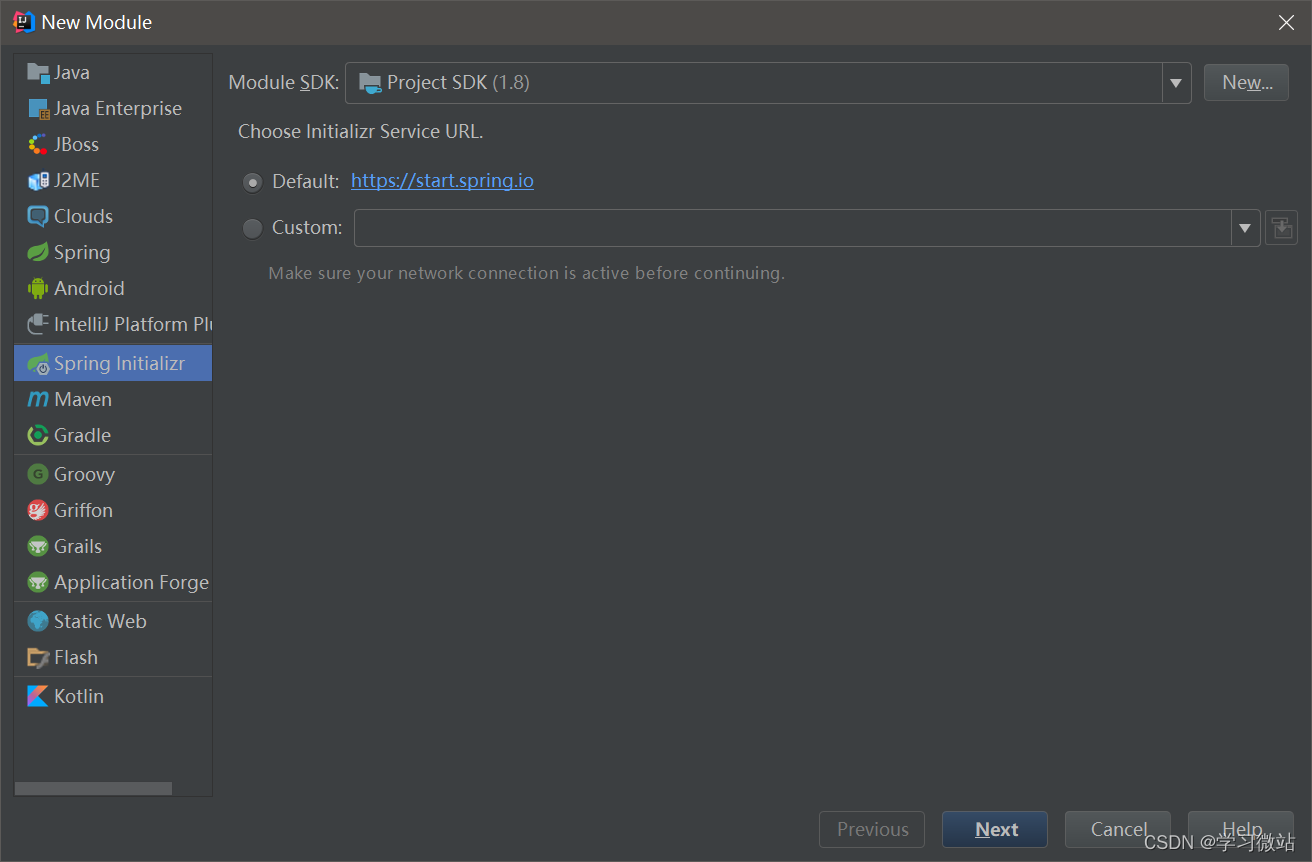
有的时候start.spring.io会超时建不了,可以等一会或者手动建,用阿里url效果最佳 https://start.aliyun.com/
网上方法
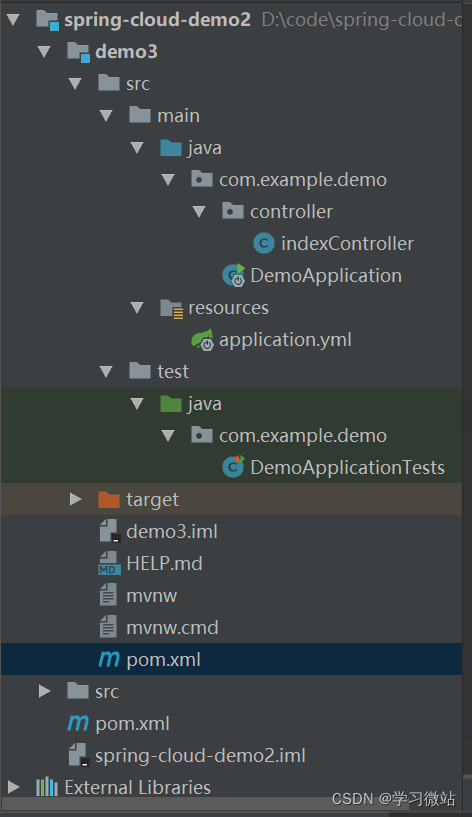
初始化成大概这样
3、application.properties,这里我替换成application.yml
# 服务注册中心 (单节点)
server:port: 8761
eureka:instance:hostname: localhostclient:fetch-registry: false # 表示是否从Eureka Server获取注册信息,默认为true.因为这是一个单点的Eureka Server,不需要同步其他的Eureka Server节点的数据,这里设置为falseregister-with-eureka: false # 表示是否将自己注册到Eureka Server,默认为true.由于当前应用就是Eureka Server,故而设置为false.service-url:# 设置与Eureka Server的地址,查询服务和注册服务都需要依赖这个地址.默认是http://localhost:8761/eureka/;多个地址可使用','风格.defaultZone: http://${eureka.instance.hostname}:${server.port}/eureka/
4、加了controller
@RestController
public class indexController {@GetMapping("/")public String index() {return "index";}
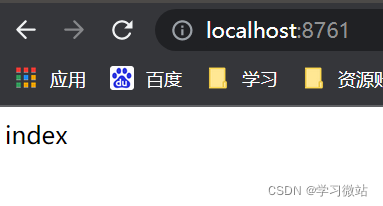
}5/输入http://localhost:8761/,它可能没识别到访问Eureka控制台,本来要进入访问Eureka控制台的
修改一下, 把IndexController全部注释掉
启动类加上注解@EnableEurekaServer
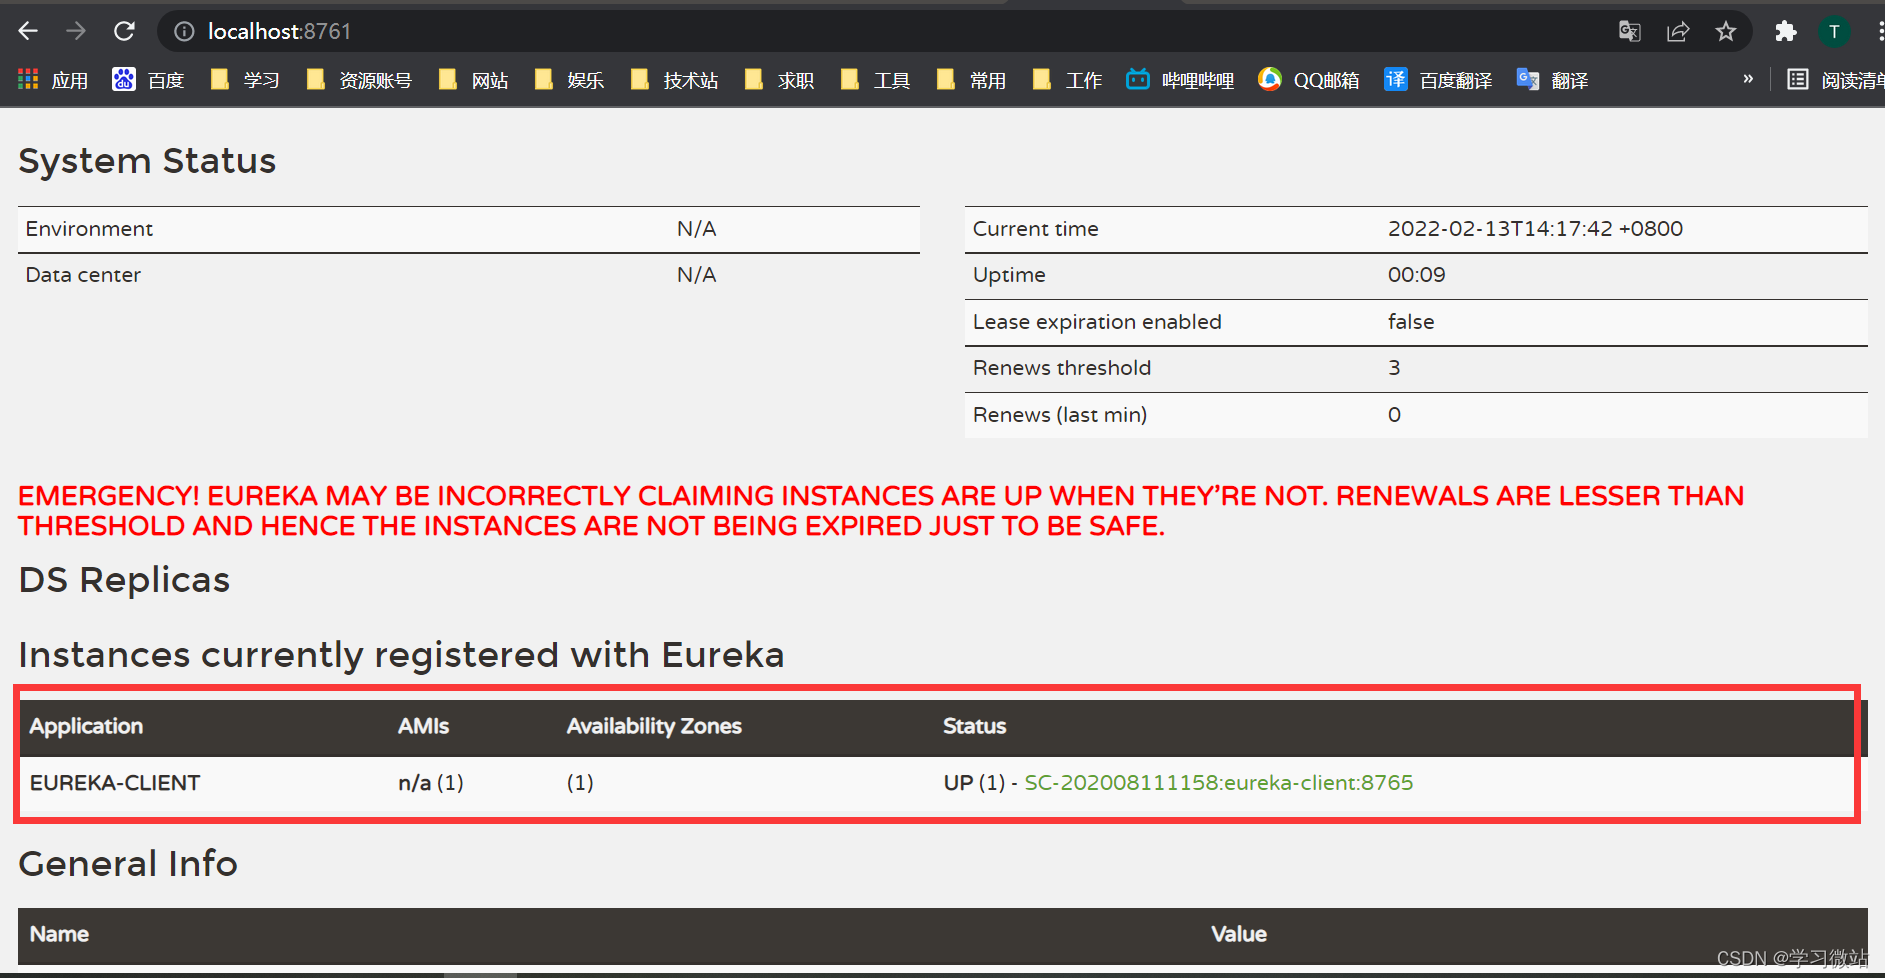
这样就能进入这样的界面
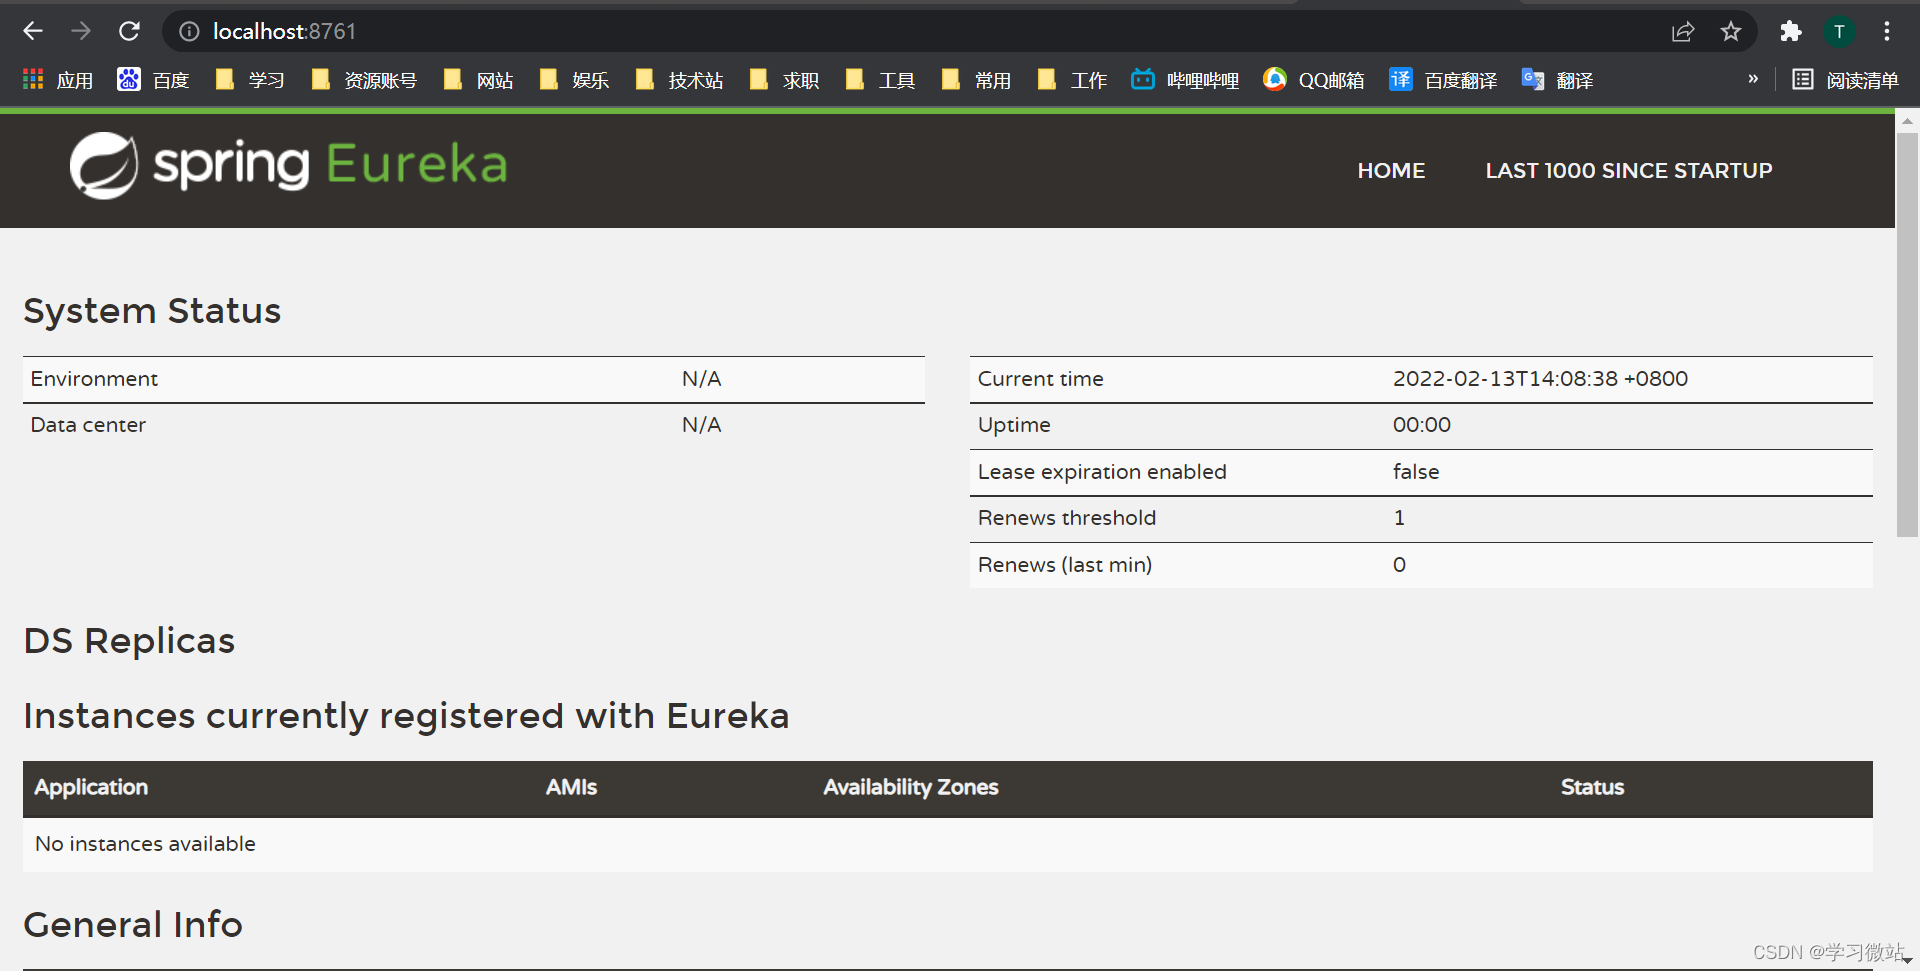
服务正常启动
然后还需要生产者、消费者
三、建生产者module
按照同样的
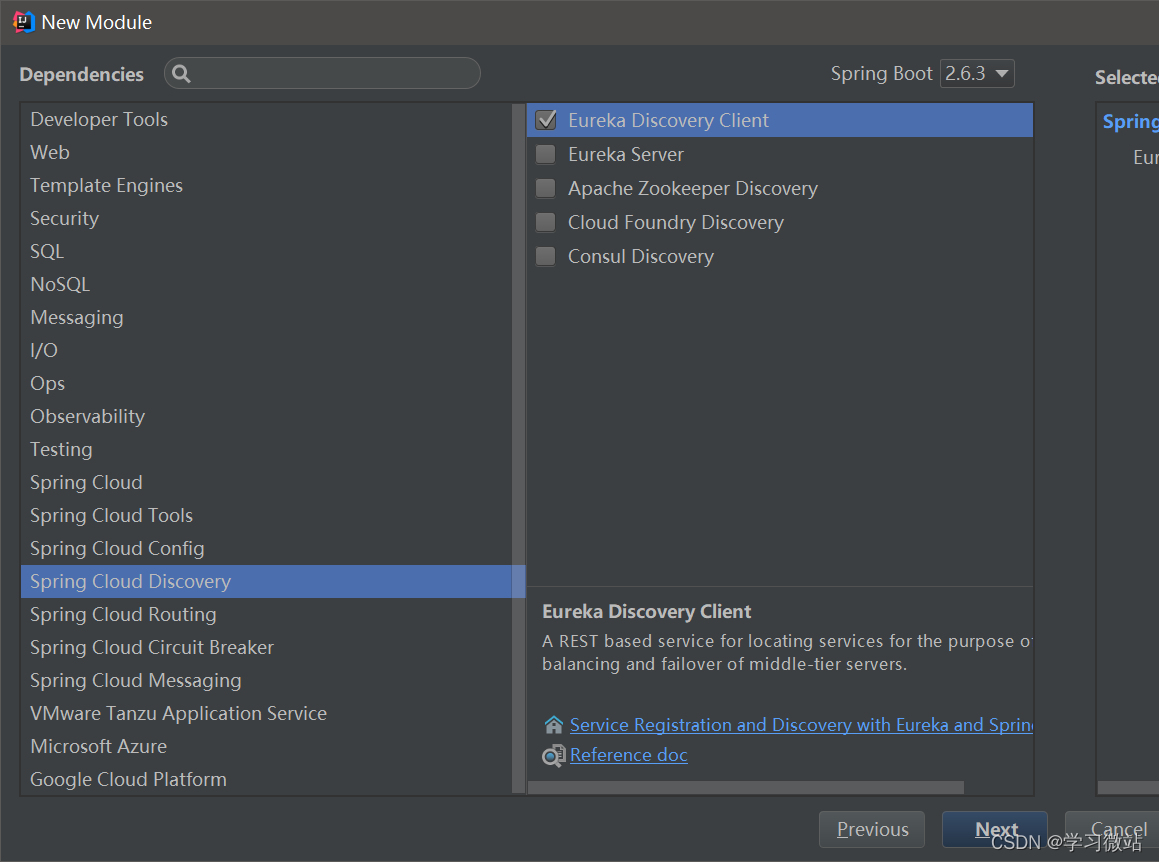
创建时需要勾选 Spring Cloud Discover–> Eureka Discover Client 和 Spring Web 的依赖。
启动类
@SpringBootApplication
@EnableEurekaClient
@RestController
public class EurekaClientApplication {public static void main(String[] args) {SpringApplication.run(EurekaClientApplication.class, args);}@RequestMapping("sayHello")public String sayHello(String param) {return "Hello " + param;}
}
application.yml
server:port: 8765spring:application:name: eureka-clienteureka:client:service-url:defaultZone: http://localhost:8761/eureka # 指定服务注册中心刷新后
四、消费者
按照同样的
创建时需要勾选 Spring Cloud Discover–> Eureka Discover Client 和 Spring Web 的依赖。
启动类
package com.example.eureka_consumer;import org.springframework.boot.SpringApplication;
import org.springframework.boot.autoconfigure.SpringBootApplication;
import org.springframework.cloud.client.discovery.EnableDiscoveryClient;
import org.springframework.cloud.client.loadbalancer.LoadBalanced;
import org.springframework.context.annotation.Bean;
import org.springframework.web.client.RestTemplate;/*** 在启动类中添加@EnableDiscoveryClient表明标注类是消费者,加入restTemplate来消费相关的服务*/
@SpringBootApplication
@EnableDiscoveryClient
public class EurekaConsumerApplication {public static void main(String[] args) {SpringApplication.run(EurekaConsumerApplication.class, args);}@Bean@LoadBalancedRestTemplate restTemplate() {return new RestTemplate();}}
controller
package com.example.eureka_consumer.controller;import lombok.extern.slf4j.Slf4j;
import org.springframework.beans.factory.annotation.Autowired;
import org.springframework.web.bind.annotation.RequestMapping;
import org.springframework.web.bind.annotation.RequestParam;
import org.springframework.web.client.RestTemplate;
import org.springframework.web.bind.annotation.RestController;/*** @author samxie* @version 1.0* @date 2022-2-13 14:28*/
@RestController
@Slf4j
public class DemoController {@AutowiredRestTemplate restTemplate;@RequestMapping("/greet")public String sayHello(@RequestParam String name) {return restTemplate.getForObject("http://EUREKA-CLIENT/sayHello?param=" + name, String.class);}}
配置文件application.yml
server:port: 8763spring:application:name: eureka-consumereureka:client:service-url:defaultZone: http://localhost:8761/eureka #指定服务注册中心结果看到生成
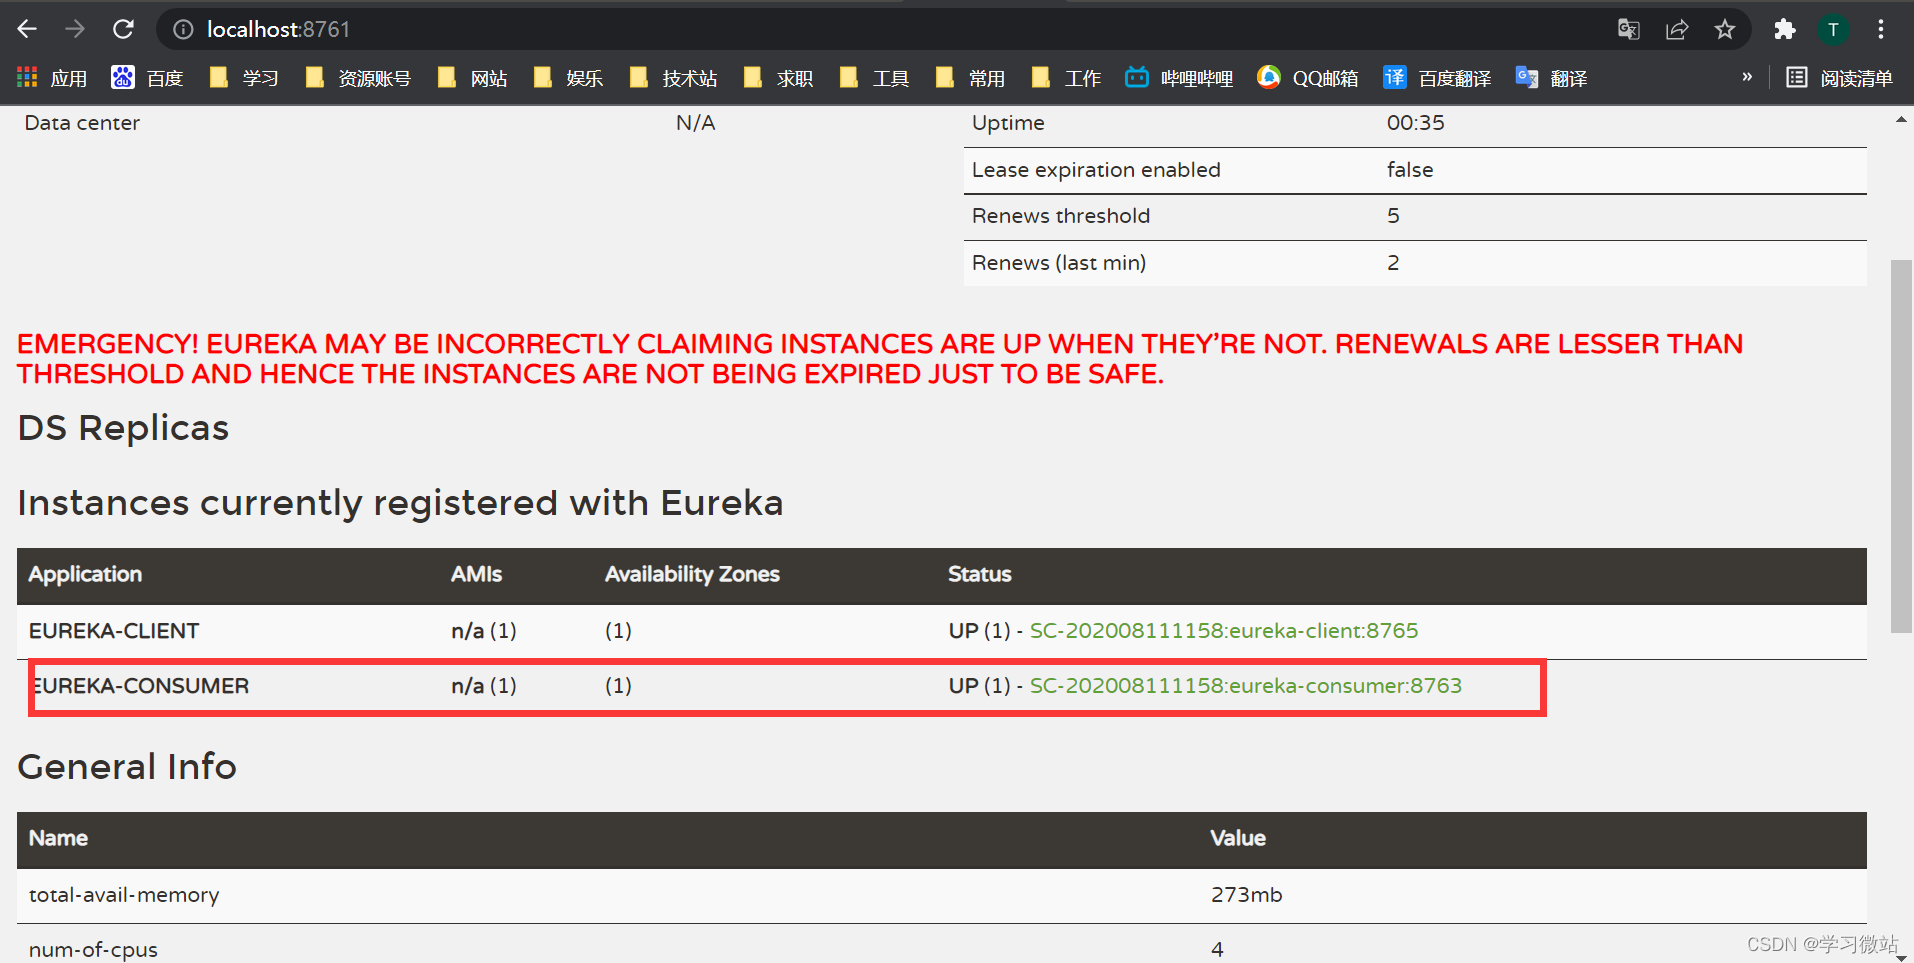
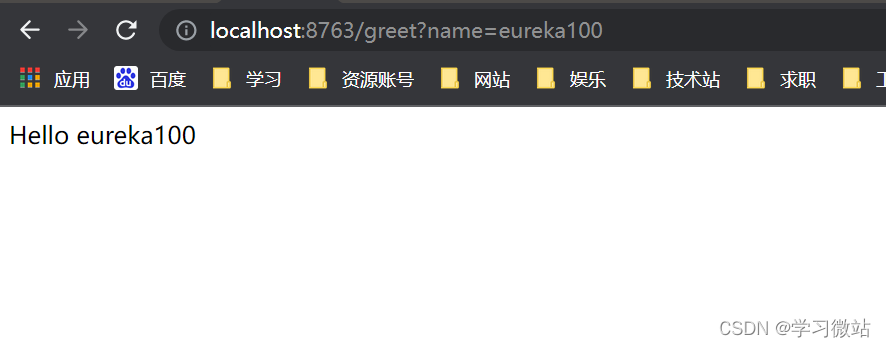
5.打开浏览器输入localhost:{server.port}/path 进行服务调用,
这里我用 http://localhost:8763/greet?name=eureka100 ,可以看到请求正确返回,正确调用了服务提供者。
https://www.cnblogs.com/binyue/p/12079356.html
本文来自互联网用户投稿,文章观点仅代表作者本人,不代表本站立场,不承担相关法律责任。如若转载,请注明出处。 如若内容造成侵权/违法违规/事实不符,请点击【内容举报】进行投诉反馈!