ApplicationListener使用和发布原理
目录
- 1. 演示
- 2. 实现原理
- 2.1 ContextRefreshedEvent大概流程
- 2.2 applicationContext.publishEvent()大概流程
- 2.3 ContextClosedEvent大概流程
- 2.4 细节一:如何获取派发器
- 2.5 细节二:容器如何获取所有监听器
- 2.6 总结流程
记录最近看视频学到的AppiicationListener的原理
ApplicationListener是用于容器初始化之后调用,如果想要在IOC容器创建完bean之后或者容器关闭的时候做一些操作,就可以用到这个监听器
1. 演示
ContextRefreshedEvent:容器创建完成(所有bean都创建)会发布这个事件
ContextClosedEvent:容器关闭也会发布事件
applicationContext.publishEvent():自己发布一个事件
@ComponentScan
public class MyApplicationListener implements ApplicationListener {@Overridepublic void onApplicationEvent(ApplicationEvent event) {System.out.println("收到的事件:" + event);}
}
@Configuration
@Import({MyApplicationListener.class})
public class AddBeanConfig {}
测试类:
@Testpublic void test08(){AnnotationConfigApplicationContext applicationContext = new AnnotationConfigApplicationContext(AddBeanConfig.class);applicationContext.publishEvent(new ApplicationEvent(new String("我自己发布的事件")) {});applicationContext.close();//收到的事件:org.springframework.context.event.ContextRefreshedEvent[source=org.springframework.context.annotation.AnnotationConfigApplicationContext@136432db, started on Wed Aug 18 10:16:02 CST 2021]//收到的事件:com.test.AppTest$1[source=我自己发布的事件]//收到的事件:org.springframework.context.event.ContextClosedEvent[source=org.springframework.context.annotation.AnnotationConfigApplicationContext@136432db, started on Wed Aug 18 10:16:02 CST 2021]}
2. 实现原理
2.1 ContextRefreshedEvent大概流程
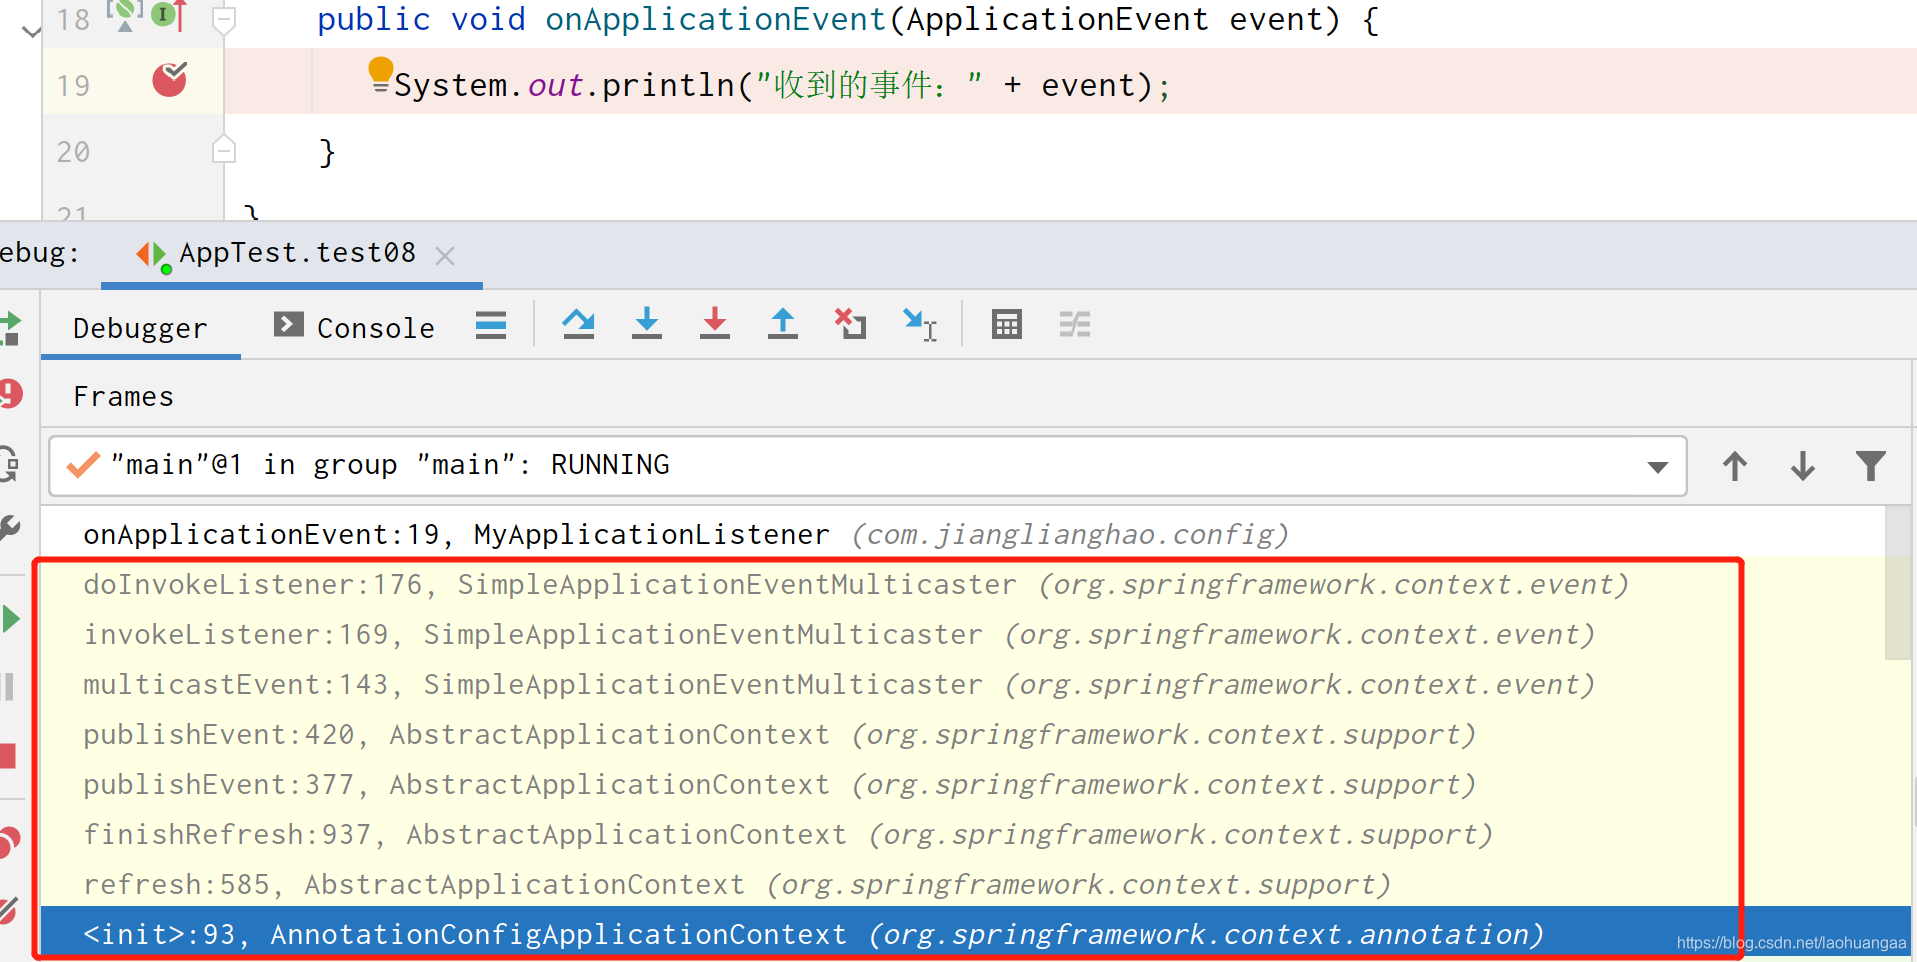
1、我们打断点后查看方法调用栈,大概能看到用了什么方法
2、调用方法流程
AnnotationConfigApplicationContext applicationContext = new AnnotationConfigApplicationContext(AddBeanConfig.class) ==> refresh() ==> finishRefresh() ==> publishEvent(new ContextRefreshedEvent(this)) ==> publishEvent(event, null) ==> getApplicationEventMulticaster().multicastEvent(applicationEvent, eventType) ⇒ invokeListener(listener, event) ⇒ doInvokeListener(listener, event) ⇒ listener.onApplicationEvent(event) ⇒ System.out.println(“收到的事件:” + event)
3、方法调用具体过程
(1)容器创建对象=>refresh()刷新对象
(2)finishRefresh();容器刷新完成会发布ContextRefreshedEvent事件
(3)publishEvent(new ContextRefreshedEvent(this)) :事件发布流程
1. 获取事件的派发器:getApplicationEventMulticaster()
2. 调用multicastEvent(applicationEvent, eventType)进行事件派发
(1)先获取到所有的Listeners
(2)获取Executor,如果Listener需要异步派发就使用Executor异步派发
(3) 如果不需要就直接同步执行invokeListener(listener, event),然后调用doInvokeListener(listener, event)方法,接着调用listener.onApplicationEvent(event),就来到我们自己重写的onApplicationEvent方法里面了。第一次调用完就会发布ContextRefreshedEvent事件
@Overridepublic void multicastEvent(final ApplicationEvent event, @Nullable ResolvableType eventType) {ResolvableType type = (eventType != null ? eventType : resolveDefaultEventType(event));Executor executor = getTaskExecutor();for (ApplicationListener listener : getApplicationListeners(event, type)) {if (executor != null) {executor.execute(() -> invokeListener(listener, event));}else {invokeListener(listener, event);}}}
2.2 applicationContext.publishEvent()大概流程
我们自己发送的事件,调用过程如下
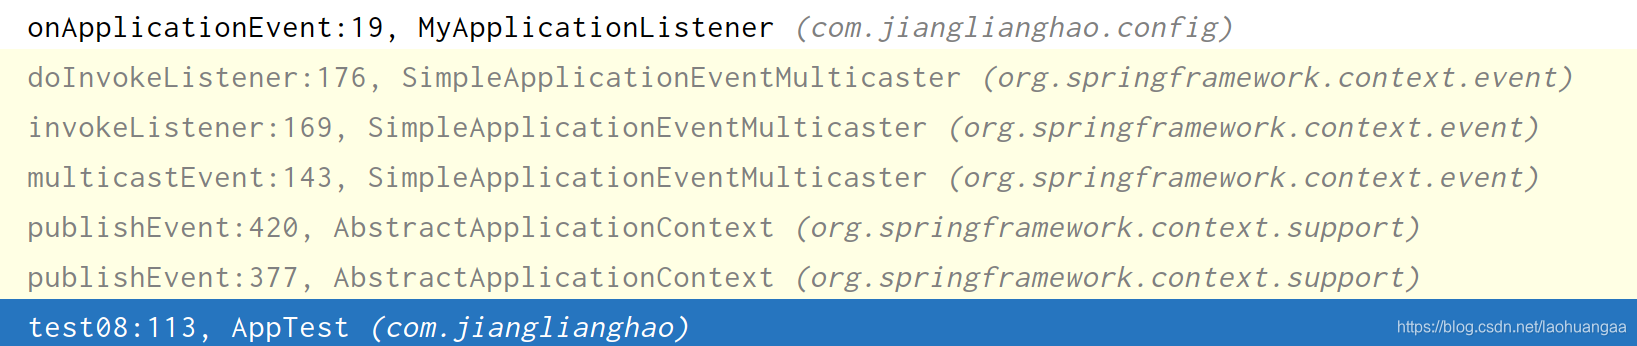
方法调用过程和上面一模一样,只不过我们自己发布的事件监听是从publishEvent开始,省去了创建IOC容器和refresh()刷新容器的步骤
2.3 ContextClosedEvent大概流程
调用过程:
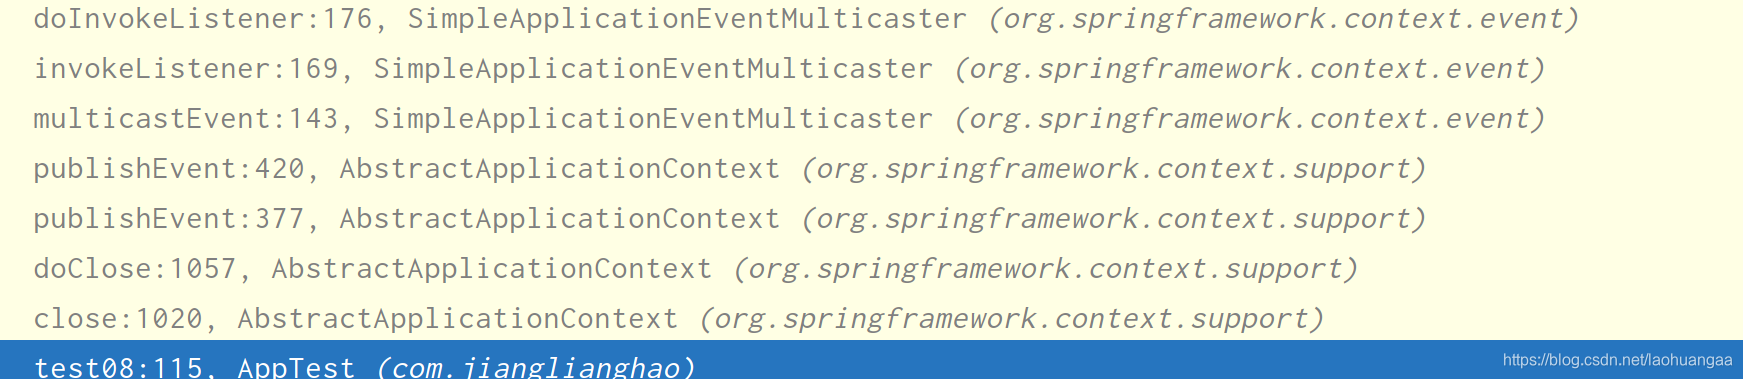
其实就是close ==> doClose() 和前面不一样,其他都是和ContextRefreshedEvent的流程一模一样。
2.4 细节一:如何获取派发器
getApplicationEventMulticaster()
(1)创建IOC容器,调用里面refresh方法
(2)refresh方法中有一个initApplicationEventMulticaster(),初始化事件派发器
protected void initApplicationEventMulticaster() {//获取bean工厂ConfigurableListableBeanFactory beanFactory = getBeanFactory();//APPLICATION_EVENT_MULTICASTER_BEAN_NAME = applicationEventMulticaster、//判断bean工厂中是否含有id为applicationEventMulticaster的派发器if (beanFactory.containsLocalBean(APPLICATION_EVENT_MULTICASTER_BEAN_NAME)) {//如果有,就直接赋值this.applicationEventMulticaster =beanFactory.getBean(APPLICATION_EVENT_MULTICASTER_BEAN_NAME, ApplicationEventMulticaster.class);if (logger.isTraceEnabled()) {logger.trace("Using ApplicationEventMulticaster [" + this.applicationEventMulticaster + "]");}}else {//如果没有,就new一个SimpleApplicationEventMulticaster,然后注册进bean工厂中//注册完之后,下次再调用就会直接走上面的流程,直接从容器中拿this.applicationEventMulticaster = new SimpleApplicationEventMulticaster(beanFactory);beanFactory.registerSingleton(APPLICATION_EVENT_MULTICASTER_BEAN_NAME, this.applicationEventMulticaster);if (logger.isTraceEnabled()) {logger.trace("No '" + APPLICATION_EVENT_MULTICASTER_BEAN_NAME + "' bean, using " +"[" + this.applicationEventMulticaster.getClass().getSimpleName() + "]");}}}
(3)上面的流程大概就是
(1) 如果在容器中能找到事件派发器,就直接从容器中拿
(2) 如果找不到,就创建一个SimpleApplicationEventMulticaster,注册进beanFactory中,下次再调用就直接从IOC容器中拿。
2.5 细节二:容器如何获取所有监听器
(1)创建IOC容器,调用里面refresh方法
(2)refresh方法中调用registerListeners()
protected void registerListeners() {//首先注册静态监听器for (ApplicationListener<?> listener : getApplicationListeners()) {getApplicationEventMulticaster().addApplicationListener(listener);}//从容器中找到所有的ApplicationListener类型的监听器名字String[] listenerBeanNames = getBeanNamesForType(ApplicationListener.class, true, false);//遍历for循环,把监听器名字加入派发器,以后我们要派发监听监听事件的时候就直接调用multicastEvent就行了for (String listenerBeanName : listenerBeanNames) {getApplicationEventMulticaster().addApplicationListenerBean(listenerBeanName);}// 首先派发earlyEvent,这个我也不知道什么意思,字面意思就是发布早期的应用事件Set<ApplicationEvent> earlyEventsToProcess = this.earlyApplicationEvents;this.earlyApplicationEvents = null;if (!CollectionUtils.isEmpty(earlyEventsToProcess)) {for (ApplicationEvent earlyEvent : earlyEventsToProcess) {getApplicationEventMulticaster().multicastEvent(earlyEvent);}}}
2.6 总结流程
(1)容器创建对象,调用refresh方法
(2)首先获取事件派发器
1、调用refresh的initApplicationEventMulticaster()方法,过程是2和3
2、 如果在容器中能找到事件派发器,就直接从容器中拿
3、如果找不到,就创建一个SimpleApplicationEventMulticaster,注册进beanFactory中,下次再调用就直接从IOC容器中拿。
(3)调用refresh的registerListeners()方法注册所有的监听器
1、首先注册静态的监听器
2、根据ApplicationListener.class获取所有的普通监听器的名字,加入到事件派发器中
3、使用派发器发布早期的应用事件
(4)调用refresh中的finishRefresh方法,容器刷新完会发布ContextRefreshedEvent事件,finishRefresh的流程如下
(5)finishRefresh中的publishEvent(new ContextRefreshedEvent(this)) :事件发布流程
1. 获取事件的派发器:getApplicationEventMulticaster()
2. 调用multicastEvent(applicationEvent, eventType)进行事件派发
(1)先获取到所有的Listeners
(2)获取Executor,如果Listener需要异步派发就使用Executor异步派发
(3) 如果不需要就直接同步执行invokeListener(listener, event),然后调用doInvokeListener(listener, event)方法,接着调用listener.onApplicationEvent(event),就来到我们自己重写的onApplicationEvent方法里面了。第一次调用完就会发布ContextRefreshedEvent事件
(6)ContextRefreshedEvent发布完成后,我们发布自己的监听事件
applicationContext.publishEvent(new ApplicationEvent(new String(“我自己发布的事件”)),直接进入publishEvent,流程和上面的一样
(7) 调用applicationContext.close()方法后,流程是close() -> doClose() ->publishEvent(new ContextClosedEvent(this)), 然后流程也和上面的一样了。
如有错误,欢迎指出
本文来自互联网用户投稿,文章观点仅代表作者本人,不代表本站立场,不承担相关法律责任。如若转载,请注明出处。 如若内容造成侵权/违法违规/事实不符,请点击【内容举报】进行投诉反馈!