Springboot集成Mybatis单数据源和多数据源笔记(亲测无误)
Mysql单数据源
1,新建Spring工程
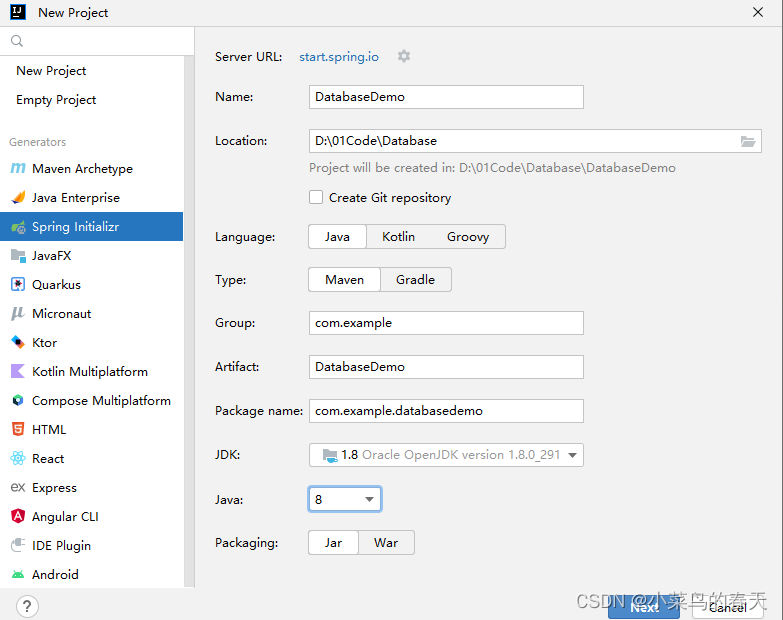
2,选择模块
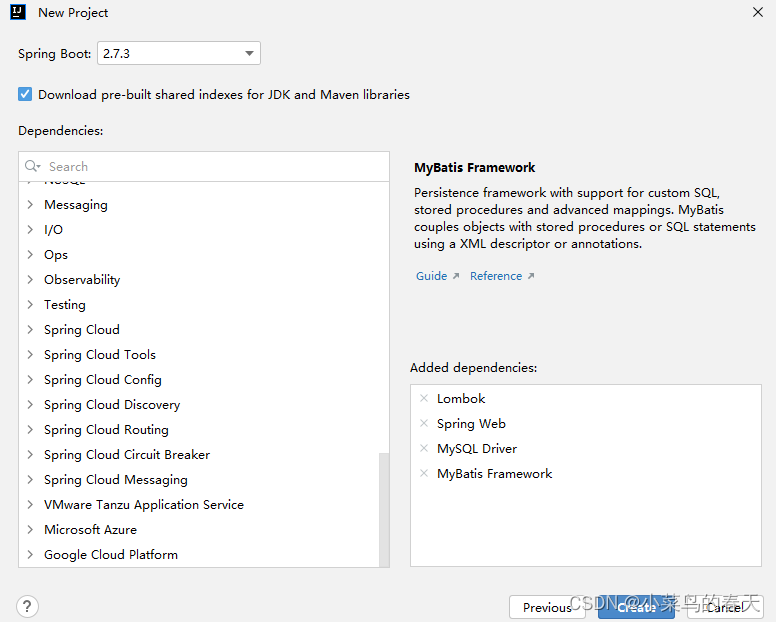
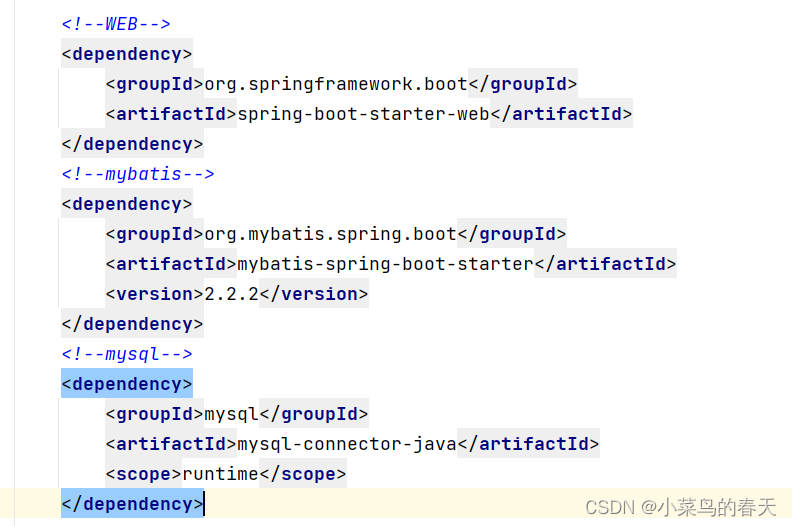
3,主要依赖:
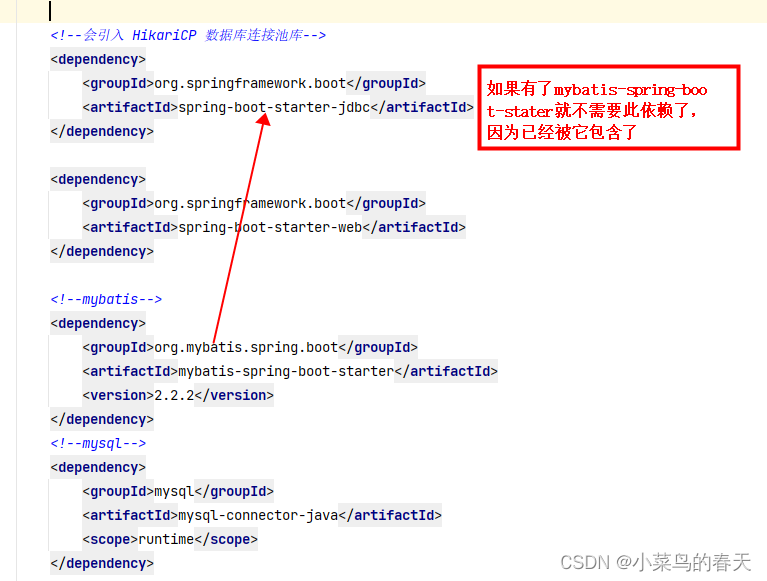
PS额外知识(和主讲内容无关):
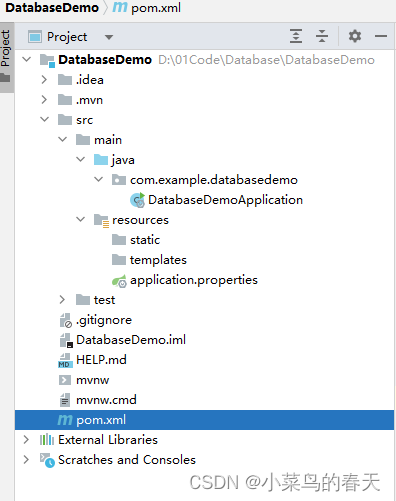
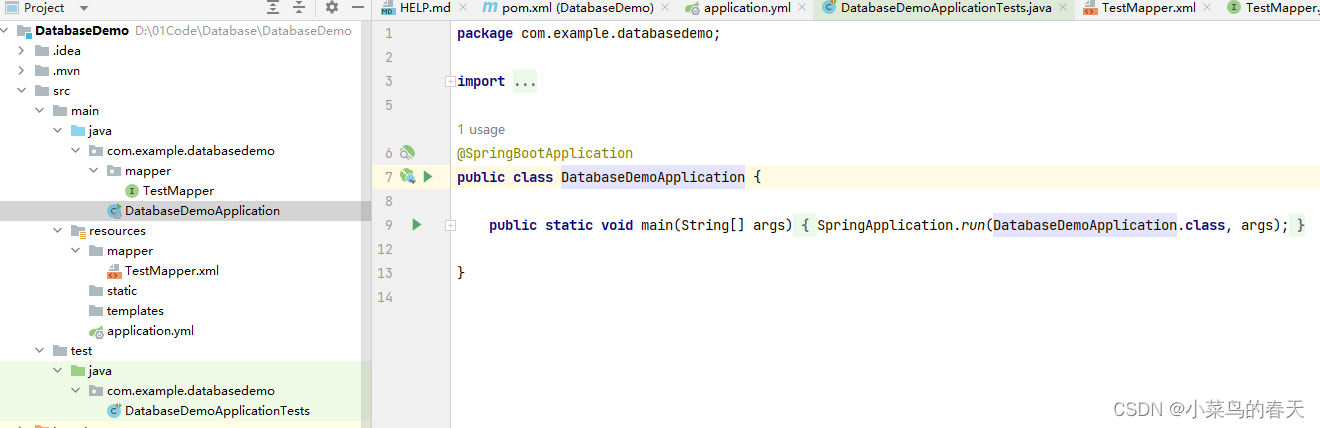
4,原始项目结构:
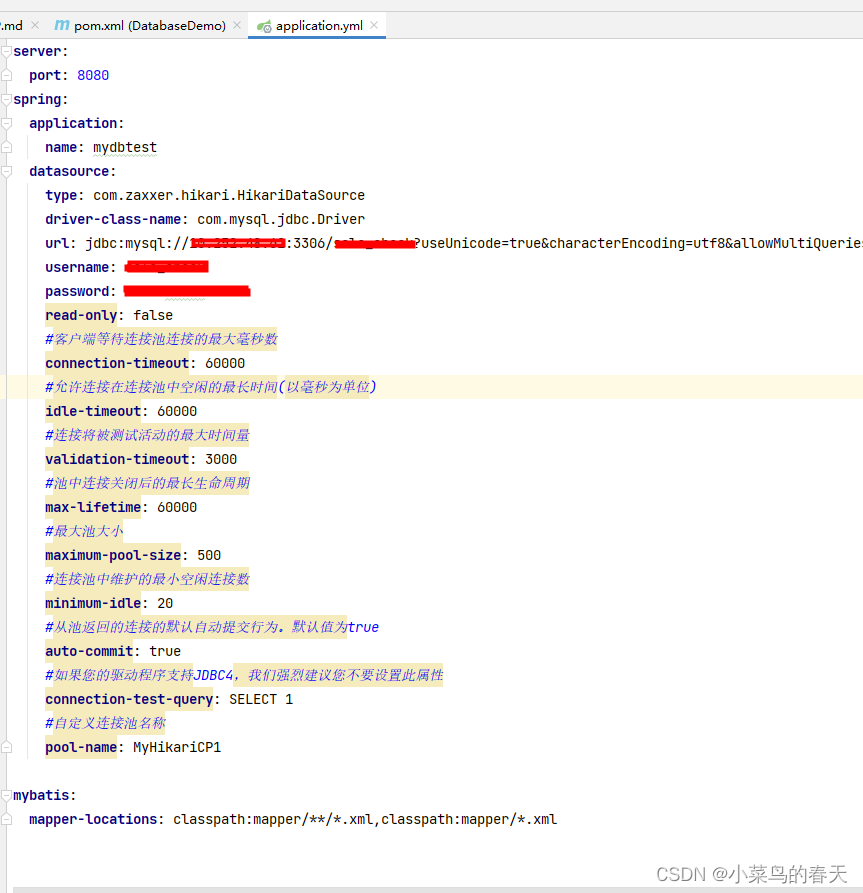
5,按照习惯将application.properties改为application.yml,并开始配置:
6,补全目录:
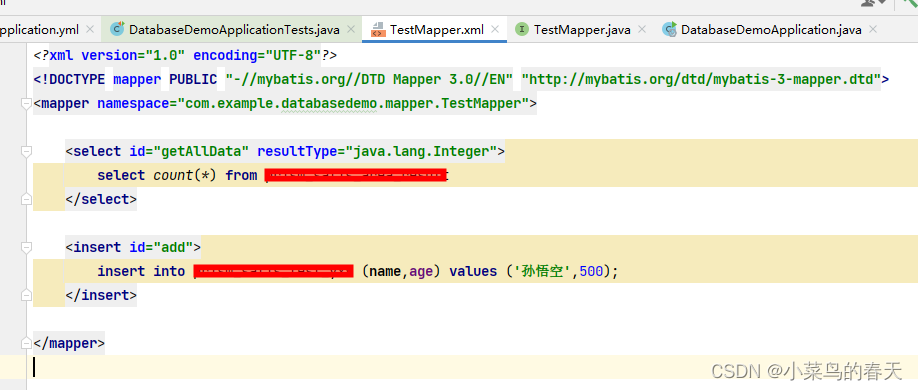
按照上面配置的mybatis.xml的位置,在resource下面新增一个mapper文件夹,并且写一个用来测试的TestMapper.xml
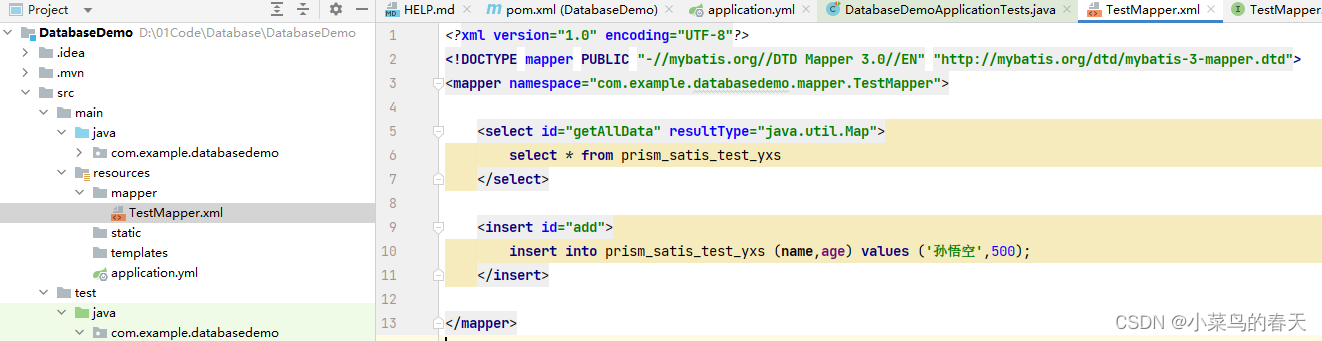
DOCTYPE mapper PUBLIC "-//mybatis.org//DTD Mapper 3.0//EN" "http://mybatis.org/dtd/mybatis-3-mapper.dtd">
<mapper namespace="com.example.databasedemo.mapper.TestMapper"><select id="getAllData" resultType="java.util.Map">select * from prism_satis_test_yxsselect><insert id="add">insert into prism_satis_test_yxs (name,age) values ('孙悟空',500);insert>
mapper>
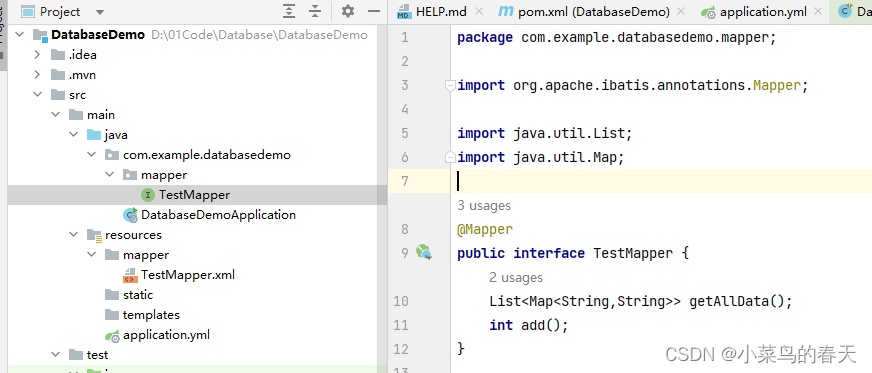
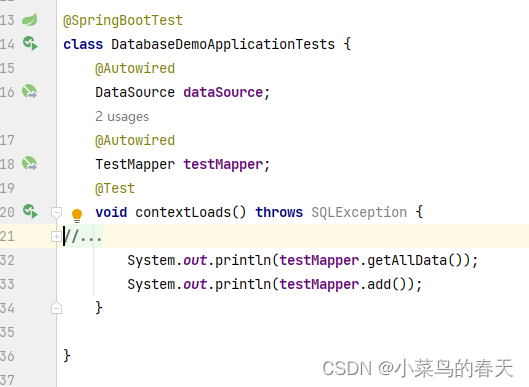
在com.example.databasedemo下同样建一个文件夹mapper用来存放mapper接口类,并新建一个TestMapper.java的接口类,标注为@Mapper类:
7,启动类保持不变,完整的项目结构和启动类如下:
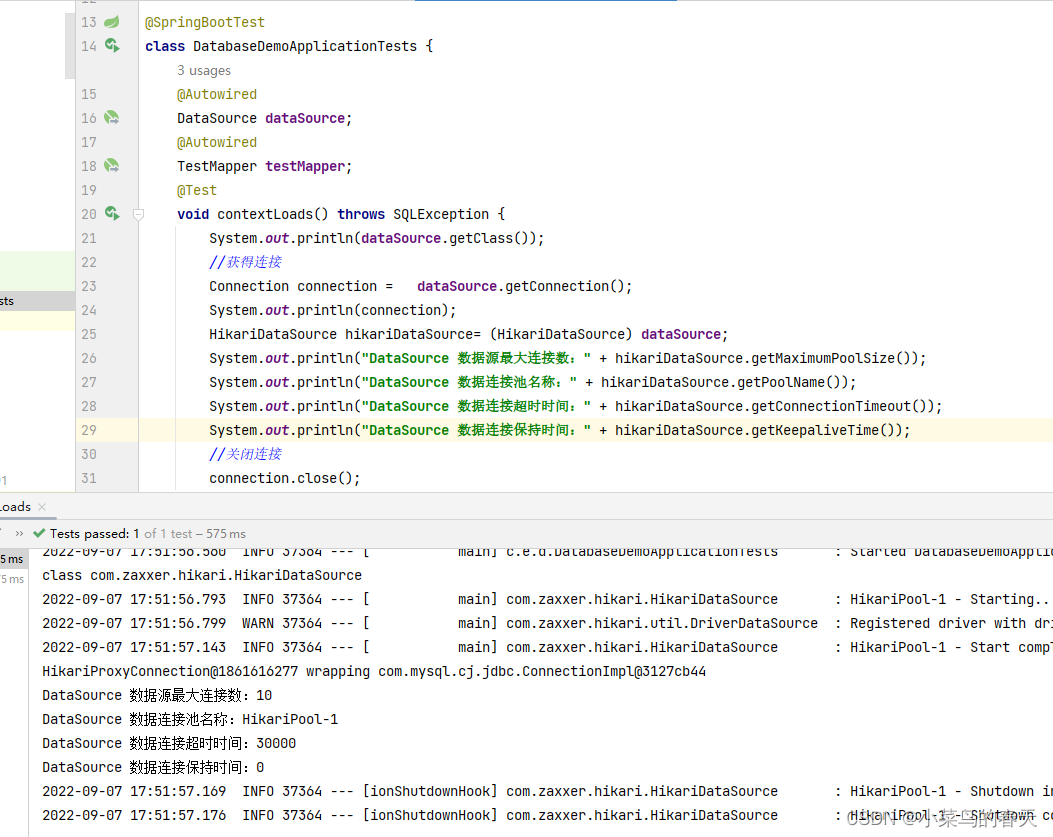
8,开始测试,如下可以看到数据被添加并能正常查询了:

ps:查看当前连接信息,确认连接池是否生效
多数据源(AOP方式)
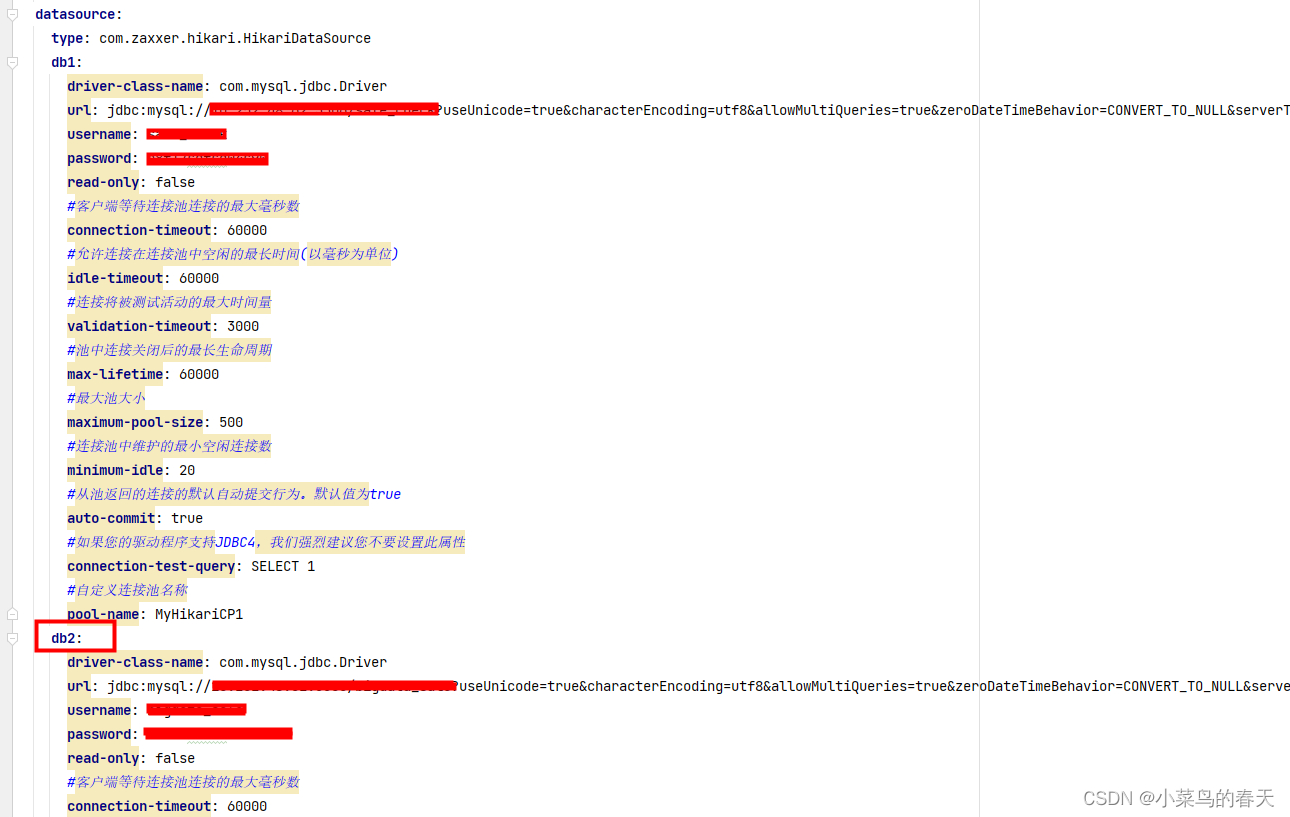
1,新建工程(同上),配置多数据源(支持多种数据源如mysql,ptsql等,可混合):
注意:配置多数据源时,需要把url换成jdbc-url(必须),有些版本中driverClassName要换成driver-class-name
2,配置动态数据源
用于存放动态数据库信息
public class DataSourceContextHolder {public static final String DEFAULT_DS = "db1";private static final ThreadLocal<String> contextHolder = new ThreadLocal<>();// 设置数据源名public static void setDB(String dbType) {contextHolder.set(dbType);}// 获取数据源名public static String getDB() {return (contextHolder.get());}// 清除数据源名public static void clearDB() {contextHolder.remove();}
}
public class DynamicDataSource extends AbstractRoutingDataSource {@Overrideprotected Object determineCurrentLookupKey() {if(DataSourceContextHolder.getDB() == null){DataSourceContextHolder.setDB(DataSourceContextHolder.DEFAULT_DS);}return DataSourceContextHolder.getDB();}
}
@Configuration
public class DataSourceConfig {@Bean(name = "db1")@ConfigurationProperties(prefix = "spring.datasource.db1") // application.yml中对应属性的前缀public HikariDataSource dataSource1() {return DataSourceBuilder.create().type(HikariDataSource.class).build();}@Bean(name = "db2")@ConfigurationProperties(prefix = "spring.datasource.db2") // application.yml中对应属性的前缀public HikariDataSource dataSource2() {return DataSourceBuilder.create().type(HikariDataSource.class).build();}@Bean(name="dynamicDataSource")@Primarypublic DataSource dynamicDataSource() {DynamicDataSource dynamicDataSource = new DynamicDataSource();// 默认数据源dynamicDataSource.setDefaultTargetDataSource(dataSource1());// 配置多数据源Map<Object, Object> dsMap = new HashMap();dsMap.put("db1", dataSource1());dsMap.put("db2", dataSource2());dynamicDataSource.setTargetDataSources(dsMap);return dynamicDataSource;}/*** 配置@Transactional注解事物* @return*/@Beanpublic PlatformTransactionManager transactionManager() {return new DataSourceTransactionManager(dynamicDataSource());}
}
3,定义注解,用来指定目标数据库
@Inherited
@Retention(RetentionPolicy.RUNTIME)
@Target({ElementType.TYPE,ElementType.METHOD})
public @interface DS {String value() default "db1";
}
4,定义切面,使用注解切换数据库
@Aspect
@Component
public class DynamicDataSourceAspect {@Before("@within(ds)")public void before(DS ds){DataSourceContextHolder.setDB(ds.value());}@After("@within(ds)")public void after(DS ds){DataSourceContextHolder.clearDB();}@Before("@annotation(ds)")public void beforeS(DS ds){DataSourceContextHolder.setDB(ds.value());}@After("@annotation(ds)")public void afterS(DS ds){DataSourceContextHolder.clearDB();}
}
4,开始测试
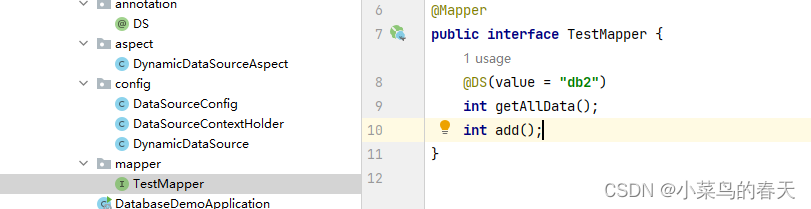
启动类不变,如此就能看到按照@DS标注的value信息动态选择了不同的数据库
多数据源(按照Mapper目录结构方式)
1,新建项目,配置多数据源(同上)
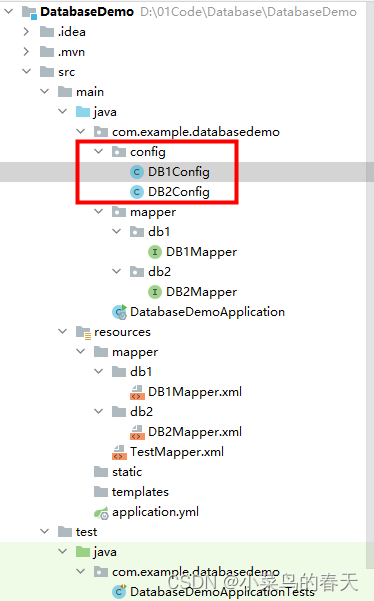
2,按照下图创建mapper,用于存放不同数据库的mapper

@Mapper
public interface DB1Mapper {int add();
}
@Mapper
public interface DB2Mapper {int getAllData();
}
3,按照下图创建config用于配置不同的数据源
@Configuration
@MapperScan(basePackages = "com.example.databasedemo.mapper.db1",sqlSessionFactoryRef = "db1SqlSessionFactory")
public class DB1Config {@Bean("db1DataSource")@ConfigurationProperties(prefix = "spring.datasource.db1") //读取application.yml中的配置参数映射成为一个对象public DataSource getDb1DataSource(){return DataSourceBuilder.create().build();}@Bean("db1SqlSessionFactory")public SqlSessionFactory db1SqlSessionFactory(@Qualifier("db1DataSource") DataSource dataSource) throws Exception {SqlSessionFactoryBean bean = new SqlSessionFactoryBean();bean.setDataSource(dataSource);// mapper的xml形式文件位置必须要配置,不然将报错:no statement (这种错误也可能是mapper的xml中,namespace与项目的路径不一致导致)bean.setMapperLocations(new PathMatchingResourcePatternResolver().getResources("classpath*:mapper/db1/*.xml"));return bean.getObject();}@Bean("db1SqlSessionTemplate")public SqlSessionTemplate db1SqlSessionTemplate(@Qualifier("db1SqlSessionFactory") SqlSessionFactory sqlSessionFactory){return new SqlSessionTemplate(sqlSessionFactory);}
}
@Configuration
@MapperScan(basePackages = "com.example.databasedemo.mapper.db2",sqlSessionFactoryRef = "db2SqlSessionFactory")
public class DB2Config {@Bean("db2DataSource")@ConfigurationProperties(prefix = "spring.datasource.db2") //读取application.yml中的配置参数映射成为一个对象public DataSource getDb1DataSource(){return DataSourceBuilder.create().build();}@Bean("db2SqlSessionFactory")public SqlSessionFactory db1SqlSessionFactory(@Qualifier("db2DataSource") DataSource dataSource) throws Exception {SqlSessionFactoryBean bean = new SqlSessionFactoryBean();bean.setDataSource(dataSource);// mapper的xml形式文件位置必须要配置,不然将报错:no statement (这种错误也可能是mapper的xml中,namespace与项目的路径不一致导致)bean.setMapperLocations(new PathMatchingResourcePatternResolver().getResources("classpath*:mapper/db2/*.xml"));return bean.getObject();}@Bean("db2SqlSessionTemplate")public SqlSessionTemplate db1SqlSessionTemplate(@Qualifier("db2SqlSessionFactory") SqlSessionFactory sqlSessionFactory){return new SqlSessionTemplate(sqlSessionFactory);}
}
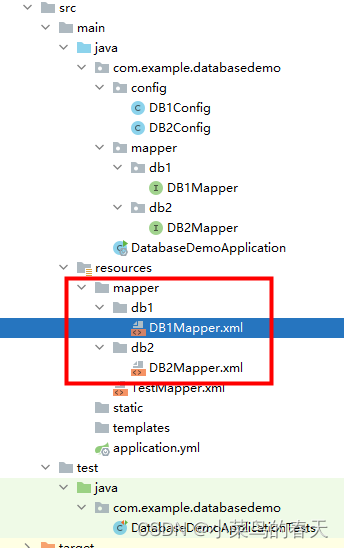
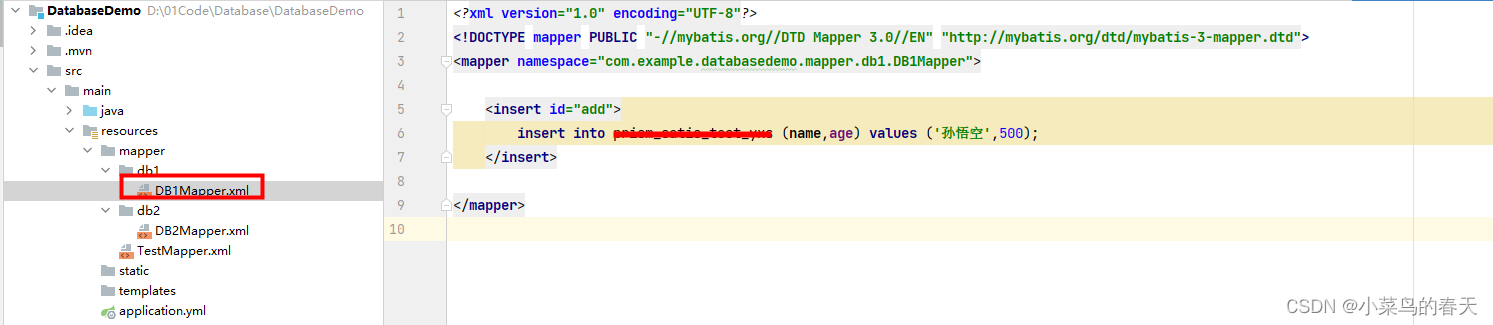
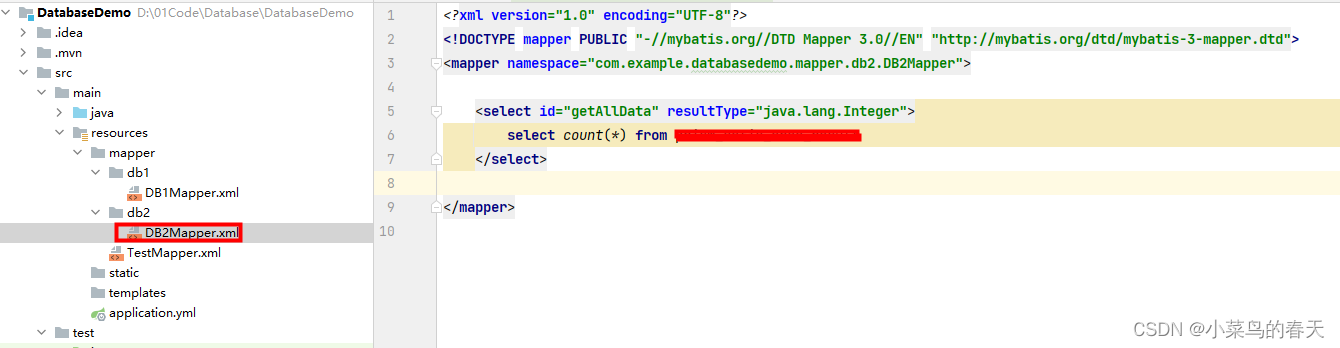
4,在resource中创建mapper结构,用于存放不同数据源下的mapper.xml文件
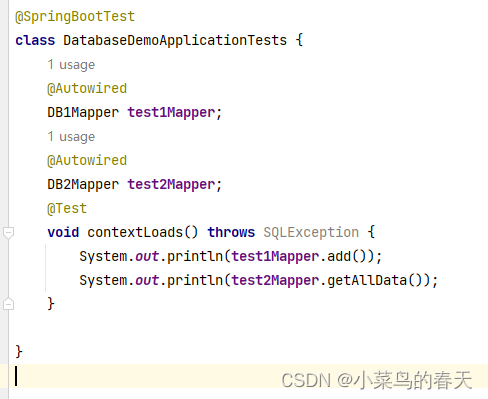
5,开始测试,亲测无误
使用插件方式(推荐)
- 创建Springboot项目(同上)
- pom中添加动态数据源插件com.baomidou
<dependency><groupId>com.baomidougroupId><artifactId>dynamic-datasource-spring-boot-starterartifactId><version>3.5.1version>
dependency>
- yml中配置多数据源信息
server:port: 8080
spring:application:name: mydbtestdatasource:dynamic:primary: master #设置默认的数据源或者数据源组strict: truedruid:initial-size: 10max-active: 100min-idle: 20max-wait: 5000phy-timeout-millis: 7200000remove-abandoned: truetest-while-idle: truetest-on-return: falsetest-on-borrow: falsevalidation-query: SELECT 1validation-query-timeout: 1time-between-eviction-runs-millis: 15000log-abandoned: falseconnection-properties: socketTimeout=30000datasource:master:driver-class-name: com.mysql.jdbc.Driverurl: jdbc:mysql://**:3306/information_sharing?characterEncoding=utf8&useSSL=falseusername: rootpassword: **dbocr:driver-class-name: com.mysql.jdbc.Driverurl: jdbc:mysql://**:3306/ocr_collect?useUnicode=true&characterEncoding=utf8&serverTimezone=Asia/Shanghaiusername: ocr_userpassword: **mybatis:mapper-locations: classpath:mapper/**/*.xml,classpath:mapper/*.xml
- 编写Mapper,使用@DS(“数据源名称”)选择对应数据源,默认数据源不需要写
import com.baomidou.dynamic.datasource.annotation.DS;
import org.apache.ibatis.annotations.Mapper;@Mapper
public interface DBMapper {@DS("dbocr")String getTitle();int getUserCount();
}
- 编写Mapper.xml
DOCTYPE mapper PUBLIC "-//mybatis.org//DTD Mapper 3.0//EN" "http://mybatis.org/dtd/mybatis-3-mapper.dtd">
<mapper namespace="com.example.databasedemo.mapper.DBMapper"><select id="getTitle" resultType="java.lang.String">select titlefrom data_crawler_car_newswhere enabled = trueand source not in ('和讯汽车')order by news_time desc limit 1select><select id="getUserCount" resultType="java.lang.Integer">SELECT count(*)FROM app_userselect>
mapper>
- 测试
@SpringBootTest
class DatabaseDemoApplicationTests {
@AutowiredDBMapper dbMapper;@Testvoid contextLoads() throws SQLException {System.out.println(dbMapper.getTitle());System.out.println(dbMapper.getUserCount());}}
本文来自互联网用户投稿,文章观点仅代表作者本人,不代表本站立场,不承担相关法律责任。如若转载,请注明出处。 如若内容造成侵权/违法违规/事实不符,请点击【内容举报】进行投诉反馈!