图片上传api——chevereto个人图床搭建后端发送请求
目录
- chevereto个人图床
- chevereto图床介绍
- chevereto图床效果展示
- chevereto图床搭建步骤
- 使用chevereto图床API开发
- 1. 测试chevereto的api接口(Postman测试)
- 2. 使用Java进行开发图床的图片上传功能
- 3. 测试上传接口
- 后端发送请求的方法
- 源码下载
chevereto个人图床
chevereto图床介绍
- Chevereto是一个免费图床建站源码是一个允许用户创建自己的照片展示专题的网站程序,类似于图库,非常适合自己搭建图床平台,易于部署,无需sql数据库,支持图片的批量上传,支持主题的定制。
- Chevereto采用PHP语言开发的网络相册脚本程序,支持多语言,提供中文语言包的下载的开源在线图片存储分享服务系统,支持本地上传和在线获取两种图像上传方式,并集成了TinyURL网址缩短服务。
- Chevereto这套程序可以像WordPress一样随意架设在任何空间上。而它的功能除了一般图片空间单纯的从电脑上传图片外,也支援利用网址也可以上传,最值得一说的是还有TinyURL的缩短网址的功能可以使用,因此这套Chevereto可以说是比市面上的图片空间好太多了。
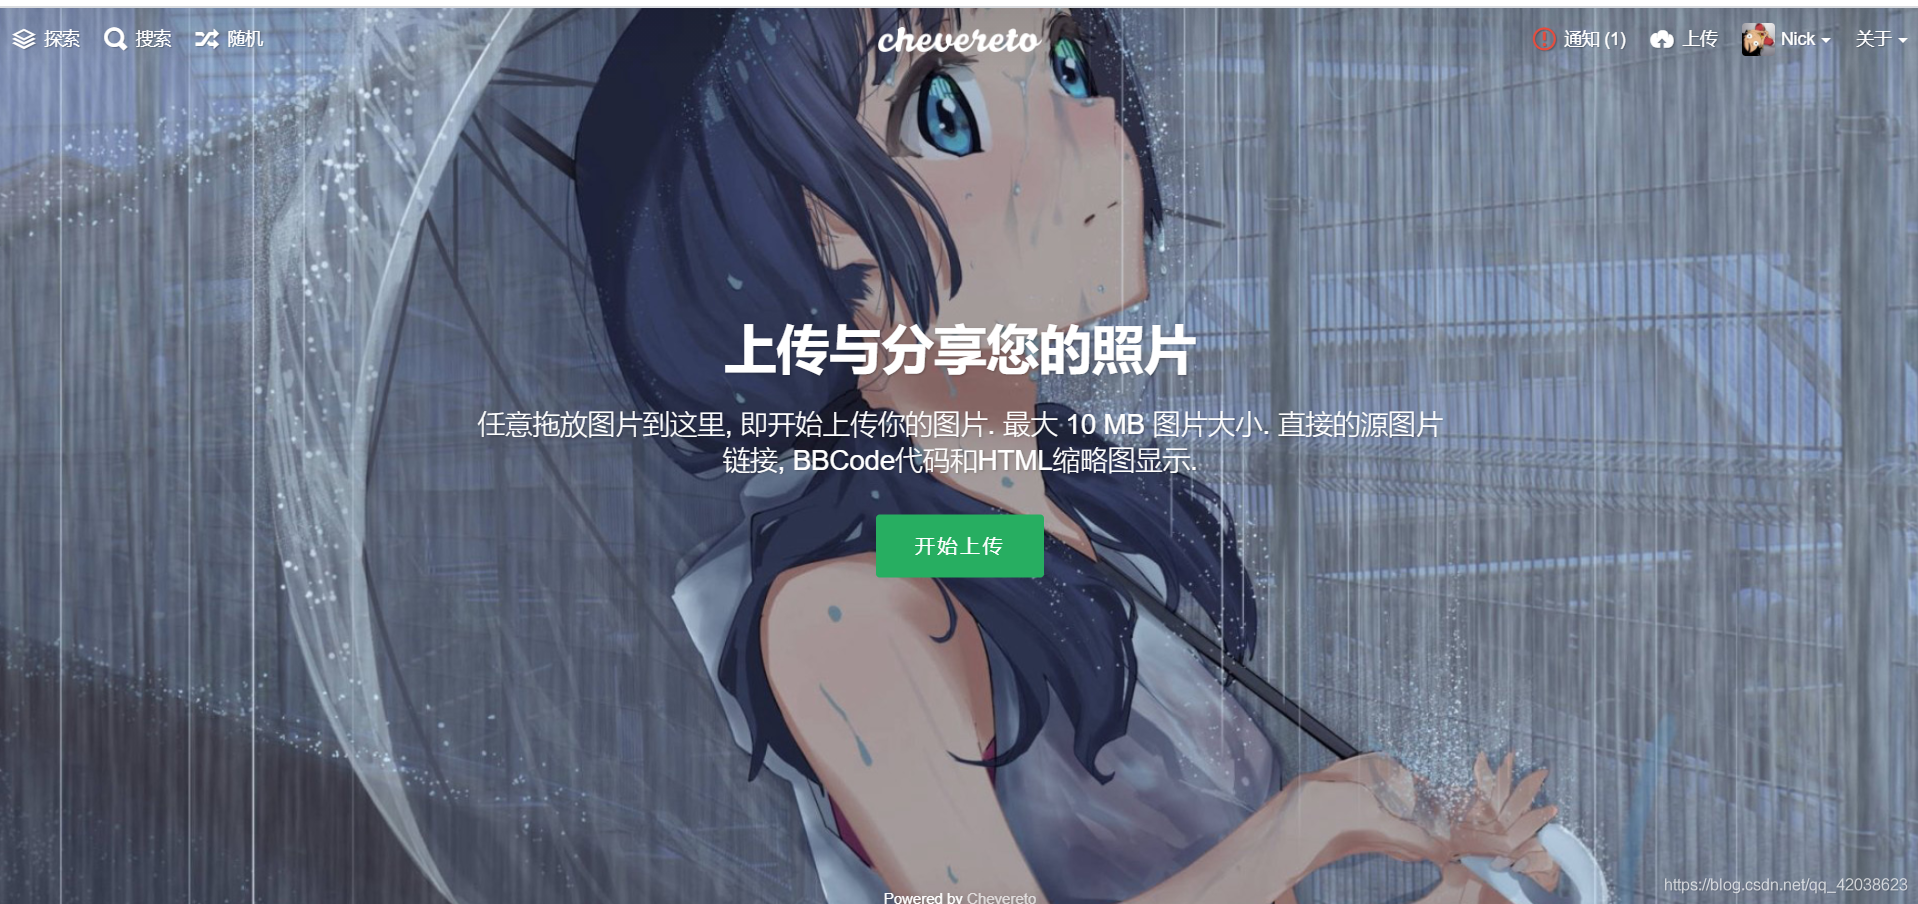
chevereto图床效果展示
本人的图床网站:http://images.qkongtao.cn/
chevereto图床搭建步骤
-
先去下载chevereto程序,下载地址:https://github.com/Chevereto/Chevereto-Free
或者网盘下载:
链接:https://pan.baidu.com/s/1HtvvvT9EKCvqNVDHOtCsDw
提取码:0qzz -
我们把压缩包的文件解压出来用FTP上传到网站的根目录。环境面板不同根目录地址各不相同我就不介绍了。总之上传到网站根目录下。

-
修改这个压缩包解压后所有文件的权限,最好修改成777。
-
自己先创建好数据库,通过网址进入程序
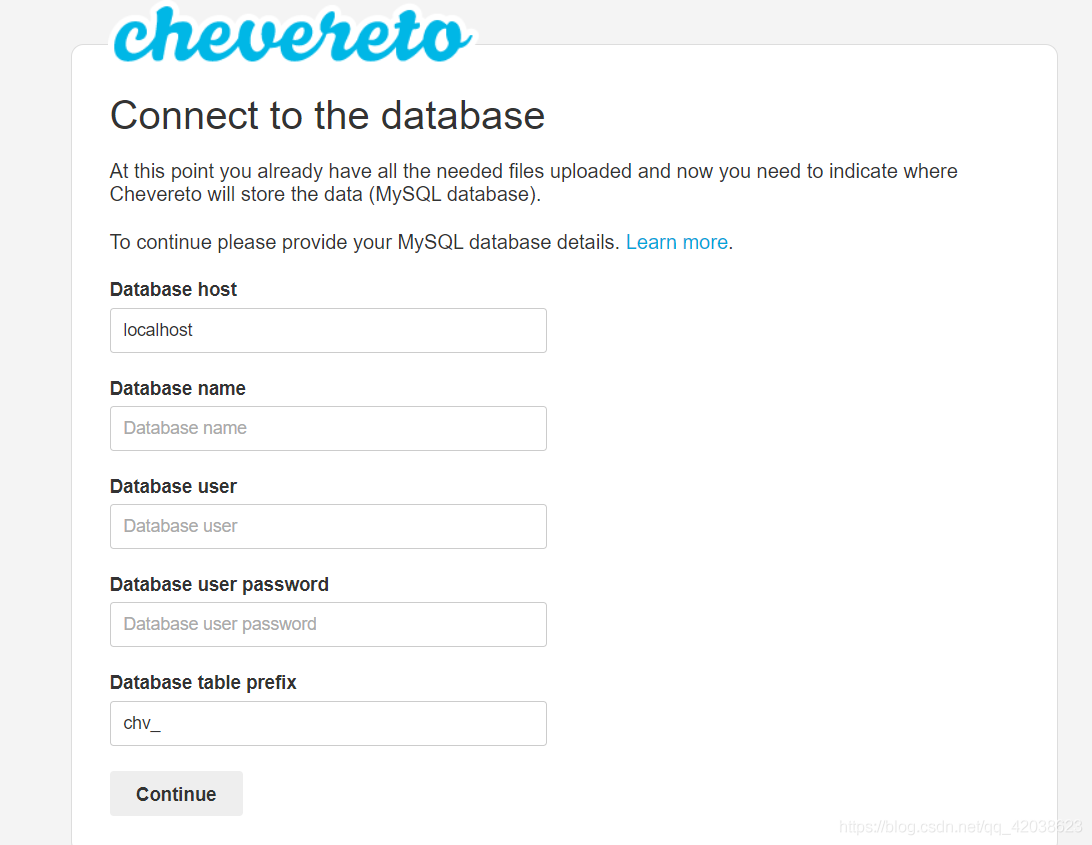
5. 根据要求填写,还有填写相关管理员的信息,填写成功后,再次进入该网址,就直接进入了chevereto图床首页。
6. 进入之后可以登录进入仪盘表对网站进行美化。
使用chevereto图床API开发
chevereto图床API开发可以查阅文档:http://ch.cndrew.cn/cn/API/API%20V1/#api_4
里面也有chevereto的使用方法。
下面就来说说怎么把chevereto图床应用到项目中:
1. 测试chevereto的api接口(Postman测试)
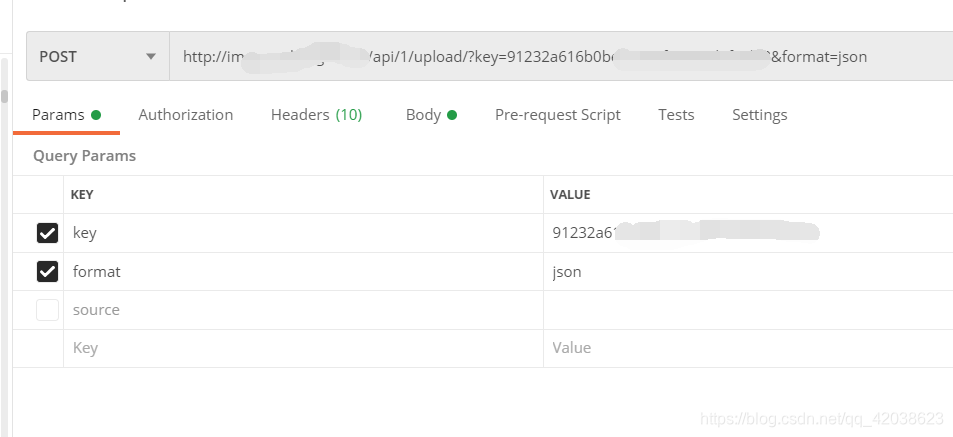
- 使用post请求(http://你的图床网址/api/1/upload/?key=***********&format=json)
- post请求也需要携带url参数(?key=************&format=json)
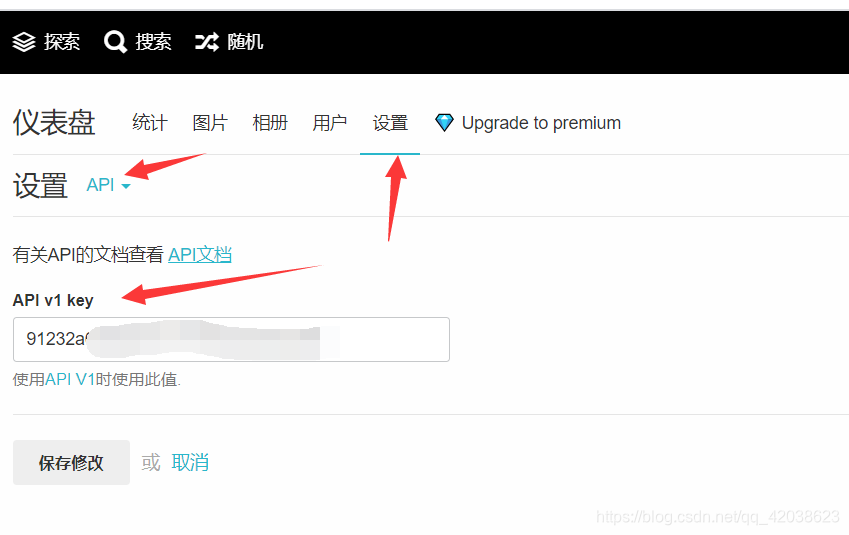
key可以在网址仪盘表后台获得 - 最后在body里面携带文件参数
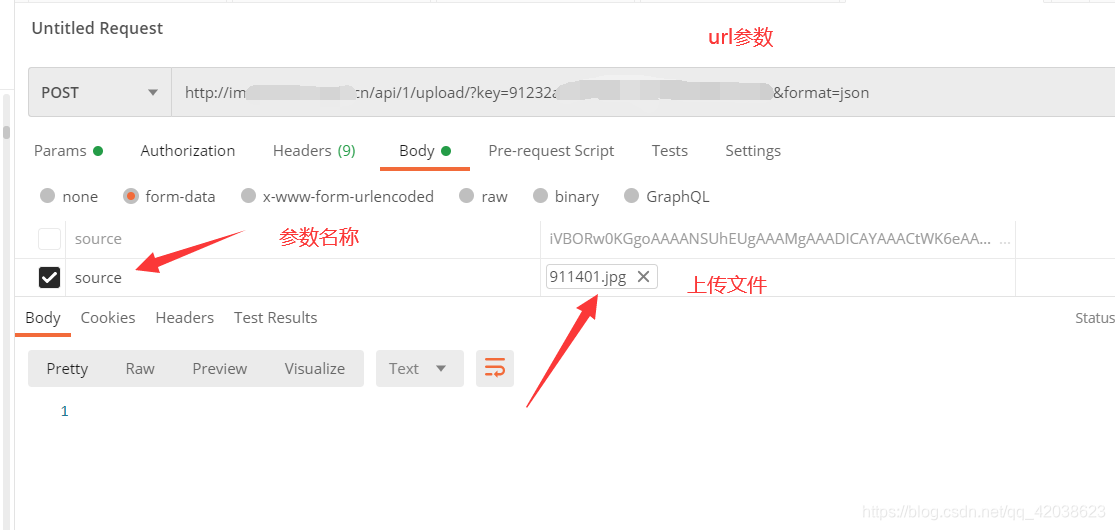
- 请求成功后返回
{"status_code": 200,"success": {"message": "image uploaded","code": 200},"image": {"name": "911401","extension": "jpg","size": "606003","width": "1920","height": "1080","date": "2021-04-02 00:21:17","date_gmt": "2021-04-01 15:21:17","title": "911401","description": null,"nsfw": "0","storage_mode": "datefolder","storage_id": null,"md5": "4efe43e242baa28c623c1e3efdff1b39","source_md5": null,"original_filename": "911401.jpg","original_exifdata": null,"views": "0","category_id": null,"chain": "7","thumb_size": "9318","medium_size": "33633","expiration_date_gmt": null,"likes": "0","is_animated": "0","file": {"resource": {"type": "path","chain": {"image": "/www/wwwroot/root/Chevereto-Free-master/images/2021/04/02/911401.jpg","thumb": "/www/wwwroot/root/Chevereto-Free-master/images/2021/04/02/911401.th.jpg","medium": "/www/wwwroot/root/Chevereto-Free-master/images/2021/04/02/911401.md.jpg"}}},"id_encoded": "l41","filename": "911401.jpg","mime": "image/jpeg","url": "http://images.qkongtao.cn/images/2021/04/02/911401.jpg","url_viewer": "http://images.qkongtao.cn/image/l41","image": {"filename": "911401.jpg","name": "911401","mime": "image/jpeg","extension": "jpg","url": "http://images.qkongtao.cn/images/2021/04/02/911401.jpg","size": "606003"},"thumb": {"filename": "911401.th.jpg","name": "911401.th","mime": "image/jpeg","extension": "jpg","url": "http://images.qkongtao.cn/images/2021/04/02/911401.th.jpg","size": "9318"},"medium": {"filename": "911401.md.jpg","name": "911401.md","mime": "image/jpeg","extension": "jpg","url": "http://images.qkongtao.cn/images/2021/04/02/911401.md.jpg","size": "33633"},"size_formatted": "606 KB","display_url": "http://images.qkongtao.cn/images/2021/04/02/911401.md.jpg","display_width": "1920","display_height": "1080","views_label": "次浏览","likes_label": "喜欢","how_long_ago": "刚刚","date_fixed_peer": "2021-04-01 15:21:17","title_truncated": "911401","title_truncated_html": "911401","is_use_loader": false},"status_txt": "OK"
}
2. 使用Java进行开发图床的图片上传功能
步骤是这样的:
- 先在后端配置好请求的参数和路径
- 然后再Java后端发送http请求,传入的文件参数正是客户端的文件
- 再在后端接收Java后端发送http请求后响应回来的数据
- 最后可以对返回的数据进行处理:比如重要信息存入数据库、响应给客户端的数据进行自定义封装等等
- 导入坐标
<dependency><groupId>org.apache.httpcomponentsgroupId><artifactId>httpclientartifactId><version>4.5.6version>dependency><dependency><groupId>org.apache.httpcomponentsgroupId><artifactId>httpmimeartifactId><version>4.5.6version>dependency>
- 编写工具类CheveretoUtil.java
package cn.kt.qinu_demo.utils;import org.springframework.web.multipart.MultipartFile;
import sun.misc.BASE64Encoder;/*** @author tao* @date 2021-03-28 21:58* 概要:*/
public class CheveretoUtil {//文件上传URLpublic static final String CHEVERETO_URL = "http://你的网址/api/1/upload/";//Chevereto API Keypublic static final String CHEVERETO_API_KEY = "你的key";/*** MultipartFile转BASE64字符串** @param file* @return* @throws Exception*/public static String multipartFileToBASE64(MultipartFile file) throws Exception {BASE64Encoder base64Encoder = new BASE64Encoder();String base64EncoderImg = base64Encoder.encode(file.getBytes());return base64EncoderImg;}public static String upload(MultipartFile file) throws Exception {String jsonObject = null;try {//jsonObject = OkHttpClientUtils.sendPost(CheveretoUtil.CHEVERETO_URL + "?key=" + CHEVERETO_API_KEY + "&format=json", file);//jsonObject = HttpClientUtil.gettestRestTemplate(file, CheveretoUtil.CHEVERETO_URL + "?key=" + CHEVERETO_API_KEY + "&format=json");jsonObject = HttpClientUtil.gettesthttpclient(file, CheveretoUtil.CHEVERETO_URL + "?key=" + CHEVERETO_API_KEY + "&format=json");} catch (Exception e) {e.printStackTrace();}System.out.println(jsonObject);return jsonObject;}
}
- 编写携带文件发送post请求的工具类HttpClientUtil.java
package cn.kt.qinu_demo.utils;import lombok.SneakyThrows;
import org.apache.http.Consts;
import org.apache.http.HttpResponse;
import org.apache.http.client.config.RequestConfig;
import org.apache.http.client.methods.HttpPost;
import org.apache.http.entity.ContentType;
import org.apache.http.entity.mime.HttpMultipartMode;
import org.apache.http.entity.mime.MultipartEntityBuilder;
import org.apache.http.impl.client.CloseableHttpClient;
import org.apache.http.impl.client.HttpClients;
import org.apache.http.util.EntityUtils;
import org.apache.poi.ss.formula.functions.T;
import org.springframework.beans.factory.annotation.Autowired;
import org.springframework.core.io.ByteArrayResource;
import org.springframework.http.HttpEntity;
import org.springframework.http.HttpHeaders;
import org.springframework.http.MediaType;
import org.springframework.util.LinkedMultiValueMap;
import org.springframework.util.MultiValueMap;
import org.springframework.web.client.RestTemplate;
import org.springframework.web.multipart.MultipartFile;import javax.annotation.PostConstruct;
import java.io.IOException;/*** @author tao* @date 2021-03-29 22:55* 概要:*/
public class HttpClientUtil {/*** @param file* @param url  发送携带file的post请求,接收返回的数据*/@SneakyThrowspublic static String gettesthttpclient(MultipartFile file, String url) {System.out.println(url);CloseableHttpClient httpclient = HttpClients.createDefault();RequestConfig requestConfig = RequestConfig.custom().setConnectionRequestTimeout(10000).setConnectTimeout(5000).build();HttpPost httpPost = new HttpPost(url);MultipartEntityBuilder entityBuilder = MultipartEntityBuilder.create();// 解决中文文件名乱码问题entityBuilder.setMode(HttpMultipartMode.BROWSER_COMPATIBLE);entityBuilder.setCharset(Consts.UTF_8);ContentType contentType = ContentType.create(ContentType.TEXT_PLAIN.getMimeType(), Consts.UTF_8);entityBuilder.addBinaryBody("source", file.getInputStream(), ContentType.DEFAULT_BINARY, file.getOriginalFilename());httpPost.setEntity(entityBuilder.build());httpPost.setConfig(requestConfig);HttpResponse execute = httpclient.execute(httpPost);String flag = EntityUtils.toString(execute.getEntity());return flag;}
}
- 编写CheveretoController.java
package cn.kt.qinu_demo.controller;import cn.kt.qinu_demo.utils.CheveretoUtil;
import com.alibaba.fastjson.JSON;
import com.alibaba.fastjson.JSONObject;
import lombok.extern.slf4j.Slf4j;
import org.springframework.web.bind.annotation.ResponseBody;
import org.springframework.web.bind.annotation.RestController;
import org.springframework.web.bind.annotation.PostMapping;
import org.springframework.web.bind.annotation.RequestMapping;
import org.springframework.web.multipart.MultipartFile;import java.util.*;/*** @author tao* @date 2021-03-28 21:57* 概要:*/@RestController
@Slf4j
@RequestMapping("chevereto")
public class CheveretoController {/*** 商品图片上传** @param file* @return*/@PostMapping("/upload")@ResponseBodypublic JSONObject upload(MultipartFile file) throws Exception {String str = CheveretoUtil.upload(file);//将带有json格式的字符串转换为json对象JSONObject jsonObject = JSON.parseObject(str);/**----------------------- 编写存储和返回需要的相关逻辑 ------------------------- */return jsonObject;}
}
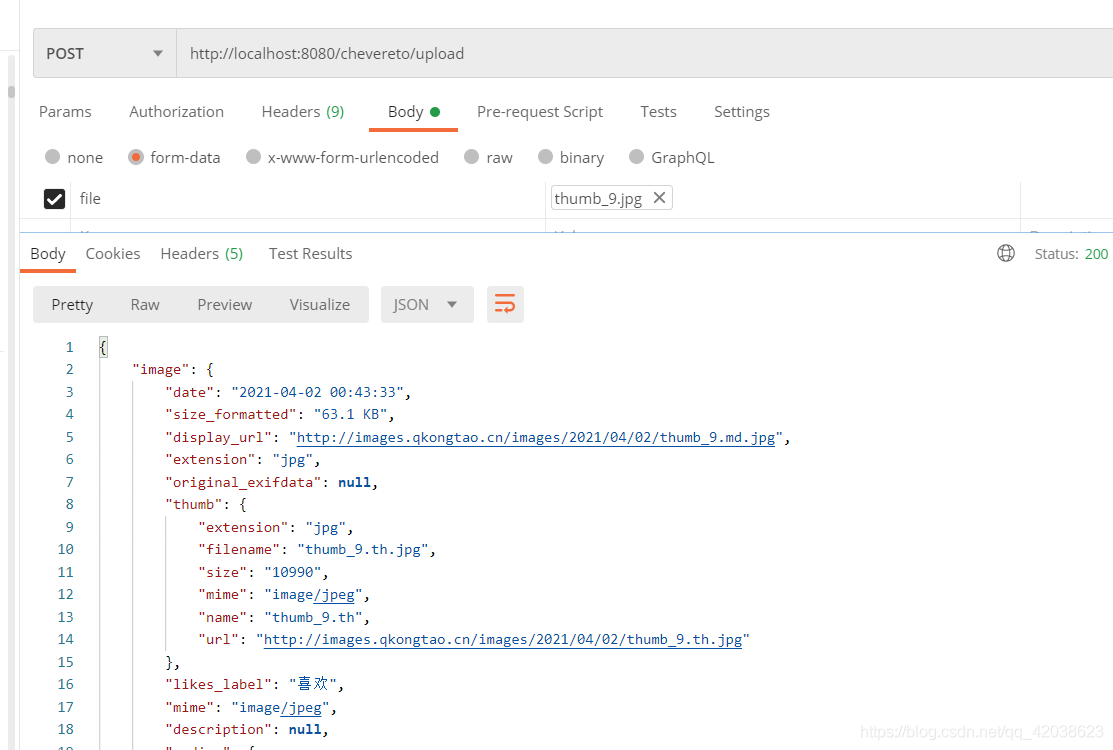
3. 测试上传接口
url:http://localhost:8080/chevereto/upload
method:post
参数:body(file:file)
后端发送请求的方法
- 之前做项目的时候也遇到过需要在后端发送请求来获取数据
具体可以参考我的这篇博客:http://qkongtao.cn/?p=514#1_java - 使用okhttp3类
具体细节可以参考以下代码(测试可行)
package cn.kt.qinu_demo.utils;import lombok.extern.slf4j.Slf4j;
import okhttp3.*;import java.io.IOException;
import java.util.Iterator;
import java.util.Map;
import java.util.concurrent.TimeUnit;/*** @author tao* @date 2021-03-28 22:00* 概要:OkHttp 工具类*/
@Slf4j
public class OkHttpClientUtils {private static final int READ_TIMEOUT = 150;private static final int CONNECT_TIMEOUT = 100;private static final int WRITE_TIMEOUT = 60;private static final MediaType JSON = MediaType.parse("application/json; charset=utf-8");private static final byte[] LOCKER = new byte[0];private static OkHttpClientUtils mInstance;private static OkHttpClient okHttpClient = new OkHttpClient();private OkHttpClientUtils() {okhttp3.OkHttpClient.Builder clientBuilder = new okhttp3.OkHttpClient.Builder();// 读取超时clientBuilder.readTimeout(READ_TIMEOUT, TimeUnit.SECONDS);// 连接超时clientBuilder.connectTimeout(CONNECT_TIMEOUT, TimeUnit.SECONDS);//写入超时clientBuilder.writeTimeout(WRITE_TIMEOUT, TimeUnit.SECONDS);okHttpClient = clientBuilder.build();}/*** 单例模式获取 NetUtils** @return {@link OkHttpClientUtils}*/public static OkHttpClientUtils getInstance() {if (mInstance == null) {synchronized (LOCKER) {if (mInstance == null) {mInstance = new OkHttpClientUtils();}}}return mInstance;}/*** GET,同步方式,获取网络数据** @param url 请求地址* @return {@link Response}*/public Response getData(String url) {// 构造 RequestRequest.Builder builder = new Request.Builder();Request request = builder.get().url(url).build();System.out.println(request);// 将 Request 封装为 CallCall call = okHttpClient.newCall(request);System.out.println(call);// 执行 Call,得到 ResponseResponse response = null;try {response = call.execute();} catch (IOException e) {e.printStackTrace();}return response;}/*** POST 请求,同步方式,提交数据** @param url        请求地址* @param bodyParams 请求参数* @return {@link Response}*/public Response postData(String url, Map<String, String> bodyParams) {// 构造 RequestBodyRequestBody body = setRequestBody(bodyParams);// 构造 RequestRequest.Builder requestBuilder = new Request.Builder();Request request = requestBuilder.post(body).url(url).build();// 将 Request 封装为 CallCall call = okHttpClient.newCall(request);// 执行 Call,得到 ResponseResponse response = null;try {response = call.execute();} catch (IOException e) {e.printStackTrace();}return response;}/*** 同步 POST 请求,使用 JSON 格式作为参数** @param url  请求地址* @param json JSON 格式参数* @return 响应结果* @throws IOException 异常*/public String postJson(String url, String json) throws IOException {RequestBody body = RequestBody.create(JSON, json);Request request = new Request.Builder().url(url).post(body).build();Response response = okHttpClient.newCall(request).execute();if (response.isSuccessful()) {return response.body().string();} else {throw new IOException("Unexpected code " + response);}}/*** GET 请求,异步方式,获取网络数据** @param url       请求地址* @param myNetCall 回调函数*/public static void getDataAsync(String url, final MyNetCall myNetCall) {// 构造 RequestRequest.Builder builder = new Request.Builder();Request request = builder.get().url(url).build();// 将 Request 封装为 CallCall call = okHttpClient.newCall(request);// 执行 Callcall.enqueue(new Callback() {@Overridepublic void onFailure(Call call, IOException e) {myNetCall.failed(call, e);}@Overridepublic void onResponse(Call call, Response response) throws IOException {myNetCall.success(call, response);}});}/*** 构造 POST 请求参数** @param bodyParams 请求参数* @return {@link RequestBody}*/private RequestBody setRequestBody(Map<String, String> bodyParams) {RequestBody body = null;okhttp3.FormBody.Builder formEncodingBuilder = new okhttp3.FormBody.Builder();if (bodyParams != null) {Iterator<String> iterator = bodyParams.keySet().iterator();String key = "";while (iterator.hasNext()) {key = iterator.next().toString();formEncodingBuilder.add(key, bodyParams.get(key));}}body = formEncodingBuilder.build();return body;}/*** POST 请求,异步方式,提交数据** @param url        请求地址* @param bodyParams 请求参数* @param myNetCall  回调函数*/public void postDataAsync(String url, Map<String, String> bodyParams, final MyNetCall myNetCall) {// 构造 RequestBodyRequestBody body = setRequestBody(bodyParams);// 构造 RequestbuildRequest(url, myNetCall, body);}/*** 异步 POST 请求,使用 JSON 格式作为参数** @param url       请求地址* @param json      JSON 格式参数* @param myNetCall 回调函数* @throws IOException 异常*/public void postJsonAsync(String url, String json, final MyNetCall myNetCall) throws IOException {RequestBody body = RequestBody.create(JSON, json);// 构造 RequestbuildRequest(url, myNetCall, body);}/*** 构造 Request 发起异步请求** @param url       请求地址* @param myNetCall 回调函数* @param body      {@link RequestBody}*/private void buildRequest(String url, MyNetCall myNetCall, RequestBody body) {Request.Builder requestBuilder = new Request.Builder();Request request = requestBuilder.post(body).url(url).build();// 将 Request 封装为 CallCall call = okHttpClient.newCall(request);// 执行 Callcall.enqueue(new Callback() {@Overridepublic void onFailure(Call call, IOException e) {myNetCall.failed(call, e);}@Overridepublic void onResponse(Call call, Response response) throws IOException {myNetCall.success(call, response);}});}/*** 自定义网络回调接口*/public interface MyNetCall {/*** 请求成功的回调处理** @param call     {@link Call}* @param response {@link Response}* @throws IOException 异常*/void success(Call call, Response response) throws IOException;/*** 请求失败的回调处理** @param call {@link Call}* @param e    异常*/void failed(Call call, IOException e);}}
- 携带文件发送POST请求(如HttpClientUtil.java)
package cn.kt.qinu_demo.utils;import lombok.SneakyThrows;
import org.apache.http.Consts;
import org.apache.http.HttpResponse;
import org.apache.http.client.config.RequestConfig;
import org.apache.http.client.methods.HttpPost;
import org.apache.http.entity.ContentType;
import org.apache.http.entity.mime.HttpMultipartMode;
import org.apache.http.entity.mime.MultipartEntityBuilder;
import org.apache.http.impl.client.CloseableHttpClient;
import org.apache.http.impl.client.HttpClients;
import org.apache.http.util.EntityUtils;
import org.apache.poi.ss.formula.functions.T;
import org.springframework.beans.factory.annotation.Autowired;
import org.springframework.core.io.ByteArrayResource;
import org.springframework.http.HttpEntity;
import org.springframework.http.HttpHeaders;
import org.springframework.http.MediaType;
import org.springframework.util.LinkedMultiValueMap;
import org.springframework.util.MultiValueMap;
import org.springframework.web.client.RestTemplate;
import org.springframework.web.multipart.MultipartFile;import javax.annotation.PostConstruct;
import java.io.IOException;/*** @author tao* @date 2021-03-29 22:55* 概要:*/
public class HttpClientUtil {/*** @param file* @param url  发送携带file的post请求,接收返回的数据*/@SneakyThrowspublic static String gettesthttpclient(MultipartFile file, String url) {System.out.println(url);CloseableHttpClient httpclient = HttpClients.createDefault();RequestConfig requestConfig = RequestConfig.custom().setConnectionRequestTimeout(10000).setConnectTimeout(5000).build();HttpPost httpPost = new HttpPost(url);MultipartEntityBuilder entityBuilder = MultipartEntityBuilder.create();// 解决中文文件名乱码问题entityBuilder.setMode(HttpMultipartMode.BROWSER_COMPATIBLE);entityBuilder.setCharset(Consts.UTF_8);ContentType contentType = ContentType.create(ContentType.TEXT_PLAIN.getMimeType(), Consts.UTF_8);entityBuilder.addBinaryBody("source", file.getInputStream(), ContentType.DEFAULT_BINARY, file.getOriginalFilename());httpPost.setEntity(entityBuilder.build());httpPost.setConfig(requestConfig);HttpResponse execute = httpclient.execute(httpPost);String flag = EntityUtils.toString(execute.getEntity());return flag;}
}
源码下载
本次下载的项目源码包含
- 七牛云API文件上传源码(上一篇博客:文件上传——七牛云)
- chevereto图床API开发源码
链接如下
链接:https://pan.baidu.com/s/1Y6xrpSSTu68_-dp3pcBEOQ
提取码:tw2b
真的是为爱发电,希望大家多多点赞、关注、支持!
本文来自互联网用户投稿,文章观点仅代表作者本人,不代表本站立场,不承担相关法律责任。如若转载,请注明出处。 如若内容造成侵权/违法违规/事实不符,请点击【内容举报】进行投诉反馈!