Nginx系列(1):Nginx的离线安装及配置详解
目录
前言
1、准备依赖环境
1.1 首先查看Linux 的系统版本号
1.2 下载nginx、openssl、zlib、pcre
1.3 安装c++编译环境
1.4 安装openssl
1.5 安装PCRE
1.6 安装zlib
1.7 镜像文件下载
2、Nginx安装配置
2.1 安装Nginx
2.2 启动Nginx
2.3 Nginx基本操作
2.4 使用systemctl控制Nginx

前言
Nginx是一个高性能的HTTP和反向代理WEB服务器,同时也提供了IMAP/POP3/SMTP服务。Nginx是由伊戈尔·赛索耶夫为俄罗斯访问量第二的Rambler.ru站点(俄文:Рамблер)开发的,第一个公开版本0.1.0发布于2004年10月4日。
其将源代码以类BSD许可证的形式发布,因它的稳定性、丰富的功能集、示例配置文件和低系统资源的消耗而闻名。2011年6月1日,nginx 1.0.4发布。
Nginx是一款轻量级的Web 服务器/反向代理服务器及电子邮件(IMAP/POP3)代理服务器,在BSD-like 协议下发行。其特点是占有内存少,并发能力强,事实上nginx的并发能力在同类型的网页服务器中表现较好,中国大陆使用nginx网站用户有:百度、京东、新浪、网易、腾讯、淘宝等。
关于负载均衡及反向代理的具体理解和使用,后边将逐步展开总结,这里暂不赘述。下面直接进入安装配置步骤。
1、准备依赖环境
安装Nginx时,发现系统没有装各种依赖库,基本上是gcc、pre-devel、openssl-devel、zlib-devel,Linux又是内网环境,并不能用yum install来进行安装,这里就提供一种离线安装方式。
1.1 首先查看Linux 的系统版本号
cat /etc/redhat-release
[root@node01 /]# cat /etc/redhat-release
CentOS Linux release 7.6.1810 (Core)
1.2 下载nginx、openssl、zlib、pcre
自定义安装包路径:# mkdir/opt/xxx-opt/xxx
依赖包下载命令:
# wget http://nginx.org/download/nginx-1.19.0.tar.gz
# wget http://www.openssl.org/source/openssl-fips-2.0.16.tar.gz
# wget http://zlib.net/zlib-1.2.11.tar.gz
# wget http://ftp.pcre.org/pub/pcre/pcre-8.44.tar.gz
# wget http://mirror.koddos.net/gcc/releases/gcc-10.1.0.tar.gz
1.3 安装c++编译环境
【方式一】yum方式安装,如果有联网环境,或者配置好的yum源仓库,可以直接执行命令:
yum install gcc-c++
[root@localhost src]# yum install gcc-c++
省略安装内容...
期间会有确认提示输入y回车
Is this ok [y/N]:y
省略安装内容...
【方式二】rpm包离线安装
解压镜像CentOS-7-x86_64-DVD-1810.iso,进入到CentOS-7-x86_64-DVD-1810\Packages目录,这下面存储了很多rpm包。找到下面列出的rpm包,上传到CentOS机器任意位置。
| binutils-2.27-34.base.el7.x86_64.rpm cpp-4.8.5-36.el7.x86_64.rpm gcc-4.8.5-16.el7.x86_64.rpm gcc-c++-4.8.5-36.el7.x86_64.rpm glibc-2.17-260.el7.x86_64.rpm glibc-common-2.17-260.el7.x86_64.rpm glibc-devel-2.17-260.el7.x86_64.rpm glibc-headers-2.17-260.el7.x86_64.rpm kernel-headers-3.10.0-957.el7.x86_64.rpm libgcc-4.8.5-36.el7.x86_64.rpm libgomp-4.8.5-36.el7.x86_64.rpm libmpc-1.0.1-3.el7.x86_64.rpm libstdc++-devel-4.8.5-36.el7.x86_64.rpm mpfr-3.1.1-4.el7.x86_64.rpm zlib-1.2.7-18.el7.x86_64.rpm |
执行rpm包安装:rpm -Uvh ./*.rpm --nodeps --force
接下来,我们来逐步安装Nginx的相关依赖。
1.4 安装openssl
[root@localhost src]# tar zxvf openssl-fips-2.0.16.tar.gz
省略安装内容...
[root@localhost src]# cd openssl-fips-2.0.16
[root@localhost openssl-fips-2.0.16]# ./config &&make && make install注意:指定自定义安装目录,执行 ./config --prefix=/opt/openssl-opt/ openssl &&make && make install
省略安装内容...
注意:
在安装openssl时需要安装Perl5,否则报一下错误。Operating system: x86_64-whatever-linux2 You need Perl 5.
安装Perl 5的执行步骤为:
#需要安装 perl-5https://www.cpan.org/src/README.html
# wget https://www.cpan.org/src/5.0/perl-5.28.0.tar.gz
# tar -xzf perl-5.28.0.tar.gz
# cd perl-5.28.0
# ./Configure -des -Dprefix=$HOME/localperl && Make && make install
注意:
在执行Configure 命令时,如果出现cc: command not found 错误,先安装gcc--c++即可。
1.5 安装PCRE
[root@localhost src]# tar zxvf pcre-8.40.tar.gz
省略安装内容...
[root@localhost src]# cd pcre-8.40
[root@localhost pcre-8.40]# ./configure && make && make install
注意:指定自定义安装目录,执行 ./configure --prefix=/opt/pcre-opt/ pcre && make && make install
省略安装内容...
1.6 安装zlib
[root@localhost src]# tar zxvf zlib-1.2.11.tar.gz
省略安装内容...
[root@localhost src]# cd zlib-1.2.11
[root@localhost zlib-1.2.11]# ./configure && make && make install
注意:指定自定义安装目录,执行 ./configure --prefix=/opt/zlib-opt/zlib && make && make install
省略安装内容...
OK,经过上边步骤,我们已经完成Ngix依赖组件的安装。
1.7 镜像文件下载
CentOS 7.6-1810镜像ISO下载:http://vault.centos.org/7.6.1810/isos/x86_64/
CentOS 7.2-1511镜像ISO下载:Index of /7.2.1511/isos/x86_64
Nginx下载:Index of /download/
2、Nginx安装配置
Nginx安装包下载:# wget http://nginx.org/download/nginx-1.19.0.tar.gz
2.1 安装Nginx
自定义安装目录的路径:# mkdir/opt/nginx-opt/nginx
#解压nginx-1.19.0.tar.gz
[root@localhost nginx]# tar -zxvf nginx-1.19.0.tar.gz
省略安装内容...
[root@localhost nginx]# cd nginx-1.19.0
[root@localhost nginx-1.19.0]# ./configure && make && make install
注意:指定自定义安装目录,执行 ./configure --prefix=/opt/nginx-opt/nginx && make && make install
省略安装内容...
2.2 启动Nginx
先找一下nginx安装到什么位置上了。
[root@node01 sbin]# whereis nginx
nginx: /usr/sbin/nginx
这里我们执行的自定义安装,路径好像不是我们指定的哇。进入看下:
lrwxrwxrwx 1 root root 31 Jun 23 05:48 nginx -> /opt/nginx-opt/nginx/sbin/nginx
这个软连接指向了我们自定义安装路径。
创建软连接:ln -s /opt/nginx-opt/nginx/sbin/nginx /sbin/ && nginx && nginx -t
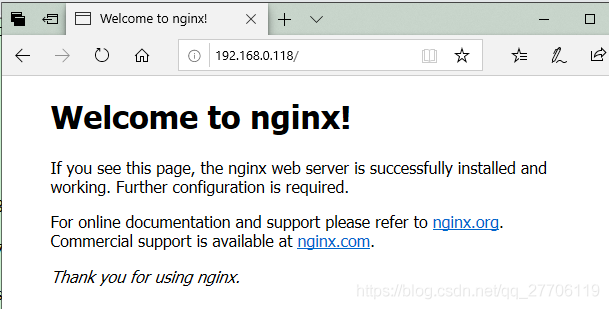
打开浏览器输入localhost或者http://192.168.0.118:80/会看到下图,说明nginx启动成功。
2.3 Nginx基本操作
启动
[root@localhost ~]# /opt/nginx-opt/nginx/sbin/nginx
停止/重启
[root@localhost ~]# /opt/nginx-opt/nginx/sbin/nginx -s stop(quit、reload)
命令帮助
[root@localhost ~]#/opt/nginx-opt/nginx/sbin/nginx -h
验证配置文件
[root@localhost ~]# /opt/nginx-opt/nginx/sbin/nginx -t
配置文件
[root@localhost ~]# vim/opt/nginx-opt/nginx/conf/nginx.conf
设置开机启动
[root@localhost ~]# systemctl enable nginx
2.4 使用systemctl控制Nginx
Systemctl是一个系统管理守护进程、工具和库的集合,用于取代System V、service和chkconfig命令,初始进程主要负责控制systemd系统和服务管理器。
通过Systemctl –help可以看到该命令主要分为:查询或发送控制命令给systemd服务,管理单元服务的命令,服务文件的相关命令,任务、环境、快照相关命令,systemd服务的配置重载,系统开机关机相关的命令。
【1】创建nginx.service
vim /usr/lib/systemd/system/nginx.service
【2】编辑nginx服务启动文件
| [Unit] Description=nginx -high performance web server After=network.target remote-fs.target nss-lookup.target [Service] Type=forking WorkingDirectory=/opt/nginx-opt/nginx ExecStartPre=/opt/nginx-opt/nginx/sbin/nginx -t -c \ /opt/nginx-opt/nginx/conf/nginx.conf ExecStart=/opt/nginx-opt/nginx/sbin/nginx -c \ /opt/nginx-opt/nginx/conf/nginx.conf ExecReload=/opt/nginx-opt/nginx/sbin/nginx -s reload ExecStop=/opt/nginx-opt/nginx/sbin/nginx -s stop PrivateTmp=true [Install] WantedBy=multi-user.target |
【3】使文件生效
Systemctl daemon-reload
【4】启动nginx
systemctl start nginx
【5】关闭nginx
systemctl stop nginx
【6】重启nginx
systemctl restart nginx
【7】开机启动
systemctl enable nginx
【8】测试
| [root@node01 sbin]# netstat -ntlp Jun 27 06:08:53 node01 systemd[1]: Starting nginx -high performance web server... Welcome to nginx!If you see this page, the nginx web server is successfully installed and For online documentation and support please refer to Thank you for using nginx. [root@node01 sbin]# |
愿你就像早晨八九点钟的太阳,活力十足,永远年轻。
本文来自互联网用户投稿,文章观点仅代表作者本人,不代表本站立场,不承担相关法律责任。如若转载,请注明出处。 如若内容造成侵权/违法违规/事实不符,请点击【内容举报】进行投诉反馈!