Spring Cloud系列(二十一) Spring Cloud Feign快速入门(Finchley.RC2版本)
前面已经相信介绍了Spring Cloud Ribbon 和 Spring Cloud Hystrix,了解了如何在微服务架构中实现客户端负载均衡的服务调用以及如何通过断路器来保护微服务应用。这两者将被作为基础工具类框架广泛地应用在各个微服务实现中,不仅包括我们自身的业务类微服务,也包括一些基础设施类微服务(比如网关)。而且这两个组件几乎都是同时出现的,那么我们是否可以有更高层次的封装来整合这两个组件以简化开发呢?Spring Cloud Feign就是这样一个工具,它基于Netflix Feign实现,整合了Spring Cloud Ribbon 和 Spring Cloud Hystrix,除了提供这两者的强大功能外,它还提供了一种声明式的Web服务客户端定义方式。
Spring Cloud Feign在Ribbon基础上做了封装,只需要创建一个接口并用注解的方式配置它,就可以完成对服务提供方的接口绑定,简化了在使用Ribbon时自行封装服务调用客户端的开发量。Spring Cloud Feign具备可插拔的注解支持,包括Feign注解和JAX-RS注解。同时,它在Netflix Feign的基础上扩展了对Spring MVC注解的支持,这对于习惯使用Spring MVC的开发者来说大大减少了学习成本。另外,Feign自身的一些组件如编码器和解码器等,也是以插拔的方式提供,在有需求的时候我们可以方便的扩展和替换它们。
版本说明
org.springframework.boot spring-boot-starter-parent 2.0.2.RELEASE UTF-8 UTF-8 1.8 Finchley.RC2
快速入门
现在来看看Feign如何通过它提供的声明式服务绑定功能来实现对该服务接口的调用。这里我们依然使用hello-service服务来提供服务,也就是eureka-client-vFinchley.Rc2工程。
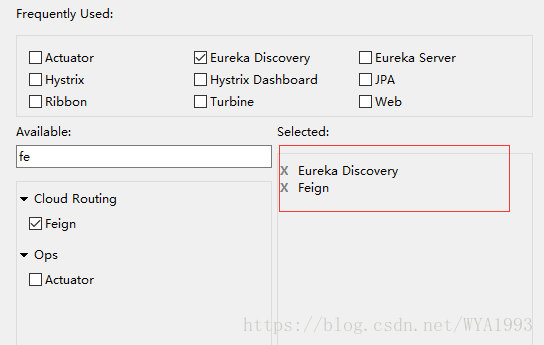
第一步,创建一个Spring Boot工程,命名feign-consumer-vFinchley.RC2,勾选如下依赖:
此时的pom文件(只展示了eureka客户端和feign的依赖)
org.springframework.cloud spring-cloud-starter-netflix-eureka-client
org.springframework.cloud spring-cloud-starter-openfeign
第二步,在应用主类Application添加@EnableFeignClients注解,开启Spring Cloud Feign的支持功能。
@EnableFeignClients
@EnableDiscoveryClient
@SpringBootApplication
public class Application {public static void main(String[] args) {SpringApplication.run(Application.class, args);}
}第三步,定义HelloService接口,通过@FeignClient注解指定服务名来绑定服务,然后使用Spring MVC的注解来绑定具体该服务提供的REST接口。
@FeignClient("hello-service")
public interface HelloService {@GetMapping("hello")String hello();
}
注意:服务名不区分大小写,所以这里大写“HELLO-SERVICE”或者小写“hello-service”都可以。另外@FeignClient的serviceId属性已经废弃,若要写属性名,可以使用name或者value。
第四步,创建FeignConsumerController,注入上面的HelloService,来实现对Feign客户端的调用,从而对hello-service服务发起请求。
@RestController
public class FeignConsumerController {@Autowiredprivate HelloService helloService;@GetMapping("hello")public String hello(){return helloService.hello();}
}第五步,同Ribbon一样,修改application.yml,指定注册中心和服务名以及端口号。
spring:application:name: feign-consumer #为服务命名
server:port: 5001
eureka:client:service-url: defaultZone: http://localhost:1111/eureka/ #指定服务注册中心位置instance:prefer-ip-address: trueinstance-id: ${spring.cloud.client.ip-address}:${server.port}
测试
启动服务注册中心,即eureka-server-vFinchley.Rc2工程
启动服务提供者hello-service,即eureka-client-vFinchley.Rc2 工程 -- jar包运行并指定两个不同端口来启动两个实例
启动服务消费者feign-consumer,即feign-consumer-vFinchley.RC2工程
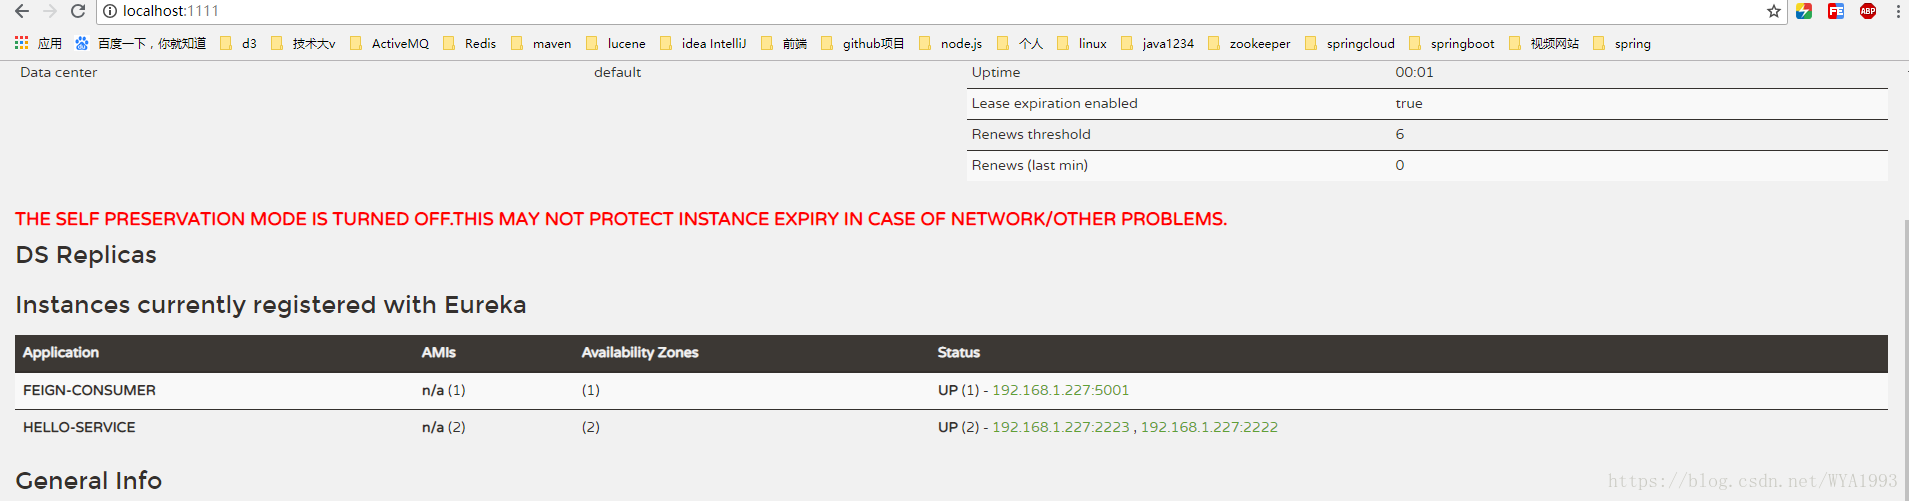
接下来和测试Ribbon客户端负载均衡一样,请求http://localhost:5001/hello接口,发现得到的结果和Ribbon是一样的,返回了hello。并且可以看到Feign实现的消费者依然是利用Ribbon维护了针对hello-service的服务列表信息,并且通过轮询实现了客户端负载均衡。但是和Ribbon不同,通过Feign我们只需要定义服务绑定接口,以声明式的方法,优雅而简单的实现了服务调用。
参数绑定
在刚刚的示例中,我们使用Spring Cloud Feign实现的是一个不带参数的REST服务绑定。然而现实系统中的各种业务接口要比它复杂得多,我们会在HTTP的各个位置传入不同类型的参数,并且在返回请求响应的时候也可能是一个复杂的对象结构。下面来看一下Feign对不同形式参数的绑定方式。
第一步,扩展hello-service服务,在eureka-client-vFinchley.Rc2工程新建FeignController,添加如下接口
@RestController
@RequestMapping("feign")
public class FeignController {/*** 带有Request参数的请求,并返回对象实体* @param name 姓名* @param age 密码* @return*/@GetMapping("hello1")public User hello1(@RequestParam String name,@RequestParam int age){return new User(1,name,age);}/*** 带有Header信息的请求,并返回对象实体* @param name 姓名* @param age 密码* @return*/@GetMapping("hello2")public User hello2(@RequestHeader String name,@RequestHeader int age){return new User(2,name,age);}/*** 请求体是对象的请求,并返回对象实体* @param user * @return*/@PostMapping("hello3")public User hello3(@RequestBody User user){return user;}}
User对象定义如下
public class User implements Serializable{private static final long serialVersionUID = -3653242135661883164L;private Integer id;private String name;private Integer age;public User() {}public User(String name, Integer age) {super();this.name = name;this.age = age;}public User(Integer id, String name, Integer age) {super();this.id = id;this.name = name;this.age = age;}public Integer getId() {return id;}public void setId(Integer id) {this.id = id;}public String getName() {return name;}public void setName(String name) {this.name = name;}public Integer getAge() {return age;}public void setAge(Integer age) {this.age = age;}@Overridepublic String toString() {return "User [id=" + id + ", name=" + name + ", age=" + age + "]";}}注意:必须提供User的默认构造方法,不然Spring Cloud Feign根据JSON字符串转换User对象时会抛出异常。
第二步,修改服务消费者feign-consumer,添加与hello-service服务同样的User实体。
第三步,扩展HelloService,添加如下方法。
@FeignClient("hello-service")
public interface HelloService {@GetMapping("hello")String hello();@GetMapping("feign/hello1")public User hello1(@RequestParam("name") String name,@RequestParam("age") int age);@GetMapping("feign/hello2")public User hello2(@RequestHeader("name") String name,@RequestHeader("age") int age);@PostMapping("feign/hello3")public User hello3(@RequestBody User user);
}
注意:在定义各参数绑定时,@RequestParam和@RequestHeader等可以指定参数名称的注解,它们的value必须写。在Spring MVC中,这些注解会根据参数名来作为默认值,但是在Feign中绑定参数必须通过value属性来指明具体的参数名,不然会抛出IllegalStateException异常,而且value属性不能为空。
第四步,在服务消费者feign-consumer的FeignController添加对上述声明接口的调用。
@RestController
public class FeignConsumerController {@Autowiredprivate HelloService helloService;@GetMapping("hello")public String hello(){return helloService.hello();}@GetMapping("hello1")public String hello1(){StringBuilder sb = new StringBuilder();sb.append(helloService.hello1("test1", 22)).append("\n");sb.append(helloService.hello2("test2", 22)).append("\n");sb.append(helloService.hello3(new User(3,"test1", 22))).append("\n");return sb.toString();}
}
测试
启动服务注册中心,即eureka-server-vFinchley.Rc2工程
启动服务提供者hello-service,即eureka-client-vFinchley.Rc2 工程 -- jar包运行并指定两个不同端口来启动两个实例
启动服务消费者feign-consumer,即feign-consumer-vFinchley.RC2工程
请求http://localhost:5001/hello1接口,返回结果
org.springframework.boot spring-boot-starter-parent 2.0.2.RELEASE UTF-8 UTF-8 1.8
org.springframework.boot spring-boot-starter-web org.springframework.boot spring-boot-starter-test test 第三步,将上面的User对象复制过来。
第四步,创建HelloService接口。
@RequestMapping("/refactor")
public interface HelloService {@GetMapping("feign/hello4")public User hello4(@RequestParam("name") String name,@RequestParam("age") int age);@GetMapping("feign/hello5")public User hello5(@RequestHeader("name") String name,@RequestHeader("age") int age);@PostMapping("feign/hello6")public User hello6(@RequestBody User user);
}
为了避免和feign-consumer提供的绑定服务接口混淆,这里除了头部定义了/refactor前缀之外,还将接口更改为/feign/hello4,/feign/hello5,/feign/hello6。
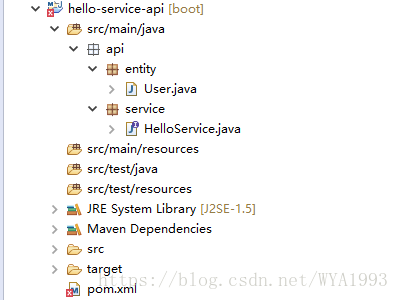
hello-service-api的项目结构
第五步,对hello-service服务重构,在pom.xml中新增对hello-service-api的依赖。
com.wya.springboot hello-service-api 0.0.1-SNAPSHOT
第六步,修改hello-service服务代码,创建RefactorHelloController,实现hello-service-api的HelloService接口。
@RestController
public class RefactorHelloController implements HelloService{@Overridepublic User hello4(@RequestParam("name") String name,@RequestParam("age") int age) {return new User(4,name,age);}@Overridepublic User hello5(@RequestHeader("name") String name,@RequestHeader("age") int age) {return new User(5,name,age);}@Overridepublic User hello6(@RequestBody User user) {return user;}
}可以看到,通过继承的方式,在Controller中不再包含以往会定义的请求映射注解@GetMapping和@PostMapping,然后在添加@RestController注解是该类成为一个REST接口类。
注意:@RequestParam和@RequestHeader等可以指定参数名称的注解,它们的value必须写。
第七步,重构消费者feign-consumer,在pom.xml中新增对hello-service-api的依赖,同第五步。
第八步,创建RefactorHelloService接口,并继承hello-service-api包中的HelloService接口,然后添加@FeignClient注解来绑定服务。
@FeignClient("hello-service")
public interface RefactorHelloService extends api.service.HelloService{}第九步,在feign-consumer的FeignConsumerController中添加RefactorHelloService的依赖。并新增一个接口调用RefactorHelloService的接口。
@Autowired
private RefactorHelloService refactorHelloService;@GetMapping("hello2")
public String hello2(){StringBuilder sb = new StringBuilder();sb.append(refactorHelloService.hello4("test1", 22)).append("\n");sb.append(refactorHelloService.hello5("test2", 22)).append("\n");sb.append(refactorHelloService.hello6(new api.entity.User(6,"test1", 22))).append("\n");return sb.toString();
}
注意:hello6方法的User实体来自hello.service.api
测试
启动服务注册中心,即eureka-server-vFinchley.Rc2工程
启动服务提供者hello-service,即eureka-client-vFinchley.Rc2 工程 -- jar包运行并指定两个不同端口来启动两个实例
启动服务消费者feign-consumer,即feign-consumer-vFinchley.RC2工程
请求http://localhost:5001/hello2接口,返回结果
User [id=4, name=test1, age=22]
User [id=5, name=test2, age=22]
User [id=6, name=test1, age=22]
优点与缺点
使用Spring Cloud Feign继承特性的优点很明显,可以将接口的定义从Controller中剥离出来,同时配合Maven私有仓库就可以轻易的实现接口定义的共享,实现在构建期的接口绑定,从而有效减少服务客户端的绑定配置。这么做虽然可以很方便的实现接口定义和依赖的共享,不用在复制粘贴接口进行绑定,但是这样的做法使用不当的话也会带来副作用。由于接口在构建期间就建立起了依赖,那么接口变动就会对项目构建造成影响,可能服务提供方修改了一个接口定义,那么会直接导致客户端工程的构建失败。所以必须在开发评审期就严格遵守面向对象的开闭原则,尽量做好前后版本的兼容,避免牵一发而动全身。
本文来自互联网用户投稿,文章观点仅代表作者本人,不代表本站立场,不承担相关法律责任。如若转载,请注明出处。 如若内容造成侵权/违法违规/事实不符,请点击【内容举报】进行投诉反馈!