win10 下用 vs code 编译调试代码的过程 (MinGW)
一、下载软件
官网下载 vs code 和 MinGW。
二、建立工作区
1、建立文件夹 “ProjectTest”,其内创建 Hello.cpp 文件,内容如下:
#include int main()
{cout<<"Hello world!"< 2、在标题栏中选择“文件”,再选择“打开文件夹”,选择刚才创建的“ProjectTest”。会弹出下面对话框:
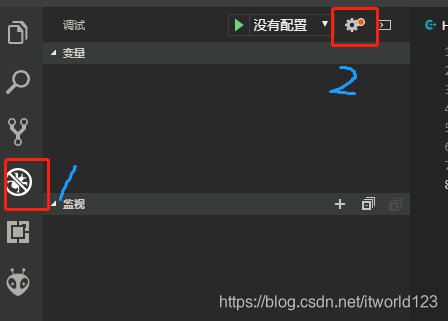
3、按照下图一次选中
弹出下面对话框,选择红框部分
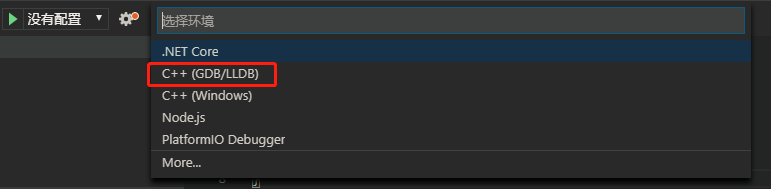
再选择第一个

会有报错,先不管。
三、配置 json 文件
在 .vscode 文件夹下创建 tasks.json 和 launch.json 两个文件。代码分别如下:
{"version": "2.0.0","command": "g++","args": ["-g","${file}","-o","${fileBasenameNoExtension}.exe"], // 编译命令参数"problemMatcher": {"owner": "cpp","fileLocation": ["relative", "${workspaceRoot}"],"pattern": {"regexp": "^(.*):(\\d+):(\\d+):\\s+(warning|error):\\s+(.*)$","file": 1,"line": 2,"column": 3,"severity": 4,"message": 5}}
}
{// Use IntelliSense to learn about possible attributes.// Hover to view descriptions of existing attributes.// For more information, visit: https://go.microsoft.com/fwlink/?linkid=830387"version": "0.2.0","configurations": [  {"name": "(gdb) Launch","type": "cppdbg","request": "launch","program": "${workspaceFolder}/${fileBasenameNoExtension}.exe","args": [],"stopAtEntry": false,"cwd": "${workspaceFolder}","environment": [],"externalConsole": true,"MIMode": "gdb","miDebuggerPath": "C:\\MinGW\\bin\\gdb.exe",// miDebugger的路径,注意这里要与MinGw的路径对应"preLaunchTask": "g++", // 调试会话开始前执行的任务,一般为编译程序,c++为g++, c为gcc"setupCommands": [{"description": "Enable pretty-printing for gdb","text": "-enable-pretty-printing","ignoreFailures": true}]}]
}
四、运行
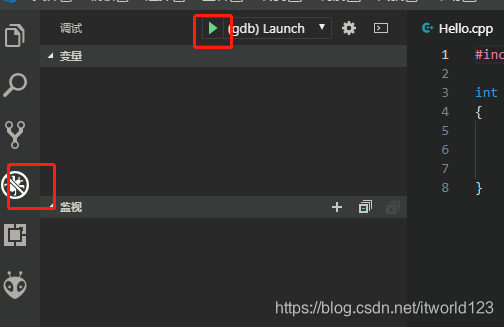
配置完成之后,重启 vs code。单击下图中的绿色的按钮,即可完成exe的生成和调试。
(SAW:Game Over!)
本文来自互联网用户投稿,文章观点仅代表作者本人,不代表本站立场,不承担相关法律责任。如若转载,请注明出处。 如若内容造成侵权/违法违规/事实不符,请点击【内容举报】进行投诉反馈!