消息队列实现分布式事务
业务流转图:

搭建环境:activemq + springboot + mybatis + mysql
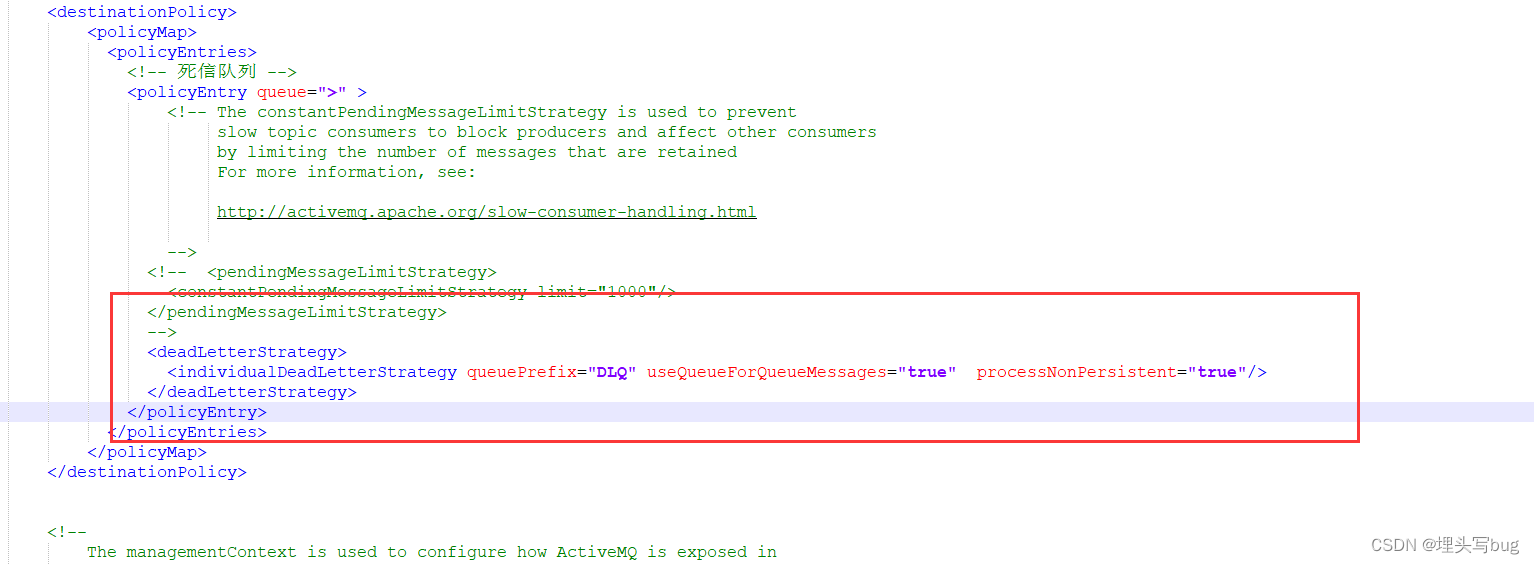
1、下载activemq配置activemq配置信息(conf/activemq.xml):
2、建表td_order_event,分别在每个服务对应的每个库创建一张临时流转表记录,这边演示创建两边一模一样的表);
CREATE TABLE `td_order_event` (`id` tinyint(10) NOT NULL,`order_type` tinyint(10) DEFAULT NULL COMMENT '订单类型(0: 创建,1, 已下单,2,已支付 )',`process` varchar(255) DEFAULT NULL,`content` varchar(500) DEFAULT NULL,`create_time` timestamp NULL DEFAULT NULL ON UPDATE CURRENT_TIMESTAMP,`update_time` timestamp NULL DEFAULT NULL ON UPDATE CURRENT_TIMESTAMP COMMENT '订单中间事件表',PRIMARY KEY (`id`)
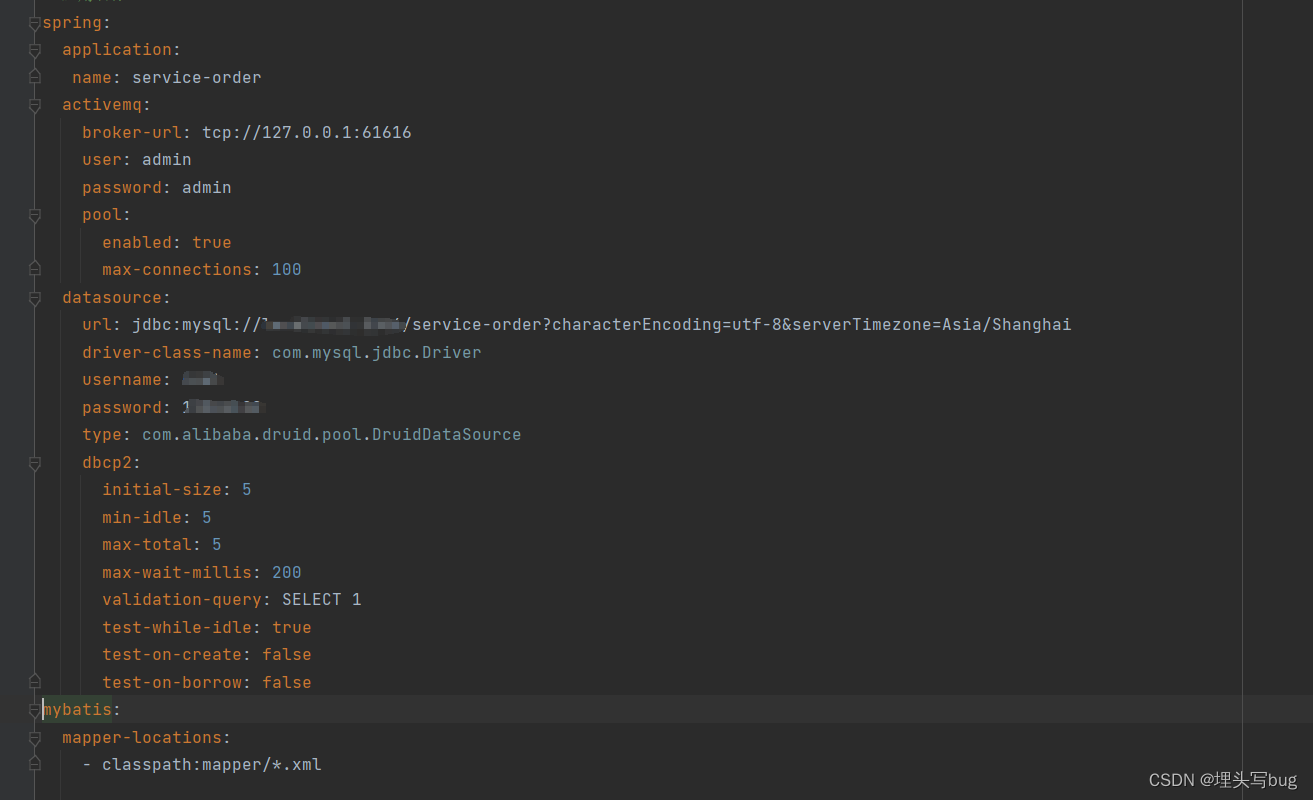
) ENGINE=InnoDB DEFAULT CHARSET=utf8mb4;3、分别准备两个服务 、搭建环境导入相关依赖;
org.springframework.boot spring-boot-starter-web org.projectlombok lombok 1.18.12 provided com.alibaba fastjson 1.2.28 mysql mysql-connector-java 5.1.6 com.alibaba druid 1.1.22 com.alibaba druid-spring-boot-starter 1.1.22 org.springframework.boot spring-boot-starter-activemq org.apache.activemq activemq-pool org.mybatis.spring.boot mybatis-spring-boot-starter 2.0.0 org.springframework.boot spring-boot-starter-tomcat provided org.springframework.boot spring-boot-starter-test test org.junit.vintage junit-vintage-engine 4、配置生产端链接信息application.yml, 及代码编写;
import org.apache.activemq.ActiveMQConnectionFactory;
import org.apache.activemq.command.ActiveMQQueue;
import org.springframework.beans.factory.annotation.Value;
import org.springframework.context.annotation.Bean;
import org.springframework.context.annotation.Configuration;import javax.jms.Queue;@Configuration
public class ActiveConfig {@Value("${spring.activemq.broker-url}")private String brokerUrl;@Beanpublic Queue queue() {return new ActiveMQQueue("ActiveMQQueue");}@Beanpublic ActiveMQConnectionFactory connectionFactory() {return new ActiveMQConnectionFactory(brokerUrl);}
}
@SpringBootApplication
@MapperScan(value = "com.xxx.serviceorder.dao")
@EnableJms
@EnableScheduling
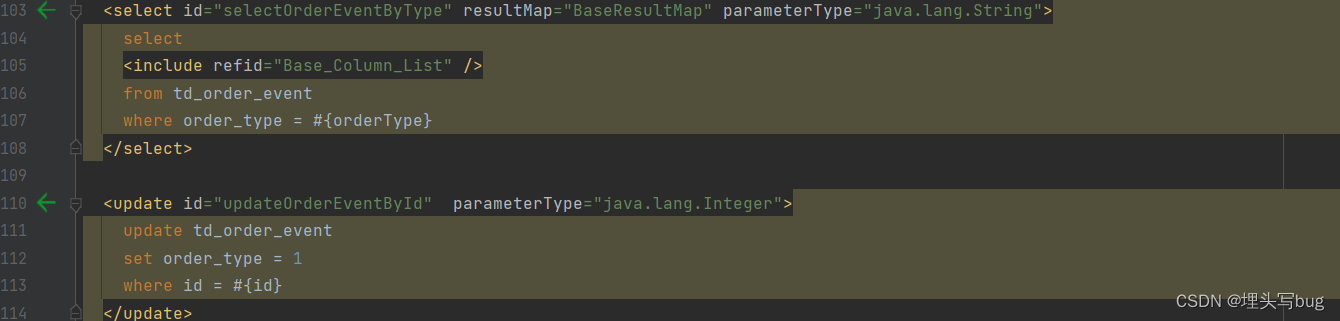
public class ServiceOrderApplication {public static void main(String[] args) {SpringApplication.run(ServiceOrderApplication.class, args);}}4.2 编写sql语句, 分别一个查询语句,更新数据;
4.3 编写定时任务,监听数据;
import com.alibaba.fastjson.JSONObject;
import com.xckk.serviceorder.dao.TdOrderEventDao;
import com.xckk.serviceorder.entity.TdOrderEvent;
import org.springframework.beans.factory.annotation.Autowired;
import org.springframework.jms.core.JmsMessagingTemplate;
import org.springframework.scheduling.annotation.Scheduled;
import org.springframework.stereotype.Component;
import org.springframework.transaction.annotation.Transactional;
import javax.jms.Queue;
import java.util.Date;
import java.util.List;@Component
public class Produce {@Autowiredprivate TdOrderEventDao tdOrderEventDao;@Autowiredprivate Queue queue;@Autowiredprivate JmsMessagingTemplate jmsMessagingTemplate;@Scheduled(cron = "0/5 * * * * ?")@Transactional(rollbackFor = Exception.class)public void task() {System.out.println(new Date() +"【开始执行】");// 查询新建的中间表List tdOrderEvents = tdOrderEventDao.selectOrderEventByType("0");for (TdOrderEvent tdOrderEvent : tdOrderEvents) {tdOrderEventDao.updateOrderEventById(tdOrderEvent.getId());System.out.println(tdOrderEvent.getId() + "数据修改成功");//jmsMessagingTemplate.convertAndSend(queue, JSONObject.toJSONString(tdOrderEvent));}}
}
5、编写消费端代码;

sql语句,利用主键id,确保消息重复;
5.1 配置mqbean信息
import org.apache.activemq.ActiveMQConnectionFactory;
import org.apache.activemq.RedeliveryPolicy;
import org.springframework.beans.factory.annotation.Value;
import org.springframework.context.annotation.Bean;
import org.springframework.context.annotation.Configuration;
import org.springframework.jms.config.DefaultJmsListenerContainerFactory;
import org.springframework.jms.config.JmsListenerContainerFactory;@Configuration
public class ActiveConfig {@Value("${spring.activemq.broker-url}")private String brokerUrl;@Value("${spring.activemq.user}")private String userName;@Value("${spring.activemq.password}")private String passWord;@Beanpublic ActiveMQConnectionFactory connectionFactory(RedeliveryPolicy redeliveryPolicy) {ActiveMQConnectionFactory connectionFactory = new ActiveMQConnectionFactory(userName, passWord, brokerUrl);connectionFactory.setRedeliveryPolicy(redeliveryPolicy);return connectionFactory;}/*** 重发配置* @return*/@Beanpublic RedeliveryPolicy redeliveryPolicy() {RedeliveryPolicy policy = new RedeliveryPolicy();return policy;}@Beanpublic JmsListenerContainerFactory jmsListenerContainerFactory(ActiveMQConnectionFactory activeMQConnectionFactory) {DefaultJmsListenerContainerFactory containerFactory = new DefaultJmsListenerContainerFactory();containerFactory.setConnectionFactory(activeMQConnectionFactory);// 1: 自动确认 2:客户端手动确认 3:自动批量确认 4:事务提交并确认containerFactory.setSessionAcknowledgeMode(2);return containerFactory;}}
业务处理 :处理失败测重试六次,六次都失败则加入死信队列处理;
import com.alibaba.fastjson.JSONObject;
import com.xckk.servicepay.dao.TdOrderEventDao;
import com.xckk.servicepay.entity.TdOrderEvent;
import org.springframework.beans.factory.annotation.Autowired;
import org.springframework.jms.annotation.JmsListener;
import org.springframework.stereotype.Component;import javax.jms.JMSException;
import javax.jms.Session;
import javax.jms.TextMessage;@Component
public class ConsumerQueue {@Autowiredprivate TdOrderEventDao tdOrderEventDao;@JmsListener(destination = "ActiveMQQueue", containerFactory = "jmsListenerContainerFactory")public void receive(TextMessage textMessage, Session session) throws JMSException {System.out.println(" 消费的消息:"+textMessage.getText());try {String text = textMessage.getText();TdOrderEvent tdOrderEvent = JSONObject.toJavaObject(JSONObject.parseObject(text), TdOrderEvent.class);tdOrderEventDao.insert(tdOrderEvent);textMessage.acknowledge();} catch (Exception e) {e.printStackTrace();System.out.println("ActiveMQQueue>>> 异常!!!!");session.recover();}}/*** 死信队列** @param text*/@JmsListener(destination = "DLQ.ActiveMQQueue")public void receive(String text) {System.out.println("处理失败的数据!!!" + text);}
}
验证:
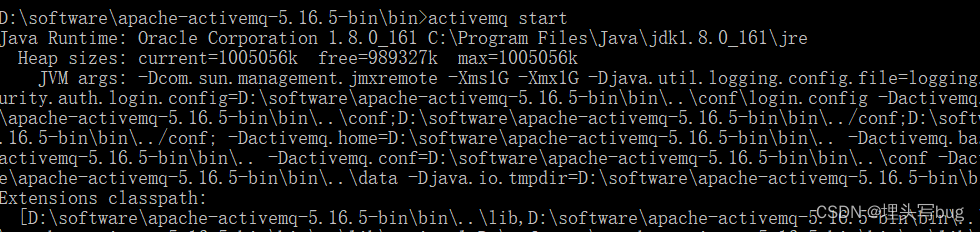
1、启动mq
2、启动两端服务
3、插入一条测试数据

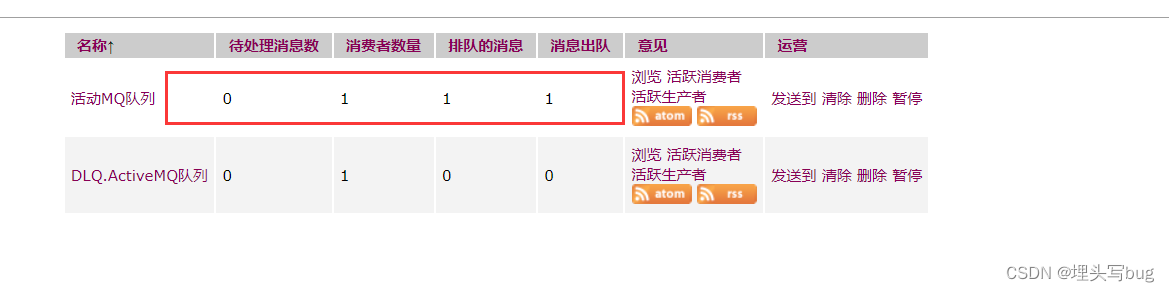
数据处理完毕;
4、测试异常信息(比如mq挂掉、消息重复等等)
本文来自互联网用户投稿,文章观点仅代表作者本人,不代表本站立场,不承担相关法律责任。如若转载,请注明出处。 如若内容造成侵权/违法违规/事实不符,请点击【内容举报】进行投诉反馈!