Flutter 图片显示方式及显示样式(圆形或圆角)
图片显示
1、本地图片
Image.asset加载项目资源包的图片
//先将图片拷贝到项目 images 目录中,然后在 pubspec.yaml文件配置文件相对路径到 assets Image.asset('images/pic1.jpg'), /// 加载本地资源gif图片Image.asset('images/timg.gif', height: 200, width: 200),Image.file加载手机内置或外置存储的图片
//加载Android平台的外置存储图片需要AndroidManifest.xml配置android.permission.READ_EXTERNAL_STORAGE权限Image.file(File('/0/images/cat.jpg'),width: 200,height: 200,
)
2、网络图片
Image.network无本地缓存
Image.network('https://pic2.zhimg.com/v2-639b49f2f6578eabddc458b84eb3c6a1.jpg',width: 120,height: 120
),FadeInImage.assetNetwork淡入效果,无本地缓存
/// 有的时候我们需要像Android那样使用一个占位图或者图片加载出错时显示某张特定的图片,这时候需要用到 FadeInImage 这个组件FadeInImage.assetNetwork(placeholder: 'images/avatar.png',image: 'https://pic1.zhimg.com/v2-7fab628481a26f025188b095b5cfafbc.jpg',width: 200,height: 200
)CachedNetworkImage第三方控件,有本地缓存和淡入效果
https://github.com/renefloor/flutter_cached_network_image//1、将依赖框架配置到pubspec.yaml文件
dependencies:cached_network_image: ^2.5.0
//2、引入相关类
import 'package:cached_network_image/cached_network_image.dart';//3、使用控件,默认自带图片淡入效果
CachedNetworkImage(imageUrl: 'https://pic4.zhimg.com/v2-19dced236bdff0c47a6b7ac23ad1fbc3.jpg',width: 200,height: 200,
)
圆形头像
1、CircleAvatar
CircleAvatar(//头像半径radius: 60,//头像图片backgroundImage: NetworkImage('https://pic2.zhimg.com/v2-639b49f2f6578eabddc458b84eb3c6a1.jpg'),
),
2、ClipOval
ClipOval( //圆形头像child: new Image.network('https://pic2.zhimg.com/v2-639b49f2f6578eabddc458b84eb3c6a1.jpg',width: 120.0,),
),
3、Container + BoxDecoration
Container(width: 120,height: 120,decoration: BoxDecoration(shape: BoxShape.circle,image: DecorationImage(image: NetworkImage('https://pic2.zhimg.com/v2-639b49f2f6578eabddc458b84eb3c6a1.jpg'),fit: BoxFit.cover))
)
圆角图片
1、ClipRRect
 /// 使用裁剪来实现图片圆角
ClipRRect( //圆角图片borderRadius: BorderRadius.circular(8),child: Image.network('https://pic2.zhimg.com/v2-639b49f2f6578eabddc458b84eb3c6a1.jpg',width: 120,height: 120),
),
2、Container + BoxDecoration
/// 使用边框来实现图片圆角
Container(width: 120,height: 120,decoration: BoxDecoration(shape: BoxShape.rectangle,borderRadius: BorderRadius.circular(8),image: DecorationImage(image: NetworkImage('https://pic2.zhimg.com/v2-639b49f2f6578eabddc458b84eb3c6a1.jpg')))
)
其他各种形状
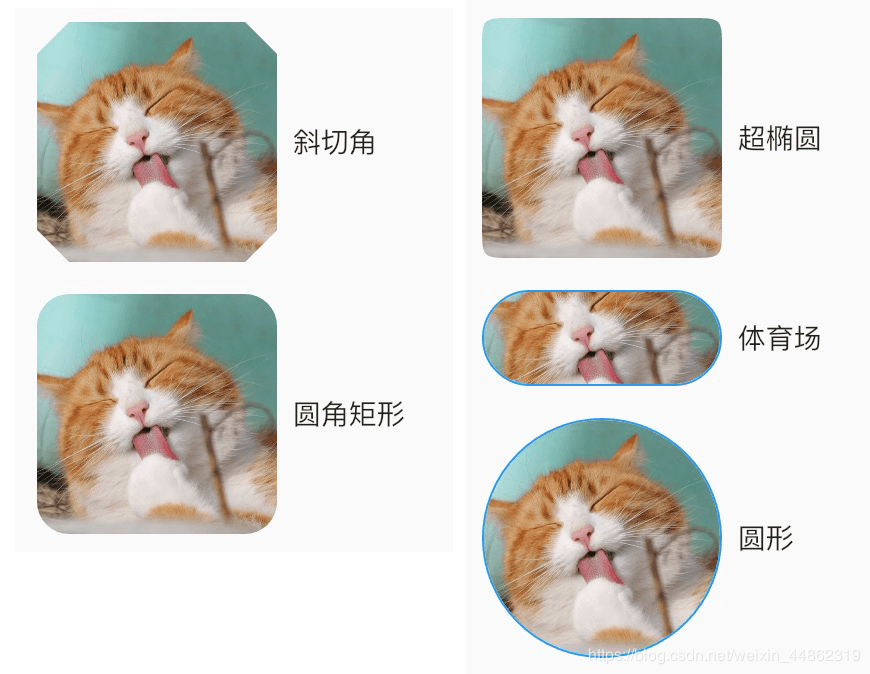
使用ShapeDecoration可以做出各种形状
- 斜切角:
BeveledRectangleBorder - 圆角:
RoundedRectangleBorder - 超椭圆:
SuperellipseShape - 体育场:
StadiumBorder - 圆形:
CircleBorder
//斜切角形状示例
Container(width: 120,height: 120,decoration: ShapeDecoration(shape: BeveledRectangleBorder(borderRadius: BorderRadius.circular(16)),image: DecorationImage(fit: BoxFit.cover,image: NetworkImage('https://pic2.zhimg.com/v2-639b49f2f6578eabddc458b84eb3c6a1.jpg')))
)
上面转载的链接 https://www.cnblogs.com/joe235/p/11199042.html
下面是自己工作中用到的
容器左上角和右下角有弧度
borderRadius: BorderRadius.only(topLeft: Radius.circular(20.0),topRight: Radius.zero,bottomLeft: Radius.zero,bottomRight: Radius.circular(20.0)),)容器左右两边有弧度
borderRadius:BorderRadius.all(Radius.circular(Dimens.rgap_dp25))容器底部加根线
decoration: BoxDecoration(color:Colors.white,border: Border(bottom: BorderSide(width:0.5,color:Colors.black12)))使用decoration实现颜色的渐变(左右渐变)
decoration: BoxDecoration(gradient: LinearGradient(begin: isOrientationLeftRight? Alignment.centerLeft: Alignment.topCenter,end: isOrientationLeftRight? Alignment.centerRight: Alignment.bottomCenter,colors: [gradientStart, gradientEnd]),/*阴影设置boxShadow: [new BoxShadow(color: Colors.grey[500],blurRadius: 20.0,spreadRadius: 1.0,)]*/),
颜色混合图片
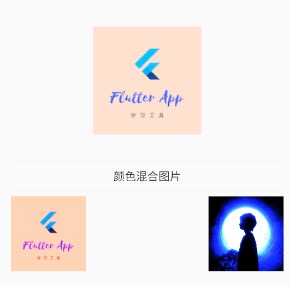
Row(children: [Image.asset('images/flutter_logo.png',width: 100,/// 混合的颜色,和colorBlendMode一起使用color: Colors.red,/// 颜色和图片混合模式,功能较强大,其它模式参见官方文档或源码colorBlendMode: BlendMode.overlay),Image.network("https://avatars2.githubusercontent.com/u/20411648?s=460&v=4",width: 100,colorBlendMode: BlendMode.colorDodge,color: Colors.blue)], mainAxisAlignment: MainAxisAlignment.spaceBetween), centerSlice图片内部拉伸

Image.asset('images/flutter_logo.png',width: 250,height: 250,fit: BoxFit.contain,centerSlice:Rect.fromCircle(center: const Offset(20, 20), radius: 1)),matchTextDirection图片内部方向
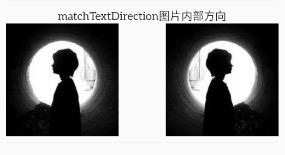
Row(mainAxisAlignment: MainAxisAlignment.spaceBetween,children: [Directionality(textDirection: TextDirection.ltr,child: Image.network("https://avatars2.githubusercontent.com/u/20411648?s=460&v=4",height: 150,matchTextDirection: true,fit: BoxFit.cover)),Directionality(textDirection: TextDirection.rtl,child: Image.network("https://avatars2.githubusercontent.com/u/20411648?s=460&v=4",height: 150,matchTextDirection: true,fit: BoxFit.cover))]),
本文来自互联网用户投稿,文章观点仅代表作者本人,不代表本站立场,不承担相关法律责任。如若转载,请注明出处。 如若内容造成侵权/违法违规/事实不符,请点击【内容举报】进行投诉反馈!