JUC异步编程
什么是JUC
JUC的意思是java并发编程工具包,是java.util.concurrent包的简称。目的就是为了更好的支持高并发任务,让开发者利用这个包进行的多线程开发时,可以有效的减少竞争条件和死锁线程。
异步编程
模拟用户下单操作。。。
1、根据地址id查询地址信息 -- > 0.5s
2、查询用户购物车的数据 -- >0.5s
3、查询购物车中的商品信息 -- > 1s
4、创建订单 -- > 0.5s
5、创建订单详情 --> 0.5s
用户创建要给一个订单总共耗时3s,没给操作都是同步执行的。如果变成异步是否会提高性能?
CompletableFuture
Java8新增了CompletableFuture 提供对异步计算的支持,可以通过回调的方式处理计算结果。
runAsync 和 supplyAsync方法
public static CompletableFuture runAsync(Runnable runnable)
public static CompletableFuture runAsync(Runnable runnable, Executor executor)
public static  CompletableFuture supplyAsync(Supplier supplier)
public static  CompletableFuture supplyAsync(Supplier supplier, Executor executor)
CompletableFuture 提供了四个静态方法来创建一个异步操作。
没有指定Executor的方法会使用ForkJoinPool.commonPool() 作为它的线程池执行异步代码。如果指定线程池,则使用指定的线程池运行。以下所有的方法都类同。
runAsync方法不支持返回值。
supplyAsync可以支持返回值。
使用默认和指定的线程池
// 创建一个线程池ExecutorService executorService = Executors.newFixedThreadPool(10);System.out.println("线程开始。。。");// 使用默认的线程池CompletableFuture.runAsync(() -> {System.out.println("任务开始执行。。");});// 使用指定的线程池CompletableFuture.runAsync(() ->{System.out.println("任务2开始执行。。。");},executorService);System.out.println("线程结束");线程执行完后有返回值
// 创建一个线程池ExecutorService executorService = Executors.newFixedThreadPool(10);System.out.println("线程开始。。。");// 使用指定线程池运行一个任务CompletableFuture integerCompletableFuture = CompletableFuture.supplyAsync(() -> {Integer sum = 0;for (int i = 1; i <=5; i++) {try {Thread.sleep(200);} catch (InterruptedException e) {e.printStackTrace();}sum += i;}return sum;}, executorService);// get()阻塞等结果System.out.println("sum:"+voidCompletableFuture.get());System.out.println("线程结束"); 计算结果完成时的回调方法
当CompletableFuture的计算结果完成,或者抛出异常的时候,可以执行特定的Action。主要是下面的方法:
public CompletableFuture whenComplete(BiConsumer action)
public CompletableFuture whenCompleteAsync(BiConsumer action)
public CompletableFuture whenCompleteAsync(BiConsumer action, Executor executor)
public CompletableFuture exceptionally(Function fn) 可以看到Action的类型是BiConsumer它可以处理正常的计算结果,或者异常情况。
whenComplete 和 whenCompleteAsync 的区别:
whenComplete:是执行当前任务的线程继续执行 whenComplete 的任务。
whenCompleteAsync:是执行把 whenCompleteAsync 这个任务继续提交给线程池来进行执行。
exceptionally:任务运行出现异常后调用,在这个方法里面可以改变任务的返回值(降级)。
        CompletableFuture integerCompletableFuture = CompletableFuture.supplyAsync(() -> {System.out.println("任务线程:"+Thread.currentThread().getName());Integer sum = 0;for (int i = 1; i <= 5; i++) {try {Thread.sleep(100);} catch (InterruptedException e) {e.printStackTrace();}int x = 10 / 0;sum += i;}return sum;}, executorService).whenComplete((resp, exc) -> {
//            System.out.println("任务执行完了,返回结果是:" + resp + ",异常:" + exc);System.out.println("whenComplete:"+Thread.currentThread().getName());}).whenCompleteAsync((resp,exc)->{System.out.println("whenCompleteAsync:"+Thread.currentThread().getName());},executorService).exceptionally((exc) -> {
//            System.out.println("出现异常了,这个方法里面可以修改返回结果");return 20;});System.out.println("sum:" + integerCompletableFuture.get());
handle
handle 是执行任务完成时对结果的处理。
exceptionally和handle同时存在,handle 的返回值会覆盖掉exceptionally的。whenCompleteAsync是感知任务执行完了,而handle是任务执行完了真真的调用
CompletableFuture integerCompletableFuture = CompletableFuture.supplyAsync(() -> {System.out.println("任务线程:"+Thread.currentThread().getName());Integer sum = 0;for (int i = 1; i <= 5; i++) {try {Thread.sleep(100);} catch (InterruptedException e) {e.printStackTrace();}int x = 10 / 0;sum += i;}return sum;}, executorService).handle((resp,exc)->{System.out.println("handle:resp:"+resp+",exc:"+exc);return 22;});System.out.println("sum:" + integerCompletableFuture.get()); 任务串行化
前一个任务执行完才能执行后一个任务。
// 接收前一个任务的执行结果,并消费处理,该任务没有返回结果 ,可以接收到上一个任务的异常
public CompletionStage  whenComplete(BiConsumer action)
public CompletionStage  whenCompleteAsync(BiConsumer action)
public CompletionStage  whenCompleteAsync(BiConsumer action, Executor executor)// 不依赖前面任务的执行结果,只要前面任务执行完了,该任务就马上执行
public CompletableFuture thenRun(Runnable action)
public CompletableFuture thenRunAsync(Runnable action)
public CompletableFuture thenRunAsync(Runnable action, Executor executor)// 接收前一个任务的执行结果,并消费处理,该任务没有返回结果
public CompletableFuture thenAccept(Consumer action)
public CompletableFuture thenAcceptAsync(Consumer action)
public CompletableFuture thenAcceptAsync(Consumer action,Executor executor)//接收前一个任务的执行结果,并消费,该任务有返回结果
public  CompletableFuture thenApply( Function fn)
public  CompletableFuture thenApplyAsync(Function fn)
public  CompletableFuture thenApplyAsync( Function fn, Executor executor)//接收前一个任务的执行结果,并消费,该任务有返回结果,可以接收到前面任务异常
public  CompletableFuture handle(BiFunction fn)
public  CompletableFuture handleAsync(BiFunction fn)
public  CompletableFuture handleAsync(BiFunction fn, Executor executor)
CompletableFuture integerCompletableFuture = CompletableFuture.supplyAsync(() -> {System.out.println("任务1开始执行,计算结果返回");int x = 10 * 2;return x;}, executorService);integerCompletableFuture.thenRunAsync(() -> {System.out.println("任务2开始执行,这里不需要依赖任务1的返回值");}, executorService);integerCompletableFuture.thenAcceptAsync((resp)->{System.out.println("任务3开始执行,这里需要依赖到任务1中的返回值:"+resp+",该任务没有返回值");},executorService);CompletableFuture stringCompletableFuture = integerCompletableFuture.thenApplyAsync((resp) -> {System.out.println("任务4开始执行,这里需要依赖到任务1中的返回值:" + resp + ",该任务有回值");return "任务4:" + resp;}, executorService);System.out.println("sum:" + stringCompletableFuture.get()); 两个任务组合-- 都要完成
两个任务都要完成以后,再去触发第三个任务。
// 组合两个任务,不需要获取前两个任务的结果,之前前两个任务执行完后就执行该任务
public CompletableFuture runAfterBoth(CompletionStage other,Runnable action)
public CompletableFuture runAfterBothAsync(CompletionStage other, Runnable action)
public CompletableFuture runAfterBothAsync(CompletionStage other, Runnable action,Executor executor)// 组合两个任务,需要前两个任务的返回结果,执行该任务后没有返回结果
public  CompletableFuture thenAcceptBoth(CompletionStage other, BiConsumer action)
public  CompletableFuture thenAcceptBothAsync(CompletionStage other, BiConsumer action)
public  CompletableFuture thenAcceptBothAsync(CompletionStage other,BiConsumer action, Executor executor)// 组合两个任务,需要前两个任务的返回结果,执行该任务后有返回结果
public  CompletableFuture thenCombine(CompletionStage other,BiFunction fn)
public  CompletableFuture thenCombineAsync(CompletionStage other,BiFunction fn)
public  CompletableFuture thenCombineAsync(CompletionStage other,BiFunction fn, Executor executor)
// 第1个任务CompletableFuture future1 = CompletableFuture.supplyAsync(() -> {System.out.println("任务1执行");return 10;}, executorService);// 第2个任务CompletableFuture future2 = CompletableFuture.supplyAsync(() -> {System.out.println("任务2执行");return "java";}, executorService);// 组合前两个任务
// future1.runAfterBothAsync(future2, () -> {
// System.out.println("前两个任务执行后在执行该任务,不需要前两个任务的结果,该任务不需要返回");
// }, executorService);// future1.thenAcceptBothAsync(future2, (f1, f2) -> {
// System.out.println("前两个任务执行后在执行该个任务,需要前两个任务的结果:" + f1 + " -- " + f2 + ",该任务不需要返回");
// }, executorService);CompletableFuture stringCompletableFuture = future1.thenCombineAsync(future2, (f1, f2) -> {System.out.println("前两个任务执行后在执行该个任务,需要前两个任务的结果:" + f1 + " -- " + f2 + ",该任务需要返回");return f1 + f2;}, executorService);System.out.println("sum:" + stringCompletableFuture.get()); 多任务组合
allof顾名思义,就是所有的任务执行完成后返回future,
anyof就是只要有一个任务执行完成后就返回future并将第一个完成的参数带着一起返回,
CompletableFuture future1 = CompletableFuture.supplyAsync(() -> {try {Thread.sleep(5000);System.out.println("任务1查询用户地址");} catch (InterruptedException e) {e.printStackTrace();}return "addressList";}, executorService);CompletableFuture future2 = CompletableFuture.supplyAsync(() -> {try {Thread.sleep(3000);} catch (InterruptedException e) {e.printStackTrace();}System.out.println("任务2查询用户购物车");return "carList";}, executorService);CompletableFuture future3 = CompletableFuture.supplyAsync(() -> {try {Thread.sleep(2000);} catch (InterruptedException e) {e.printStackTrace();}System.out.println("任务3查询购物车商品");return "goodsList";}, executorService);// 组合多个任务,所有任务都要完成
// CompletableFuture voidCompletableFuture = CompletableFuture.allOf(future1, future2, future3);
// voidCompletableFuture.get(); // 等待所有任务完成。// 组合多个任务,只要有一个任务完成CompletableFuture Java定时调度机制
定时任务作为一种系统调度工具,在一些需要有定时作业的系统中应用广泛,如每逢某个时间点统计数据、在将来某个时刻执行某些动作。比如:每天晚上十二点统计当日的订单,销量等等。
ScheduledExecutorService
ScheduledExecutorService是JDK提供的一个定时调度类,主要作用就是可以将定时任务与线程池功能结合使用。因为ScheduledExecutorService继承于ExecutorService,所以本身支持线程池的所有功能。额外还提供了4种方法,我们来看看其作用。
常用API
/*** 带延迟时间的调度,只执行一次* 调度之后可通过Future.get()阻塞直至任务执行完毕*/ public ScheduledFuture schedule(Runnable command,long delay, TimeUnit unit);/*** 带延迟时间的调度,只执行一次* 调度之后可通过Future.get()阻塞直至任务执行完毕,并且可以获取执行结果*/ publicScheduledFuture schedule(Callable callable,long delay, TimeUnit unit);/*** 带延迟时间的调度,循环执行,固定频率*/ public ScheduledFuture scheduleAtFixedRate(Runnable command,long initialDelay,long period,TimeUnit unit);/*** 带延迟时间的调度,循环执行,固定延迟*/ public ScheduledFuture scheduleWithFixedDelay(Runnable command,long initialDelay,long delay,TimeUnit unit);
延时调用,只执行一次
// 1.创建一个定时调度类,里面包含一个线程池,启动线程的核心数是10,ScheduledExecutorService scheduler = Executors.newScheduledThreadPool(10);// 2.延时2s后执行,只调用一次,没有返回值scheduler.schedule(() -> {System.out.println("schedule: " + new Date());}, 2, TimeUnit.SECONDS);// 3.延时2s后执行,只调用一次,有回值ScheduledFuture future = scheduler.schedule(() -> {System.out.println("schedule: " + new Date());return 10;}, 2, TimeUnit.SECONDS);Integer result = future.get(); // 获取返回值System.out.println("result:" + result); // 1.创建一个定时调度类,里面包含一个线程池,启动线程的核心数是10,ScheduledExecutorService scheduler = Executors.newScheduledThreadPool(10);// 循环执行,固定频率(任务执行时间超过了周期时间,直接执行了)scheduler.scheduleAtFixedRate(new Runnable() {@Overridepublic void run() {System.out.println("Start: scheduleWithFixedDelay: " + new Date());try {Thread.sleep(10000);} catch (InterruptedException e) {e.printStackTrace();}System.out.println("End : scheduleWithFixedDelay: " + new Date());}}, 0, 5, TimeUnit.SECONDS);// 循环执行,固定延迟(任务执行时间超过了周期时间,还要等周期的时间)scheduler.scheduleWithFixedDelay(new Runnable() {@Overridepublic void run() {System.out.println("Start: scheduleWithFixedDelay: " + new Date());try {Thread.sleep(10000);} catch (InterruptedException e) {e.printStackTrace();}System.out.println("End : scheduleWithFixedDelay: " + new Date());}}, 0, 5, TimeUnit.SECONDS);Scheduled注解
Spring 3.0 版本之后自带定时任务,提供了@EnableScheduling注解和@Scheduled注解来实现定时任务功能。
基于注解@Scheduled默认为单线程,开启多个任务时,任务的执行时机会受上一个任务执行时间的影响。@EnableScheduling注解: 在配置类上使用,开启计划任务的支持。 @Scheduled注解: 来声明这是一个任务,包括 cron,fixDelay,fixRate 等类型(方法上,需先开启计划任务的支持)。
@Scheduled注解基本使用
@Component
public class ScheduleTask {@Scheduled(cron = "0/2 * *  * * ? ")   //每2秒执行一次public void task1() {String data = new SimpleDateFormat("yyyy-MM-dd HH:mm:ss").format(new Date());System.out.println(Thread.currentThread().getId() + ":" + data);}
}@SpringBootApplication
@EnableScheduling // 开启定时任务
public class ThreadLockApplication {public static void main(String[] args) {SpringApplication.run(ThreadLockApplication.class, args);}
}
cron表达式
该参数接收一个cron表达式,cron表达式是一个字符,共6或7个域,每一个域代表一个含义。
cron表达式语法:

通配符说明:
*表示所有值。 例如:在分的字段上设置 *,表示每一分钟都会触发。?表示不指定值。使用的场景为不需要关心当前设置这个字段的值。例如:要在每月的10号触发一个操作,但不关心是周几,所以需要周位置的那个字段设置为”?” 具体设置为 0 0 0 10 * ?-表示区间。例如 在小时上设置 “10-12”,表示 10,11,12点都会触发。,表示指定多个值,例如在周字段上设置 “MON,WED,FRI” 表示周一,周三和周五触发/用于递增触发。如在秒上面设置”5/15” 表示从5秒开始,每增15秒触发(5,20,35,50)。 在日字段上设置’1/3’所示每月1号开始,每隔三天触发一次。L表示最后的意思。在日字段设置上,表示当月的最后一天(依据当前月份,如果是二月还会依据是否是润年[leap]), 在周字段上表示星期六,相当于”7”或”SAT”。如果在”L”前加上数字,则表示该数据的最后一个。例如在周字段上设置”6L”这样的格式,则表示“本月最后一个星期五”W表示离指定日期的最近那个工作日(周一至周五). 例如在日字段上置”15W”,表示离每月15号最近的那个工作日触发。如果15号正好是周六,则找最近的周五(14号)触发, 如果15号是周未,则找最近的下周一(16号)触发.如果15号正好在工作日(周一至周五),则就在该天触发。如果指定格式为 “1W”,它则表示每月1号往后最近的工作日触发。如果1号正是周六,则将在3号下周一触发。(注,”W”前只能设置具体的数字,不允许区间”-“)。#序号(表示每月的第几个周几),例如在周字段上设置”6#3”表示在每月的第三个周六.注意如果指定”#5”,正好第五周没有周六,则不会触发该配置(用在母亲节和父亲节再合适不过了) ;小提示:’L’和 ‘W’可以一组合使用。如果在日字段上设置”LW”,则表示在本月的最后一个工作日触发;周字段的设置,若使用英文字母是不区分大小写的,即MON与mon相同
示例:
每隔5秒执行一次:*/5 * * * * ?每隔1分钟执行一次:0 */1 * * * ?每天23点执行一次:0 0 23 * * ?每天凌晨1点执行一次:0 0 1 * * ?每月1号凌晨1点执行一次:0 0 1 1 * ?每月最后一天23点执行一次:0 0 23 L * ?每周星期六凌晨1点实行一次:0 0 1 ? * L在26分、29分、33分执行一次:0 26,29,33 * * * ?每天的0点、13点、18点、21点都执行一次:0 0 0,13,18,21 * * ?可通过在线生成Cron表达式的工具:在线Cron表达式生成器 来生成自己想要的表达式。
@Scheduled单线的问题
@Scheduled默认使用单线程执行任务,如果是每2s循环执行一次任务,加入其中有一个任务超4s,那么后面的任务就需要等待4s后才去执行任务。所以在任务处理时一般都是用多线程的方式。
@Scheduled(cron = "0/2 * * * * ?") //每2秒执行一次public void task1() {String data = new SimpleDateFormat("yyyy-MM-dd HH:mm:ss").format(new Date());try {Thread.sleep(4000);} catch (InterruptedException e) {e.printStackTrace();}System.out.println(Thread.currentThread().getId() + ":" + data);}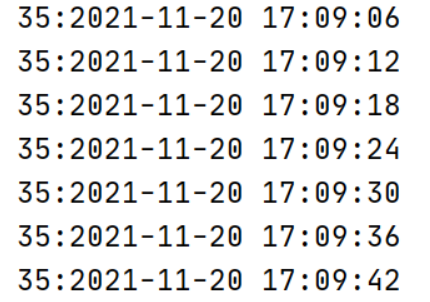
1、使用@Async来解决
@EnableAsync是Spring提供的处理任务组件,使用默认的线程池。
@Component
@Async // 使用异步处理任务
@EnableAsync // 开启异步处理
public class ScheduleTask {@Scheduled(cron = "0/2 * *  * * ?")   //每2秒执行一次public void task1() {String data = new SimpleDateFormat("yyyy-MM-dd HH:mm:ss").format(new Date());try {Thread.sleep(4000);} catch (InterruptedException e) {e.printStackTrace();}System.out.println(Thread.currentThread().getId() + ":" + data);}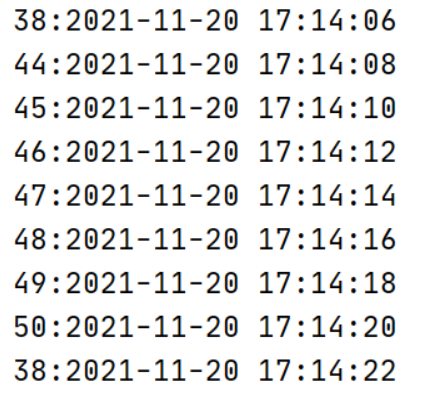
2、使用自定义线程池处理
// 创建一个线程池ExecutorService executorService = Executors.newFixedThreadPool(10);@Scheduled(cron = "0/2 * * * * ?") //每2秒执行一次public void task1() {// 每次执行任务启动一个线程去处理executorService.submit(() -> {String data = new SimpleDateFormat("yyyy-MM-dd HH:mm:ss").format(new Date());try {Thread.sleep(4000);} catch (InterruptedException e) {e.printStackTrace();}System.out.println(Thread.currentThread().getId() + ":" + data);});}请求合并
场景
高并发场景中,调用批量接口相比调用非批量接口有更大的性能优势。但有时候,请求更多的是单个接口,不能够直接调用批量接口,如果这个接口是高频接口,对其做请求合并就很有必要了。比如电影网站的获取电影详情接口,APP的一次请求是单个接口调用,用户量少的时候请求也不多,完全没问题;但同一时刻往往有大量用户访问电影详情,是个高并发的高频接口,如果都是单次查询,后台就不一定能hold住了。为了优化这个接口,后台可以将相同的请求进行合并,然后调用批量的查询接口。
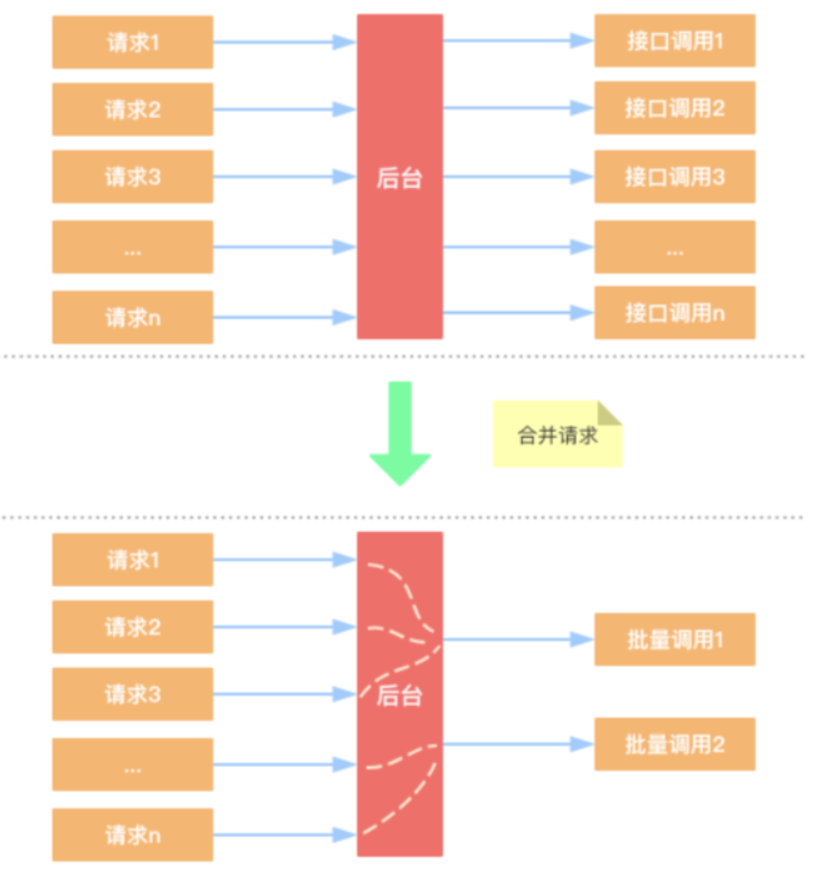
请求合并的目的
- 减少访问数据库的次数
- 单位时间内的多个请求,合并为一个请求。让业务逻辑层把单个查询的sql,改为批量查询的sql。或者逻辑里面需要调用redis,那批量逻辑里面就可以用redis的pipeline去实现。
单个接口
@Autowiredprivate UserService userService;@GetMapping("/info/{id}")public User info(@PathVariable Integer id) {return userService.info(id);}这个接口如果访问的频率很高,会对数据库或者redis造成很大的压力,可以优化成批量接口。
批量接口
1、请求参数封装
@Data
public class BatchRequest {// 数据唯一标识private Integer id;// 线程阻塞任务private CompletableFuture future;
}
2、响应结果封装
@Data
public class BatchResult {private String id;private User user;
}
3.任务批量处理
@Configuration
public class BarchRequestTask {// 场景一个线程池处理任务private ExecutorService executorService = Executors.newFixedThreadPool(10);@Autowiredprivate UserMapper userMapper;// 创建一个缓存队列,用来方批量处理的任务@Beanpublic LinkedBlockingQueue blockingQueue() {LinkedBlockingQueue linkedBlockingQueue = new LinkedBlockingQueue();return linkedBlockingQueue;}@Scheduled(cron = "0/5 * * * * *") // 每5s执行一次public void actionTask() {executorService.submit(() -> {// 1.准备一个集合List list = new ArrayList<>();// 2.队列中的任务取出来放到集合中int size = blockingQueue.size();for (int i = 0; i  0) {// 3.批量查询List resultes = userMapper.batchQuery(list);// 4.把结果集响应给线程for (BatchRequest request : list) {// 把集合转成MapMap map = resultes.stream().collect(Collectors.toMap(BatchResult::getId, BatchResult::getUser));// 从结果集中找到当前请求对应的结果User user = map.get(request.getId().toString());// 把结果集响应给对应的线程request.getFuture().complete(user);}}});}
}
4.批量接口
@Autowiredprivate LinkedBlockingQueue blockingQueue; // 阻塞队列@GetMapping("/batchInfo/{id}")public User batchInfo(@PathVariable Integer id) {// 1、创建一个批量请求任务对象BatchRequest request = new BatchRequest();CompletableFuture future = new CompletableFuture();request.setId(id);request.setFuture(future); // 设置阻塞任务// 2.把任务添加到对象中blockingQueue.add(request);User user = null;try {user = future.get(); // 阻塞等待线程去处理} catch (InterruptedException e) {e.printStackTrace();} catch (ExecutionException e) {e.printStackTrace();}return user == null ? null : user;} 5.dao层批量查询
6.接口批量测试
String url = "http://localhost:8080/threadMere/batchInfo/";for (int i = 1; i < 10; i++) {new Thread(() -> {DefaultHttpClient client = new DefaultHttpClient();HttpGet httpGet = new HttpGet(url + 3);try {CloseableHttpResponse execute = client.execute(httpGet);InputStream content = execute.getEntity().getContent();Scanner scanner = new Scanner(content);while (scanner.hasNextLine()) {System.out.println(scanner.nextLine());}} catch (IOException e) {e.printStackTrace();}}).start();}}Fork/Join框架
Fork/Join框架是Java 7提供的一个用于并行执行任务的框架,是一个把大任务分割成若干个小任务,最终汇总每个小任务结果后得到大任务结果的框架,从而提升应用的性能。Fork/Join框架要完成两件事情:
1.任务分割:首先Fork/Join框架需要把大的任务分割成足够小的子任务,如果子任务比较大的话还要对子任务进行继续分割
2.执行任务并合并结果:分割的子任务分别放到双端队列里,然后启动几个线程分别从双端队列里获取任务执行。子任务执行完的结果都放在另外一个队列里,启动一个线程从队列里取数据,然后合并这些数据。
在Java的Fork/Join框架中,使用两个类完成上述操作
1.ForkJoinTask:我们要使用Fork/Join框架,首先需要创建一个ForkJoin任务。该类提供了在任务中执行fork和join的机制。通常情况下我们不需要直接集成ForkJoinTask类,只需要继承它的子类,Fork/Join框架提供了两个子类:
cursiveTask:用于有返回结果的任务
2.ForkJoinPool:ForkJoinTask需要通过ForkJoinPool来执行
任务分割出的子任务会添加到当前工作线程所维护的双端队列中,进入队列的头部。当一个工作线程的队列里暂时没有任务时,它会随机从其他工作线程的队列的尾部获取一个任务(工作窃取算法)。
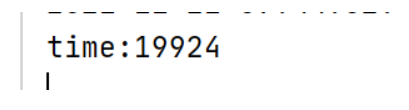
请求未拆分
@GetMapping("/sum")public Integer sum() {long start = System.currentTimeMillis();Integer sum = 0;for (int i = 0; i < 10000; i++) {try {Thread.sleep·1);} catch (InterruptedException e) {e.printStackTrace();}sum += i;}long end = System.currentTimeMillis();System.out.println("time:" + (end - start));return sum;}运行:
请求拆分
1、提交任务
@GetMapping("/sum2")public Integer sum2() {long start = System.currentTimeMillis();// 给数组中添加元素Integer[] array = new Integer[10000];for (int i = 0; i < 10000; i++) {array[i] = i;}// 创建ForkJoinPoolForkJoinPool pool = new ForkJoinPool();// 创建taskComputeTask task = new ComputeTask(0, array.length, array);// 任务拆分,获取结果Integer sum = pool.invoke(task);long end = System.currentTimeMillis();System.out.println("time:" + (end - start));return sum;}2.请求拆分合并
@Data
@AllArgsConstructor
@NoArgsConstructor
public class ComputeTask extends RecursiveTask {private Integer start;private Integer end;private Integer[] task;@Overrideprotected Integer compute() {int sum = 0;if ((end - start) < 100) {for (int i = start; i < end; i++) {try {Thread.sleep(1);} catch (InterruptedException e) {e.printStackTrace();}sum += i;}} else {int mid = (end + start) / 2;ComputeTask left = new ComputeTask(start, mid, task);ComputeTask right = new ComputeTask(mid, end, task);left.fork(); // 拆分right.fork(); // 拆分sum = left.join() + right.join(); // 等待获取结果}return sum;}
}
3.运行
本文来自互联网用户投稿,文章观点仅代表作者本人,不代表本站立场,不承担相关法律责任。如若转载,请注明出处。 如若内容造成侵权/违法违规/事实不符,请点击【内容举报】进行投诉反馈!