前端富文本编辑器quill与uEditor在Vue2.0中的使用
vue-quill编辑器
https://www.kancloud.cn/liuwave/quill (中文官网)
使用 yarn add vue-quill 即可快速安装
<template><div :class="prefixCls"><div class="edit_container"><quill-editorv-model="content"ref="myQuillEditor":options="editorOption"@blur="onEditorBlur($event)"@focus="onEditorFocus($event)"@change="onEditorChange($event)">quill-editor>div>div>
template>
代码如下
<script>
import { quillEditor } from 'vue-quill-editor' //调用编辑器
import 'quill/dist/quill.core.css'
import 'quill/dist/quill.snow.css'
import 'quill/dist/quill.bubble.css'
export default {name: 'QuillEditor',components: {quillEditor,},props: {prefixCls: {type: String,default: 'ant-editor-quill',},// 表单校验用字段// eslint-disable-next-linevalue: {type: String,//接受父组件的数据},//富文本配置项editorOption: {type: Object,},},mounted() {this.$refs.myQuillEditor.quill.enable(false)this.content = this.valuethis.$refs.myQuillEditor.quill.enable(true)},data() {return {content: null,}},computed: {editor() {return this.$refs.myQuillEditor.quill},},methods: {onEditorBlur(quill) {// console.log('editor blur!', quill)// console.log(this.oldVal)},onEditorFocus(quill) {// console.log('editor focus!', quill)// console.log(quill)},onEditorReady(quill) {// console.log('editor ready!', quill)},onEditorChange({ quill, html, text }) {sessionStorage.setItem("editorText",html)// this.$emit('change', html, text)//此处可返回父组件html,text格式的数据},// 清空clear() {this.content = ''},},watch: {value(New, Old) {this.content = New},},
}
</script>
在当前光标后插入图片 | | 文字
//获取编辑器实例let quill = this.$refs.QuillEditor.$refs.myQuillEditor.quill//获取当前位置let length = quill.selection.savedRange.index//插入图片quill.insertEmbed(length, 'image', '图片src')//光标移到插入元素后一位quill.setSelection(length + 1)
踩坑记录: 组件化Quill编辑器传入value用来设置编辑器的值,修改过后通过this.$emit传出,由于组件watch中动态修改编辑器的值,每输入一个字母就会进入一个循环,父传子→子传父,导致编辑器的光标每输入一个字母就回到首位,删除同理,最终通过sessionStorage解决了该bug(父组件在点击提交的时候取出富文本的值)
赋值: props→value
取值: onEditorChange→emit || sessionStorage
清空: 父组件.ref.clear()
百度uEditor编辑器
http://fex.baidu.com/ueditor (中文文档)
百度编辑器需要在官网下载,选择自己需要的版本,通过引入或安装的方式使用,需要注意的是,引入的方式必须引入css文件,大部分教程都没有引入css文件,导致编辑器显示不正常
安装的方式: yarn add vue-ueditor-wrap
引入的方式教程如下:
选择jsp版本会得到如下文件,放在public中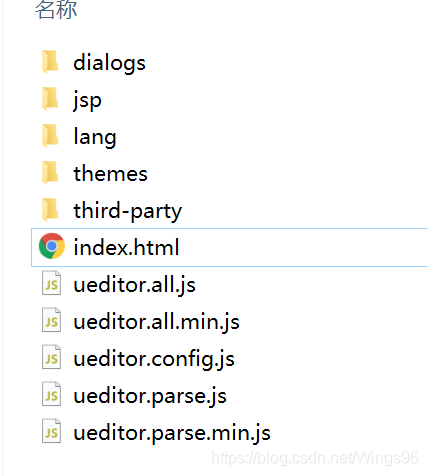
在index.html中引入js:

在main.js中引入css
// 导入编辑器
import "../public/UE/themes/default/css/ueditor.css"
编辑器组件
<template><div><script :id="randomId" type="text/plain" name="container">script>div>
template>
export default {name: 'UE',data() {return {/** 编辑器实例 */editor: null,/** 每个编辑器生成不同的id,以防止冲突 */randomId: 'editor_1' + parseInt(Math.random() * 10000 + 1),ready: false,defaultText: '',}},props: {defaultMsg: {type: String,// default},config: {type: Object,// default: () => ({// serverUrl: `${api.base}/ueditor/`// })},},watch: {defaultMsg(newVal, oldVal) {if (newVal != null && this.ready) {this.editor.setContent(newVal)}},},mounted() {this.initEditor()},methods: {/** 初始化编辑器 */initEditor() {this.$nextTick(() => {// 获取richText实例this.editor = window.UE.getEditor(this.randomId, this.config)this.editor.addListener('ready', () => {this.ready = truethis.editor.setContent(this.defaultMsg)})})},// 插入文本insert(text) {this.editor.execCommand('inserthtml', `${text}`);},//获取值getUEContent() {return this.editor.getContent()},// 清空clear() {this.editor.addListener('ready', () => {this.ready = truethis.editor.setContent('')})},},destroyed() {this.editor.destroy()},
}
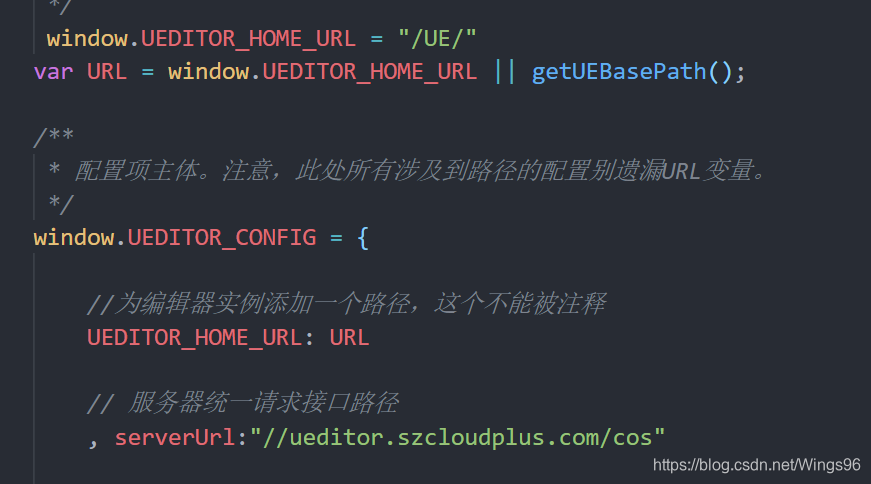
</script>踩坑记录: 必须修改ueditor.config.js中的配置项,否则上传图片会报错(和后端沟通)
赋值: props→defaultMsg
取值: 父组件.ref.getUEContent()
清空: 父组件.ref.clear()
插入文本&&父组件设置编辑器默认值: this.$refs.uEditor.insert(text)
本文来自互联网用户投稿,文章观点仅代表作者本人,不代表本站立场,不承担相关法律责任。如若转载,请注明出处。 如若内容造成侵权/违法违规/事实不符,请点击【内容举报】进行投诉反馈!