手把手教你搭建vue3项目-npm组件推荐
现在大家应该项目都搭建好了,所以我们要优化自己的项目,vue项目npm组件必不可少,所以这篇给他大家推荐一些必备组件
目录
- 创建项目
- 组件推荐
- axios封装(页面loading)
- Vuex封装
- Router封装
封装组件引入
-
为了整洁我们先封装一个地方为我们引用全局组件
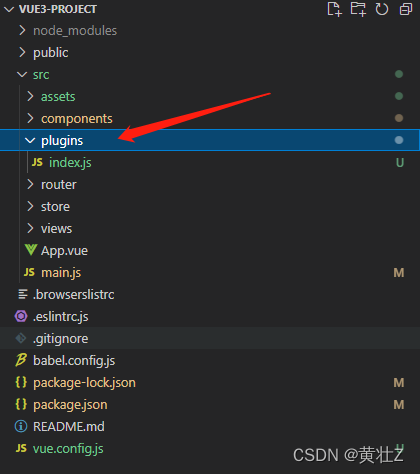
我们先在src路径下创建一个文件夹,这里我叫plugins,接着在文件夹下创建一个index.js -
在index.js中添加一个方法为我们安装插件
/*** 安装插件* @param {*} app vue实例*/ export function installPlugins(app) {console.log(app) } -
在main.js中执行安装方法
import { createApp } from 'vue'
import App from './App.vue'
import router from './router'
import store from './store'
import { installPlugins } from '../src/plugins'
const app = createApp(App).use(store).use(router)
// 安装插件
installPlugins(app)
app.mount('#app')
这样以后所有需要全局引入的组件和文件,我们只需要在plugins/index.js中引入就可以了
1.element plus(UI框架)
有过vue2开发经验得肯定对element-ui相当熟悉,element-ui可以说目前Vue生态圈最火的桌面UI组件库,随着vue3的到来element团队推出element plus来对vue3进行兼容,所以vue3我们还是优选使用它。
- 下载
npm i element-plus - 下载图标库
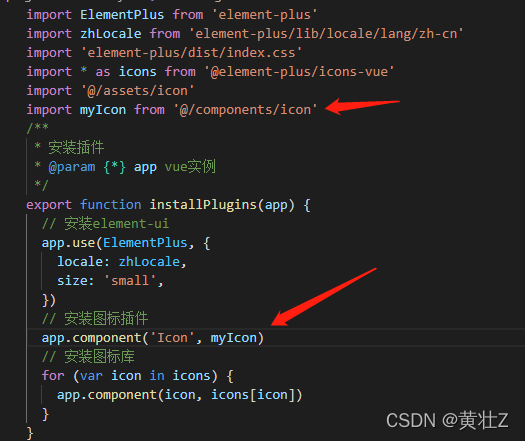
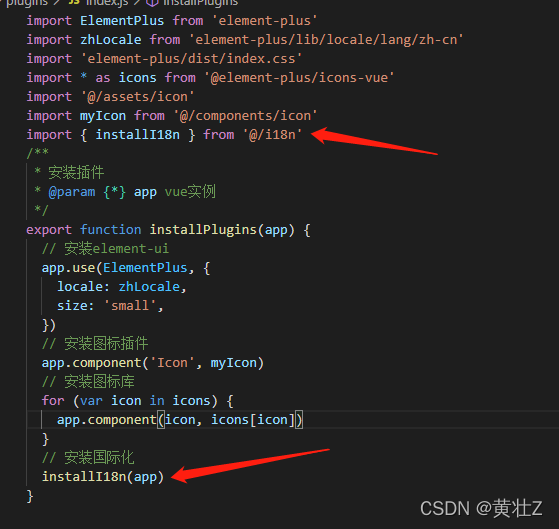
npm i @element-plus/icons-vue - 全局引入,修改plugins/index.js文件
import ElementPlus from 'element-plus' import zhLocale from 'element-plus/lib/locale/lang/zh-cn' import 'element-plus/dist/index.css' import * as icons from '@element-plus/icons-vue' /*** 安装插件* @param {*} app vue实例*/ export function installPlugins(app) {// 安装element-uiapp.use(ElementPlus, {locale: zhLocale,size: 'small',})// 安装图标库for (var icon in icons) {app.component(icon, icons[icon])} } - 到这里就全局引入成功了,更多组件用法直接去官网查看就可以了【element plus】

2.eslint:代码检查
eslint就是个必需品,使用它可以避免低级错误和统一代码的风格,而且可以根据自己的习惯进行配置
- 安装(根据教程来的不用安装,因为我们创建项目的时候已经加上了)
npm install eslint
vscode开发工具我们可以安装ESLint插件搭配使用 - 打开.eslintrc.js(没有该文件的可以自己创建),eslint配置文件,添加一个规则试一下
0 = off, 1 = warn, 2 = error

- 随便打开个vue文件测试一下

这个时候可以看到eslint检测没通过,因为我设置的是2所以他会直接报错 - .eslintignore文件(没有该文件的可以自己创建)可以配置我们那些文件夹不进行检测


我在过滤文件里添加了src路径,所以可以看到之前报错的地方不报错了,大家可以按照自己的需求去过滤文件。
【eslint就到这里了,更多配置请去官网查看(eslint)】
3.prettier (代码格式化)
prettier使用可以使你得代码更加的整洁,可读性高。特别是多人开发的时候prettier可以使代码风格统一,一般搭配ESLint使用。
- 安装
npm i prettier --save-dev
vscode开发工具我们可以安装Prettier - Code formatter插件搭配使用
npm i eslint-plugin-prettier --save-dev配合ESLint检测代码
npm i @vue/eslint-config-prettier@ --save-dev防止与eslint选项冲突 - 在根目录创建配置文件prettier.config.js,添加配置信息
module.exports = {// 代码换行的字符长度printWidth: 80,// 缩进长度tabWidth: 2,// 缩进的方式 false空格 或 trueTabuseTabs: false,// 语句的结尾是否要使用分号semi: false,// 使用单引号代替双引号singleQuote: true,// 对象的属性是否需要添加引号quoteProps: 'as-needed',// 在 JSX 中使用单引号替代双引号jsxSingleQuote: false,// 元素末尾的逗号。默认为 es5trailingComma: 'es5',// 对象中的空格bracketSpacing: true,// 将 html 开始标签的后面一个 > 放在最后一行的末尾,而不是单独一行jsxBracketSameLine: false,// 当箭头函数只有一个参数时,是否加上括号arrowParens: 'always',// 指定编译指示:只格式化在文件顶部包含特定注释的文件。requirePragma: false,// 文件已经被 Prettier 格式化之后,会在文件顶部插入一个特殊的 @format 标记。insertPragma: true,// 所有空格都将认定为是无意义的htmlWhitespaceSensitivity: 'ignore',// vue 文件中,是否给 script 和 style 内的代码添加缩进。vueIndentScriptAndStyle: true,// 指定代码最后是否添加一行空行endOfLine: 'lf', } - .eslintrc.js配置文件添加prettier配置
extends中添加 ‘@vue/prettier’,'extends': ['plugin:vue/vue3-recommended','eslint:recommended','@vue/prettier',],
rules中添加prettier推荐配置rules: {'no-console': process.env.NODE_ENV === 'production' ? 'warn' : 'off','no-debugger': process.env.NODE_ENV === 'production' ? 'warn' : 'off',// prettier推荐配置"prettier/prettier": "error","arrow-body-style": "off","prefer-arrow-callback": "off",// 禁止与 -0 进行比较'no-compare-neg-zero': 2,// 自动关闭'vue/html-self-closing': ['error',{html: {void: 'any',normal: 'any',component: 'always',},svg: 'always',math: 'always',},],}
“prettier/prettier”: “error”,
“arrow-body-style”: “off”,
“prefer-arrow-callback”: “off”,
4.stylelint:样式代码检查
样式代码格式化和检测同样重要
- 安装
npm install stylelint --save-dev
vscode安装Stylelint插件配置自动保存
npm i stylelint-config-standard --save-dev标准配置,如果您希望 stylelint 强制执行风格约定
npm i stylelint-scss --save-dev引入了特定于SCSS语法的规则 - 在根目录创建配置文件.stylelintrc.js,添加配置信息
如果需要更多规则直接去官网查看配置【stylelint】module.exports = {extends: 'stylelint-config-standard',plugins: ['stylelint-scss'],rules: {'indentation': 2,'selector-pseudo-element-no-unknown': [true,{ignorePseudoElements: ['v-deep']}],'string-quotes': "double",'function-max-empty-lines': 0} }
5.svg-sprite-loader:搭建自己的图标组件
虽然element给我们带了了很多图标,但是我们在公司一般都会有自己特殊的图标而且还不会少,如果不管理起来看起来还乱糟糟的,所以我们就要搭建个自己的图标组件方便使用,废话不说直接来。
- 安装
npm i svg-sprite-loader - 然后我们在src/assets下创建一个icon文件夹用来存放所有图标
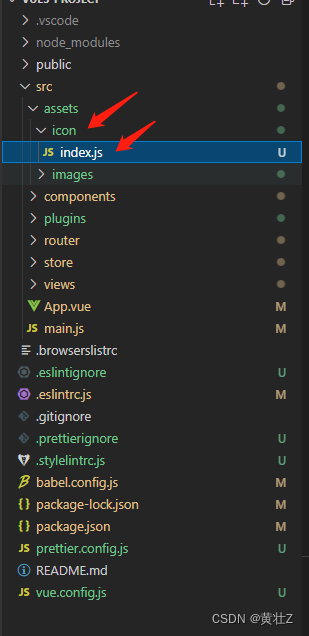
- 还需要在这个文件夹中创建一个index.js文件用来抛出全部图标
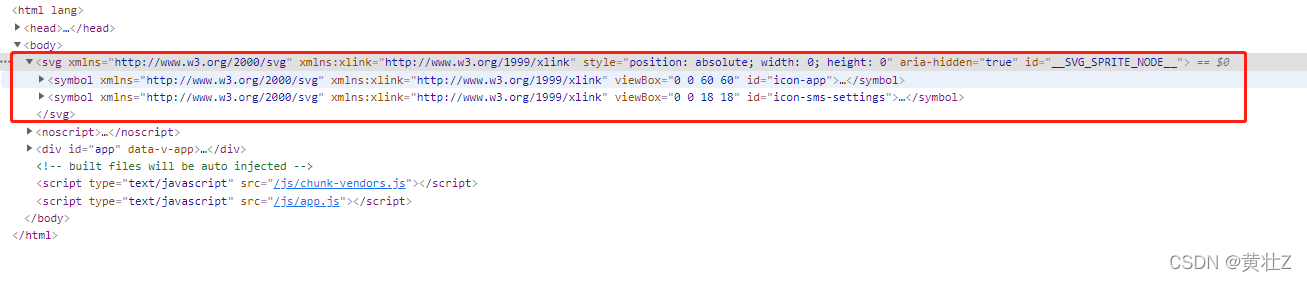
index.js代码const req = require.context('.', true, /\.svg$/) const requireAll = (requireContext) => {return requireContext.keys().map(requireContext) } requireAll(req) - 然后我们需要打开根目录webpack配置文件vue.config.js(没有该文件自行创建就可以),添加图标库
/*** @description webpack配置文件*/const path = require('path') const resolve = (dir) => {return path.join(__dirname, dir) }module.exports = {configureWebpack() {return {resolve: {// 声明别名alias: {'@': resolve('src'),'*': resolve(''),},},}},chainWebpack(config) {config.resolve.symlinks(true)// 添加图标库config.module.rule('svg').exclude.add(resolve('src/assets/icon')).end()config.module.rule('icon').test(/\.svg$/).include.add(resolve('src/assets/icon')).end().use('svg-sprite-loader').loader('svg-sprite-loader').options({ symbolId: 'icon-[name]' }).end()},runtimeCompiler: true,productionSourceMap: false, } - 然后在plugins/index.js中引入icon存放处的抛出图标文件

这个时候运行在浏览器查看源码源码中多了个svg标签你就成功了
我这里已经有两个图标了,只需要把图标放到icon文件夹里他就会自动抛出,然后我们测试一下

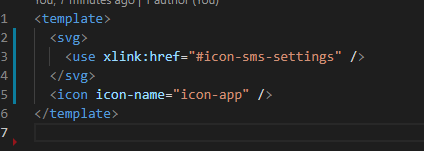
可以看到我已经在icon添加了两个图标,然后在app.vue写一下测试代码,为什么我这个名字加了个icon是因为在webpack配置文件添加symbolId: ‘icon-[name]’ ,这样会使你所有的文件名加上一个icon,所以使用的时候也要加上。
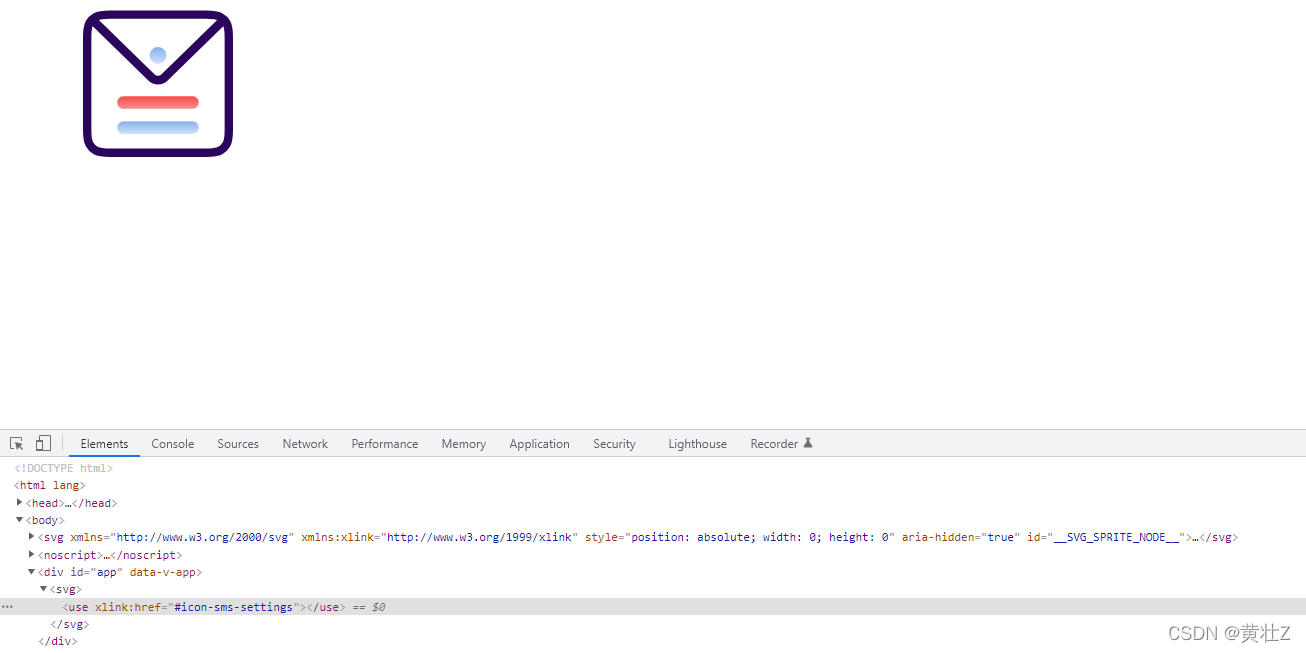
这就是运行结果了 - 但是这样使用我是不允许的,一点都不整洁嘛,所以我们要把icon展现代码封装成一个组件

在components文件夹下创建icon文件夹然后分别创建vue文件和scss文件 - index.vue中代码
<template><svg class="icon" aria-hidden="true"><use :xlink:href="'#' + iconName" /></svg> </template><script>export default {name: 'Icon',props: {// 图标名字iconName: {type: String,default: '',},},} </script><style scoped lang="scss">@import './icon.scss'; </style> - scss代码
.icon {margin-right: 5px;width: 21px;height: 19px;vertical-align: -0.3em; } - 注册图标组件为全局组件,然后我们在任何地方都可以使用这个组件了
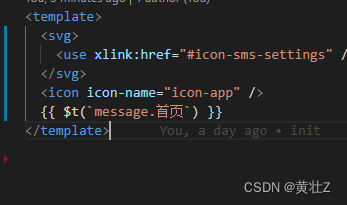
测试一下

完美,图标库就到这里了
6.vue-i18n:国际化
-
安装
npm install vue-i18n -
然后在src下创建个i18n文件用来存放我们所有的国际化文件
-
在i18n文件下创建个index.js用来创建和安装国际化
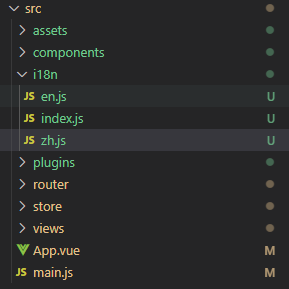
我这里有en/英语,zh/中文两个文件 -
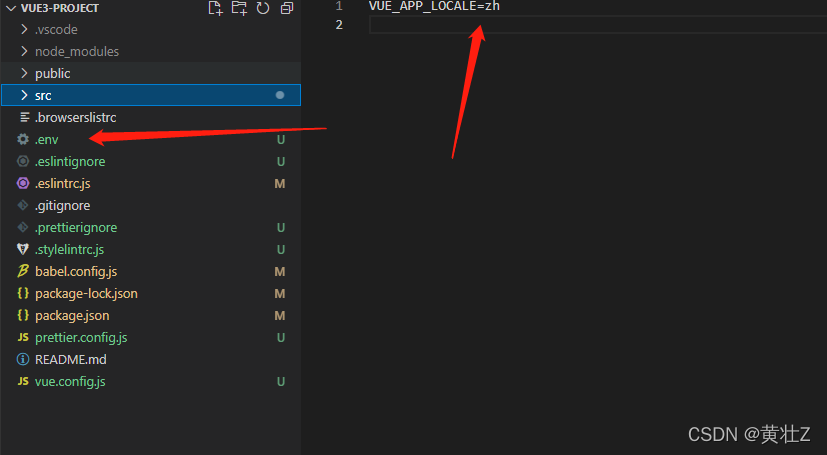
在.env文件中添加语言配置
-
index.js代码
import en from './en'
import zh from './zh'
import { createI18n } from 'vue-i18n'export function installI18n(app) {const messages = {en,zh,}const i18n = createI18n({fallbackLocale: 'zh',globalInjection: true,legacy: false,locale: process.env.VUE_APP_LOCALE,messages,})app.use(i18n)
}
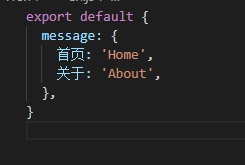
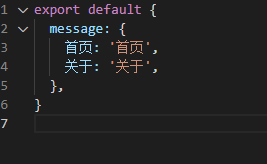
en/zh文件代码格式
然后在全局安装一下i18n
然后测试一下

中文没问题,然后我们测试一下英文,修改.env配置VUE_APP_LOCALE=en,然后重启

完美,更多用法请查看【vue-i18n】
这篇npm组件推荐就结束了,后面有优秀的组件会持续更新的
下期会带来axios封装
喜欢就关注点赞一下吧,会尽快更新!!!
本文来自互联网用户投稿,文章观点仅代表作者本人,不代表本站立场,不承担相关法律责任。如若转载,请注明出处。 如若内容造成侵权/违法违规/事实不符,请点击【内容举报】进行投诉反馈!