【一】springboot整合swagger(超详细)
springboot篇章整体栏目:
【一】springboot整合swagger(超详细
【二】springboot整合swagger(自定义)(超详细)
【三】springboot整合token(超详细)
【四】springboot整合mybatis-plus(超详细)(上)
【五】springboot整合mybatis-plus(超详细)(下)
【六】springboot整合自定义全局异常处理
【七】springboot整合redis(超详细)
【八】springboot整合AOP实现日志操作(超详细)
【九】springboot整合定时任务(超详细)
【十】springboot整合redis实现启动服务即将热点数据保存在全局以及redis(超详细)
【十一】springboot整合quartz实现定时任务优化(超详细)
【十二】springboot整合线程池解决高并发(超详细,保你理解)
【十三】springboot整合异步调用并获取返回值(超详细)
【十四】springboot整合WebService(超详细)
【十五】springboot整合WebService(关于传参数)(超详细)
【十六】springboot整合WebSocket(超详细)
【十七】springboot整合WebSocket实现聊天室(超详细)
【十八】springboot实现自定义全局异常处理
【十九】springboot整合ElasticSearch实战(万字篇)
【二十】springboot整合过滤器实战
【二十一】springboot整合拦截器实战并对比过滤器
【二十二】springboot整合activiti7(1) 实战演示篇
【二十三】springboot整合spring事务详解以及实战
【二十四】springboot使用EasyExcel和线程池实现多线程导入Excel数据
【二十五】springboot整合jedis和redisson布隆过滤器处理缓存穿透
【二十六】springboot实现多线程事务处理_springboot多线程事务
【二十七】springboot之通过threadLocal+参数解析器实现同session一样保存当前登录信息的功能
介绍:接下来我会把学习阶段学到的框架等知识点进行整合,每一次整合是在前一章的基础上进行的,所以后面的整合不会重复放前面的代码。每次的demo我放在结尾。
qq交流群导航——>231378628
第一步:创建Springboot项目
打开idea——>点击文件,创建文件。

选择Spring Initializr,点击下一步。

选择java版本8。
点击下一步。

根据需要导入依赖,后期可以再按需添加。
点击完成,创建完成Springboot项目。
第二步:导入依赖
org.springframework.boot spring-boot-starter-web org.projectlombok lombok true org.springframework.boot spring-boot-starter-test test io.springfox springfox-swagger2 2.9.2 io.springfox springfox-swagger-ui 2.9.2 com.github.xiaoymin swagger-bootstrap-ui 1.9.2 注意:swagger的访问地址有两种样式,此处将两种样式的依赖都进行了导入,样式如下图:


按需索取。
第三步:修改文件
将配置文件改成yml文件
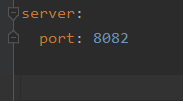
设置端口号,如图:
修改启动类,加上@EnableSwagger2注解,目的是开启默认配置的swagger,后期(下一章)会讲到如何自定义swagger配置并开启,如图:

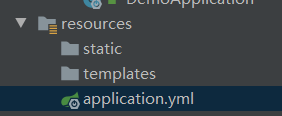
第四步:创建文件
创建目录结构如图:

下面展示每一个文件,按需自取。
Controller:
@Api(tags = "产品接口")
@RestController
@RequestMapping("/productController")
public class ProductController {@ApiOperation(value = "获取产品详情信息")@GetMapping("/getProductDetail")@ApiImplicitParam(name = "pid", value = "产品id", paramType = "String")public BaseResponse getProductDetail(@RequestParam(value = "pid") String pid) {return RespGenerator.returnOK("成功");}@ApiOperation(value = "获取产品列表信息")@PostMapping("/getProductList")public BaseResponse> getProductList() {return RespGenerator.returnOK("成功");}@ApiOperation(value = "删除产品")@PostMapping("/deleteProductList")public BaseResponse deleteProductList(@RequestBody DeleteProductVO deleteProductVO) {return RespGenerator.returnOK("成功");}}
@Api(tags = "用户接口")
@RestController
@RequestMapping("userController")
public class UserController {@ApiOperation(value = "修改用户信息")@PostMapping("/updateUserMessage")public BaseResponse updateUserMessage(@RequestBody UpdateUserVO updateUserVO) {return RespGenerator.returnOK("成功");}@ApiOperation(value = "获取用户列表信息")@PostMapping("/getUserList")public BaseResponse> getUserList() {return RespGenerator.returnOK("成功");}@ApiOperation(value = "删除用户信息")@PostMapping("/deleteUser")public BaseResponse deleteUser(@RequestBody DeleteUserVO deleteUserVO) {return RespGenerator.returnOK("成功");}} Api注解:定义接口名称
ApiOperation注解:定义方法名称
ApiImplicitParam注解:定义param参数的各个属性
BO(传出参数):
@Data
@ApiModel("产品详情BO类")
public class ProductDetailBO implements Serializable {/*** 序列化*/private static final long serialVersionUID = 8073662434406951441L;@ApiModelProperty(value = "产品ID")private String pid;@ApiModelProperty(value = "产品名称")private String productName;@ApiModelProperty(value = "价格")private String price;}
@Data
@ApiModel("用户详情BO类")
public class UserDetailBO implements Serializable {/*** 序列化*/private static final long serialVersionUID = 8073662434406951441L;@ApiModelProperty(value = "用户ID")private String uid;@ApiModelProperty(value = "用户姓名")private String userName;@ApiModelProperty(value = "用户密码")private String password;}ApiModel注解:定义对象名称
ApiModelProperty注解:定义参数名称
实体类:
@Data
public class Product {private String pid;private String productName;private String price;}
@Data
public class User {private String uid;private String userName;private String password;}VO:
@Data
@ApiModel("删除产品传入VO类")
public class DeleteProductVO implements Serializable {/*** 序列化*/private static final long serialVersionUID = 8073662434406951441L;@ApiModelProperty(value = "产品ID集合")private List pids;}
@Data
@ApiModel("删除用户传入VO类")
public class DeleteUserVO implements Serializable {/*** 序列化*/private static final long serialVersionUID = 8073662434406951441L;@ApiModelProperty(value = "用户ID集合")private List uids;} @Data
@ApiModel("修改用户信息传入VO类")
public class UpdateUserVO implements Serializable {/*** 序列化*/private static final long serialVersionUID = 8073662434406951441L;@ApiModelProperty(value = "用户ID")private String uid;@ApiModelProperty(value = "用户密码")private String password;}响应类:
@Data
public class BaseResponse {private String code;private String message;private T data;/*** * 默认构造方法* * @param code*            状态码* @param message*            接口信息* @param data*            接口数据*/public BaseResponse(String code, String message, T data) {super();this.code = code;this.message = message;this.data = data;}/*** 默认构造方法*/public BaseResponse() {super();}}
统一返回类:
public class RespGenerator {/*** 接口调用成功时出参* * @param data* 接口返回数据* @return*/@SuppressWarnings({ "unchecked", "rawtypes" })public static BaseResponse returnOK(Object data) {return new BaseResponse("200", "接口调用成功!", data);}/*** 调用失败* * @param code* 错误码* @param message* 错误信息* @return*/public static BaseResponse到此完毕,接下来会继续更新加强整合,尽情期待。
访问地址:http://localhost:8082/swagger-ui.html或者http://localhost:8082/doc.html
demo地址:studydemo/整合swagger at main · zrc11/studydemo · GitHub
本文来自互联网用户投稿,文章观点仅代表作者本人,不代表本站立场,不承担相关法律责任。如若转载,请注明出处。 如若内容造成侵权/违法违规/事实不符,请点击【内容举报】进行投诉反馈!