java+elasticsearch7.17.3,使用pytorch的resnet50模型实现以图搜图效果
前言:
现在需要用java+elasticsearch的方式实现以图搜图的效果,效果如下:
相关文章:https://blog.csdn.net/m0_52640724/article/details/129357847
实现效果如下:
目录
- 一、相关环境
- 二、引入算法
- 三、创建表和索引
- 1、mysq中创建file_vector表
- 2、创建es索引
- 四、java项目引入依赖
- 五、调用算法
- 六、预处理文件数据
- 七、同步数据到es
- 八、查询数据
- 九、演示效果
- 十、后续可优化点
一、相关环境
java:jdk11
elasticsearch:7.17.3
windows:win10
linux:centos7.9
二、引入算法
此算法是使用pytorch中resnet50模型计算图片的张量,数据存入elasticsearch中,匹配数据正弦值大小
将下面链接中的算法下载后即可,放入 D:/test/ 文件夹
无需配置相关算法环境
算法下载地址
三、创建表和索引
避免重复生成内容,将算法生成的正弦值存入mysql表中,设置mysql和es数据同步
1、mysq中创建file_vector表

2、创建es索引
PUT /file_vector
{"mappings": {"properties": {"vectorList": {"type": "dense_vector","dims": 1024},"url" : {"type" : "keyword"},"fileId": {"type": "keyword"}}}
}
四、java项目引入依赖
本项目使用的是maven,直接在pom文件中引入依赖即可
注意:由于环境不一致,在本地开发过程中引入的是windows版本依赖,在linux环境中引入的是linux版本依赖,如果linux为centos8以上,似乎windows版本依赖也可行
<!--elasticsearch依赖     开始--><dependency><groupId>co.elastic.clients</groupId><artifactId>elasticsearch-java</artifactId><version>7.17.3</version></dependency><dependency><groupId>com.fasterxml.jackson.core</groupId><artifactId>jackson-databind</artifactId><version>2.12.3</version></dependency><dependency><groupId>jakarta.json</groupId><artifactId>jakarta.json-api</artifactId><version>2.0.1</version></dependency><!--elasticsearch依赖     结束--><!--提取图片正弦值依赖开始   windows环境依赖-->
<!--        <dependency>-->
<!--            <groupId>ai.djl.pytorch</groupId>-->
<!--            <artifactId>pytorch-engine</artifactId>-->
<!--            <version>0.19.0</version>-->
<!--        </dependency>-->
<!--        <dependency>-->
<!--            <groupId>ai.djl.pytorch</groupId>-->
<!--            <artifactId>pytorch-native-cpu</artifactId>-->
<!--            <version>1.10.0</version>-->
<!--            <scope>runtime</scope>-->
<!--        </dependency>-->
<!--        <dependency>-->
<!--            <groupId>ai.djl.pytorch</groupId>-->
<!--            <artifactId>pytorch-jni</artifactId>-->
<!--            <version>1.10.0-0.19.0</version>-->
<!--        </dependency>--><!--提取图片正弦值依赖结束  windows环境依赖 --><!--提取图片正弦值依赖开始   linux环境依赖--><dependency><groupId>ai.djl.pytorch</groupId><artifactId>pytorch-engine</artifactId><version>0.16.0</version></dependency><dependency><groupId>ai.djl.pytorch</groupId><artifactId>pytorch-native-cpu-precxx11</artifactId><classifier>linux-x86_64</classifier><version>1.9.1</version><scope>runtime</scope></dependency><dependency><groupId>ai.djl.pytorch</groupId><artifactId>pytorch-jni</artifactId><version>1.9.1-0.16.0</version><scope>runtime</scope></dependency><!--提取图片正弦值依赖结束 linux环境依赖 -->
五、调用算法
将第二步中的算法放入对应的文件夹中
在下面代码中,windows版本下算法路径为 D:/test/faceModel.pt ,也可自行更改
//获取图片正弦值@Overridepublic Predictor<Image, float[]> getVectorData() {Model model; //模型Predictor<Image, float[]> predictor; //predictor.predict(input)相当于python中model(input)int IMAGE_SIZE = 224;try {model = Model.newInstance("faceModel");//这里的model.pt是上面代码展示的那种方式保存的
//            model.load(FileInfoServiceImpl.class.getClassLoader().getResourceAsStream("faceModel.pt"));model.load(new FileInputStream("D:/test/faceModel.pt"));
//            model.load(new FileInputStream("/usr/local/dm/algorithm/faceModel.pt"));Transform resize = new Resize(IMAGE_SIZE);Transform toTensor = new ToTensor();Transform normalize = new Normalize(new float[]{0.485f, 0.456f, 0.406f}, new float[]{0.229f, 0.224f, 0.225f});//Translator处理输入Image转为tensor、输出转为float[]Translator<Image, float[]> translator = new Translator<Image, float[]>() {@Overridepublic NDList processInput(TranslatorContext ctx, Image input) throws Exception {NDManager ndManager = ctx.getNDManager();System.out.println("input: " + input.getWidth() + ", " + input.getHeight());NDArray transform = normalize.transform(toTensor.transform(resize.transform(input.toNDArray(ndManager))));
//                    System.out.println(transform.getShape());NDList list = new NDList();list.add(transform);return list;}@Overridepublic float[] processOutput(TranslatorContext ctx, NDList ndList) throws Exception {return ndList.get(0).toFloatArray();}};predictor = new Predictor<>(model, translator, Device.cpu(), true);return predictor;} catch (Exception e) {e.printStackTrace();}return null;}
六、预处理文件数据
将 D:/test/photo/ 文件夹中放入图片,调用接口批量生成图片的张量存入表中
public void addFileVector111() {try {File file = new File("D:/test/photo/");for (File listFile : file.listFiles()) {InputStream inputStream = new FileInputStream("D:/test/photo/" + listFile.getName());Predictor<Image, float[]> vectorData = getVectorData();float[] vector = vectorData.predict(ImageFactory.getInstance().fromInputStream(inputStream));if (vector == null) {log.error("生成正弦值内容失败");continue;}Gson gson = new Gson();String s = gson.toJson(vector);String newSub = s.substring(1, s.length() - 1);//存储fileVector表FileVector f = new FileVector();f.setVectorList(newSub);f.setUrl(listFile.getAbsolutePath());f.setStatus("1");int i = fileVectorDao.insertSelective(f);if (i <= 0) continue;}} catch (Exception e) {e.printStackTrace();log.error("添加图片正弦值失败" + e);}}
七、同步数据到es
原本mysql数据同步到es用的是canal,似乎canal无法传输text类型的文件,则改为通过程序同步
@Overridepublic ApiResult addEsFileVectorList() {ElasticsearchClient esClient = null;Long sqlLimitNum = 1000L;Boolean flag = true;try {long beginTime = System.currentTimeMillis();Integer successNum = 0;Long beginFileVectorId = 0L;Long endFileVectorId = sqlLimitNum;while (flag) {List<FileVector> fileVectorList = fileVectorDao.selectFileVectorList(beginFileVectorId, sqlLimitNum);if (fileVectorList != null && fileVectorList.size() > 0) {BulkRequest.Builder br = new BulkRequest.Builder();List<Long> successFileVecIdList = new ArrayList<>();//成功的同步id记录for (FileVector f : fileVectorList) {String[] strArray = f.getVectorList().split(",");Float[] floatArray = Arrays.stream(strArray).map(Float::parseFloat).toArray(Float[]::new);//存储es数据Map<String, Object> jsonMap = new HashMap<>();jsonMap.put("fileId", f.getFileId());jsonMap.put("vectorList", floatArray);jsonMap.put("url", f.getUrl());br.operations(op -> op.index(idx -> idx.index("file_vector").id(f.getFileVectorId().toString()).document(jsonMap)));successFileVecIdList.add(f.getFileVectorId());}if (successFileVecIdList != null && successFileVecIdList.size() > 0) {esClient = this.getEsClient();BulkResponse bulk = esClient.bulk(br.build());if (bulk.errors()) {System.out.println("有部分数据操作失败");for (BulkResponseItem item : bulk.items()) {if (item.error() != null) {//如果失败需要将失败的id保存Long failFileVectorId = Long.valueOf(String.valueOf(item.id()));successFileVecIdList.remove(failFileVectorId);}}}}//修改file_vector表中同步状态if (successFileVecIdList != null && successFileVecIdList.size() > 0)fileVectorDao.updateStatusByFileIdList(successFileVecIdList, "0");successNum += successFileVecIdList.size();beginFileVectorId = endFileVectorId + 1;endFileVectorId = endFileVectorId + sqlLimitNum;} else {flag = false;}}long endTime = System.currentTimeMillis();System.out.println("用时:" + (endTime - beginTime) + "ms");return ApiResult.success("同步成功,共执行" + successNum + "条记录");} catch (Exception e) {e.printStackTrace();log.error("批量同步es_file_vector失败" + e);} finally {try {esClient._transport().close();} catch (IOException e) {e.printStackTrace();}}return ApiResult.error("同步失败");}
八、查询数据
接收一张图片,调用算法获取图片张量,调用es获取正弦值匹配数据
可自行设置匹配图片匹配阈值,下面代码中设置的是0.8
public static List<SearchResult> search1(InputStream input) {ElasticsearchClient client = null;try {float[] vector = getVectorList().predict(ImageFactory.getInstance().fromInputStream(input));System.out.println(Arrays.toString(vector));// 连接Elasticsearch服务器client = getEsClient();Script.Builder script = new Script.Builder();script.inline(_1 -> _1.lang("painless").source("cosineSimilarity(params.queryVector, doc['vectorList'])").params("queryVector", JsonData.of(vector)));FunctionScoreQuery.Builder funQueryBuilder = new FunctionScoreQuery.Builder();funQueryBuilder.query(_1 -> _1.matchAll(_2 -> _2));funQueryBuilder.functions(_1 -> _1.scriptScore(_2 -> _2.script(script.build())));SearchResponse<Map> search = client.search(_1 -> _1.index("file_vector").query(funQueryBuilder.build()._toQuery()).source(_2 -> _2.filter(_3 -> _3.excludes("vector"))).size(100).minScore(0.8) //此处是设置返回匹配最低分数, Map.class);List<SearchResult> list = new ArrayList<>();List<Hit<Map>> hitsList = search.hits().hits();for (Hit<Map> mapHit : hitsList) {float score = mapHit.score().floatValue();String url = (String) mapHit.source().get("url");SearchResult aa = new SearchResult(url, score);list.add(aa);}return list;} catch (Exception e) {e.printStackTrace();} finally {try {client._transport().close();} catch (IOException e) {e.printStackTrace();}}return null;}//生成es连接private static ElasticsearchClient getEsClient() {try {//调用es有同步和异步之分,下列方法是同步阻塞调用// Create the low-level clientRestClient restClient = RestClient.builder(new HttpHost(ES_IP, ES_PORT)).build();// Create the transport with a Jackson mapperElasticsearchTransport transport = new RestClientTransport(restClient, new JacksonJsonpMapper());// And create the API clientElasticsearchClient client = new ElasticsearchClient(transport);return client;} catch (Exception e) {e.printStackTrace();}return null;}
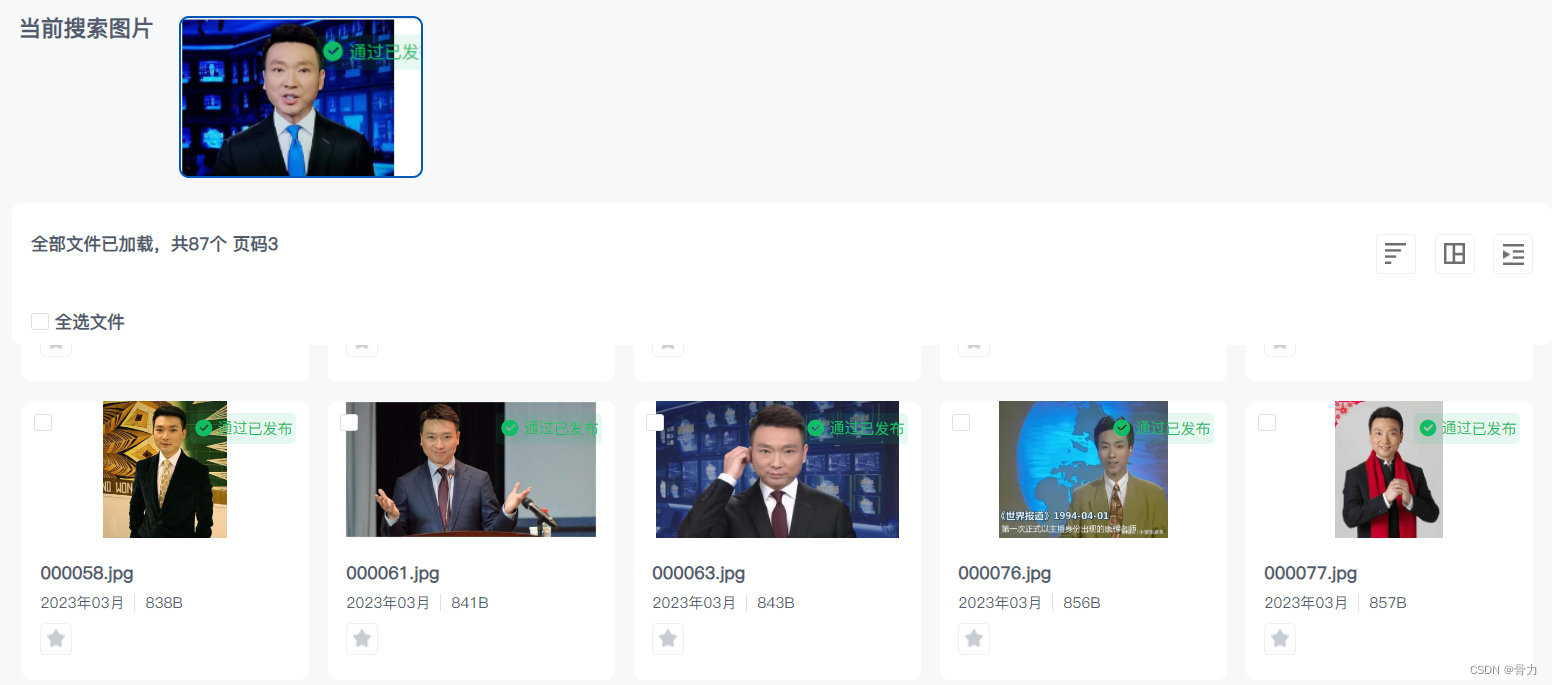
九、演示效果
通过设置不同的阈值,匹配的精确程度也不一样,如果设置阈值为0.9,只会返回构图完全一样的图片,设置为0.8,则会实现下图效果
十、后续可优化点
1、在上面的流程设计中,是通过java程序同步的es,java程序设置定时任务同步,时效性会比较差,mysql中无法存放float[]格式数据,看是否有其他方案提高同步时效性
2、图片阈值方面的设置还需要根据具体场景具体分析,阈值太低容易误读文件,阈值太高容易漏查文件
大家有什么好的解决方案欢迎留言探讨。
本文来自互联网用户投稿,文章观点仅代表作者本人,不代表本站立场,不承担相关法律责任。如若转载,请注明出处。 如若内容造成侵权/违法违规/事实不符,请点击【内容举报】进行投诉反馈!