Vision pro 自定义工具(c#)
目录
- 一、编写自定义工具
- 1、新建Windows类库
- 2、CogTool
- 2.1、环境
- 2.2、代码
- 3、CogToolEditV2用户控件
- 3.1、环境
- 3.2、代码
- 4、环境和注意事项
- 二、测试并生成VTT文件
- 1、从解决方案中添加一个新建的Windows窗体应用
- 2、添加引用
- 3、在窗体加入CogToolEditV21控件、CogTool、CogImageFileEditV2(传输图像,测试写的自定义工具)
- 4、生成VTT文件,通过CogImageFileEditV2传入图片
- 5、执行后,在项目的bin\debug中找到VTT文件
- 6、运行窗体、测试工具功能
- 三、将自定义工具加入到Vision pro中
- 1、创建一个16x16像素的图标,文件格式为.ico
- 2、打开vision pro文件位置
- 3、ico、dll:放在vision pro文件所在位置
- 4、vtt:放在vision pro文件所在位置下的Templates \ Tools
- 5、将工具添加输入输出图像的终端
- 5、展示
- 四、下载地址(VisionPro所需要的dll、ico、图片都在源代码里)
一、编写自定义工具
1、新建Windows类库
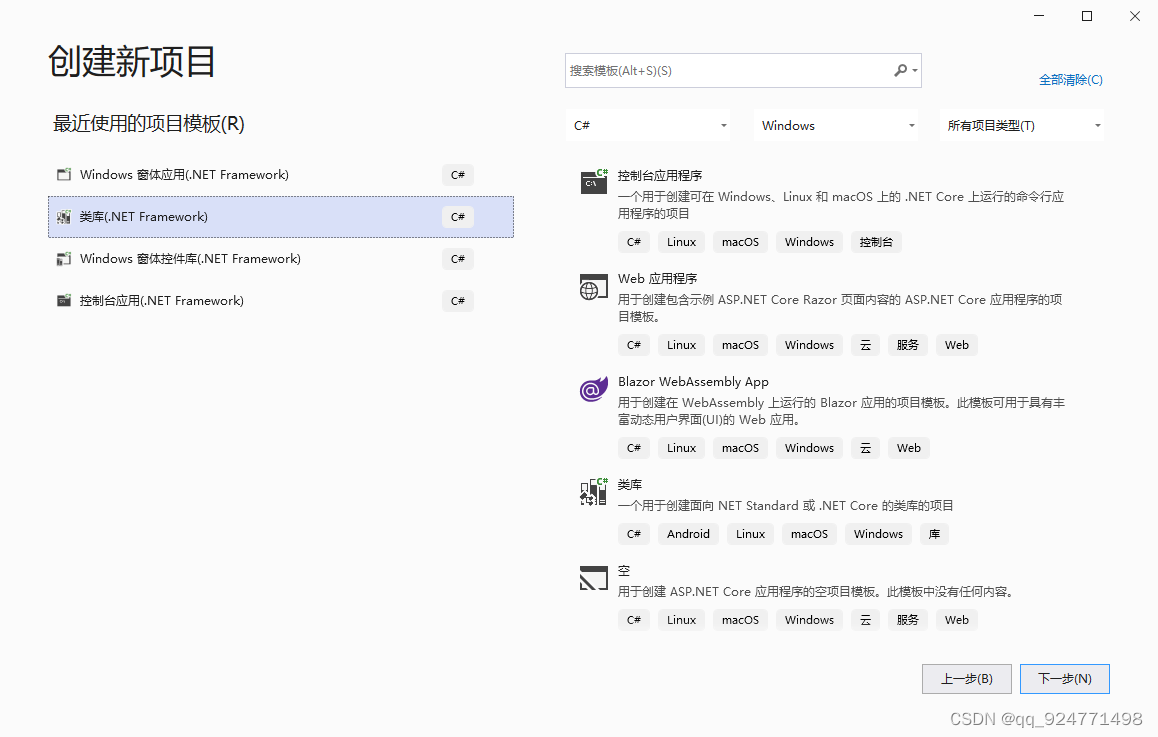
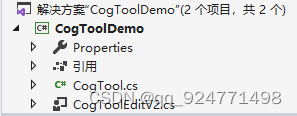
类库里面添加类和用户控件
2、CogTool
2.1、环境
需要Cognex.VisionPro 和 Cognex.VisionPro.Core 的引用
2.2、代码
using Cognex.VisionPro.Implementation;
using System;
using System.Collections.Generic;
using System.Linq;
using System.Text;
using System.Threading.Tasks;
using System.Runtime.Serialization;
using System.ComponentModel;
using System.Windows.Forms;
using Cognex.VisionPro;
using System.Drawing;namespace CogToolDemo
{//需要Cognex.VisionPro 和 Cognex.VisionPro.Core 的引用[Serializable][Editor(typeof(CogToolEditV2), typeof(Control))] //CogToolEditV2为用户控件名称[CogDefaultToolInputTerminal(0, "InputImage", "InputImage")][CogDefaultToolOutputTerminal(0, "OutputImage", "OutputImage")][System.ComponentModel.DesignerCategory("")]public class CogTool : Cognex.VisionPro.Implementation.CogToolBase{#region 私有变量// 输入图像(可以不序列化输入图像)[CogSerializationOptionsAttribute(CogSerializationOptionsConstants.InputImages)]private ICogImage _InputImage;// 输出图像(可以不序列化输出图像)[CogSerializationOptionsAttribute(CogSerializationOptionsConstants.OutputImages)]private ICogImage _OutputImage;//------------新增私有变量-------------/// 3、CogToolEditV2用户控件
3.1、环境
1、需要Cognex.VisionPro.Controls的引用
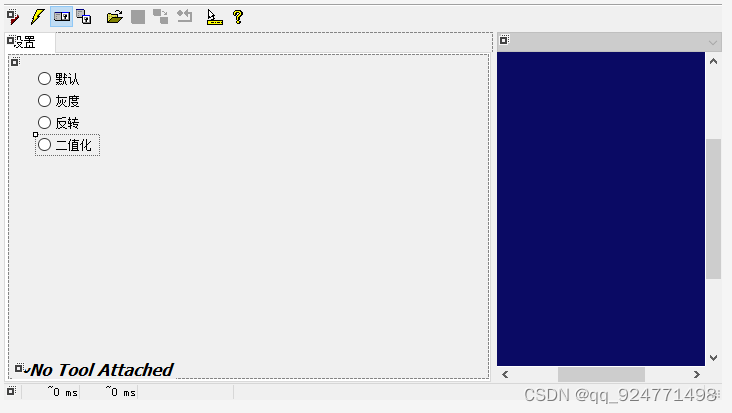
2、需要继承CogToolEditControlBaseV2类
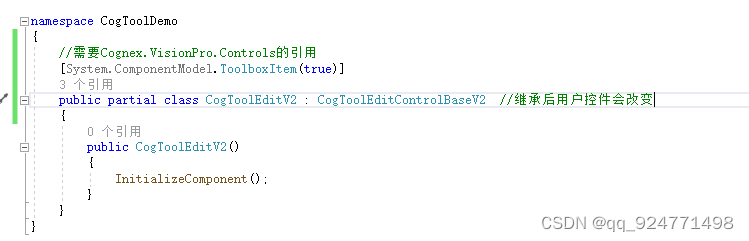
继承后,控件会如下图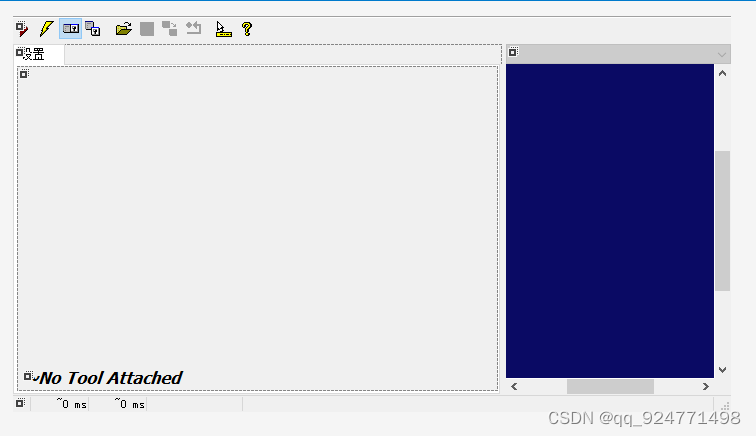
3.2、代码
using Cognex.VisionPro;
using System;
using System.Collections.Generic;
using System.ComponentModel;
using System.Data;
using System.Drawing;
using System.Linq;
using System.Text;
using System.Threading.Tasks;
using System.Windows.Forms;namespace CogToolDemo
{//需要Cognex.VisionPro.Controls的引用[System.ComponentModel.ToolboxItem(true)]public partial class CogToolEditV2 : CogToolEditControlBaseV2  //继承后用户控件会改变{//构造函数public CogToolEditV2(): base(false){InitializeComponent();tbbElectric.Visible = false;//选中默认项this.radioButton1.Checked = true;}//创建Subject属性,包括getter和setter。对象是vision工具的实例,其状态将通过此控件公开[Browsable(false)][DesignerSerializationVisibility(DesignerSerializationVisibility.Hidden)]public CogTool Subject{get { return base.GetSubject() as CogTool; }set { base.SetSubject(value); }}//在Subject被替换后的第一个线程安全机会调用此方法。控件应使用此方法使用来自新Subject的值(重新)初始化自身。protected override void InitializeFromSubject(){base.InitializeFromSubject();SetupSettingsTab();}//当Subject引发已更改的事件时,都会调用此方法。此函数始终在GUI线程上执行。//在这里,你可以更新其关联工具属性值可能已更改的任何子控件,如所提供的已更改事件参数的状态标志所示。protected override void SubjectValuesChanged(object sender,CogChangedEventArgs e){base.SubjectValuesChanged(sender, e);if ((e.StateFlags & CogTool.SfImageProcessing) != 0){SetupSettingsTab();}}// 每当SubjectInUse属性发生更改时,就会调用此方法。这是启用或禁用子控制的好地方。protected override void SubjectInUseChanged(){base.SubjectInUseChanged();bool bEnabled = false;if (Subject != null)  //Subject不为空if (!SubjectInUse)   //Subject没有运行bEnabled = true;//控制控件Enabled属性radioButton1.Enabled = bEnabled;radioButton2.Enabled = bEnabled;radioButton3.Enabled = bEnabled;radioButton4.Enabled = bEnabled;} // protected override void SubjectInUseChanged()// SetupSettingsTab() 访问 Subject.xxx,// 因此只能在安全时间调用(例如,当 SubjectInUse 为 false 时)。private void SetupSettingsTab(){AssertSafe();bool bChecked = false;if (Subject != null)bChecked = true;if (bChecked){//工具窗体关闭后,重新获取控件状态switch (Subject.ImageProcessingType){case 0:radioButton1.Checked = true;radioButton2.Checked = false;radioButton3.Checked = false;radioButton4.Checked = false;break;case 1:radioButton1.Checked = false;radioButton2.Checked = true;radioButton3.Checked = false;radioButton4.Checked = false;break;case 2:radioButton1.Checked = false;radioButton2.Checked = false;radioButton3.Checked = true;radioButton4.Checked = false;break;case 3:radioButton1.Checked = false;radioButton2.Checked = false;radioButton3.Checked = false;radioButton4.Checked = true;break;default:radioButton1.Checked = true;radioButton2.Checked = false;radioButton3.Checked = false;radioButton4.Checked = false;break;}}bool bEnabled = false;if (Subject != null)bEnabled = true;//控制控件Enabled属性radioButton1.Enabled = bEnabled;radioButton2.Enabled = bEnabled;radioButton3.Enabled = bEnabled;radioButton4.Enabled = bEnabled;}private void radioButton1_CheckedChanged(object sender, EventArgs e){if (Subject == null)return;if (SubjectInUse)return;Subject.ImageProcessingType = 0;}private void radioButton2_CheckedChanged(object sender, EventArgs e){if (Subject == null)return;if (SubjectInUse)return;Subject.ImageProcessingType = 1;}private void radioButton3_CheckedChanged(object sender, EventArgs e){if (Subject == null)return;if (SubjectInUse)return;Subject.ImageProcessingType = 2;}private void radioButton4_CheckedChanged(object sender, EventArgs e){if (Subject == null)return;if (SubjectInUse)return;Subject.ImageProcessingType = 3;}}
}
4、环境和注意事项
1、目标平台为Any CPU,后面窗体添加此控件的时候就不会出问题
2、生成的DLL要与VisionPro工具名一致,不一致的话后面添加进VisionPro里面会获取不到ico图标

二、测试并生成VTT文件
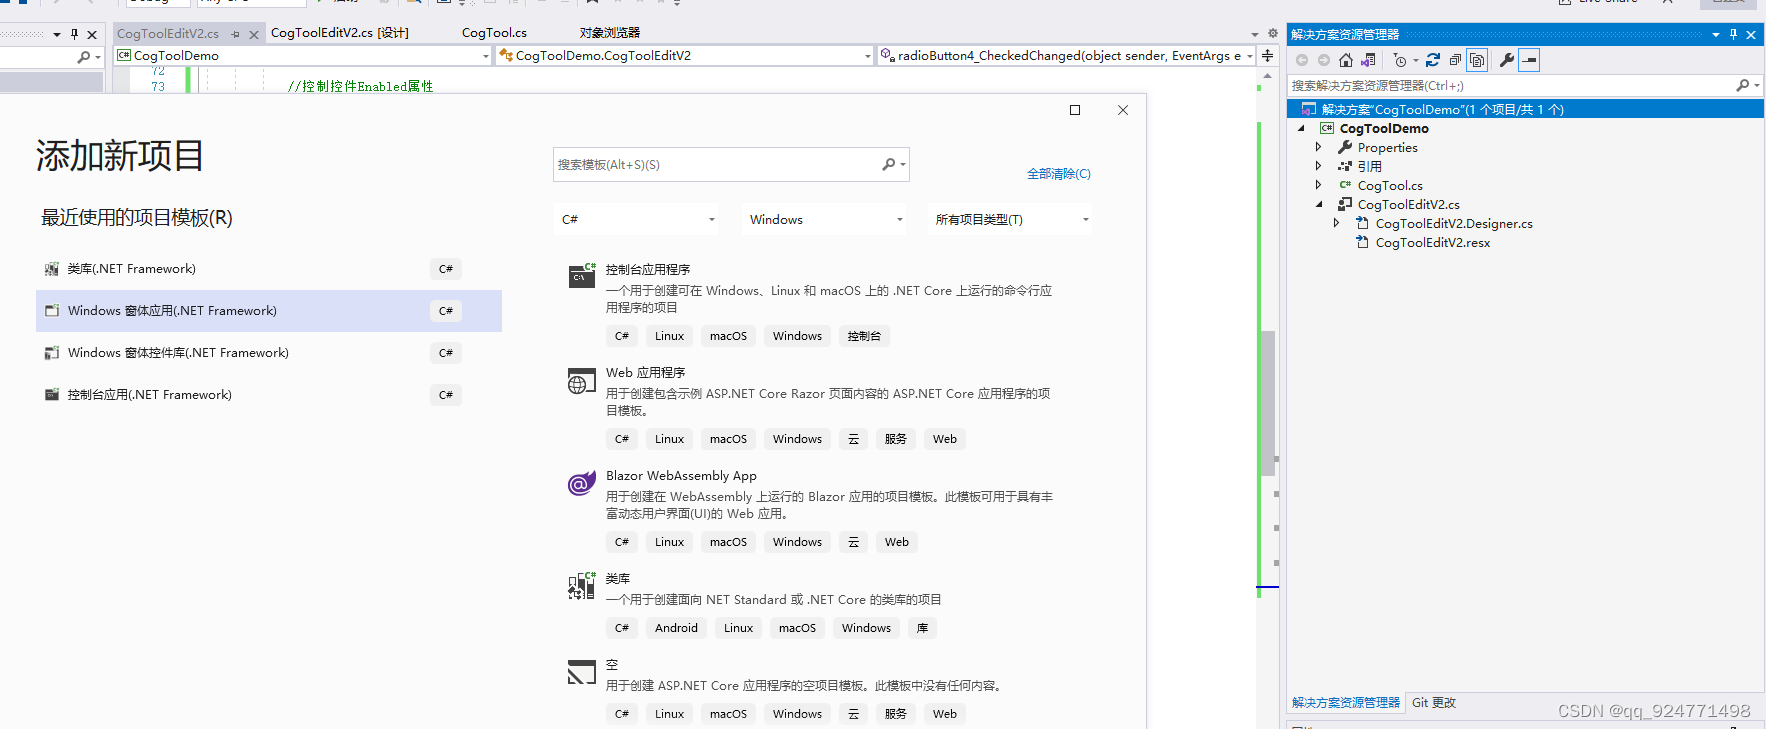
1、从解决方案中添加一个新建的Windows窗体应用
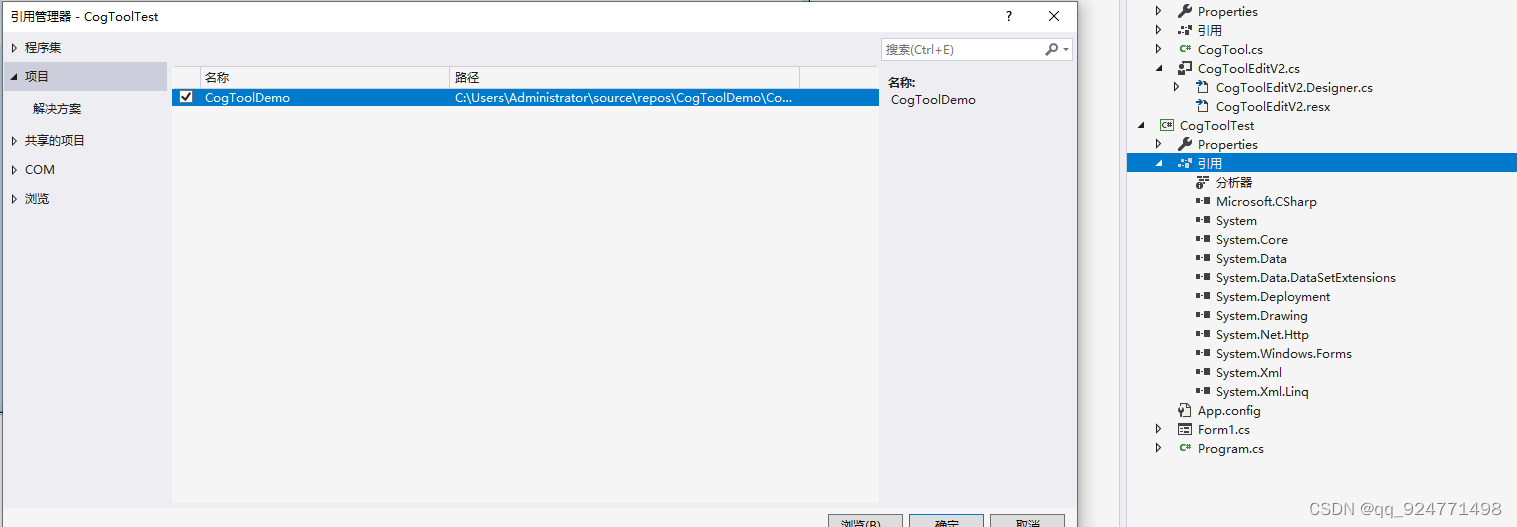
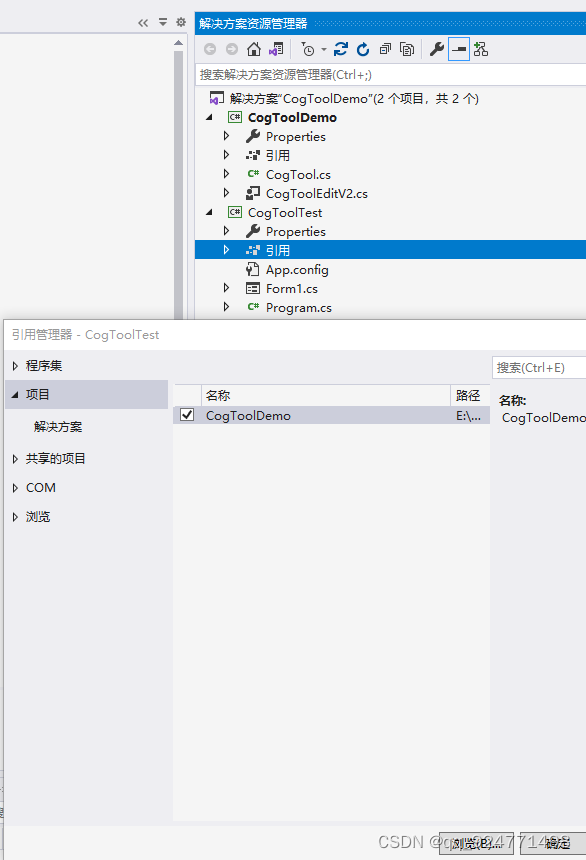
2、添加引用
3、在窗体加入CogToolEditV21控件、CogTool、CogImageFileEditV2(传输图像,测试写的自定义工具)
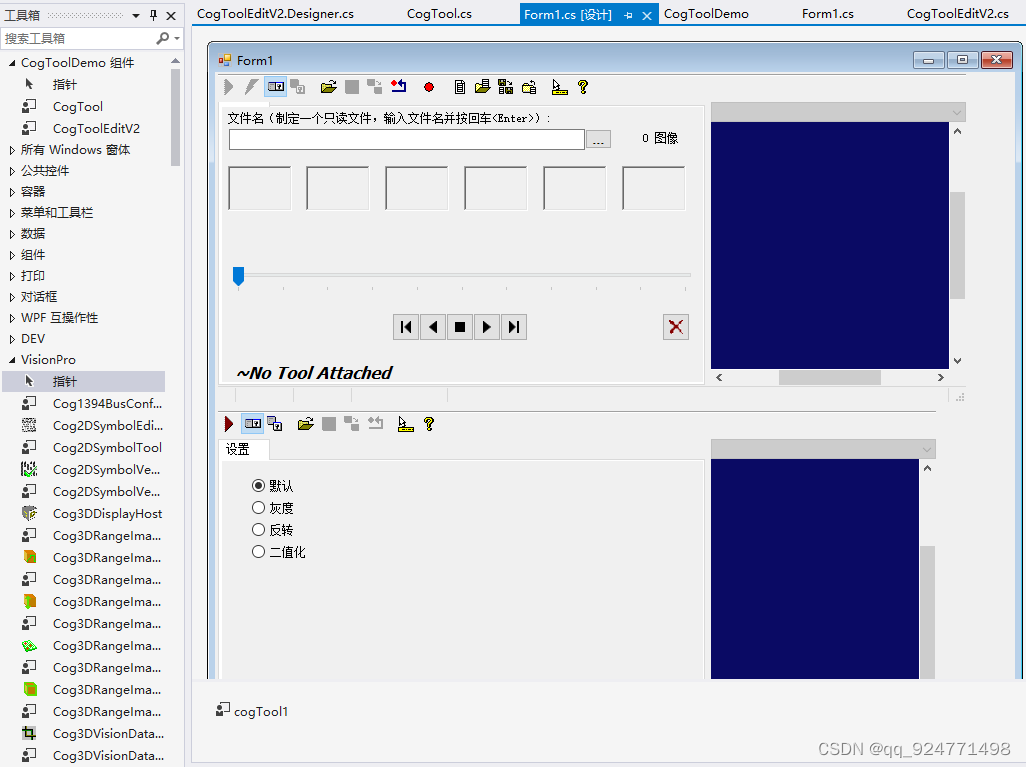
记得添加引用
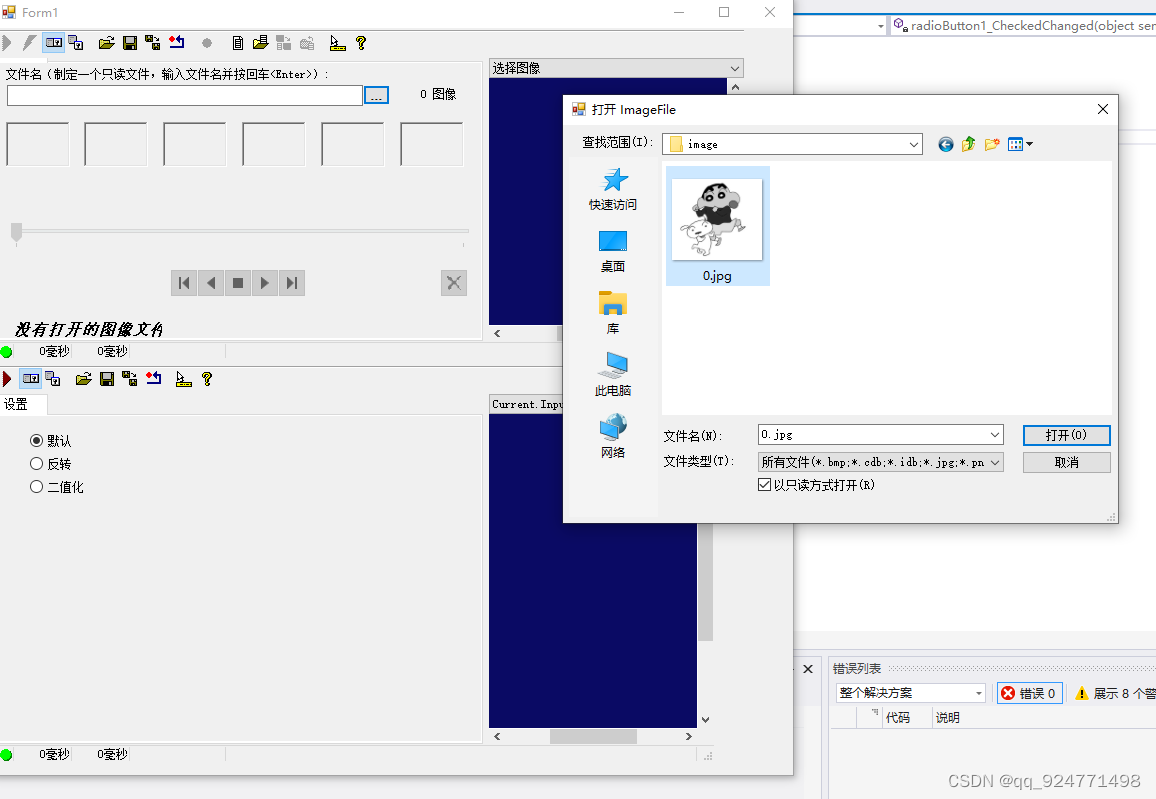
4、生成VTT文件,通过CogImageFileEditV2传入图片
public partial class Form1 : Form{public Form1(){InitializeComponent();cogImageFileEditV21.Subject.Ran += new EventHandler(Subject_Ran);//生成VTTCogSerializer.SaveObjectToFile(cogTool1, Directory.GetCurrentDirectory() + "\\CogTool.vtt");}void Subject_Ran(object sender, EventArgs e){//将cogImageFile里的图像输入进cogToolEdit里cogToolEditV21.Subject.InputImage = cogImageFileEditV21.Subject.OutputImage;}}
5、执行后,在项目的bin\debug中找到VTT文件
6、运行窗体、测试工具功能

三、将自定义工具加入到Vision pro中
1、创建一个16x16像素的图标,文件格式为.ico
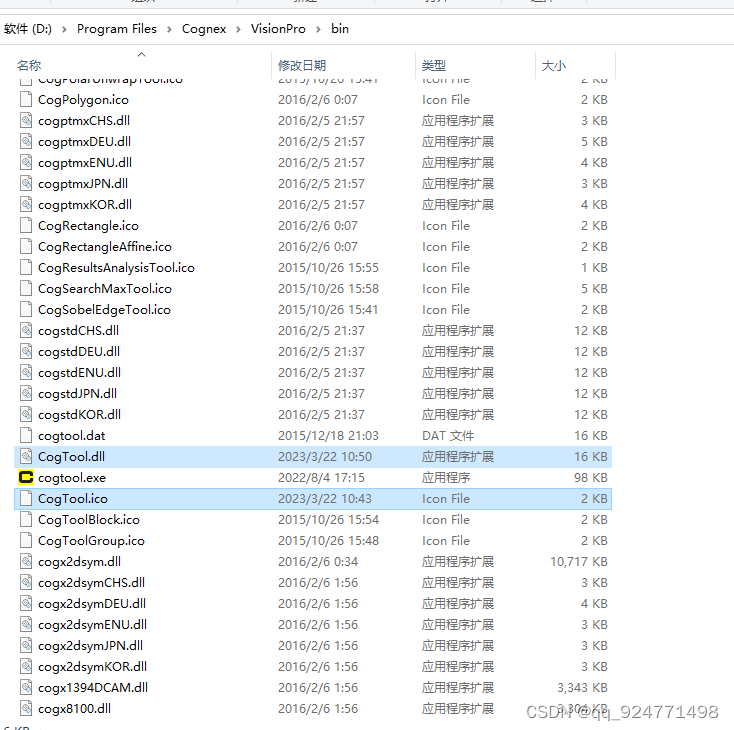
2、打开vision pro文件位置

3、ico、dll:放在vision pro文件所在位置
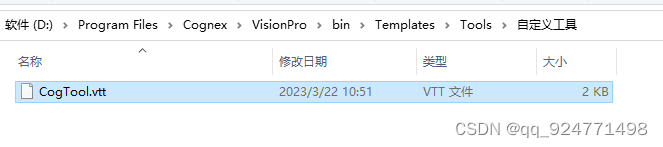
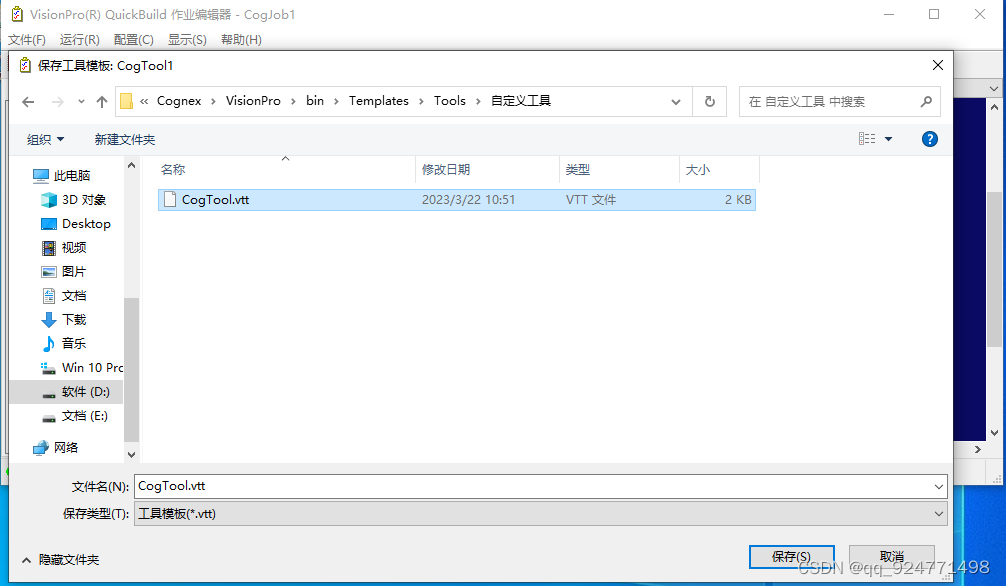
4、vtt:放在vision pro文件所在位置下的Templates \ Tools
也可自己新建文件夹将VTT文件放入
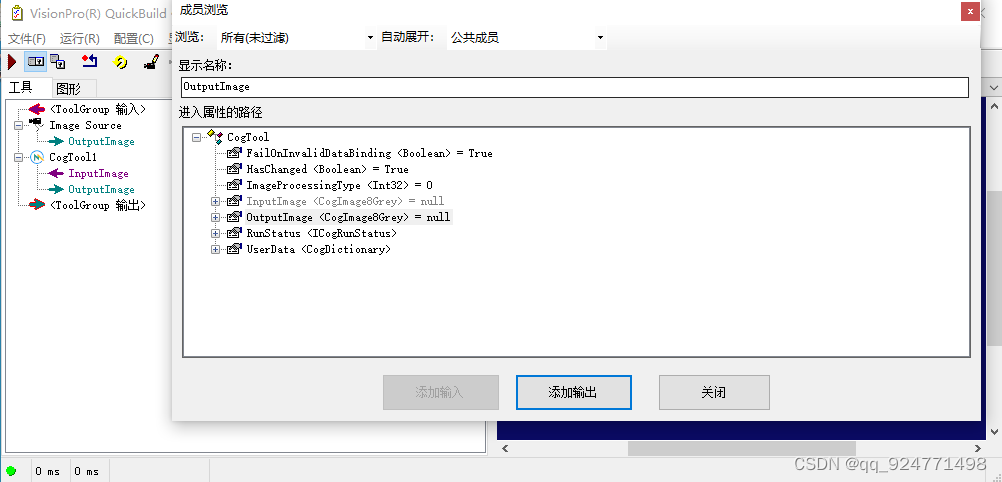
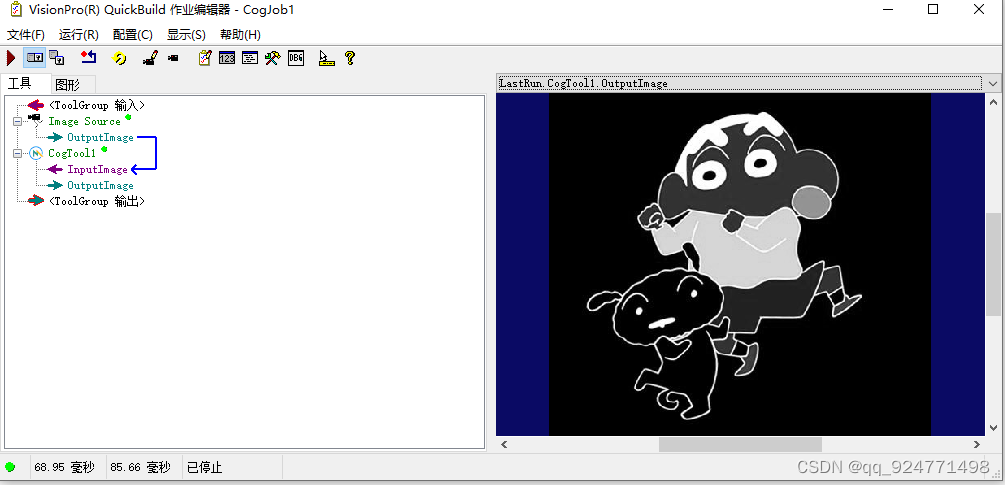
5、将工具添加输入输出图像的终端
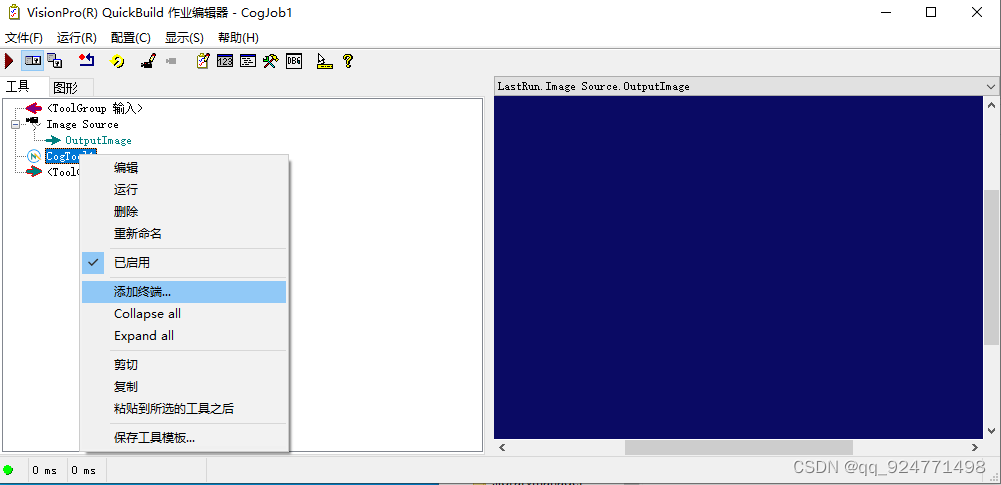
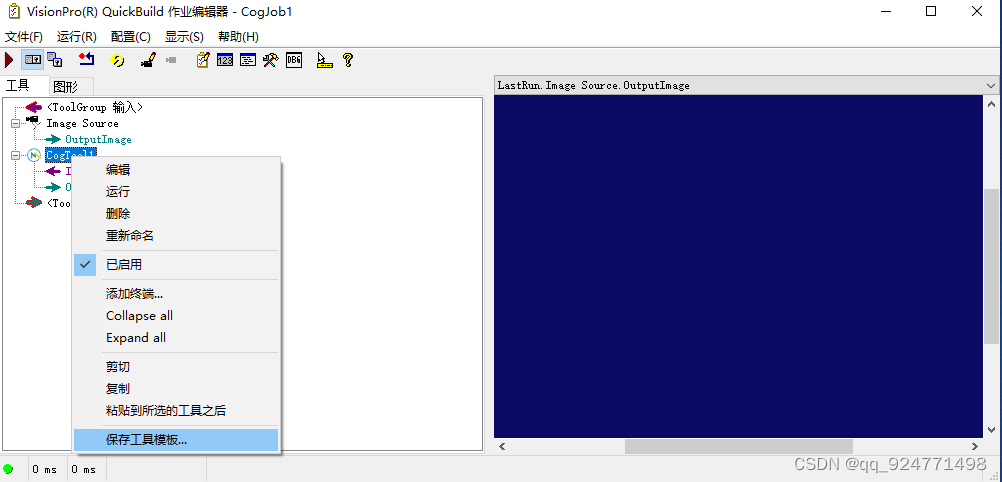
保存后重新启动VisionPro
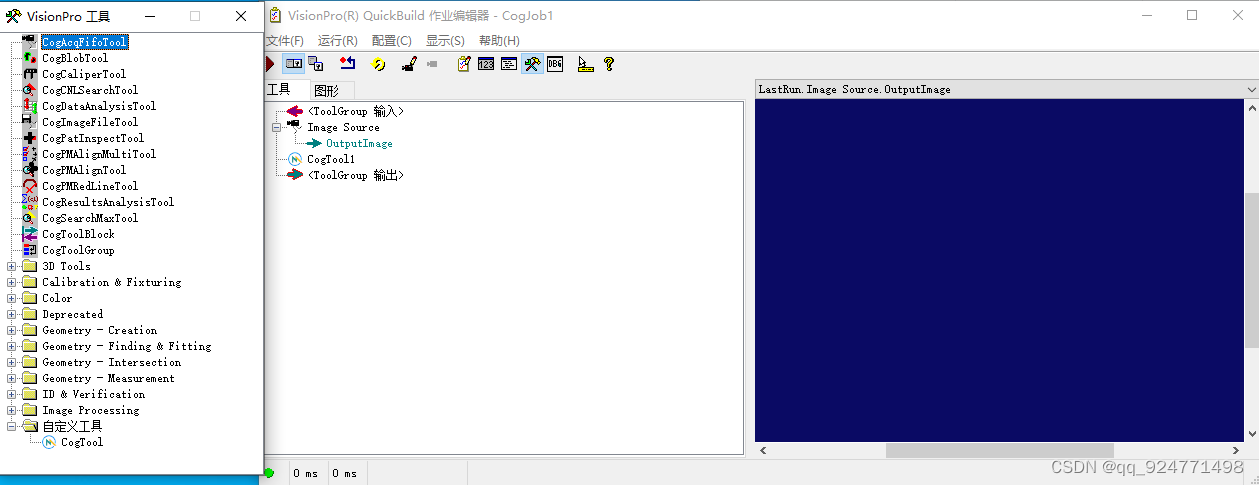
5、展示
四、下载地址(VisionPro所需要的dll、ico、图片都在源代码里)
很多人找我要源码,Github又不太好上传大文件,我就把我的网站新增了下载功能,如果下载接口出现问题请大家评论区回复一下,谢谢。
地址:VioionPro自定义工具
本文来自互联网用户投稿,文章观点仅代表作者本人,不代表本站立场,不承担相关法律责任。如若转载,请注明出处。 如若内容造成侵权/违法违规/事实不符,请点击【内容举报】进行投诉反馈!