基于mykernel的简单时间片轮转多道程序内核代码分析
首先,特别感谢孟宁老师提供了这么好的课程资源,让我在学习和实验的过程中收获很多!
学号358,原创作品转载请注明出处 https://github.com/mengning/linuxkernel/
实验记录
一、本实验使用实验楼提供的环境链接: https://www.shiyanlou.com/courses/195
cd LinuxKernel/linux-3.9.4
rm -rf mykernel
patch -p1 < ../mykernel_for_linux3.9.4sc.patch #打补丁
make allnoconfig
make #编译
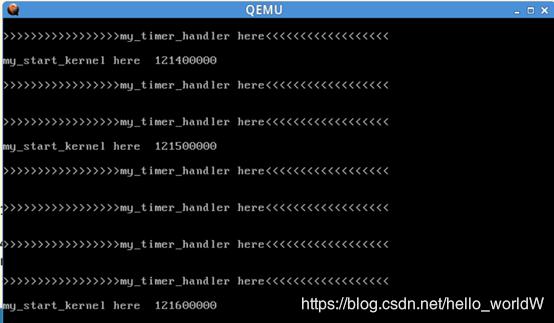
qemu -kernel arch/x86/boot/bzImage然后会弹出窗口,并一直运行输出my_timer_handler here。
关闭这个窗口以后,我们在输入 cd mykernel进入目录下,ls查看当前目录下的文件

打开mymain.c和myinterrupt查看代码
mymain.c
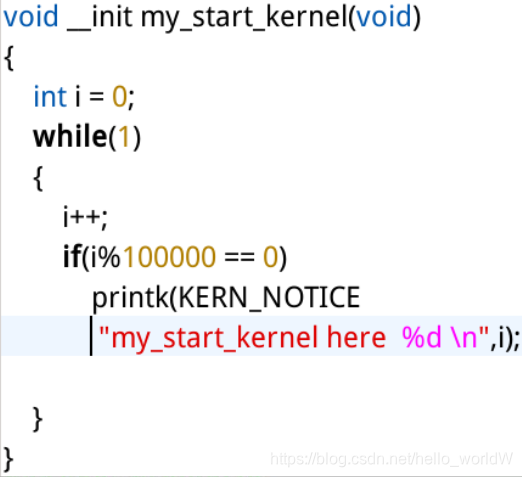
在mymain.c的my_start_kernel函数中,我们可以看到一个while循环,在这个循环体中不停的输出 my_start_kernel here
myinterrput
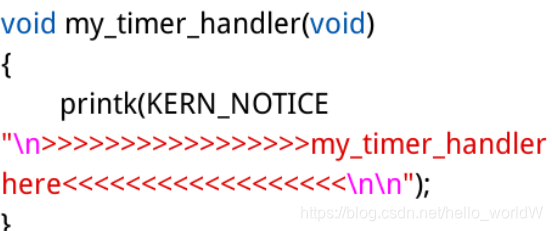
在myinterrupt.c的函数my_timer_handler中,同样会重复会输出my_timer_handler here 字符串。
通过对上面两个函数的了解,我们知道mykernel启动后会调用这两个函数,并在QEMU窗口产生上面截图中的效果。因此,我们要对上面两个文件进行改变,完成系统进程的初始化和进程的轮转调度,就可以实现简单时间片轮转多道程序。
二、一个简单的时间片轮转多道程序
1、程序中需要改变三个文件代码,mymain.c,myinterrupt.c和mypcb.h
本实验使用到的源码来自孟老师的github,给了我很多思路上的启发!https://github.com/mengning/mykernel
2、将上面介绍的三个文件复制进mykernel文件夹,覆盖原来存在的文件,再重新make编译,得到如下的结果
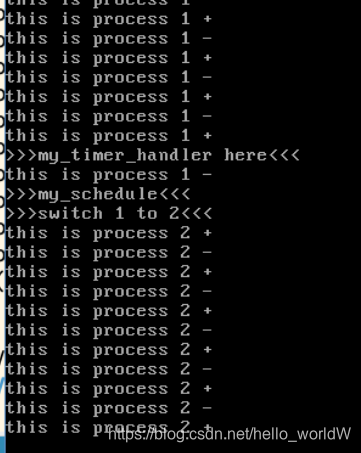
从上图中可以看出,系统进程实现了从process 1到process 2的切换
3、源码分析
/**  linux/mykernel/mypcb.h**  Kernel internal PCB types**  Copyright (C) 2013  Mengning**/
#define MAX_TASK_NUM        4
#define KERNEL_STACK_SIZE   1024*2 # unsigned long
/* CPU-specific state of this task */
struct Thread {unsigned long  ip;unsigned long  sp;
};
typedef struct PCB{int pid;volatile long state; /* -1 unrunnable, 0 runnable, >0 stopped */unsigned long stack[KERNEL_STACK_SIZE];/* CPU-specific state of this task */struct Thread thread;unsigned long task_entry;struct PCB *next;
}tPCB;
void my_schedule(void);
分析:
这段代码定义了PCB进程块的结构体。Thread结构体中定义了线程的指针ip和堆栈指针sp。
PCB进程控制块,定义了进程号pid,进程状态信息state(-1 unrunnable, 0 runnable, >0 stopped),stack定义了进程使用到的堆栈信息,thread是当前正在执行的线程信息,task_entry定义了程序入口,next指针指向下一个PCB,通过链表的形式将PCB组织起来。
最后my_schedule(void)是一个函数声明。
/**  linux/mykernel/mymain.c**  Kernel internal my_start_kernel**  Copyright (C) 2013  Mengning**/
#include <linux/types.h>
#include <linux/string.h>
#include <linux/ctype.h>
#include <linux/tty.h>
#include <linux/vmalloc.h>
#include "mypcb.h"
tPCB task[MAX_TASK_NUM];
tPCB * my_current_task = NULL;
volatile int my_need_sched = 0;
void my_process(void);
void __init my_start_kernel(void)
{int pid = 0;int i;/* Initialize process 0*/task[pid].pid = pid;task[pid].state = 0;/* -1 unrunnable, 0 runnable, >0 stopped */task[pid].task_entry = task[pid].thread.ip = (unsigned long)my_process;task[pid].thread.sp = (unsigned long)&task[pid].stack[KERNEL_STACK_SIZE-1];task[pid].next = &task[pid];/*fork more process */for(i=1;i<MAX_TASK_NUM;i++){memcpy(&task[i],&task[0],sizeof(tPCB));task[i].pid = i;//*(&task[i].stack[KERNEL_STACK_SIZE-1] - 1) = (unsigned long)&task[i].stack[KERNEL_STACK_SIZE-1];task[i].thread.sp = (unsigned long)(&task[i].stack[KERNEL_STACK_SIZE-1]);task[i].next = task[i-1].next;task[i-1].next = &task[i];}/* start process 0 by task[0] */pid = 0;my_current_task = &task[pid];asm volatile("movl %1,%%esp\n\t"  /* set task[pid].thread.sp to esp */"pushl %1\n\t"          /* push ebp */"pushl %0\n\t"          /* push task[pid].thread.ip */"ret\n\t"              /* pop task[pid].thread.ip to eip */: : "c" (task[pid].thread.ip),"d" (task[pid].thread.sp) /* input c or d mean %ecx/%edx*/);
}
int i = 0;
void my_process(void)
{    while(1){i++;if(i%10000000 == 0){printk(KERN_NOTICE "this is process %d -\n",my_current_task->pid);if(my_need_sched == 1){my_need_sched = 0;my_schedule();}printk(KERN_NOTICE "this is process %d +\n",my_current_task->pid);}     }
}
上面这段代码中__init my_start_kernel是启动后最先调用的函数,在这个函数初始化了PID为0的进程控制块,同时在for循环中创建了其他的进程,在mypcb.h中我们定义了#define MAX_TASK_NUM 4,因此这里创建0~3的进程。然后把这4个PCB结构的控制块连接成链表结构。接下来的汇编代码中,将sp的值送到%esp中,然后再将sp,ip值依次压栈,然后返回进程的执行地址,用来执行进程。
在这个程序中,每个进程都会执行 my_process 函数,my_process 在执行的时候,会打印出this is process+当前进程的id,从而让我们看到当前执行的进程信息。
 /**  linux/mykernel/myinterrupt.c**  Kernel internal my_timer_handler**  Copyright (C) 2013  Mengning**/
#include <linux/types.h>
#include <linux/string.h>
#include <linux/ctype.h>
#include <linux/tty.h>
#include <linux/vmalloc.h>#include "mypcb.h"extern tPCB task[MAX_TASK_NUM];
extern tPCB * my_current_task;
extern volatile int my_need_sched;
volatile int time_count = 0;  //时间计数器/** Called by timer interrupt.* it runs in the name of current running process,* so it use kernel stack of current running process*/
void my_timer_handler(void)//时间中断程序
{
#if 1if(time_count%1000 == 0 && my_need_sched != 1){printk(KERN_NOTICE ">>>my_timer_handler here<<<\n");//如果计数器为1000并且标志位不等于1那么执行此条语句my_need_sched = 1;} time_count ++ ;
#endifreturn;
}void my_schedule(void)
{tPCB* next; //表示下一个运行的进程tPCB * prev; //表示当前正在运行的进程if(my_current_task == NULL || my_current_task->next == NULL){return;}//如果当前任务为空或者没有其他进程需要执行返回printk(KERN_NOTICE ">>>my_schedule<<<\n");/* schedule */next = my_current_task->next;prev = my_current_task;if(next->state == 0)/* -1 unrunnable, 0 runnable, >0 stopped */{/* switch to next process */asm volatile( "pushl %%ebp\n\t"      /* save ebp */"movl %%esp,%0\n\t"  /* save esp */"movl %2,%%esp\n\t"     /* restore  esp */"movl $1f,%1\n\t"       /* save eip */ "pushl %3\n\t" "ret\n\t"              /* restore  eip */"1:\t"                  /* next process start here */"popl %%ebp\n\t": "=m" (prev->thread.sp),"=m" (prev->thread.ip): "m" (next->thread.sp),"m" (next->thread.ip)); //嵌入式汇编保存了当前进程的PCB信息用来为进程调度做准备my_current_task = next;  //调度下一进程printk(KERN_NOTICE ">>>switch %d to %d<<<\n",prev->pid,next->pid);    }else{next->state = 0;my_current_task = next;printk(KERN_NOTICE ">>>switch %d to %d<<<\n",prev->pid,next->pid);/* switch to new process */asm volatile( "pushl %%ebp\n\t"      /* save ebp */"movl %%esp,%0\n\t"  /* save esp */"movl %2,%%esp\n\t"     /* restore  esp */"movl %2,%%ebp\n\t"     /* restore  ebp */"movl $1f,%1\n\t"       /* save eip */ "pushl %3\n\t" "ret\n\t"              /* restore  eip */: "=m" (prev->thread.sp),"=m" (prev->thread.ip): "m" (next->thread.sp),"m" (next->thread.ip));          }   return;
}
上面代码中的my_timer_handler函数,如同我们之前所述一样,会被周期性的调用,产生中断的效果,从而实现时间片轮转。同时执行1000次后,设置my_need_sched为1,表示当前进程执行。my_schedule函数保存了上一个进程的上下文,并调用下一个进程,实现进程的切换。
总结
操作系统正常运作需要三个重要的部分:存储程序原理、堆栈以及中断的支持。操作系统需要维护PCB来对进程进行管理和调度。通过中断机制,将进程的上下文信息保存在堆栈内,然后调度下一个进程,需要时出栈返回上一进程的信息,实现进程之间的切换。
本文来自互联网用户投稿,文章观点仅代表作者本人,不代表本站立场,不承担相关法律责任。如若转载,请注明出处。 如若内容造成侵权/违法违规/事实不符,请点击【内容举报】进行投诉反馈!