Turtlebot3+Cartographer配置运行
一、安装Cartographer
首先安装ubuntu对应的ROS内核版本(如:Noetic、Melodic、Lunar等版本,注意:要和ubuntu的版本对应)。
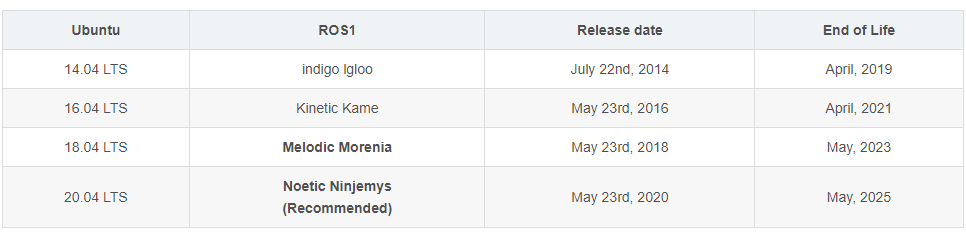
ros对应不同的ubuntu版本有不同的版本名字:
ubuntu16.04对应ros-kinetic;
ubuntu18.04对应ros-melodic;
ubuntu20.04对应ros-noetic。
如在Ubuntu20.04上,要安装ros应该用:
sudo apt-get install ros-noetic-desktop-full
参考:https://blog.csdn.net/qaqlalala/article/details/127818168
再安装cartographer_ros
参考:
(1)官网:https://google-cartographer-ros.readthedocs.io/en/latest/compilation.html#building-installation
(2)保姆级别的安装:https://blog.csdn.net/m0_45805756/article/details/126309855
(3)常见的update错误解决方法:https://blog.csdn.net/Kenny_GuanHua/article/details/116845781
注意:我的cartographer_ros安装目录是google_ws
二、安装Turtlebot3
安装Turtlebot3
将Turtlebot3安装在cartographer_ros安装目录中,这是因为方便环境变量设置,否则,可能找不到cartographer算法模块。
turtlebot3_simulations:包含了更丰富的仿真文件(如一些rviz和gazebo的launch文件)
turtlebot3:功能包中继承了了TurtleBot3的机器人文件、SLAM和导航功能包、遥控功能包和bringup功能包等
turtlebot3包下载地址:https://github.com/ROBOTIS-GIT/turtlebot3
turtlebot3_simulations包下载地址:https://github.com/ROBOTIS-GIT/turtlebot3_simulations
turtlebot3 wiki简介:http://wiki.ros.org/turtlebot3
主要是两种型号:Burger 和 Waffle Pi:
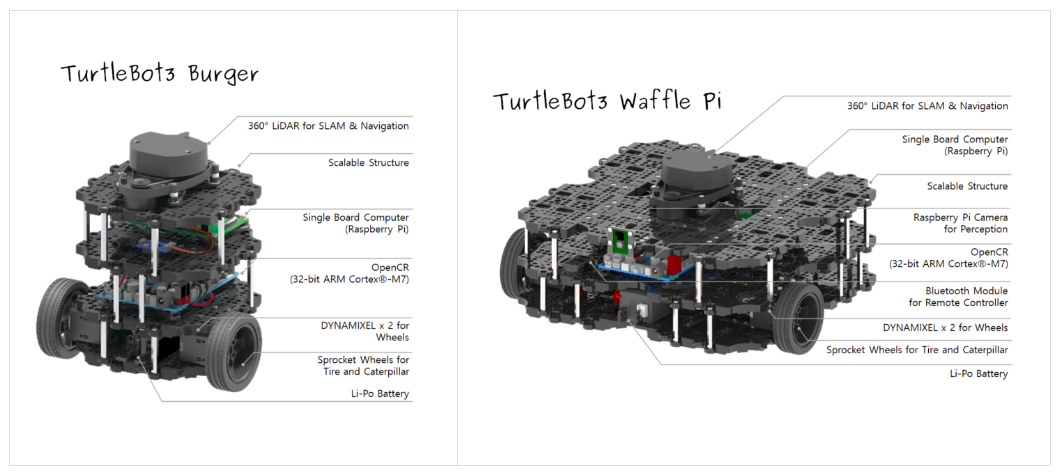
参数如下:

cd ~/google_ws/src
git clone https://github.com/ROBOTIS-GIT/turtlebot3.git
git clone https://github.com/ROBOTIS-GIT/turtlebot3_simulations.git
cd ..
rosdep install --from-paths src --ignore-src --rosdistro=${ROS_DISTRO} -y
catkin_make_isolated
启动Turtlebot3仿真环境
首先启动一个Terminal窗口
(1)设置环境变量:source ~/google_ws/devel_isolated/setup.bash
(2)设置默认的 TURTLEBOT3_MODEL。turtlebot3有三个版本,burger、waffle和waffle_pi,其中waffle_pi版本中配备的传感器最全面。
(3)运行。turtlebot3_gazebo是turtlebot3的包名,turtlebot3_stage_4.launch是要运行的文件名称。
这一步的作用是先创建好一个需要仿真的模拟环境。
source ~/google_ws/devel_isolated/setup.bash
export TURTLEBOT3_MODEL=burger
roslaunch turtlebot3_gazebo turtlebot3_stage_4.launch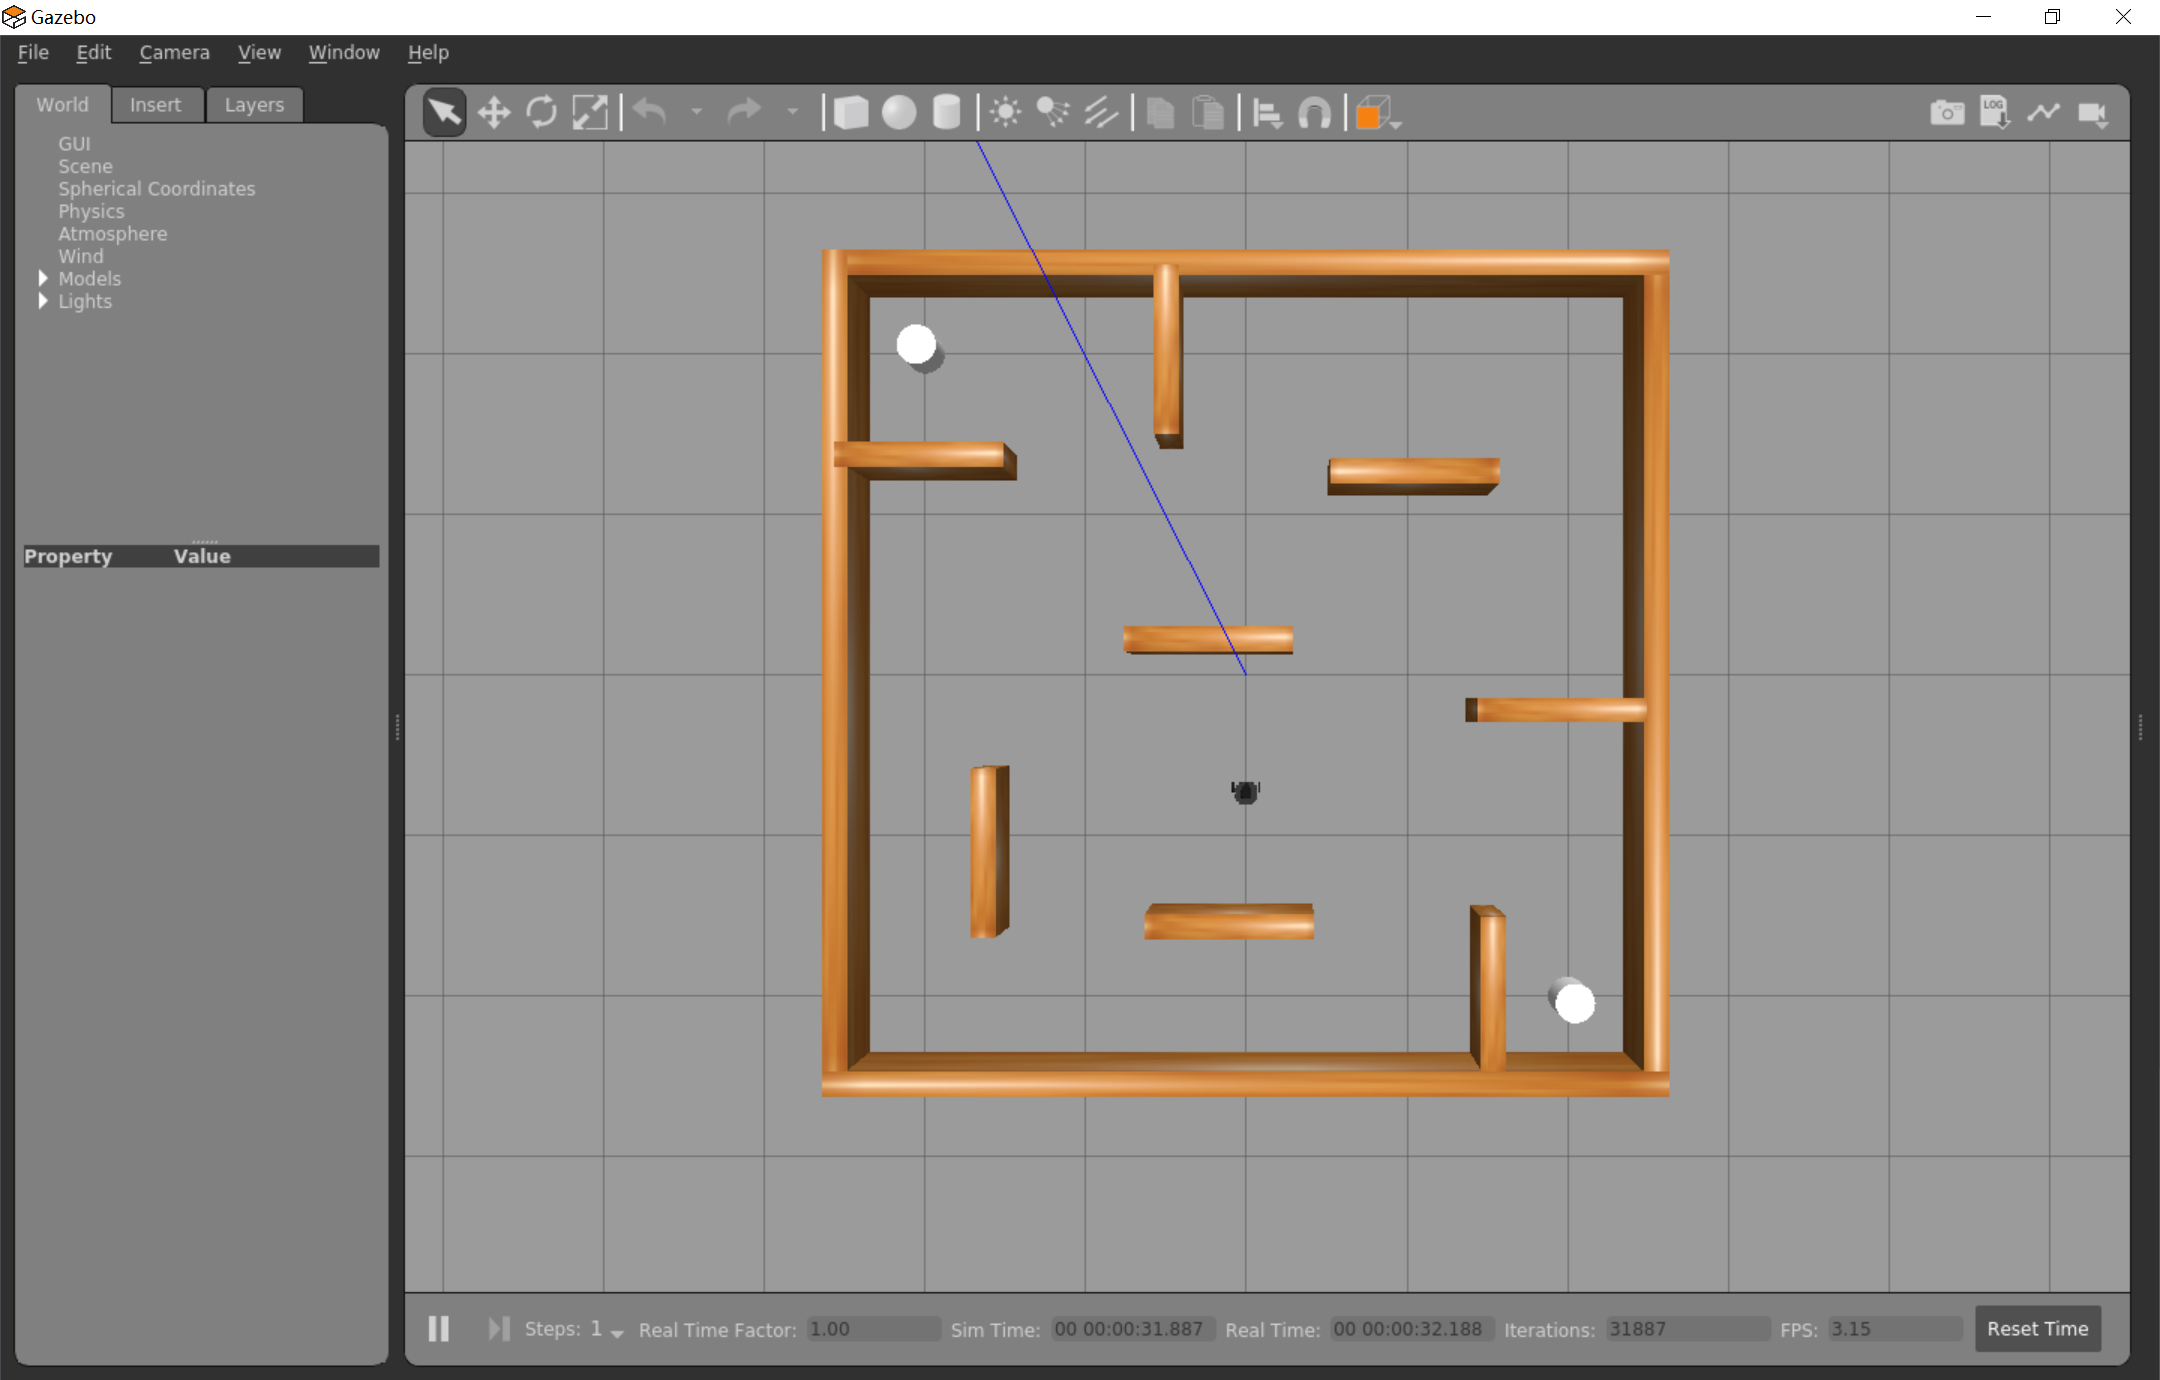
开始建图
再新建一个Terminal窗口,运行:
source ~/google_ws/devel_isolated/setup.bash
export TURTLEBOT3_MODEL=burger
roslaunch turtlebot3_slam turtlebot3_slam.launch slam_methods:=cartographer configuration_basename:=turtlebot3_lds_2d_gazebo.lua
这一步的功能是调用相应的建图算法对上一步的环境进行建图。(slam_methods:=cartographer指定SLAM建图算法是cartographer)
每一个terminal都要运行:source ~/google_ws/devel_isolated/setup.bash和export TURTLEBOT3_MODEL=burger,设置环境变量。
source ~/google_ws/devel_isolated/setup.bash
export TURTLEBOT3_MODEL=burger
turtlebot3_slam是turtlebot3的包名;slam_methods:=cartographer是设置slam的算法(支持gmapping, cartographer, hector, karto, frontier_exploration这几个slam算法);configuration_basename:=turtlebot3_lds_2d_gazebo.lua可以自行设置lua配置文件。
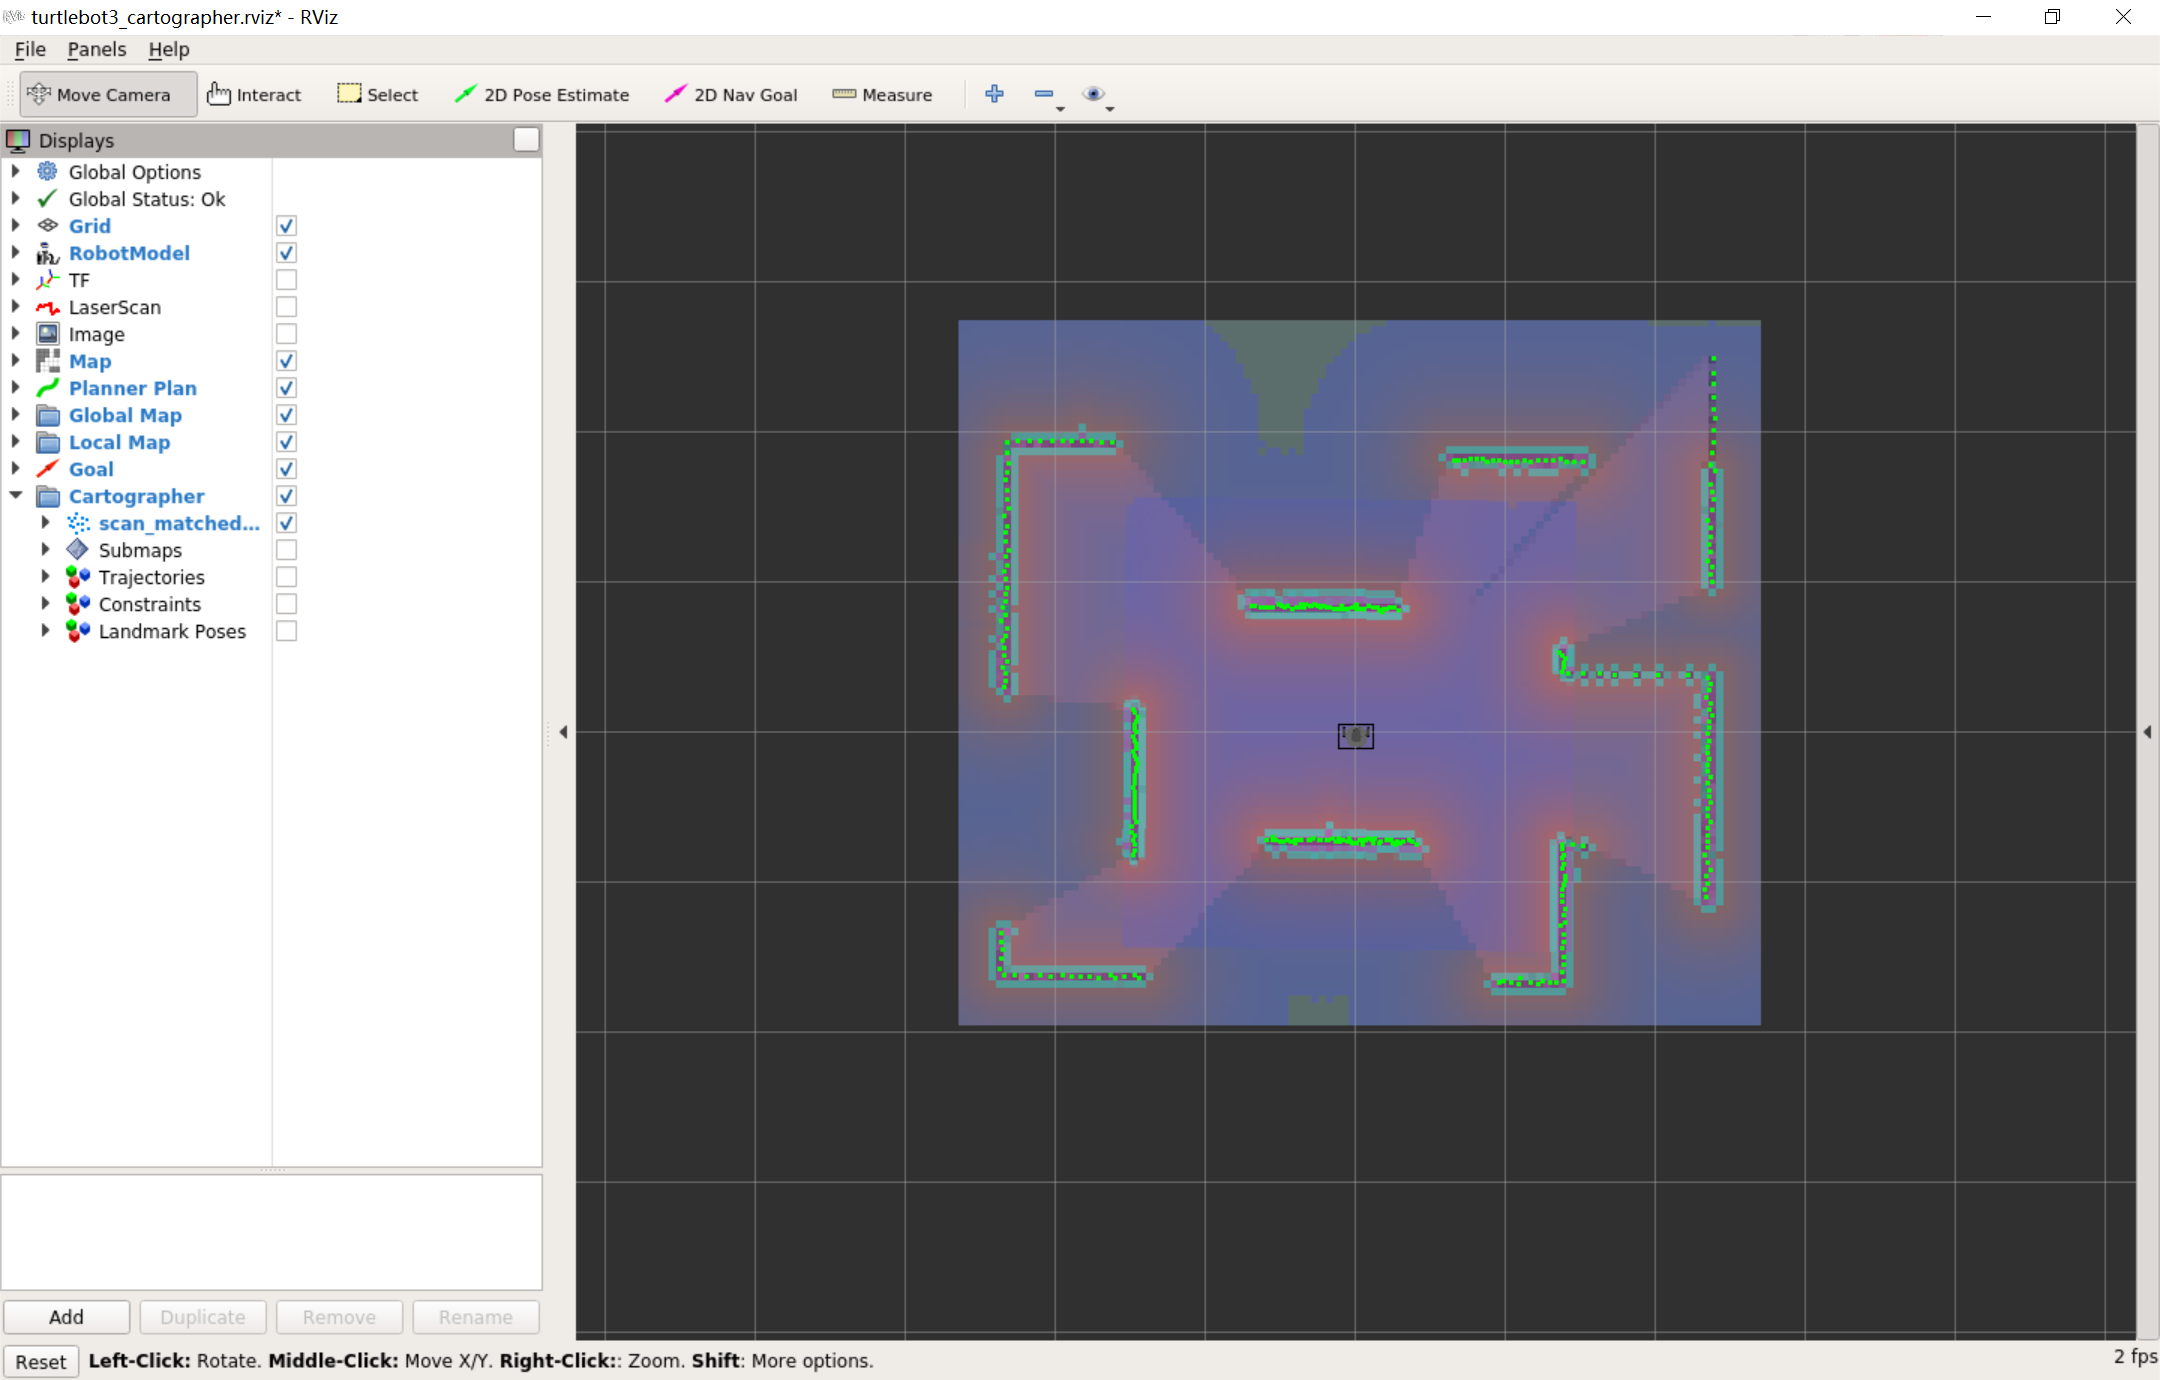
这一步中会自动调用rviz,对建图过程进行可视化。
手动控制建图
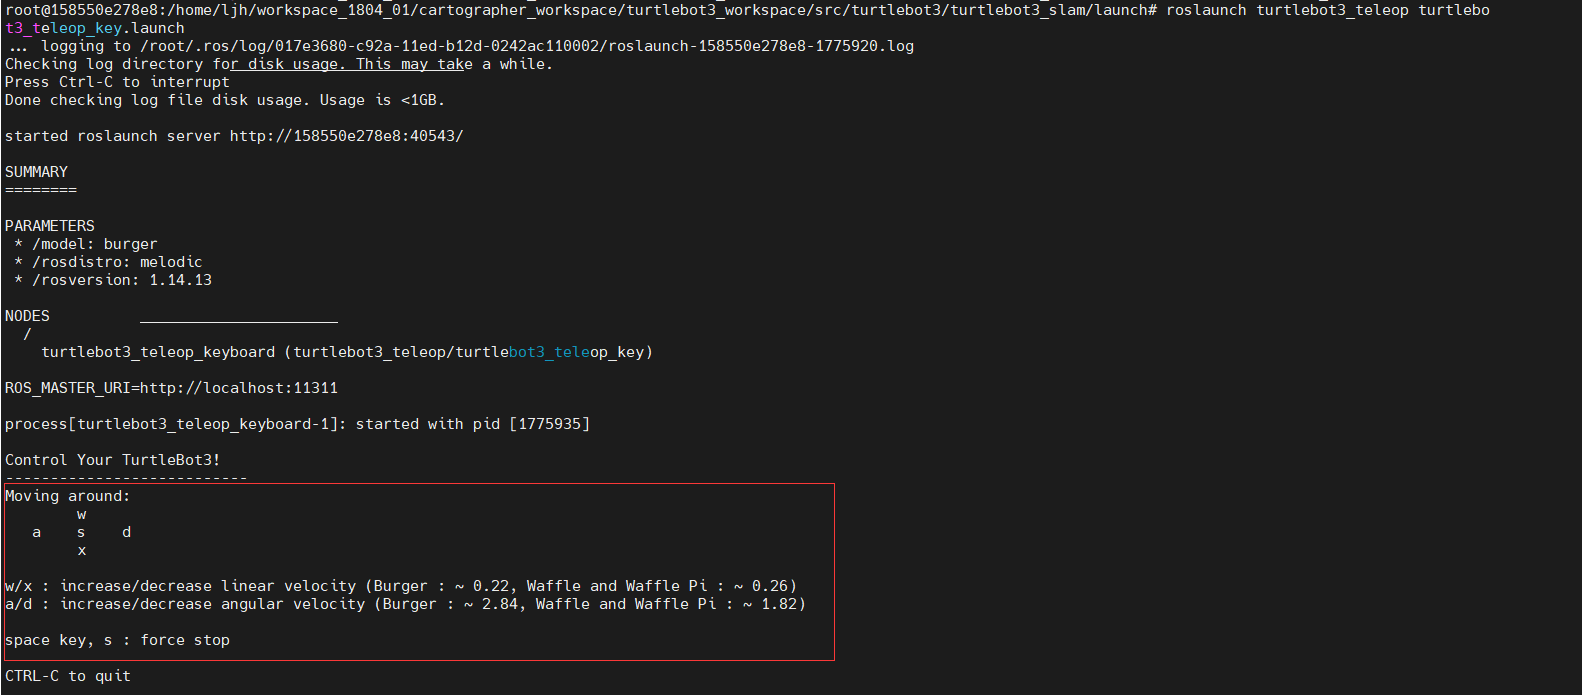
再新建一个Terminal窗口,运行如下命令打开键盘控制界面,可以通过键盘控制机器人进行移动,从而完成建图。
source ~/google_ws/devel_isolated/setup.bash
export TURTLEBOT3_MODEL=burger
roslaunch turtlebot3_teleop turtlebot3_teleop_key.launch
通过键盘进行控制小车的运行。
w和x:线速度;
a和d:角速度;
s:停止
三、分析
(1)首先看看roslaunch命令行:
roslaunch turtlebot3_gazebo turtlebot3_stage_4.launch
这句话是说:调用turtlebot3_gazebo功能包中的turtlebot3_stage_4.launch文件来启动仿真环境。
我们来看看配置文件turtlebot3_stage_4.launch:
目录:google_ws/src/turtlebot3_simulations/turtlebot3_gazebo/launch/turtlebot3_stage_4.launch
(2)再来看看命令:
source ~/google_ws/devel_isolated/setup.bash
export TURTLEBOT3_MODEL=burger
roslaunch turtlebot3_slam turtlebot3_slam.launch slam_methods:=cartographer configuration_basename:=turtlebot3_lds_2d_gazebo.lua
这个命令是:调用turtlebot3_slam功能包中的turtlebot3_slam.launch文件启动建图功能,参数是:slam_methods和configuration_basename。
a.首先我们来看看配置文件turtlebot3_lds_2d_gazebo.lua。
目录:google_ws/src/turtlebot3/turtlebot3_slam/config/turtlebot3_lds_2d_gazebo.lua
#turtlebot3_lds_2d_gazebo.lua-- Copyright 2016 The Cartographer Authors
--
-- Licensed under the Apache License, Version 2.0 (the "License");
-- you may not use this file except in compliance with the License.
-- You may obtain a copy of the License at
--
--      http://www.apache.org/licenses/LICENSE-2.0
--
-- Unless required by applicable law or agreed to in writing, software
-- distributed under the License is distributed on an "AS IS" BASIS,
-- WITHOUT WARRANTIES OR CONDITIONS OF ANY KIND, either express or implied.
-- See the License for the specific language governing permissions and
-- limitations under the License.include "map_builder.lua"
include "trajectory_builder.lua"options = {map_builder = MAP_BUILDER,trajectory_builder = TRAJECTORY_BUILDER,map_frame = "map", --地图坐标系的名字tracking_frame = "base_footprint", -- imu_link, If you are using gazebo, use 'base_footprint' (libgazebo_ros_imu's bug)published_frame = "odom", -- 设置为tf树最顶端的坐标系名称,设置完成后cartographer会发布map->published_frame的坐标系odom_frame = "odom", -- 里程计的坐标系名字provide_odom_frame = false, -- 是否提供odom的tf, 如果为true,则tf树为map->odom->footprint,如果为false,则tf树为map->published_framepublish_frame_projected_to_2d = false, -- 是否将坐标系投影到平面上,一般为falseuse_odometry = true, --是否使用里程计,如果使用要求一定要有odom的tfuse_nav_sat = false, --是否使用gpsuse_landmarks = false, --是否使用landmark num_laser_scans = 1, --是否使用单线激光数据并设置订阅topic的数量num_multi_echo_laser_scans = 0, --是否使用multi_echo_laser_scans并设置订阅topic的数量num_subdivisions_per_laser_scan = 1, --1帧数据被分成几次处理,一般为1num_point_clouds = 0, -- 是否使用16线点云数据lookup_transform_timeout_sec = 0.2,-- 查找tf时的超时时间submap_publish_period_sec = 0.3,-- 发布数据的时间间隔pose_publish_period_sec = 5e-3,trajectory_publish_period_sec = 30e-3,-- 传感器数据的采样频率rangefinder_sampling_ratio = 1., --设置为0.1则表示每10帧数据使用1帧数据odometry_sampling_ratio = 1.,fixed_frame_pose_sampling_ratio = 1.,imu_sampling_ratio = 1.,landmarks_sampling_ratio = 1.,
}--修改之前5个lua文件参数可以使用这种方式MAP_BUILDER.use_trajectory_builder_2d = true -- 进行2D建图TRAJECTORY_BUILDER_2D.min_range = 0.1 --激光的最近有效距离
TRAJECTORY_BUILDER_2D.max_range = 3.5 --激光最远的有效距离
TRAJECTORY_BUILDER_2D.missing_data_ray_length = 3. --无效激光数据设置距离为该数值
TRAJECTORY_BUILDER_2D.use_imu_data = true --是否使用imu数据
TRAJECTORY_BUILDER_2D.use_online_correlative_scan_matching = true
TRAJECTORY_BUILDER_2D.motion_filter.max_angle_radians = math.rad(0.1)POSE_GRAPH.constraint_builder.min_score = 0.65
POSE_GRAPH.constraint_builder.global_localization_min_score = 0.7return options
b.我们再来看看启动文件
目录:google_ws/src/turtlebot3/turtlebot3_slam/launch/turtlebot3_slam.launch
c.我们看看TurtleBot3包中robot的外形配置文件turtlebot3_remote.launch
google_ws/src/turtlebot3/turtlebot3_slam/turtlebot3_bringup/launch/turtlebot3_remote.launch
d.我们看看description.launch.xml文件
目录:google_ws/src/turtlebot3/turtlebot3_slam/turtlebot3_bringup/launch/includes/description.launch.xml
f.最后我们看看我们看看turtlebot3_$(arg model).urdf.xacro文件,由于model我们通过export TURTLEBOT3_MODEL=burger命令设置为burger,所以,该文件是:turtlebot3_burger.urdf.xacro
目录:google_ws/src/turtlebot3/turtlebot3_description/urdf/turtlebot3_burger.urdf.xacro
注意base_link和base_footprint的区别:
base_link是固定在机器人本体上的坐标系,通常选择机器人腰部。
base_footprint表示机器人base_link原点在地面上的投影,区别base_link之处是其“z”坐标不同。
一般为了模型不陷入地面,base_footprint的“z”坐标比base_link高。
参考文献
https://blog.csdn.net/m0_71775106/article/details/128303582
本文来自互联网用户投稿,文章观点仅代表作者本人,不代表本站立场,不承担相关法律责任。如若转载,请注明出处。 如若内容造成侵权/违法违规/事实不符,请点击【内容举报】进行投诉反馈!