⑪HTML+CSS 页面设计练习
练习
- 01_图片的列表
- 02_京东左侧导航条
- 03_网易新闻的右侧列表 ※
- 04_w3导航条 ※
- 05_京东的轮播图 ※
- 06_京东顶部导航条 ※
- 07_背景重复
- 08_按钮练习
- 09_雪碧图 ※
- 10_电影卡片 ※
- 11_米兔的动画 ※
- 12_奔跑的少年 ※
- 13_钟表 ※
- 14_复仇者联盟 ※
- 15_再做导航条(弹性容器) ※
- 16_淘宝导航
- 17_移动端页面 ※
本人是个新手,写下博客用于自我复习、自我总结。
如有错误之处,请各位大佬指出。
学习资料来源于:尚硅谷
01_图片的列表
之前涉及到的一直是文字类型的列表结构,现在想要用列表来实现图片的竖向排列。
效果图:

使用到的图片:👇


<html lang="en">
<head><meta charset="UTF-8"><meta name="viewport" content="width=device-width, initial-scale=1.0"><meta http-equiv="X-UA-Compatible" content="ie=edge"><title>图片列表title><link rel="stylesheet" href="./css/reset.css"><style>/* 设置body的背景颜色 */body{background-color: antiquewhite;}/* 设置外部ul的样式 */.img-list{/* 设置ul的宽度 */width: 190px;/* 设置ul的高度 */height: 470px;/* 裁剪溢出的内容 */overflow: hidden;/* 使ul在页面中居中 */margin: 50px auto;background-color: #F4F4F4;}/* 设置li的位置 */.img-list li:not(:last-child){margin-bottom: 9px;}/* 设置图片的大小 */.img-list img{width: 100%;}style>
head>
<body><ul class="img-list"><li><a href="javascript:;"><img src="./img/01/1.jpg" alt="图片1">a>li><li><a href="javascript:;"><img src="./img/01/2.jpg" alt="图片2">a>li><li><a href="javascript:;"><img src="./img/01/3.jpg" alt="图片3">a>li>ul>
body>
html>
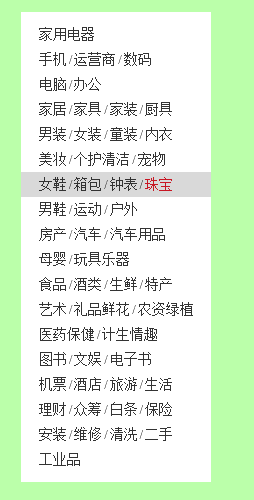
02_京东左侧导航条
效果图:
<html lang="en">
<head><meta charset="UTF-8"><meta name="viewport" content="width=device-width, initial-scale=1.0"><meta http-equiv="X-UA-Compatible" content="ie=edge"><title>京东的左侧导航title><link rel="stylesheet" href="./css/reset.css"><style>/* 设置body */body{/* 设置一个网页的背景,以使我们方便查看 */background-color: #bfa;}/* 设置菜单外部容器 */.left-nav{/* 设置宽度 */width: 190px;/* 设置高度 */height: 450px;/* 设置padding */padding: 10px 0;/* 设置一个背景颜色 */background-color: #fff;margin: 50px auto;}/* 设置菜单内部的item */.left-nav .item{height: 25px;/* 要让一个文字在父元素中垂直居中,只需将父元素的line-height设置为一个和父元素height一样的值 */line-height: 25px;/* 设置item的右内边距,将文字向内移动  */padding-left: 18px;/* 设置字体大小 */font-size: 12px;}/* 设置/的距离 */.item .line{padding: 0 2px;}/* 为item设置一个鼠标移入的状态 */.item:hover{background-color: #d9d9d9;}/* 设置超链接的样式 */.item a{/* 设置字体大小 */font-size: 14px;/* 设置字体的颜色 */color: #333;/* 去除下划线 */text-decoration: none;}/* 设置超链接的hover的样式 */.item a:hover{color: #c81623;}style>
head>
<body><nav class="left-nav"><div class="item"><a href="#">家用电器a>div><div class="item"><a href="#">手机a><span class='line'>/span><a href="#">运营商a><span class='line'>/span><a href="#">数码a>div><div class="item"><a href="#">电脑a><span class='line'>/span><a href="#">办公a>div><div class="item"><a href="#">家居a><span class='line'>/span><a href="#">家具a><span class='line'>/span><a href="#">家装a><span class='line'>/span><a href="#">厨具a>div><div class="item"><a href="#">男装a><span class='line'>/span><a href="#">女装a><span class='line'>/span><a href="#">童装a><span class='line'>/span><a href="#">内衣a>div><div class="item"><a href="#">美妆a><span class='line'>/span><a href="#">个护清洁a><span class='line'>/span><a href="#">宠物a>div><div class="item"><a href="#">女鞋a><span class='line'>/span><a href="#">箱包a><span class='line'>/span><a href="#">钟表a><span class='line'>/span><a href="#">珠宝a>div><div class="item"><a href="#">男鞋a><span class='line'>/span><a href="#">运动a><span class='line'>/span><a href="#">户外a>div><div class="item"><a href="#">房产a><span class='line'>/span><a href="#">汽车a><span class='line'>/span><a href="#">汽车用品a>div><div class="item"><a href="#">母婴a><span class='line'>/span><a href="#">玩具乐器a>div><div class="item"><a href="#">食品a><span class='line'>/span><a href="#">酒类a><span class='line'>/span><a href="#">生鲜a><span class='line'>/span><a href="#">特产a>div><div class="item"><a href="#">艺术a><span class='line'>/span><a href="#">礼品鲜花a><span class='line'>/span><a href="#">农资绿植a>div><div class="item"><a href="#">医药保健a><span class='line'>/span><a href="#">计生情趣a>div><div class="item"><a href="#">图书a><span class='line'>/span><a href="#">文娱a><span class='line'>/span><a href="#">电子书a>div><div class="item"><a href="#">机票a><span class='line'>/span><a href="#">酒店a><span class='line'>/span><a href="#">旅游a><span class='line'>/span><a href="#">生活a>div><div class="item"><a href="#">理财a><span class='line'>/span><a href="#">众筹a><span class='line'>/span><a href="#">白条a><span class='line'>/span><a href="#">保险a>div><div class="item"><a href="#">安装a><span class='line'>/span><a href="#">维修a><span class='line'>/span><a href="#">清洗a><span class='line'>/span><a href="#">二手a>div><div class="item"><a href="#">工业品a>div>nav>
body>
html>
03_网易新闻的右侧列表 ※
效果图:
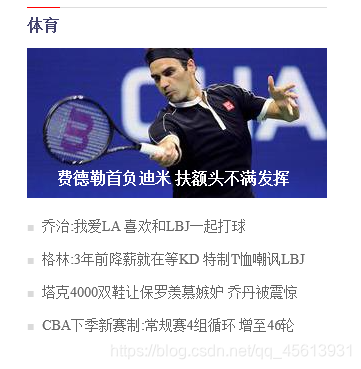
使用到的图片:👇

<html lang="en">
<head><meta charset="UTF-8"><meta name="viewport" content="width=device-width, initial-scale=1.0"><meta http-equiv="X-UA-Compatible" content="ie=edge"><title>网易的新闻列表title><link rel="stylesheet" href="./css/reset.css"><style>/* body{background-color: #bfa;} */a{/* 去除下划线 */text-decoration: none;}/* 设置容器的样式 */.news-wrapper{/* 设置宽度 */width: 300px;/* 设置高度 */height: 357px;/*设置居中  */margin: 50px auto;/* 设置背景颜色,显示轮廓 */background-color: #fff;/* 设置上边框 */border-top: 1px solid #ddd;}/* 设置news-title */.news-title{/* 为了边框和文字宽度一致,需要将h2转换为行内块元素 */display: inline-block;/* 设置高度 */height: 30px;/* 设置上边框  */border-top: 1px red solid;/* 通过margin-top将h2上移,盖住上边框 */margin-top: -1px;padding-top: 10px;}/* 设置title中超链接的样式 */.news-title a{/* 设置颜色 */color: #40406B;/* 设置文字的加粗效果 */font-weight: bold;}/* 设置图片容器的高度  */.news-img{height: 150px;}/* 设置图片的文字效果 */.news-img .img-title{/* 向上移动文字 */margin-top: -30px;/* 设置字体颜色 */color: #fff;/* 设置加粗 */font-weight: bold;/* 设置padding */padding-left: 30px;}/* 设置新闻列表 */.news-list{/* 设置上外边距 */margin-top: 20px;/* 设置左侧的padding *//* padding-left: 14px; *//* 设置项目符号 *//* list-style: square; */}/* 设置li */.news-list li{/*设置下外边距  */margin-bottom: 17px;}/* 通过before伪元素,来为每一个li添加项目符号 */.news-list li::before{content: '■';color: rgb(218, 218, 218);font-size: 12px;margin-right: 4px;}/* 设置li中文字 */.news-list li a{/* 设置字体大小 */font-size: 14px;/* 设置字体颜色 */color: #666;}/* 设置超链接的鼠标移入的样式 */.news-list li a:hover{color: red;}style>
head>
<body><div class="news-wrapper"><h2 class="news-title"><a href="#">体育a>h2><div class="news-img"><a href="#"><img src="./img/03/1.jpeg" alt="费德勒"><h3 class="img-title">费德勒首负迪米 扶额头不满发挥h3>a>div><ul class="news-list"><li><a href="#">乔治:我爱LA 喜欢和LBJ一起打球a>li><li><a href="#">格林:3年前降薪就在等KD 特制T恤嘲讽LBJa>li><li><a href="#">塔克4000双鞋让保罗羡慕嫉妒 乔丹被震惊a>li><li><a href="#">CBA下季新赛制:常规赛4组循环 增至46轮a>li>ul>div>
body>
html>
04_w3导航条 ※
效果图:

<html lang="en">
<head><meta charset="UTF-8"><meta name="viewport" content="width=device-width, initial-scale=1.0"><meta http-equiv="X-UA-Compatible" content="ie=edge"><title>导航条title><link rel="stylesheet" href="./css/reset.css"><style>/* 设置nav的大小 */.nav{/* 设置宽度和高度 */width: 1210px;height: 48px;/* 设置背景颜色 */background-color: #E8E7E3;margin:100px auto;}/* 设置nav中li */.nav li{/* 设置li向左浮动,已使菜单横向排列 */float: left;/* 设置li的高度 *//* height: 48px; *//* 将文字在父元素中垂直居中 */line-height: 48px;}/* 设置a的样式 */.nav a{/* 将a转换为块元素 */display: block;/* 去除下划线 */text-decoration: none;/* 设置字体颜色 */color: #777777;/* 修改字体大小 */font-size: 18px;padding: 0 39px;}.nav li:last-child a{padding: 0 42px 0 41px;}/* 设置鼠标移入的效果 */.nav a:hover{background-color: #3F3F3F;color: #E8E7E3;}style>
head>
<body><ul class="nav"><li><a href="#">HTML/CSSa>li><li><a href="#">Browser Sidea>li><li><a href="#">Server Sidea>li><li><a href="#">Programminga>li><li><a href="#">XMLa>li><li><a href="#">Web Buildinga>li><li><a href="#">Referencea>li>ul>
body>
html>
05_京东的轮播图 ※
效果图:
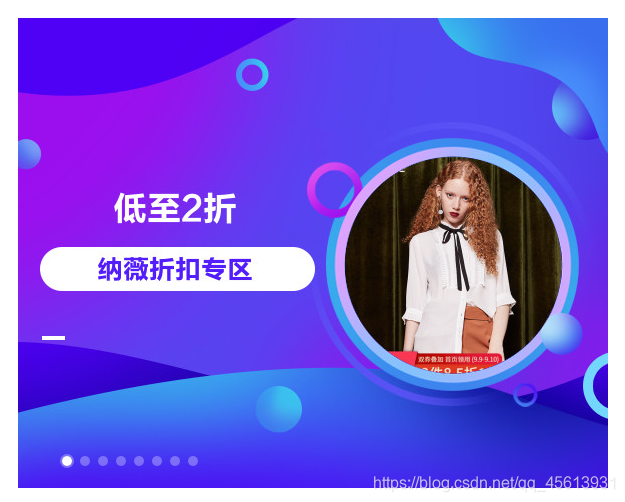
虽然实际上的效果应该是图片的轮播,但是在现在这个阶段无法实现这个行为,要实现这个行为需要JavaScript。所以为了节省空间,就只展示这一张图。
使用到的图片:👇

<html lang="en">
<head><meta charset="UTF-8"><meta name="viewport" content="width=device-width, initial-scale=1.0"><meta http-equiv="X-UA-Compatible" content="ie=edge"><title>轮播图title><link rel="stylesheet" href="./css/reset.css"><style>/* 设置图片的容器 */.img-list{width: 590px;height: 470px;margin: 100px auto;/* 为ul开启相对定位,目的是使ul中的pointer可以相对于ul定位而不是相对于初始包含块(html)去定位*/position: relative;}/* 设置li */.img-list li{position: absolute;}/* 通过修改元素的层级来显示指定的图片 */.img-list li:nth-child(4){z-index: 1;}/* 设置导航点的样式 */.pointer{position: absolute;z-index: 9999;bottom: 20px;left: 40px;}.pointer a{/* 设置元素向左浮动 */float: left;width: 10px;height: 10px;margin: 0px 2px;border-radius: 50%;background-color: rgba(255, 255, 255, .3);/* 将背景颜色值设置到内容区,边框和内边距不在有背景颜色 */background-clip: content-box;border: 2px solid transparent;}.pointer a.active,.pointer a:hover{background-color: #fff;border: 2px solid  rgba(255, 255, 255, .3);}style>
head>
<body><ul class="img-list"><li><a href="javascript:;"><img src="./img/05/1.jpg">a>li><li><a href="javascript:;"><img src="./img/05/2.jpg">a>li><li><a href="javascript:;"><img src="./img/05/3.jpg">a>li><li><a href="javascript:;"><img src="./img/05/4.jpg">a>li><li><a href="javascript:;"><img src="./img/05/5.jpg">a>li><li><a href="javascript:;"><img src="./img/05/6.jpg">a>li><li><a href="javascript:;"><img src="./img/05/7.jpg">a>li><li><a href="javascript:;"><img src="./img/05/8.jpg">a>li><div class="pointer"><a class="active" href="javascript:;">a><a href="javascript:;">a><a href="javascript:;">a><a href="javascript:;">a><a href="javascript:;">a><a href="javascript:;">a><a href="javascript:;">a><a href="javascript:;">a>div>ul>
body>
html>
06_京东顶部导航条 ※
效果图:

<html lang="en">
<head><meta charset="UTF-8"><meta name="viewport" content="width=device-width, initial-scale=1.0"><meta http-equiv="X-UA-Compatible" content="ie=edge"><title>京东顶部导航条title><link rel="stylesheet" href="./css/reset.css"><link rel="stylesheet" href="./fa/css/all.css"><style>.clearfix::before,.clearfix::after{content: '';display: table;clear: both;}body{/* 设置字体 */font:12px/1.5 Microsoft YaHei,Heiti SC,tahoma,arial,Hiragino Sans GB,"\5B8B\4F53",sans-serif;}/* 设置外部容器的样式 */.top-bar-wrapper{/* 设置宽度 */width: 100%;/* 设置背景颜色 */background-color: #E3E4E5;height: 30px;/* 设置行高,没有设置高度 使文字垂直居中 */line-height: 30px;/* 设置下边框 */border-bottom: 1px #ddd solid}/* 设置内部容器的样式 */.top-bar{/* 固定宽度 */width: 1190px;/* 设置水平居中 */margin: 0 auto;position: relative;}/* 设置字体样式 */.top-bar a ,.top-bar span,.top-bar i{color: #999;text-decoration: none;}.top-bar a:hover,.top-bar a.highlight{color: #f10215;}/* 设置location */.location{float: left;}/* 设置location下的小图标 */.location .fas{color: #f10215;}/* 设置城市列表的效果 */.location .city-list{display: none;width: 320px;height: 436px;background-color: white;border: 1px solid rgb(204, 204, 204);/* 设置绝对定位,使其不占据页面的位置 */position: absolute;top:31px;z-index: 999;box-shadow: 0 2px 2px rgba(0, 0, 0, .2)}/* 当鼠标移入到location时,让city-list显示 */.location:hover .city-list{display: block;}.current-city{padding: 0 10px;border: 1px solid transparent;border-bottom: none;position: relative;z-index: 9999;}/* 设置current-city的移入的效果 */.location:hover .current-city{background-color: white;border: 1px solid rgb(204, 204, 204);border-bottom: none;padding-bottom: 1px;}/* 设置shortcut */.shortcut{float: right;}/* 设置分割线 */.shortcut .line{width: 1px;height: 10px;background-color: rgb(204, 202, 202);margin: 12px 12px 0;}/* 设置li */.shortcut li{float: left;}style>
head>
<body><div class="top-bar-wrapper"><div class="top-bar clearfix"><div class="location"><div class="current-city"><i class="fas fa-map-marker-alt">i><a href="javascript:;">北京a>div><div class="city-list">div>div><ul class="shortcut clearfix"><li><a href="javascript:;">你好,请登录a><a class="highlight" href="javascript:;">免费注册a>li><li class="line">li><li><a href="javascript:;">我的订单a>li><li class="line">li><li><a href="javascript:;">我的京东a><i class="fas fa-angle-down">i>li><li class="line">li><li><a href="javascript:;">京东会员a>li><li class="line">li><li><a class="highlight" href="javascript:;">企业采购a><i class="fas fa-angle-down">i>li><li class="line">li><li><span>客户服务span><i class="fas fa-angle-down">i>li><li class="line">li><li><span>网站导航span><i class="fas fa-angle-down">i>li><li class="line">li><li><span>手机京东span>li>ul>div>div>
body>
html>
07_背景重复
效果图:

使用到的图片:👇

<html lang="en">
<head><meta charset="UTF-8"><meta name="viewport" content="width=device-width, initial-scale=1.0"><meta http-equiv="X-UA-Compatible" content="ie=edge"><title>背景重复title><style>.box1{width: 990px;height: 32px;margin: 0 auto;/* background-image: url('./img/07/bg.png');background-repeat: repeat-x; */background: url('./img/07/bg.png') repeat-x;}style>
head>
<body><div class="box1">div>
body>
html>
08_按钮练习
使用到的图片:👇


<html lang="en">
<head><meta charset="UTF-8"><meta name="viewport" content="width=device-width, initial-scale=1.0"><meta http-equiv="X-UA-Compatible" content="ie=edge"><title>按钮练习title><style>a:link{display: block;width: 93px;height: 29px;background-image: url('./img/08/link.png')}a:hover{background-image: url('./img/08/hover.png')}a:active{background-image: url('./img/08/active.png')}/*图片属于网页中的外部资源,外部资源都需要浏览器单独发送请求加载,浏览器加载外部资源时是按需加载的,用则加载,不用则不加载像上边的练习link会首先加载,而hover和active会在指定状态触发时才会加载*/style>
head>
<body><a href="javascript:;">a>
body>
html>
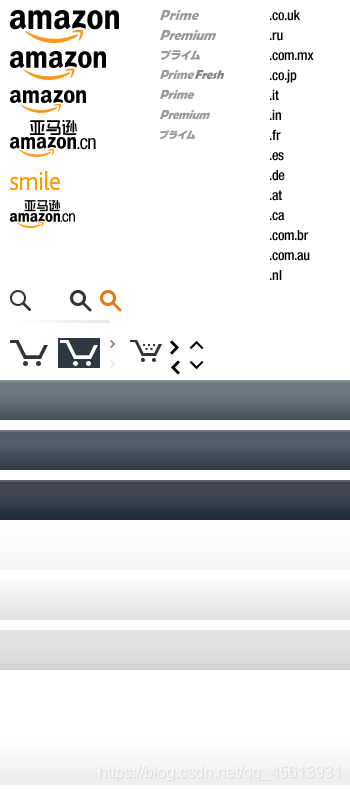
09_雪碧图 ※
效果图:

使用的雪碧图:👇

<html lang="en">
<head><meta charset="UTF-8"><meta name="viewport" content="width=device-width, initial-scale=1.0"><meta http-equiv="X-UA-Compatible" content="ie=edge"><title>按钮练习title><style>a:link{display: block;width: 93px;height: 29px;background-image: url('./img/09/btn.png')}a:hover{background-position: -93px 0;}a:active{background-position: -186px 0;}/* 解决图片闪烁的问题:可以将多个小图片统一保存到一个大图片中,然后通过调整background-position来显示的图片这样图片会同时加载到网页中 就可以有效的避免出现闪烁的问题这个技术在网页中应用十分广泛,被称为CSS-Sprite,这种图我们称为雪碧图雪碧图的使用步骤:1.先确定要使用的图标2.测量图标的大小3.根据测量结果创建一个元素4.将雪碧图设置为元素的背景图片5.设置一个偏移量以显示正确的图片雪碧图的特点:一次性将多个图片加载进页面,降低请求的次数,加快访问速度,提升用户的体验*/.box1{width: 128px;height: 46px;background-image: url('./img/09/amazon-sprite_.png');background-position:0 0;}.box2{width: 42px;height: 30px;background-image: url('./img/09/amazon-sprite_.png');background-position: -58px -338px;}style>
head>
<body><div class="box1">div><div class="box2">div><a href="javascript:;">a>
body>
html>
10_电影卡片 ※
效果图:
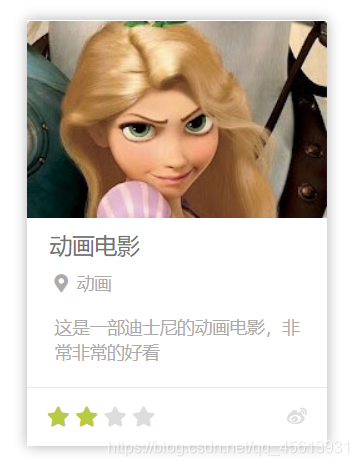
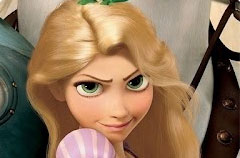
使用到的图片:👇
<html lang="en">
<head><meta charset="UTF-8"><meta name="viewport" content="width=device-width, initial-scale=1.0"><meta http-equiv="X-UA-Compatible" content="ie=edge"><title>电影卡片title><link rel="stylesheet" href="./css/reset.css"><link rel="stylesheet" href="./fa/css/all.css"><style>/* 设置外层容器 */.outer{width: 240px;margin: 100px auto;/* 设置阴影 */box-shadow: 0 0 10px rgba(0, 0, 0, .3);}/* .img-wrapper{border: 1px red solid;} *//* 设置图片 */.img-wrapper img{width: 100%;vertical-align: bottom;}.info{padding: 0 18px;color: #acaaaa;font-size: 14px;}/* 设置标题 */.info .title{color: #717171;font-size: 18px;margin: 13px 0 15px 0;}.info .category i{margin-left: 4px;margin-right: 7px;}/* 设置简介的样式 */.info .intro{margin: 18px 4px;line-height: 20px;}/* 设置下边的内容 */.star-wrapper{height: 46px;line-height: 46px;border-top: 1px solid #e9e9e9;color: #ddd;padding: 0 16px;}/* 设置星星的样式 */.star-wrapper .star{float: left;}.star-wrapper .light{color: #b9cb41;}.star-wrapper .weibo{float: right;}style>
head>
<body><div class="outer"><div class="img-wrapper"><img src="./img/10/1.jpg" alt="">div><div class="info"><h2 class="title">动画电影h2><h3 class="category"><i class="fas fa-map-marker-alt">i>动画h3><p class="intro">这是一部迪士尼的动画电影,非常非常的好看p>div><div class="star-wrapper"><ul class="star"><li class="fas fa-star light">li><li class="fas fa-star light">li><li class="fas fa-star">li><li class="fas fa-star">li>ul><ul class="weibo"><li class="fab fa-weibo">li>ul>div>div>
body>
html>
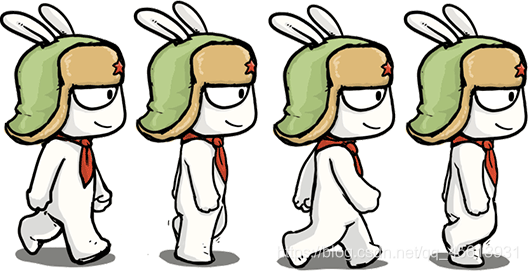
11_米兔的动画 ※
效果:把鼠标放在图片上就可展现出动态效果
使用到的图片:👇
<html>
<head><meta charset="UTF-8"><meta name="viewport" content="width=device-width, initial-scale=1.0"><meta http-equiv="X-UA-Compatible" content="ie=edge"><title>米兔的动画title><style>.box1{height: 271px;width: 132px;margin: 0 auto;background-image: url(./img/11/bigtap-mitu-queue-big.png);background-position: 0 0;/*持续时间 分几步*/transition:0.3s steps(3);}.box1:hover{background-position: -396px 0;}style>
head>
<body><div class="box1">div>
body>
html>
12_奔跑的少年 ※
效果和11类似。
使用到的图片:👇

<html lang="en">
<head><meta charset="UTF-8"><meta name="viewport" content="width=device-width, initial-scale=1.0"><meta http-equiv="X-UA-Compatible" content="ie=edge"><title>奔跑的少年title><style>.box1{width: 256px;height: 256px;margin: 0 auto;background-image: url('./img/12/bg2.png');animation: run 1s steps(6) infinite;}/* 创建关键帧 */@keyframes run {from{background-position: 0 0;}to{background-position: -1536px 0;}}style>
head>
<body><div class="box1">div>
body>
html>
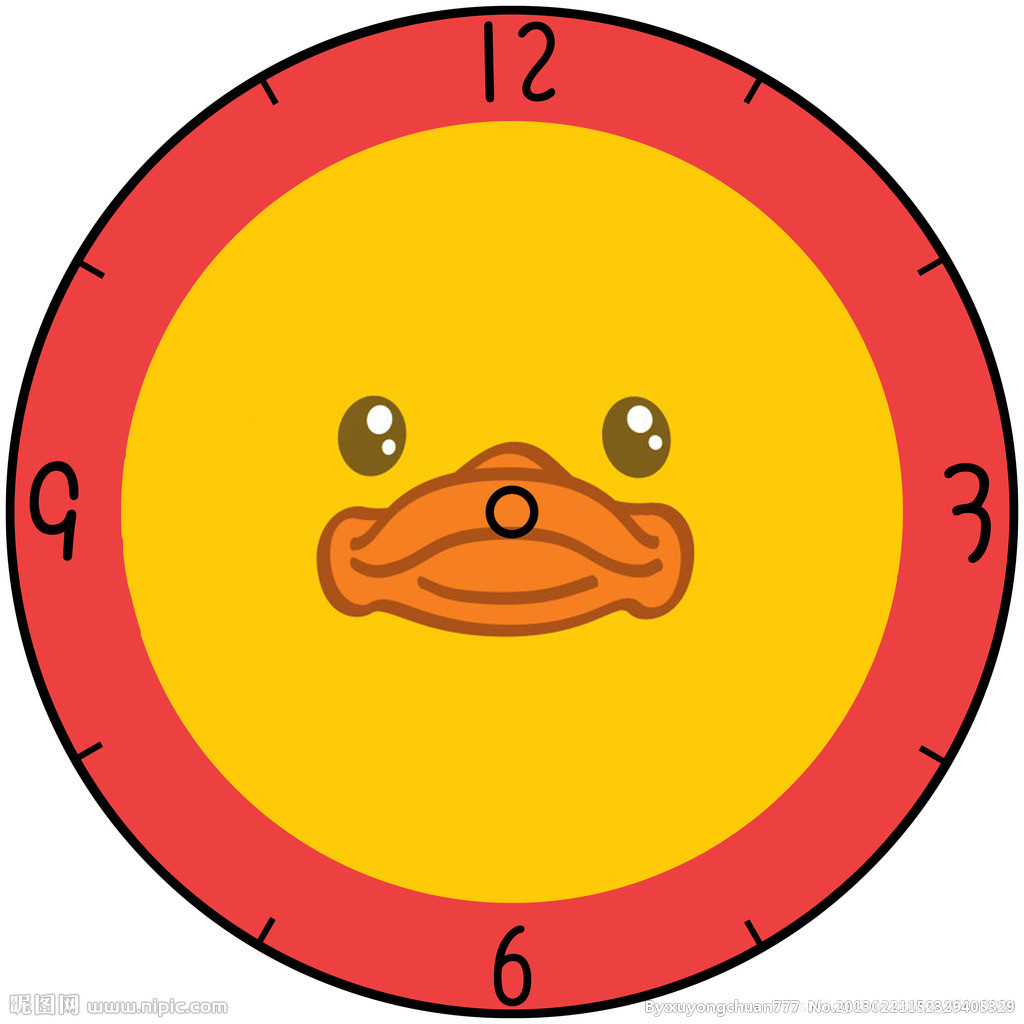
13_钟表 ※
效果图:
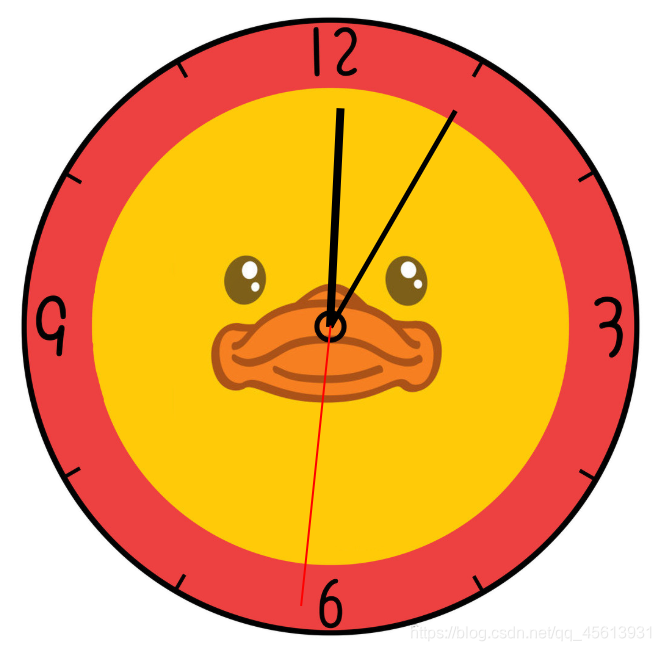
使用到的图片:👇
<html>
<head><meta charset="UTF-8"><meta name="viewport" content="width=device-width, initial-scale=1.0"><meta http-equiv="X-UA-Compatible" content="ie=edge"><title>钟表title><style>* {margin: 0;padding: 0;}/* 设置表的样式 */.clock {width: 500px;height: 500px;margin: 0 auto;margin-top: 100px;border-radius: 50%;/* border: 10px solid black; */position: relative;background-image: url(./img/13/bg3.jpg);background-size: cover;}.clock>div {position: absolute;top: 0;left: 0;bottom: 0;right: 0;margin: auto;}/* 设置时针 */.hour-wrapper {height: 70%;width: 70%;animation: run 7200s linear infinite;}.hour {height: 50%;width: 6px;background-color: #000;margin: 0 auto;}/* 设置分针 */.min-wrapper {height: 80%;width: 80%;animation: run 600s steps(60) infinite;}.min {height: 50%;width: 4px;background-color: #000;margin: 0 auto}/* 设置秒针 */.sec-wrapper {height: 90%;width: 90%;animation: run 10s steps(60) infinite;}.sec {height: 50%;width: 2px;background-color: #f00;margin: 0 auto}/* 旋转的关键帧
*/@keyframes run {from {transform: rotateZ(0);}to {transform: rotateZ(360deg);}}style>
head>
<body><div class="clock"><div class="hour-wrapper"><div class="hour">div>div><div class="min-wrapper"><div class="min">div>div><div class="sec-wrapper"><div class="sec">div>div>div>
body>
html>
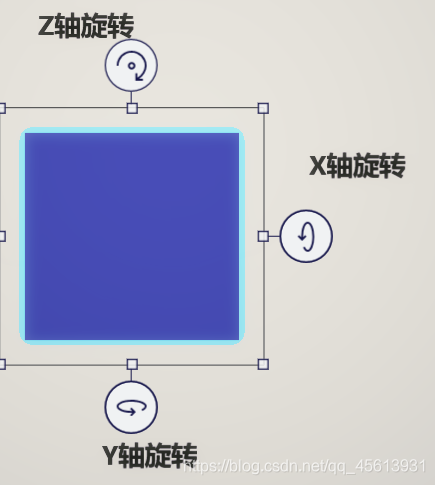
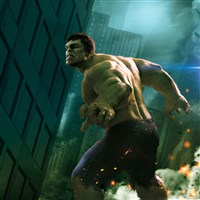
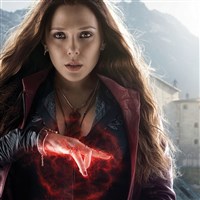
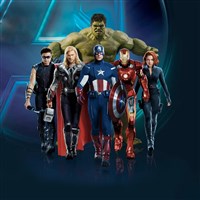
14_复仇者联盟 ※
设置3D效果后:transform-style: preserve-3d;
transform可以在不需要过渡/动画的情况下,直接对元素进行如下操作:
transform: rotateZ(20deg);
(就算设置视距perspective,有的浏览器也无法看到Z轴旋转的效果)
经测试旋转情况:(详细可参考3D绘图,正方体的X、Y、Z旋转情况)
效果图:
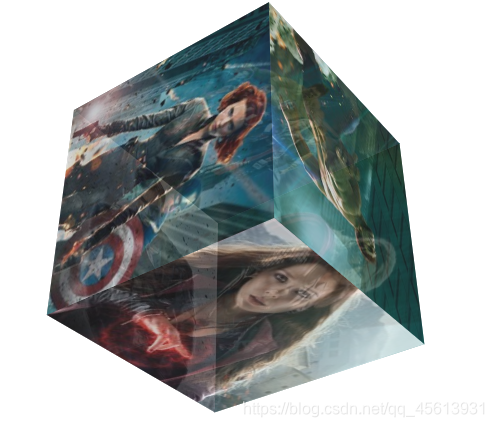
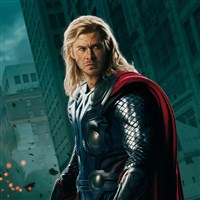
使用到的图片:👇


<html lang="en">
<head><meta charset="UTF-8"><meta name="viewport" content="width=device-width, initial-scale=1.0"><meta http-equiv="X-UA-Compatible" content="ie=edge"><title>复仇者联盟title><style>html {perspective: 800px}.cube {width: 200px;height: 200px;/* background-color: #bfa; */margin: 100px auto;/* 设置3d变形效果 */transform-style: preserve-3d;/* transform: rotateX(45deg) rotateZ(45deg); */animation: rotate 20s infinite linear;/* transform:rotateY(45deg) scaleZ(2); */}.cube>div {width: 200px;height: 200px;/* 为元素设置透明效果 */opacity: 0.7;position: absolute;}img {vertical-align: top;}.box1 {transform: rotateY(90deg) translateZ(100px);}.box2 {transform: rotateY(-90deg) translateZ(100px);}.box3 {transform: rotateX(90deg) translateZ(100px);}.box4 {transform: rotateX(-90deg) translateZ(100px);}.box5 {transform:rotateY(180deg) translateZ(100px);}.box6 {transform: rotateY(0deg) translateZ(100px);}@keyframes rotate {form{transform:rotateX(0) rotateZ(0)}to{transform:rotateX(1turn) rotateZ(1turn)}}style>
head>
<body><div class="cube"><div class="box1"><img src="./img/14/1.jpg">div><div class="box2"><img src="./img/14/2.jpg">div><div class="box3"><img src="./img/14/3.jpg">div><div class="box4"><img src="./img/14/4.jpg">div><div class="box5"><img src="./img/14/5.jpg">div><div class="box6"><img src="./img/14/6.jpg">div>div>
body>
html>
15_再做导航条(弹性容器) ※
弹性容器的导航条和之前的导航条相比,最大的好处就是,弹性容器可以帮我们填补元素未使用的空白,比较实用。之前想要保证导航条充分利用,需要合理利用空间(即要细心排版,设计每个子元素的大小,以便最大程度的占据父元素)。但实际上,对于不同浏览器,就算细心排版,仍然可能会出现问题,因为不同的浏览器有它自己的样式。而使用弹性容器,它不会考虑这些,因为它会根据大小,自动分配。
效果图:

<html lang="zh">
<head><meta charset="UTF-8"><meta name="viewport" content="width=device-width, initial-scale=1.0"><meta http-equiv="X-UA-Compatible" content="ie=edge"><title>弹性导航条title><link rel="stylesheet" href="css/reset.css"><style>.nav{width: 1210px;height: 48px;line-height: 48px;margin: 50px auto;background-color: #E8E7E3;/* 设置为弹性容器 */display: flex;}.nav li{/* 设置增长系数 */flex-grow: 1;}.nav a{display: block;color: #808080;text-decoration: none;font-size: 16px;text-align: center;}.nav a:hover{background-color: #636363;color: #fff;}style>
head>
<body><ul class="nav"><li><a href="#">HTML/CSSa>li><li><a href="#">Browser Sidea>li><li><a href="#">Server Sidea>li><li><a href="#">Programminga>li><li><a href="#">XMLa>li><li><a href="#">Web Buildinga>li><li><a href="#">Referencea>li>ul>
body>
html>
16_淘宝导航
效果图:

使用到的图片👇:


<html lang="zh">
<head><meta charset="UTF-8"><meta name="viewport" content="width=device-width, initial-scale=1.0"><meta http-equiv="X-UA-Compatible" content="ie=edge"><title>淘宝导航title><style>* {margin: 0;padding: 0;}/* 设置外层的容器 */.nav{width: 100%;}/* 设置每一行的容器 */.nav-inner{margin: 0 auto;width: 50%;/* 设置为弹性容器 */display: flex;/* 设置主轴上空白的分布 */justify-content: space-around;}.item{width: 10%;text-align: center;}.item img{/* 设置图片的宽度和父元素宽度一样 */width: 100%;}.item a{color: #333;text-decoration: none;font-size: 16px;}style>
head>
<body><nav class="nav"><div class="nav-inner"><div class="item"><a href="#"><img src="img/16/1.png"><span>天猫span>a>div><div class="item"><a href="#"><img src="img/16/2.png"><span>聚划算span>a>div><div class="item"><a href="#"><img src="img/16/3.png"><span>天猫国际span>a>div><div class="item"><a href="#"><img src="img/16/4.png"><span>外卖span>a>div><div class="item"><a href="#"><img src="img/16/5.png"><span>天猫超市span>a>div>div><div class="nav-inner"><div class="item"><a href="#"><img src="img/16/6.png"><span>充值中心span>a>div><div class="item"><a href="#"><img src="img/16/7.png"><span>飞猪旅行span>a>div><div class="item"><a href="#"><img src="img/16/8.png"><span>领金币span>a>div><div class="item"><a href="#"><img src="img/16/9.png"><span>拍卖span>a>div><div class="item"><a href="#"><img src="img/16/10.png"><span>分类span>a>div>div>nav>
body>
html>
17_移动端页面 ※
使用到的图片👇:


<html lang="zh">
<head><meta charset="UTF-8"><meta name="viewport" content="width=device-width, initial-scale=1.0"><meta http-equiv="X-UA-Compatible" content="ie=edge"><title>爱学习title><link rel="stylesheet" href="./fa/css/all.min.css"><style>*{margin: 0;padding: 0}.w, .top-bar, .banner, .menu, .course-list {width: 17.325rem;margin: 0 auto}html {font-size: 5.33333333vw;background-color: #eff0f4}a {text-decoration: none}.top-bar {display: flex;height: 4.375rem;line-height: 4.375rem;justify-content: space-between;align-items: center}	.top-bar a {color: #24253d;font-size: 1.25rem}.top-bar a i {color: #999;font-size: 1rem}.banner img {width: 100%}.menu {height: 8.225rem;display: flex;flex-flow: row wrap;justify-content: space-between;align-content: space-evenly}.menu a {width: 8.175rem;height: 2.6rem;line-height: 2.6rem;color: white;border-radius: .25rem}.menu a i {margin: 0 .5rem 0 .95rem}.menu .course {background-color: #f97053}.menu .star {background-color: #cd6efe}	.menu .sub {background-color: #fe4479}.menu .download {background-color: #1bc4fb}.course-list {height: 9.85rem;display: flex;flex-flow: column;justify-content: space-between;margin-bottom: 1.15rem}	.course-list .title {display: flex;justify-content: space-between;align-items: center}.course-list .title h2 {font-size: .825rem;color: #24253d;border-left: 2px solid #3a84ff;padding-left: 4px}.course-list .title a {font-size: .7rem;color: #656565}.item-list {width: 18rem;display: flex;overflow: auto}.item {flex: none;box-sizing: border-box;width: 8rem;height: 8.1rem;padding: 0 .55rem;background-color: #fff;box-shadow: 0 0 10px rgba(0, 0, 0, 0.3);border-radius: 5px;display: flex;flex-flow: column;justify-content: space-evenly;margin-right: .6rem}.item img {width: 100%;vertical-align: top}.item .course-title {font-size: .8rem;color: #24253d}.item .user-info {display: flex;align-items: center}.item .avatar {width: 1.05rem;height: 1.05rem}.item .nickname {margin-left: 6px;font-size: .6rem;color: #969393} style>
head>
<body><header class="top-bar"><div class="menu-btn"><a href="#"><i class="fas fa-stream">i>a>div><h1 class="logo"><a href="#">爱学习a>h1><div class="search-btn"><a href="#"><i class="fas fa-search">i>a>div>header><div class="banner"><a href="#"><img src="./img/17/banner.png" alt="">a>div><nav class="menu"><a class="course" href="#"><i class="fas fa-book">i>我的课程a><a class="star" href="#"><i class="fas fa-cut">i>明星讲师a><a class="sub" href="#"><i class="fas fa-envelope">i>我的订阅a><a class="download" href="#"><i class="fas fa-globe">i>我的下载a>nav><div class="course-list"><div class="title"><h2>最新课程h2><a class="more" href="#">更多+a>div><div class="item-list"><div class="item"><div class="cover"><img src="img/17/cover.png" alt="">div><h3 class="course-title">摄影课程h3><div class="user-info"><div class="avatar"><img src="img/17/avatar.png" alt="">div><div class="nickname">令狐冲div>div>div><div class="item"><div class="cover"><img src="img/17/cover.png" alt="">div><h3 class="course-title">摄影课程h3><div class="user-info"><div class="avatar"><img src="img/17/avatar.png" alt="">div><div class="nickname">令狐冲div>div>div><div class="item"><div class="cover"><img src="img/17/cover.png" alt="">div><h3 class="course-title">摄影课程h3><div class="user-info"><div class="avatar"><img src="img/17/avatar.png" alt="">div><div class="nickname">令狐冲div>div>div>div>div>
body>
html>
本文来自互联网用户投稿,文章观点仅代表作者本人,不代表本站立场,不承担相关法律责任。如若转载,请注明出处。 如若内容造成侵权/违法违规/事实不符,请点击【内容举报】进行投诉反馈!