学习多线程 - iOS
实现多线程的方案一共有四种:pthread,NSThread,GCD,NSOperation
一、线程的状态与生命周期
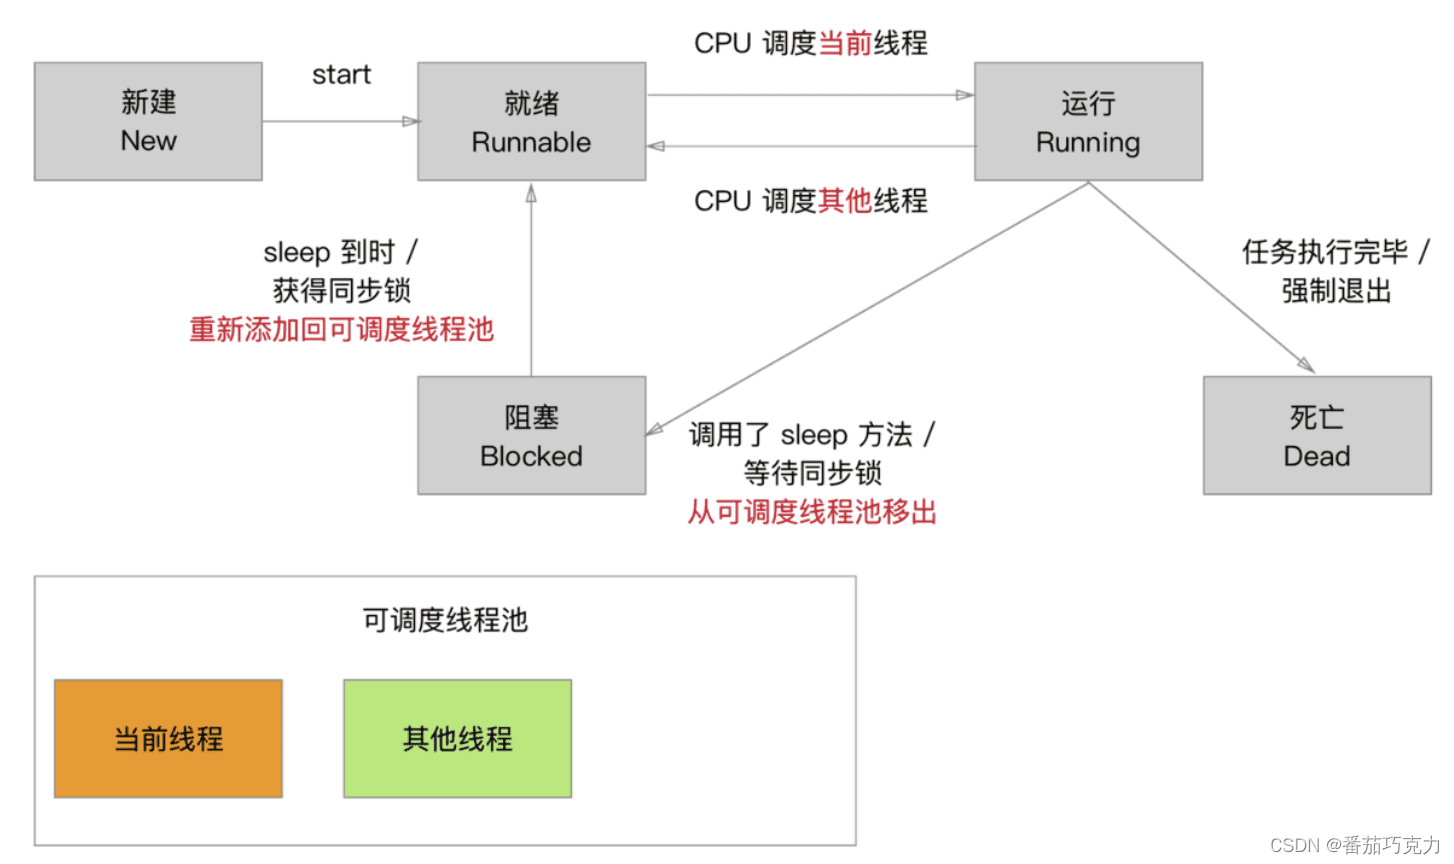
- 新建:实例化线程对象
- 就绪:向线程对象发送start消息,线程对象就被加入到可调度线程池中等待CPU调度
- 运行:CPU负责调用可调用线程池中的线程执行。线程执行完成之前,状态可能会在就绪和运行之间来回切换。就绪和运行的状态是由CPU负责,程序员不能干涉。
- 阻塞:当满足某个预订条件时,可以使用休眠或者锁,阻塞线程执行。sleepForTimeInterval(休眠指定时长),sleepUntilDate(休眠到指定日期),@synchronized(self):(互斥锁)。
- 死亡:正常死亡,线程执行完毕。非正常死亡,当满足某个条件后,在线程内部中止执行或者在主线程中止线程对象。
二、GCD的基本概念
- 同步(sync):一个接着一个,前一个没有执行完,后面不能执行,不开线程。
- 异步(async):开启多个新线程,任务同一时间可以一起执行。异步是多线程的代名词
- 队列:装载线程任务的队形结构。(系统以先进先出的方式调度队列中的任务执行)。在GCD中有两种队列:串行队列和并发队列。
- 并发队列:线程可以同时一起进行执行。实际上是CPU在多条线程之间快速的切换。(并发功能只有在异步(dispatch_async)函数下才有效)
- 串行队列:线程只能依次有序的执行。
三、GCD的使用
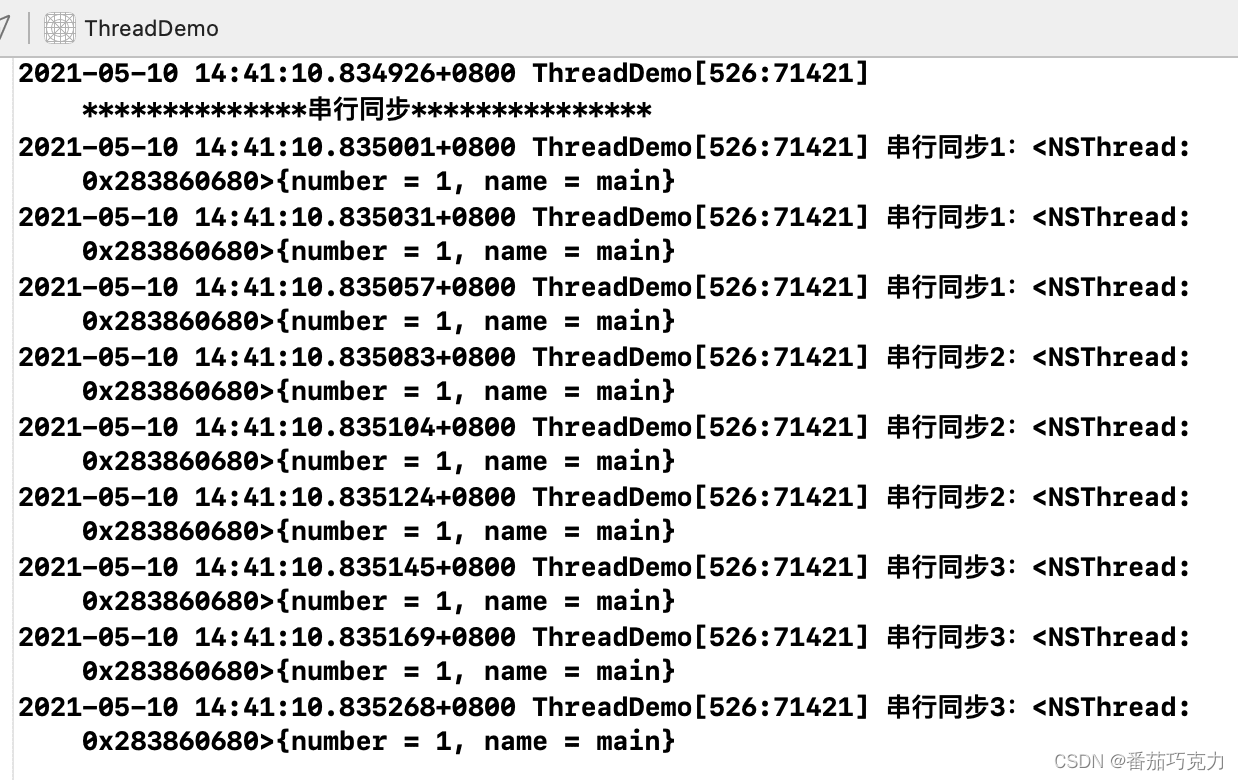
1、串行同步
- (void)syncSerial {NSLog(@"**************串行同步***************");dispatch_queue_t queue = dispatch_queue_create("test", DISPATCH_QUEUE_SERIAL);dispatch_sync(queue, ^{for (int i=0;i<3;i++) {NSLog(@"串行同步1:%@", [NSThread currentThread]);}});dispatch_sync(queue, ^{for (int i=0;i<3;i++) {NSLog(@"串行同步2:%@", [NSThread currentThread]);}});dispatch_sync(queue, ^{for (int i=0;i<3;i++) {NSLog(@"串行同步3:%@", [NSThread currentThread]);}});
}
运行结果如下:执行完一个任务,再执行写一个任务。不开启新的线程
2、串行异步
- (void)asyncSerial {NSLog(@"**************串行异步***************");dispatch_queue_t queue = dispatch_queue_create("test", DISPATCH_QUEUE_SERIAL);dispatch_async(queue, ^{for (int i=0;i<3;i++) {NSLog(@"串行异步1:%@", [NSThread currentThread]);}});dispatch_async(queue, ^{for (int i=0;i<3;i++) {NSLog(@"串行异步2:%@", [NSThread currentThread]);}});dispatch_async(queue, ^{for (int i=0;i<3;i++) {NSLog(@"串行异步3:%@", [NSThread currentThread]);}});
}
结果如下:会开启新的线程,但是因为任务是串行的,所以还是按照顺序执行任务

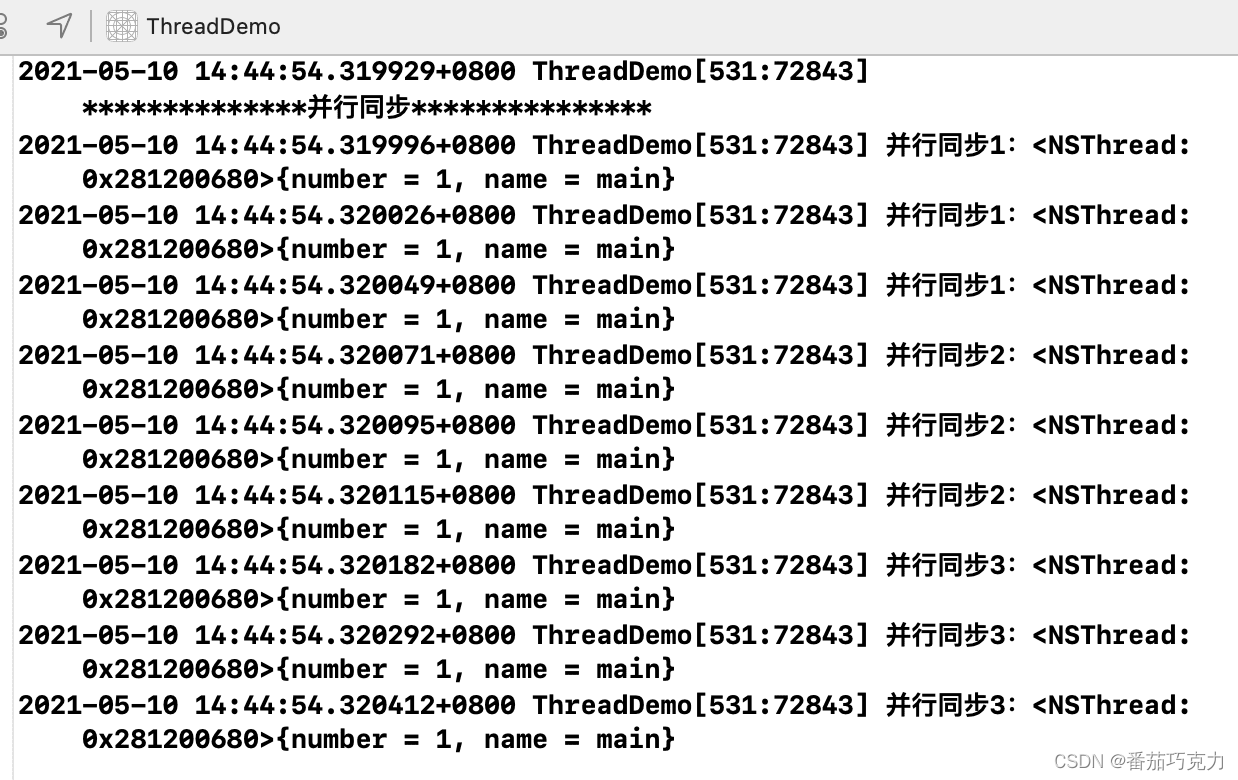
3、并行同步
- (void)syncConcurrent {NSLog(@"**************并行同步***************");dispatch_queue_t queue = dispatch_queue_create("test", DISPATCH_QUEUE_CONCURRENT);dispatch_sync(queue, ^{for (int i=0;i<3;i++) {NSLog(@"并行同步1:%@", [NSThread currentThread]);}});dispatch_sync(queue, ^{for (int i=0;i<3;i++) {NSLog(@"并行同步2:%@", [NSThread currentThread]);}});dispatch_sync(queue, ^{for (int i=0;i<3;i++) {NSLog(@"并行同步3:%@", [NSThread currentThread]);}});}结果如下:因为是同步的,所以执行完一个任务,在执行下一个任务,不会开启新的线程
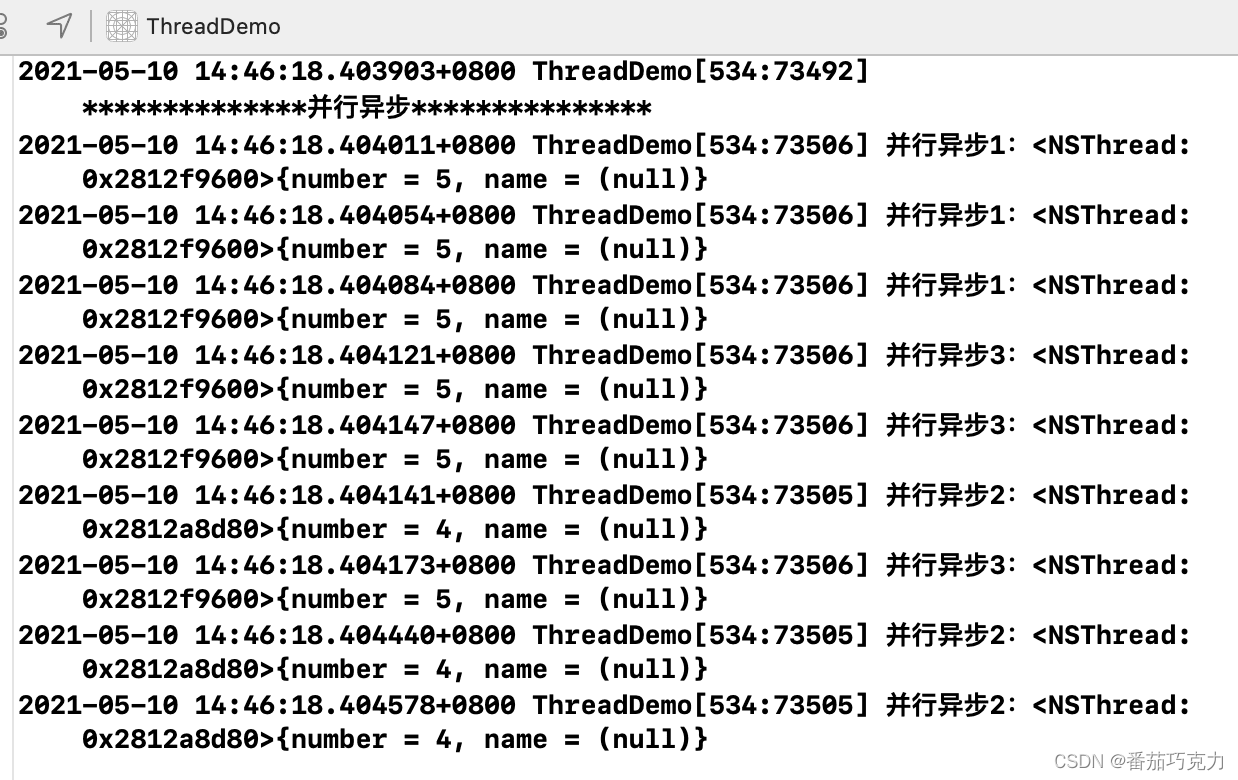
4、并行异步
- (void)asyncConcurrent {NSLog(@"**************并行异步***************");dispatch_queue_t queue = dispatch_queue_create("test", DISPATCH_QUEUE_CONCURRENT);dispatch_async(queue, ^{for (int i=0;i<3;i++) {NSLog(@"并行异步1:%@", [NSThread currentThread]);}});dispatch_async(queue, ^{for (int i=0;i<3;i++) {NSLog(@"并行异步2:%@", [NSThread currentThread]);}});dispatch_async(queue, ^{for (int i=0;i<3;i++) {NSLog(@"并行异步3:%@", [NSThread currentThread]);}});}
结果如下:任务交替执行,开启多线程。
5、GCD栅栏
当任务需要异步进行,但是这些任务需要分成两组来执行,第一组完成之后才能进行第二组的操作。这时候就用了到GCD的栅栏方法dispatch_barrier_async。
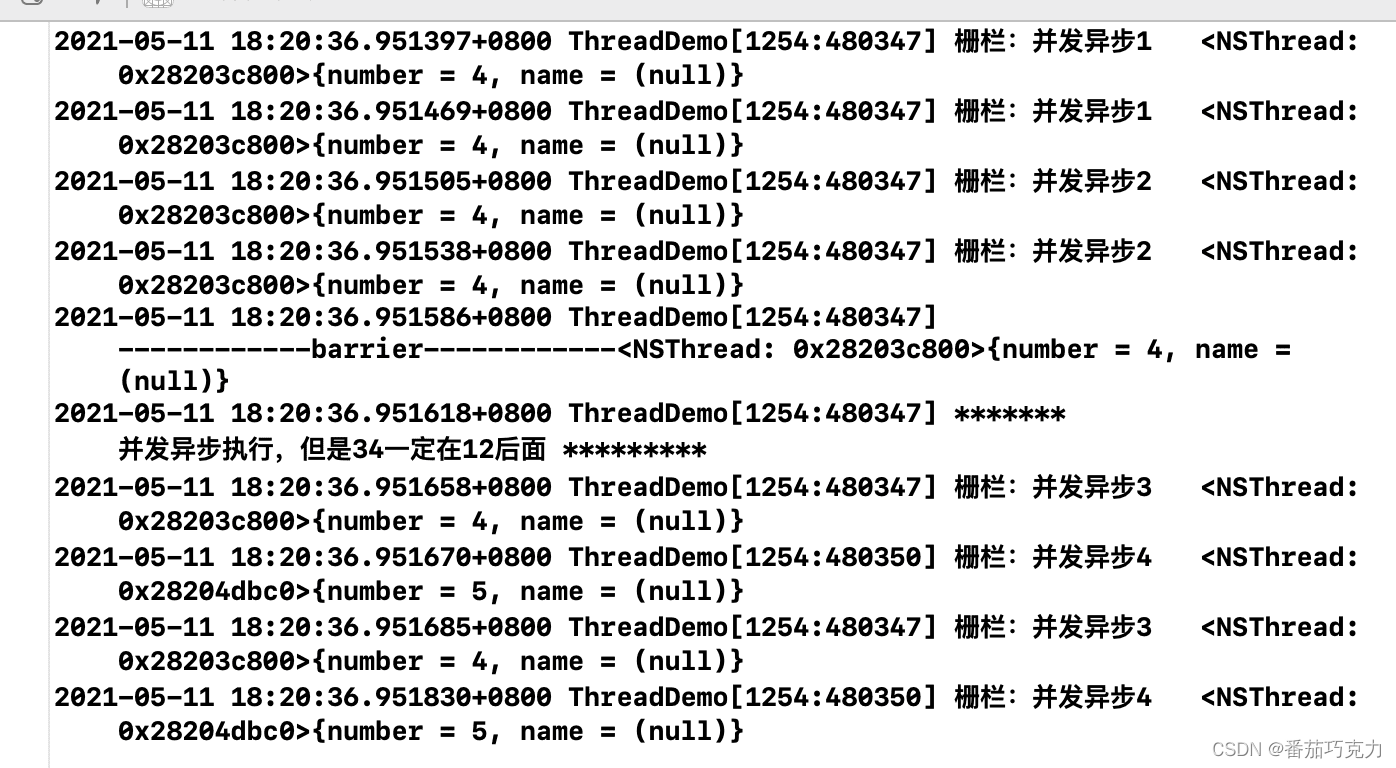
// 并发队列dispatch_queue_t queue = dispatch_queue_create("test", DISPATCH_QUEUE_CONCURRENT);// 异步执行dispatch_async(queue, ^{for (int i = 0; i < 2; i++) {NSLog(@"栅栏:并发异步1 %@",[NSThread currentThread]);}});dispatch_async(queue, ^{for (int i = 0; i < 2; i++) {NSLog(@"栅栏:并发异步2 %@",[NSThread currentThread]);}});dispatch_barrier_async(queue, ^{NSLog(@"------------barrier------------%@", [NSThread currentThread]);NSLog(@"******* 并发异步执行,但是34一定在12后面 *********");});dispatch_async(queue, ^{for (int i = 0; i < 2; i++) {NSLog(@"栅栏:并发异步3 %@",[NSThread currentThread]);}});dispatch_async(queue, ^{for (int i = 0; i < 2; i++) {NSLog(@"栅栏:并发异步4 %@",[NSThread currentThread]);}});
结果如下:开启了多条线程,所有任务都是并发异步进行。但是第一组完成之后,才会进行第二组的操作。
四、经典案例
1、买票
(1)当我们只有一个车站的时候
- (void)buyTicket {_restCount = 20;dispatch_queue_t queue = dispatch_queue_create("trainStation", DISPATCH_QUEUE_CONCURRENT);dispatch_async(queue, ^{[self saleTickets:queue];});
}- (void)saleTickets:(dispatch_queue_t)queue{while (_restCount > 0) {// 如果还有票,继续售卖NSInteger count = arc4random() % 3 + 1; // 在窗口购买任意n+1张票if (_restCount == 1){count = 1;}_restCount -= count; // 剩余票数const char *queueLabel = dispatch_queue_get_label(queue);NSString *label = [NSString stringWithUTF8String:queueLabel];NSLog(@"%@售出%ld,余票:%d张",label, (long)count, _restCount);}
}
结果如下:

(2)当我们在添加一个车站的时候
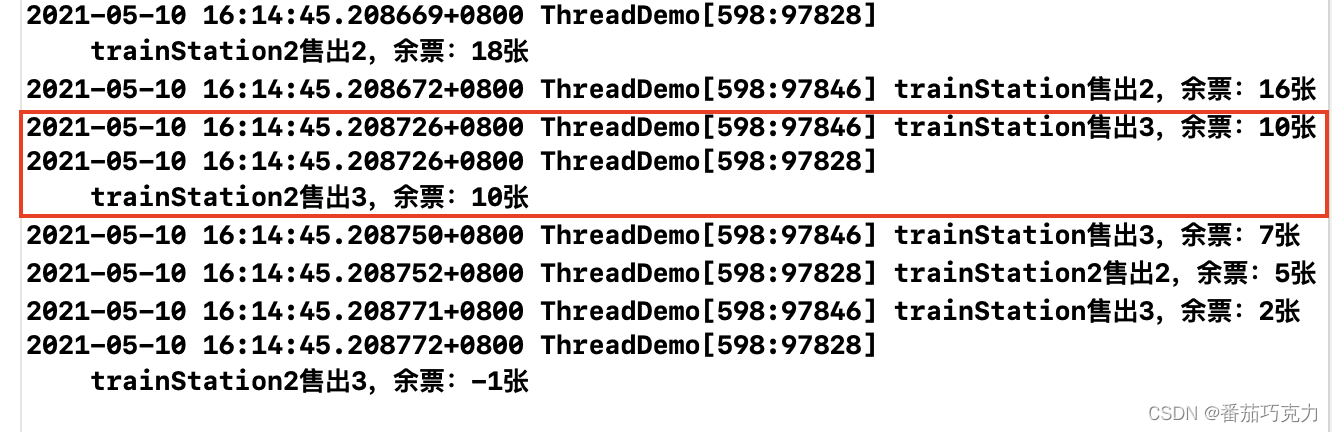
- (void)buyTicket {_restCount = 20;dispatch_queue_t queue = dispatch_queue_create("trainStation", DISPATCH_QUEUE_CONCURRENT);dispatch_async(queue, ^{[self saleTickets:queue];});dispatch_queue_t queue2 = dispatch_queue_create("trainStation2", DISPATCH_QUEUE_CONCURRENT);dispatch_sync(queue2, ^{[self saleTickets:queue2];});
}- (void)saleTickets:(dispatch_queue_t)queue{while (_restCount > 0) {// 如果还有票,继续售卖NSInteger count = arc4random() % 3 + 1; // 在窗口购买任意n+1张票if (_restCount == 1){count = 1;}_restCount -= count; // 剩余票数const char *queueLabel = dispatch_queue_get_label(queue);NSString *label = [NSString stringWithUTF8String:queueLabel];NSLog(@"%@售出%ld,余票:%d张",label, (long)count, _restCount);}
}
结果如下:我们发现结果是错乱的,这个时候我们就需要想办法解决这个错乱问题。
(3)我们需要加同步锁来解决这个问题
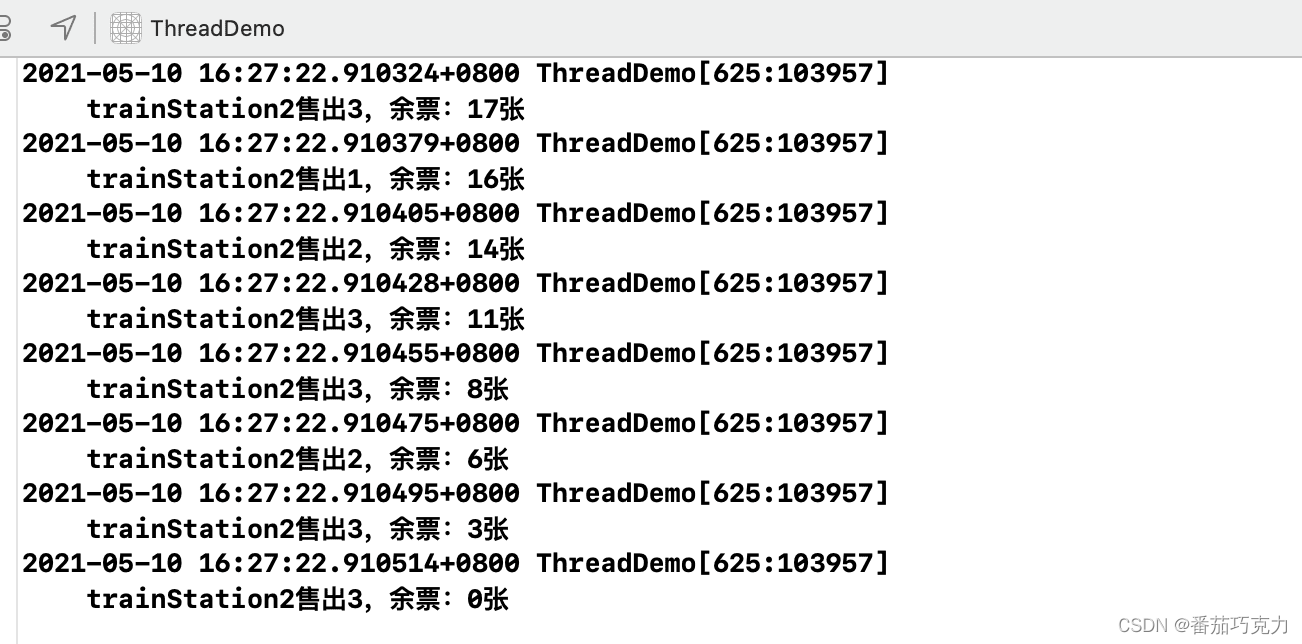
- (void)saleTickets:(dispatch_queue_t)queue{while (_restCount > 0) {@synchronized (self) {if (_restCount >0) {// 如果还有票,继续售卖NSInteger count = arc4random() % 3 + 1; // 在窗口购买任意n+1张票if (_restCount == 1){count = 1;}_restCount -= count; // 剩余票数const char *queueLabel = dispatch_queue_get_label(queue);NSString *label = [NSString stringWithUTF8String:queueLabel];NSLog(@"%@售出%ld,余票:%d张",label, (long)count, _restCount);}}}
}
结果如下:
2、异步加载图片,顺序显示
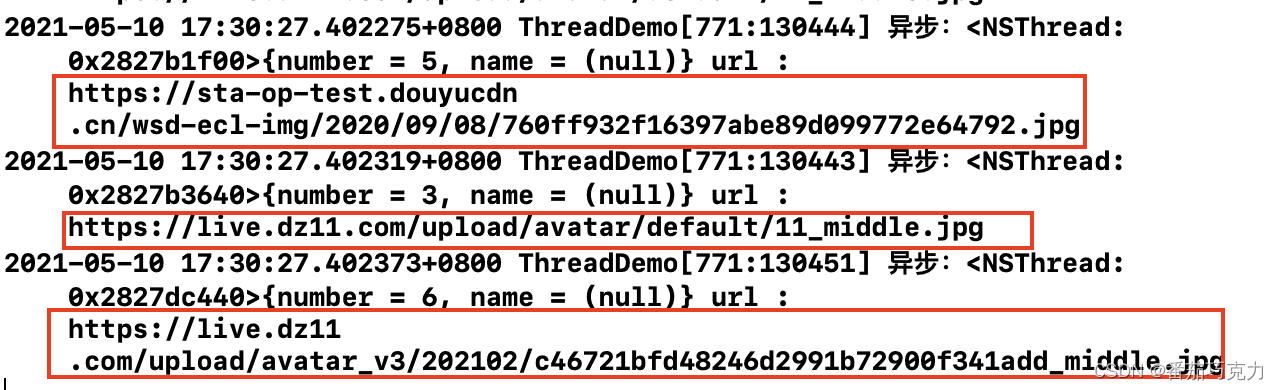
#import "UIImageView+webCach.h"@implementation UIImageView (webCach)-(void)setImageUrl:(NSURL *)url {dispatch_queue_t queue = dispatch_queue_create("inage_cache", NULL);dispatch_async(queue, ^{NSLog(@"异步:%@ url : %@",[NSThread currentThread],url);NSData *data=[NSData dataWithContentsOfURL:url];UIImage *image=[UIImage imageWithData:data];//让主线程去做dispatch_sync(dispatch_get_main_queue(), ^{self.image=image;});});}
viewload函数
UIImageView *imageView2=[[UIImageView alloc]initWithFrame:CGRectMake(60, 180, 200, 120)];imageView2.backgroundColor=[UIColor greenColor];[imageView2 setImageUrl:[NSURL URLWithString:@"https://sta-op-test.douyucdn.cn/wsd-ecl-img/2020/09/08/760ff932f16397abe89d099772e64792.jpg"]];UIImageView *imageView3=[[UIImageView alloc]initWithFrame:CGRectMake(60, 320, 200, 120)];imageView3.backgroundColor=[UIColor greenColor];[imageView2 setImageUrl:[NSURL URLWithString:@"https://live.dz11.com/upload/avatar_v3/202102/c46721bfd48246d2991b72900f341add_middle.jpg"]];[imageView2 setImageUrl:[NSURL URLWithString:@"https://live.dz11.com/upload/avatar/default/11_middle.jpg"]];
结果如下:我们发现加载顺序混乱的,我们需要让他按照顺序来加载,我们需要加上同步锁
添加同步锁:
-(void)setImageUrl:(NSURL *)url {dispatch_queue_t queue = dispatch_queue_create("inage_cache", NULL);dispatch_async(queue, ^{@synchronized (self) {NSLog(@"异步:%@ url : %@",[NSThread currentThread],url);NSData *data=[NSData dataWithContentsOfURL:url];UIImage *image=[UIImage imageWithData:data];//让主线程去做dispatch_sync(dispatch_get_main_queue(), ^{self.image=image;});}});}
结果如下:

五、NSOperation和NSOperationQueue
1、NSOperation简介
NSOperation是基于GCD之上的更高一层封装,NSOperation需要配合NSOperationQueue来实现多线程。
NSOperation实现多线程的步骤如下:
- 创建任务:先将需要执行的操作封装到NSOperation对象中。
- 创建队列:创建NSOperationQueue。
- 将任务加入到队列中:将NSOperation对象添加到NSOperationQueue中。
需要注意的是:NSOperation是个抽象类,实际运用时中需要使用它的子类,有三种方式:
-
使用子类NSInvocationOperation
-
使用子类NSBlockOperation
-
定义继承自NSOperation的子类,通过实现内部相应的方法来封装任务。
2、NSOperation的三种创建方式
- NSInvocationOperation的使用
创建NSInvocationOperation对象并关联方法,之后start。
- (void)useInvocationOperation {// 1.创建 NSInvocationOperation 对象NSInvocationOperation *op = [[NSInvocationOperation alloc] initWithTarget:self selector:@selector(task1) object:nil];// 2.调用 start 方法开始执行操作[op start];
}- (void)task1{for (int i=0;i<3;i++) {NSLog(@"NSInvocationOperation---%@",[NSThread currentThread]);}
}
结果如下:程序在主线程执行,没有开启新线程。
这是因为NSOperation多线程的使用需要配合队列NSOperationQueue,后面会讲到NSOperationQueue的使用。

- 使用子类NSBlockOperation
把任务放到NSBlockOperation的block中,然后start。
NSBlockOperation *bp = [NSBlockOperation blockOperationWithBlock:^{NSLog(@"NSBlockOperation---%@",[NSThread currentThread]);}];[bp start];
结果如下:程序在主线程执行,没有开启新线程。
同样的,NSBlockOperation可以配合队列NSOperationQueue来实现多线程。

但是NSBlockOperation有一个方法addExecutionBlock:,通过这个方法可以让NSBlockOperation实现多线程。
NSBlockOperation *bp = [NSBlockOperation blockOperationWithBlock:^{NSLog(@"NSBlockOperation主任务---%@",[NSThread currentThread]);}];[bp addExecutionBlock:^{NSLog(@"addExecutionBlock方法添加任务1========%@", [NSThread currentThread]);}];[bp addExecutionBlock:^{NSLog(@"addExecutionBlock方法添加任务2========%@", [NSThread currentThread]);}];[bp addExecutionBlock:^{NSLog(@"addExecutionBlock方法添加任务3========%@", [NSThread currentThread]);}];[bp start];
结果如下:可以看出,NSBlockOperation创建时block中的任务是在主线程执行,而运用addExecutionBlock加入的任务有的是在子线程执行的。

- 定义继承自NSOperation的子类,通过实现内部相应的方法来封装任务。
首先我们定义一个继承自NSOperation的类,然后重写它的main方法,之后就可以使用这个子类来进行相关的操作了。
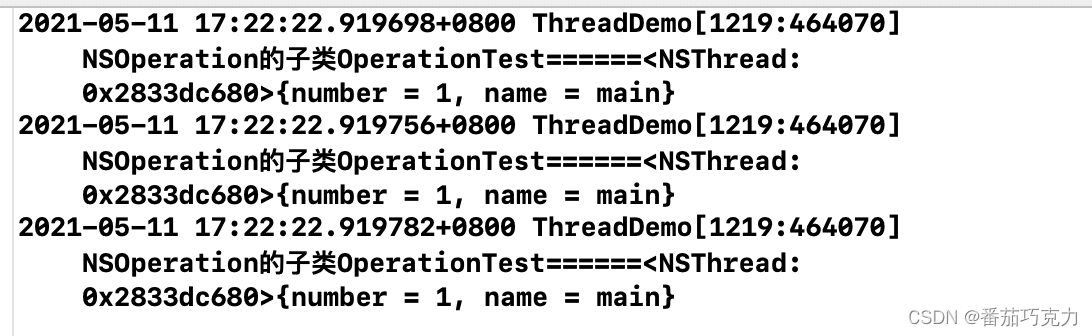
/*******************"OperationTest.h"*************************/@interface OperationTest : NSOperation@end/*******************"OperationTest.m"*************************/#import "OperationTest.h"@implementation OperationTest- (void)main {for (int i = 0; i < 3; i++) {NSLog(@"NSOperation的子类OperationTest======%@",[NSThread currentThread]);}
}@end/*****************回到主控制器使用OperationTest**********************/- (void)testOperation {OperationTest *test = [[OperationTest alloc] init];[test start];
}
结果如下:依然是在主线程执行。
所以,NSOperation是需要配合队列NSOperationQueue来实现多线程的。下面就来说一下队列NSOperationQueue。
3、队列NSOperationQueue
NSOperationQueue只有两种队列:主队列、其他队列。其他队列包含了串行和并发。
主队列的创建如下,主队列上的任务是在主线程执行的。
NSOperationQueue *mainQueue = [NSOperationQueue mainQueue];
其他队列(非主队列)的创建如下,加入到‘非队列’中的任务默认就是并发,开启多线程。
NSOperationQueue *queue = [[NSOperationQueue alloc] init];
注意:
-
非主队列(其他队列)可以实现串行或并行。
-
队列NSOperationQueue有一个参数叫做最大并发数:maxConcurrentOperationCount。
-
maxConcurrentOperationCount默认为-1,直接并发执行,所以加入到‘非队列’中的任务默认就是并发,开启多线程。
-
当maxConcurrentOperationCount为1时,则表示不开线程,也就是串行。
-
当maxConcurrentOperationCount大于1时,进行并发执行。
-
系统对最大并发数有一个限制,所以即使程序员把maxConcurrentOperationCount设置的很大,系统也会自动调整。所以把最大并发数设置的很大是没有意义的。
4、NSOperation + NSOperationQueue
- addOperation添加任务到队列
- (void)testOperationQueue {//创建队列,默认并发NSOperationQueue *queue = [[NSOperationQueue alloc] init];//创建操作,NSInvocationOperationNSInvocationOperation *op = [[NSInvocationOperation alloc] initWithTarget:self selector:@selector(queueOperationAddOperation) object:nil];// 创建操作,NSBlockOperationNSBlockOperation *bp = [NSBlockOperation blockOperationWithBlock:^{for (int i = 0; i < 3; i++) {NSLog(@"NSBlockOperation======%@", [NSThread currentThread]);}}];[queue addOperation:op];[queue addOperation:bp];}- (void)queueOperationAddOperation {NSLog(@"invocationOperation====%@", [NSThread currentThread]);
}
结果如下:可以看出,任务都是在子线程执行的,开启了新线程!

- addOperationWithBlock添加任务到队列
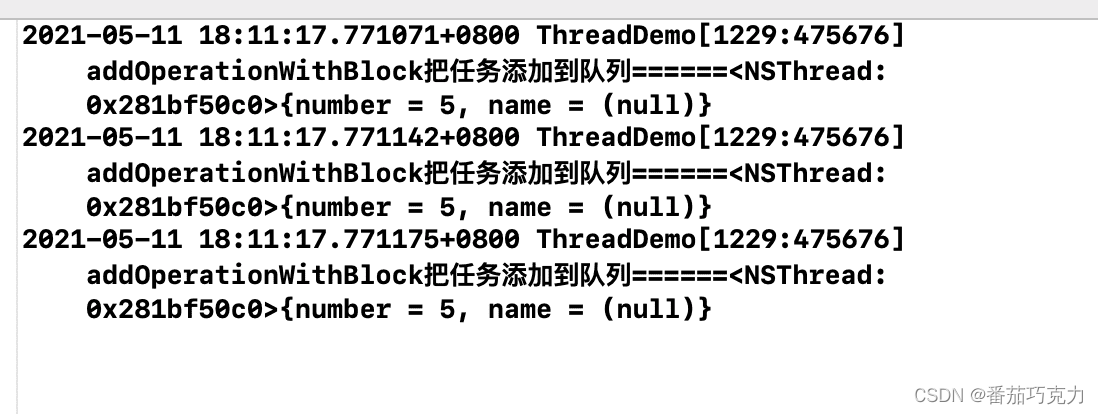
- (void)testOperationQueueWithBlock {//创建队列,默认并发NSOperationQueue *queue = [[NSOperationQueue alloc] init];//添加操作到队列[queue addOperationWithBlock:^{for (int i = 0; i < 3; i++) {NSLog(@"addOperationWithBlock把任务添加到队列======%@", [NSThread currentThread]);}}];
}
运行结果如下,任务确实是在子线程中执行。
- 运用最大并发数实现串行
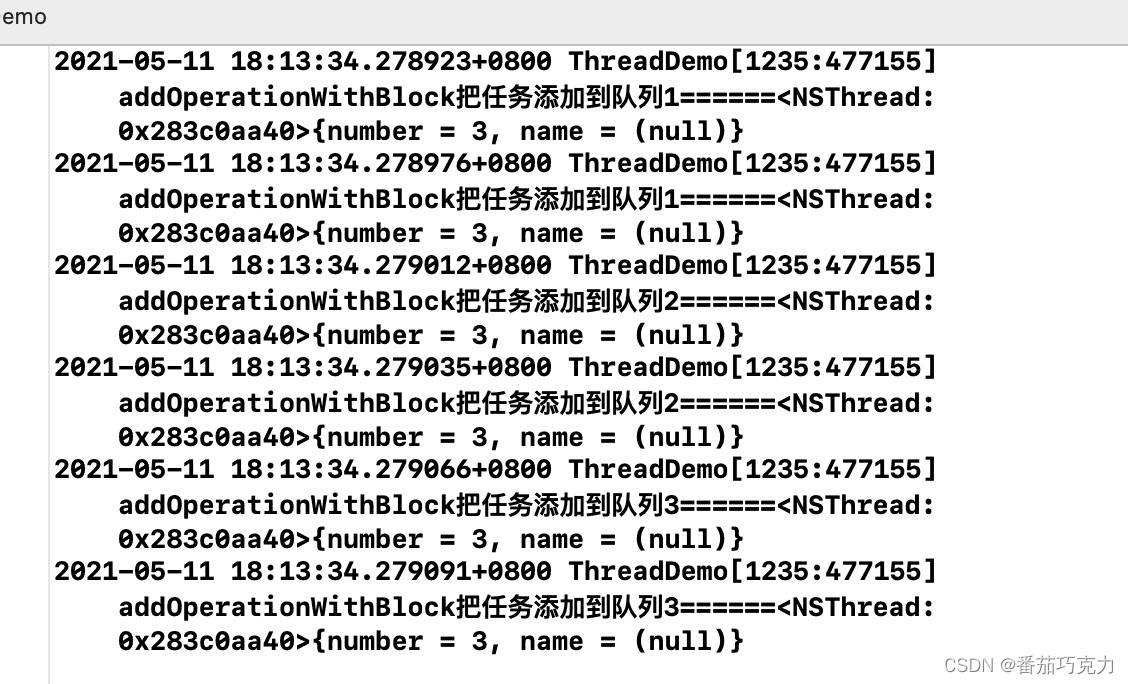
- (void)testMaxConcurrentOperationCount {// 创建队列,默认并发NSOperationQueue *queue = [[NSOperationQueue alloc] init];// 最大并发数为1,串行queue.maxConcurrentOperationCount = 1;// 最大并发数为2,并发
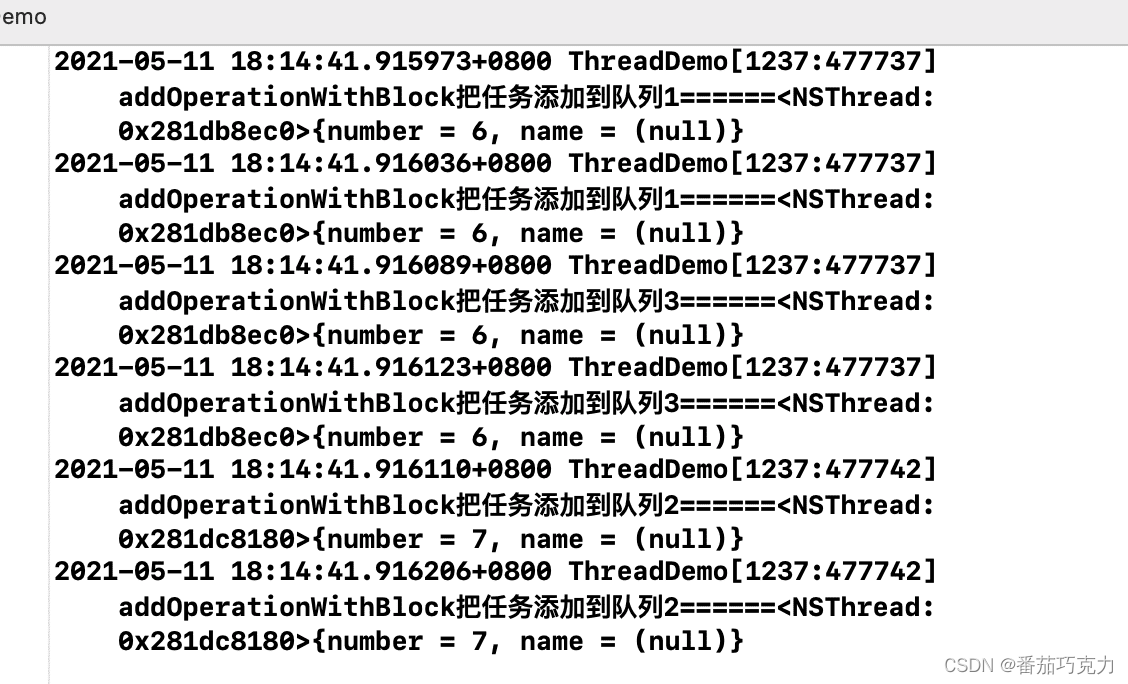
// queue.maxConcurrentOperationCount = 2;// 添加操作到队列[queue addOperationWithBlock:^{for (int i = 0; i < 2; i++) {NSLog(@"addOperationWithBlock把任务添加到队列1======%@", [NSThread currentThread]);}}];// 添加操作到队列[queue addOperationWithBlock:^{for (int i = 0; i < 2; i++) {NSLog(@"addOperationWithBlock把任务添加到队列2======%@", [NSThread currentThread]);}}];// 添加操作到队列[queue addOperationWithBlock:^{for (int i = 0; i < 2; i++) {NSLog(@"addOperationWithBlock把任务添加到队列3======%@", [NSThread currentThread]);}}];
}
最大并发数为1,串行运行结果:当最大并发数为1的时候,虽然开启了线程,但是任务是顺序执行的,所以实现了串行。
最大并发数为2,并发运行结果:。
5、NSOperation的操作依赖
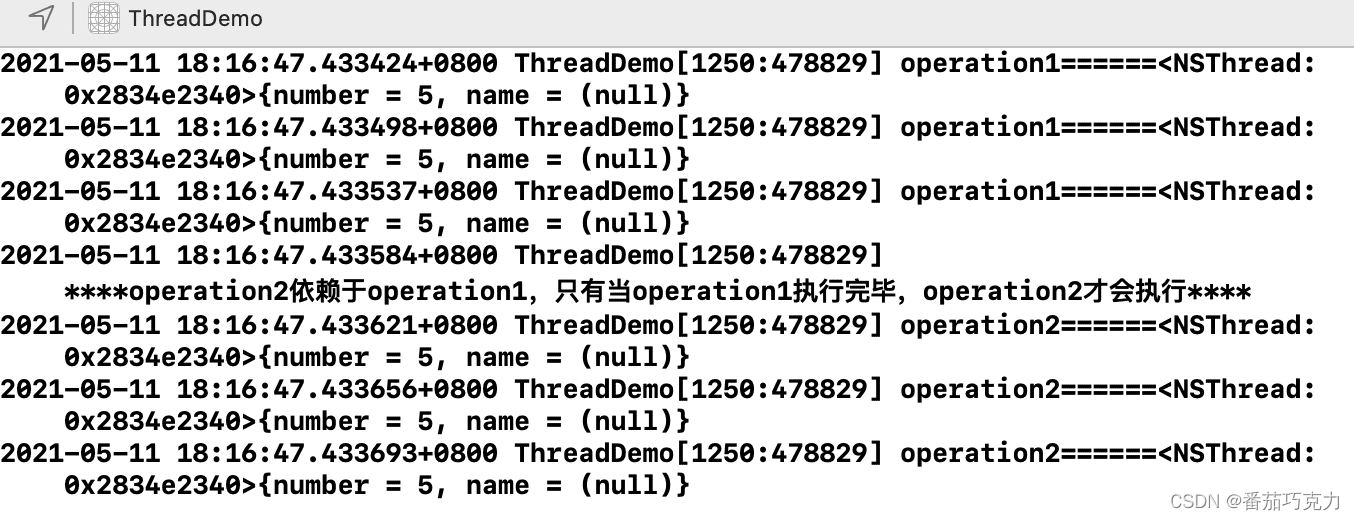
NSOperation有一个非常好用的方法,就是操作依赖。可以从字面意思理解:某一个操作(operation2)依赖于另一个操作(operation1),只有当operation1执行完毕,才能执行operation2。
// 并发队列NSOperationQueue *queue = [[NSOperationQueue alloc] init];// 操作1NSBlockOperation *operation1 = [NSBlockOperation blockOperationWithBlock:^{for (int i = 0; i < 3; i++) {NSLog(@"operation1======%@", [NSThread currentThread]);}}];// 操作2NSBlockOperation *operation2 = [NSBlockOperation blockOperationWithBlock:^{NSLog(@"****operation2依赖于operation1,只有当operation1执行完毕,operation2才会执行****");for (int i = 0; i < 3; i++) {NSLog(@"operation2======%@", [NSThread currentThread]);}}];// 使操作2依赖于操作1[operation2 addDependency:operation1];// 把操作加入队列[queue addOperation:operation1];[queue addOperation:operation2];
结果如下:
六、多线程安全问题
多个线程可能访问同一块资源,比如同一个文件,同一个对象,同一个变量等;当多线程访问同一块资源是,容易引发数据错乱和数据安全问题;
如下面这个经典图所示,线程A、B均访问了Integer变量,但最终的结果(18)可能并不是我们想要的(19);
上传失败, 请重新上传!
如果要保证共享的数据是正确的安全的,就需要使用线程同步技术:让多个线程间按顺序执行而不是并发执行;常见的线程同步技术就是加锁,同上面例子一样,加锁后能保证最终结果是正常的;
上传失败, 请重新上传!
iOS中的线程同步方案常见的有以下几种:
- pthread相关方案
- OSSpinLock
- os_unfair_lock
- GCD相关方案
- NSOperationQueue相关方案
- NSLock
- NSRecursiveLock
- NSCondition
- NSConditionLock
- @synchronized
1、pthread相关方案
(1)PTHREAD_MUTEX_NORMAL 普通互斥锁
互斥锁的机制:被这个锁保护的临界区就只允许一个线程进入,其它线程如果没有获得锁权限,那就只能在外面等着;等待锁的线程会处于休眠状态,处于休眠状态不会占用CPU资源;
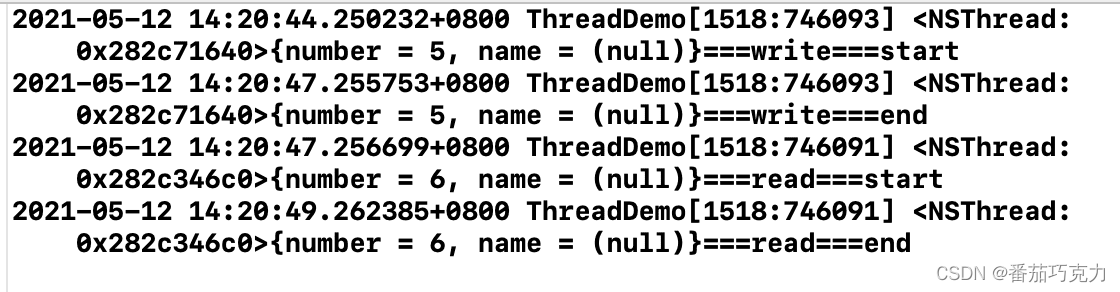
//两种初始化的方式//1、静态初始化static pthread_mutex_t lock = PTHREAD_MUTEX_INITIALIZER;//2、动态创建pthread_mutex_t lock1;// 可以根据需要配置pthread_mutexattr NULL默认为互斥锁pthread_mutex_init(&lock1, NULL);NSOperationQueue *queue = [[NSOperationQueue alloc] init];[queue addOperationWithBlock:^{pthread_mutex_lock(&lock);//加锁NSLog(@"%@===write===start",[NSThread currentThread]);sleep(3);NSLog(@"%@===write===end",[NSThread currentThread]);pthread_mutex_unlock(&lock); // 解锁}];[queue addOperationWithBlock:^{pthread_mutex_lock(&lock);//加锁NSLog(@"%@===read===start",[NSThread currentThread]);sleep(2);NSLog(@"%@===read===end",[NSThread currentThread]);pthread_mutex_unlock(&lock); // 解锁}];
结果如下:
(2)PTHREAD_MUTEX_RECURSIVE 递归锁
递归锁用于递归调用加锁的情况;对于递归调用的加锁,如果使用上面的锁,则会出现死锁;递归锁就是保证了对同一把锁能多次加锁,而不用等待解锁,从而避免了递归造成的死锁问题;
- (void)synchronizedTest {pthread_mutexattr_t att;pthread_mutexattr_init(&att);// PTHREAD_MUTEX_NORMAL普通互斥锁 PTHREAD_MUTEX_RECURSIVE递归锁pthread_mutexattr_settype(&att, PTHREAD_MUTEX_RECURSIVE);pthread_mutex_init(&_lock, &att);NSOperationQueue *queue = [[NSOperationQueue alloc] init];[queue addOperationWithBlock:^{[self recursiveTest:3]; // 递归调用}];
}// 递归方法
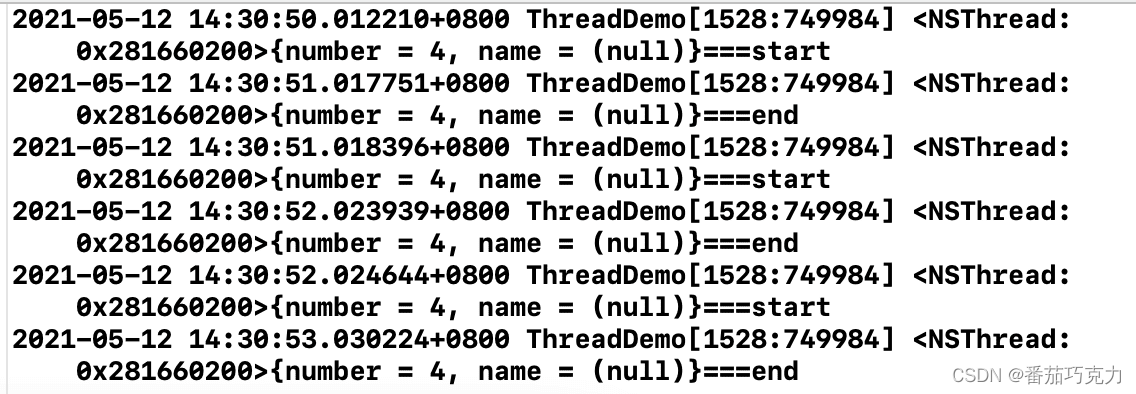
- (void)recursiveTest:(NSInteger)value {pthread_mutex_lock(&_lock);if (value > 0) {NSLog(@"%@===start",[NSThread currentThread]);sleep(1);NSLog(@"%@===end",[NSThread currentThread]);[self recursiveTest:value-1];}pthread_mutex_unlock(&_lock);
}
结果如下:
(3)pthread_rwlock 读写锁
以上锁能很好的解决线程安全问题,但是这样的话同一时间,只会有一个线程能执行;有时我们的需求并不希望这样,比如读写操作:我们希望读是不受同步机制限制,即允许多个线程同时读;对于写,我们希望同一时间只允许一个线程操作;同时,在写操作进行时不允许同时读;而读写锁就是为这种场景而生的:
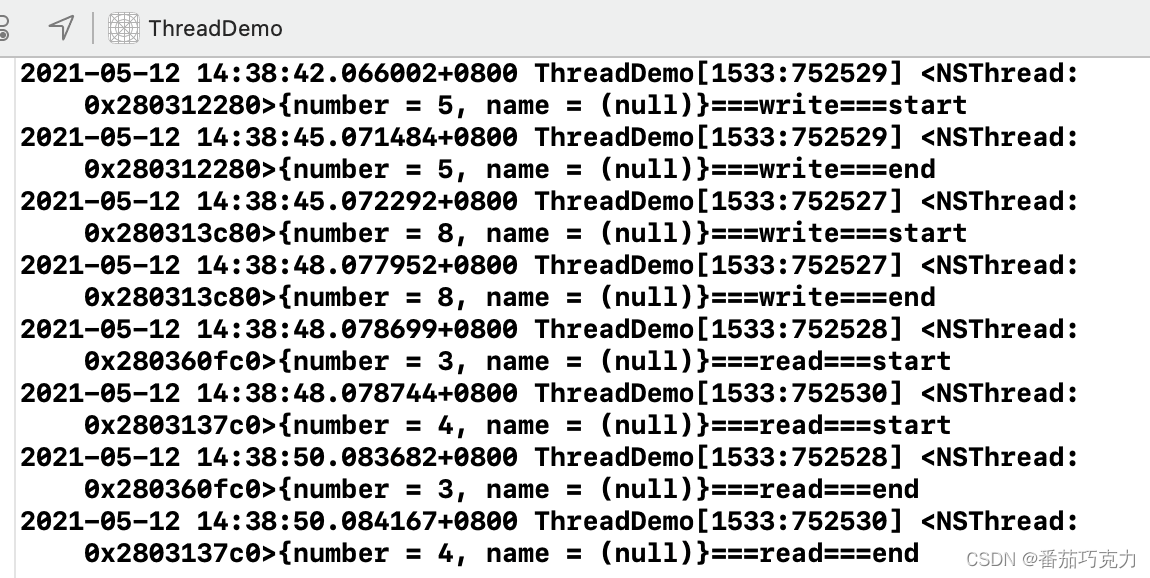
// 两种初始化方式// 1.静态初始化static pthread_rwlock_t lock = PTHREAD_RWLOCK_INITIALIZER;// 2.动态创建static pthread_rwlock_t lock1;pthread_rwlock_init(&lock1, NULL);NSOperationQueue *queue = [[NSOperationQueue alloc] init];for (int i=0;i<2;i++) {[queue addOperationWithBlock:^{pthread_rwlock_wrlock(&lock);NSLog(@"%@===write===start",[NSThread currentThread]);sleep(3);NSLog(@"%@===write===end",[NSThread currentThread]);pthread_rwlock_unlock(&lock);}];}for (int i=0;i<2;i++) {[queue addOperationWithBlock:^{pthread_rwlock_rdlock(&lock);NSLog(@"%@===read===start",[NSThread currentThread]);sleep(2);NSLog(@"%@===read===end",[NSThread currentThread]);pthread_rwlock_unlock(&lock);}];}
结果如下:多个read是可以并发的,write是同步执行的;
(4)pthread_join
使用场景:有A,B两个线程,B线程在做某些事情之前,必须要等待A线程把事情做完,然后才能接着做下去。这时候就可以用join。
static pthread_t thread1;
static pthread_t thread2;void * writeFunc(void *args) {NSLog(@"%u===write===start",(unsigned int)pthread_self());sleep(3);NSLog(@"%u===write===end",(unsigned int)pthread_self());pthread_exit(NULL);return NULL;
}void* readFunc(void *args) {pthread_join(thread1, NULL);NSLog(@"%u===read===start",(unsigned int)pthread_self());sleep(2);NSLog(@"%u===read===end",(unsigned int)pthread_self());return NULL;
}- (void)joinPthread {pthread_create(&thread1, NULL, writeFunc, NULL);pthread_create(&thread2, NULL, readFunc, NULL);
}
结果如下:

(5)pthread_cond 条件锁
条件锁能在合适的时候唤醒正在等待的线程。具体什么时候合适由程序员自己控制条件变量决定; 具体的场景就是: B线程和A线程之间有合作关系,当A线程完操作前,B线程会等待。当A线程完成后,需要让B线程知道,然后B线程从等待状态中被唤醒,然后处理自己的任务。
// 1.静态初始化static pthread_cond_t cond_lock = PTHREAD_COND_INITIALIZER;static pthread_mutex_t mutex_lock = PTHREAD_MUTEX_INITIALIZER; // 需要配合mutex互斥锁使用// 2.动态创建static pthread_cond_t cond_lock1;pthread_cond_init(&cond_lock1, NULL);NSOperationQueue *queue = [[NSOperationQueue alloc] init];[queue addOperationWithBlock:^{pthread_mutex_lock(&mutex_lock);while (self.condition_value <= 0) { // 条件成立则暂时解锁并等待pthread_cond_wait(&cond_lock, &mutex_lock);}NSLog(@"%@===read===start",[NSThread currentThread]);sleep(2);NSLog(@"%@===read===end",[NSThread currentThread]);pthread_mutex_unlock(&mutex_lock);}];[queue addOperationWithBlock:^{pthread_mutex_lock(&mutex_lock);NSLog(@"%@===write===start",[NSThread currentThread]);sleep(3);self.condition_value = 1; // 一定要更改条件 否则上面read线程条件成立又会waitNSLog(@"%@===write===end",[NSThread currentThread]);pthread_cond_signal(&cond_lock); // 传递信号给等待的线程 而且是在解锁前pthread_mutex_unlock(&mutex_lock);}];
结果如下:

(6)semaphore 信号量
信号量维护了一个unsigned int类型的value,通过这个值控制线程同步;具体有以下使用场景:
- 信号量的初始值设为1,代表同时只允许1条线程访问资源,保证线程同步
// 创建 原型sem_t *sem_open(const char *name,int oflag,mode_t mode,unsigned int value);// name 信号的外部名字// oflag 选择创建或打开一个现有的信号灯// mode 权限位// value 信号初始值sem_t *sem = sem_open("semname", O_CREAT, 0644, 1);NSOperationQueue *queue = [[NSOperationQueue alloc] init];[queue addOperationWithBlock:^{sem_wait(sem); // 首先判断信号量value 如果=0则等待,否则value-1并正常往下走NSLog(@"%@===write===start",[NSThread currentThread]);sleep(3);NSLog(@"%@===write===end",[NSThread currentThread]);sem_post(sem); // 执行完发送信号,value+1}];[queue addOperationWithBlock:^{sem_wait(sem);NSLog(@"%@===read===start",[NSThread currentThread]);sleep(2);NSLog(@"%@===read===end",[NSThread currentThread]);sem_post(sem);}];
- 信号量的初始值value,可以用来控制线程并发访问的最大数量
sem_t *sem = sem_open("semCount", O_CREAT, 0644, 3);NSOperationQueue *queue = [[NSOperationQueue alloc] init];for (int i=0;i<9;i++) {[queue addOperationWithBlock:^{sem_wait(sem);NSLog(@"%@===write===start",[NSThread currentThread]);sleep(3);NSLog(@"%@===write===end",[NSThread currentThread]);sem_post(sem);}];}结果如下:

以上代码,其实就类似设置NSOperationQueue的maxConcurrentOperationCount效果;
NSOperationQueue *queue = [[NSOperationQueue alloc] init];
queue.maxConcurrentOperationCount = 3;
2、OSSpinLock自旋锁
自旋锁的作用同互斥锁一样,不同于互斥锁的线程休眠机制,自旋锁等待的线程会忙等,也就是等待的过程其实是在跑一个while循环;这样等待的过程同样消耗CPU资源,但这种方式不会涉及线程唤醒、休眠的切换,性能会高点;
死等是死锁,相当于2个及以上进程构成了一个环状的资源请求顺序,根本停不下来。
忙等是指负责提供资源的进程还没完成工作, 忙着准备资源,而请求资源的进程不得不处于等待状态直到资源可用为止。
两者区别是前者永无止境,空耗资源;后者一旦资源就绪,挂起状态就结束了。可以继续其他工作。
__block OSSpinLock lock = OS_SPINLOCK_INIT;NSOperationQueue *queue = [[NSOperationQueue alloc] init];[queue addOperationWithBlock:^{OSSpinLockLock(&lock);NSLog(@"%@===write===start",[NSThread currentThread]);sleep(3);NSLog(@"%@===write===end",[NSThread currentThread]);OSSpinLockUnlock(&lock);}];[queue addOperationWithBlock:^{OSSpinLockLock(&lock);NSLog(@"%@===read===start",[NSThread currentThread]);sleep(2);NSLog(@"%@===read===end",[NSThread currentThread]);OSSpinLockUnlock(&lock);}];现在使用自旋锁会有警告:
'OSSpinLock' is deprecated: first deprecated in iOS 10.0 - Use os_unfair_lock() from instead
这是因为OSSpinLock已经不再安全了,会有优先级反转问题; 多线程并发处理,原理上说是CPU时间片轮转机制,即将时间划分为极小单位,每个线程依次执行这极段的时间;这样多个线程看起来是同时执行的;另外,不同的线程有可能是不同的优先级;高优先级的线程要占用较长的时间、CPU资源;高优先级线程始终会在低优先级线程前执行,一个线程不会受到比它更低优先级线程的干扰。 如果使用自旋锁,且一个低优先级的线程先于高优先级的线程获得锁并访问共享资源;同时高优先级的线程也会尝试获取锁,获取锁失败就一直忙等,忙等状态占用大量CPU资源;而低优先级的线程也需要CPU资源,但是竞争不过从而导致任务迟迟完不成,无法解锁;
苹果给的建议是使用os_unfair_lock替代,但这个最低只支持iOS10;
 __block os_unfair_lock lock = OS_UNFAIR_LOCK_INIT; // 初始化
os_unfair_lock_lock(&lock); // 加锁
os_unfair_lock_unlock(&lock); // 解锁
3、NSLock
这个其实就是对pthread_mutex普通互斥锁的封装;面向对象,使用起来更方便;
- (void)lock;
- (void)unlock;
- (BOOL)tryLock;
- (BOOL)lockBeforeDate:(NSDate *)limit;
lock 和 tryLock 方法都会请求加锁, 唯一不同的是 trylock 在没有获得锁的时候可以继续做一些任务和处理,lockBeforeDate方法也比较简单,就是在limit时间点之前获得锁,没有拿到返回NO。
4、NSRecursiveLock 递归锁
对pthread_mutex递归锁的封装,方法和NSLock的一样;
- (void)lock;
- (void)unlock;
- (BOOL)tryLock;
- (BOOL)lockBeforeDate:(NSDate *)limit;
5、NSCondition
对pthread_cond条件锁的封装,使用pthread_cond需要配合pthread_mutex互斥锁使用,NSCondition封装好了,一把锁就能实现:
    NSCondition *lock = [[NSCondition alloc] init];NSOperationQueue *queue = [[NSOperationQueue alloc] init];[queue addOperationWithBlock:^{[lock lock];while (self.condition_value <= 0) { // 条件成立则暂时解锁并等待[lock wait];}NSLog(@"%@===read===start",[NSThread currentThread]);sleep(2);NSLog(@"%@===read===end",[NSThread currentThread]);[lock unlock];}];[queue addOperationWithBlock:^{[lock lock];NSLog(@"%@===write===start",[NSThread currentThread]);sleep(3);self.condition_value = 1; // 一定要更改条件 否则上面read线程条件成立又会waitNSLog(@"%@===write===end",[NSThread currentThread]);[lock signal]; // 传递信号给等待的线程 而且是在解锁前
//        [lock broadcast] // 通知所有线程[lock unlock];}];
6、NSConditionLock
对NSCondition的进一步封装,在NSCondition基础上,加了可控制的条件condition;通过条件变量,控制通知哪条线程;
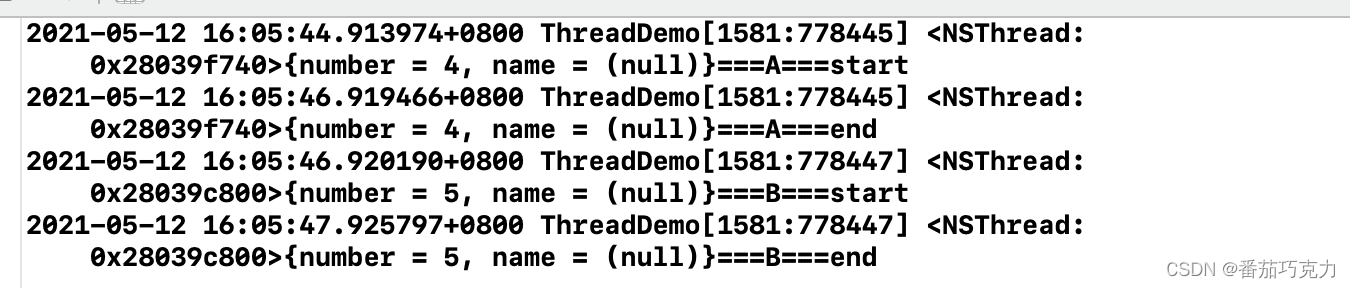
    NSConditionLock *lock = [[NSConditionLock alloc] initWithCondition:1]; // 初始化,设置condition=1NSOperationQueue *queue = [[NSOperationQueue alloc] init];[queue addOperationWithBlock:^{[lock lockWhenCondition:1]; // 当condition=1时 获取锁成功 否则等待(但是首次使用lockWhenCondition时condition不对时也能获取锁成功)NSLog(@"%@===A===start",[NSThread currentThread]);sleep(2);NSLog(@"%@===A===end",[NSThread currentThread]);// unlock根据不同的条件 控制对应的线程[lock unlockWithCondition:2]; // 解锁,同时设置condition=2并signal;
//        [lock unlockWithCondition:3];}];[queue addOperationWithBlock:^{[lock lockWhenCondition:2];NSLog(@"%@===B===start",[NSThread currentThread]);sleep(1);NSLog(@"%@===B===end",[NSThread currentThread]);[lock unlock];}];[queue addOperationWithBlock:^{[lock lockWhenCondition:3];NSLog(@"%@===C===start",[NSThread currentThread]);sleep(1);NSLog(@"%@===C===end",[NSThread currentThread]);[lock unlock];}];
结果如下: 线程A解锁时可以传不同条件值,对应条件值的其他等待线程就会被唤醒;这里条件值为2,则执行线程B任务;条件设置为3,则执行线程C任务;如果是其他值则线程B,C继续一直等待;
7、@synchronized
是对mutex递归锁的封装; @synchronized(obj)内部会生成obj对应的递归锁,然后进行加锁、解锁操作;一个对象对应一把锁;
NSObject *obj = [[NSObject alloc] init];@synchronized (obj) {// ...}
8、GCD相关
(1)dispatch_semaphore信号量
这个和之前讲的semaphore差不多;
// 创建信号量
dispatch_semaphore_t sem = dispatch_semaphore_create(1);
// 判断信号量,如果=0则等待,否则信号值-1往下执行
dispatch_semaphore_wait(sem, DISPATCH_TIME_FOREVER);
// 发送信号量,信号值+1
dispatch_semaphore_signal(sem);
(2)DISPATCH_QUEUE_SERIAL 串行队列
串行队列的任务就是同步执行的;
dispatch_queue_t queue = dispatch_queue_create("serial_queue", DISPATCH_QUEUE_SERIAL);
dispatch_async(queue, ^{// ThreadA dosomething....
});
dispatch_async(queue, ^{// ThreadB dosomething....
});
(3)dispatch_group
将任务分组,组内任务异步执行;当所有任务执行完后,可以通知其他线程执行任务:
 // group必须使用自己创建的并发队列 使用global全局队列无效 dispatch_queue_t queue = dispatch_queue_create("concurrent_queue", DISPATCH_QUEUE_CONCURRENT);
//    dispatch_queue_t queue = dispatch_get_global_queue(0, 0); xxxdispatch_group_t group = dispatch_group_create();dispatch_group_async(group, queue, ^{sleep(1);NSLog(@"%@===TaskA",[NSThread currentThread]);});dispatch_group_async(group, queue, ^{sleep(1);NSLog(@"%@===TaskB",[NSThread currentThread]);});dispatch_group_notify(group, queue, ^{NSLog(@"%@===TaskC",[NSThread currentThread]);});
//    dispatch_async(queue, ^{
//        dispatch_group_wait(group, dispatch_time(DISPATCH_TIME_NOW, (int64_t)(2 * NSEC_PER_SEC))); // 可以设置等待的超时时间
//        NSLog(@"%@===TaskC",[NSThread currentThread]);
//    });
以上代码对应的场景就是:A,B线程可以并发执行,但C线程一定要在AB线程执行完后再执行; dispatch_group_notify也可以使用dispatch_group_wait替代,一样是阻塞的作用,而dispatch_group_wait能设置等待超时时间;超过时间将不再阻塞,继续任务; 还有一点需要注意的是,dispatch_group必须使用自己创建的并发队列, 使用global全局队列无效,使用串行队列没有意义;
(4) dispatch_barrier
dispatch_barrier就是起到一个栅栏的作用;栅栏两边的任务可以并发执行,栅栏里的任务必须等到栅栏上边的任务执行完才执行,栅栏下边的任务必须等栅栏里的任务执行完后才执行; dispatch_barrier其实就是阻塞队列的作用;
dispatch_queue_t queue = dispatch_queue_create("concurrent_queue", DISPATCH_QUEUE_CONCURRENT);dispatch_async(queue, ^{sleep(1);NSLog(@"%@===TaskA",[NSThread currentThread]);});dispatch_async(queue, ^{sleep(1);NSLog(@"%@===TaskB",[NSThread currentThread]);});// async不会阻塞当前线程(主线程)dispatch_barrier_async(queue, ^{NSLog(@"%@===Barrier",[NSThread currentThread]);});// sync会阻塞当前队列(主队列)// dispatch_barrier_sync(queue, ^{// NSLog(@"%@===Barrier",[NSThread currentThread]);// });dispatch_async(queue, ^{sleep(1);NSLog(@"%@===TaskC",[NSThread currentThread]);});dispatch_async(queue, ^{sleep(1);NSLog(@"%@===TaskD",[NSThread currentThread]);});NSLog(@"%@===MainTask",[NSThread currentThread]);
结果如下:

dispatch_barrier的使用有两种方式
- dispatch_barrier_async
- dispatch_barrier_sync
async不会阻塞当前队列,sync同时会阻塞当前队列;如果以上代码换成dispatch_barrier_sync,最终的结果将是MainTask会在Barrier任务后;
结果如下: 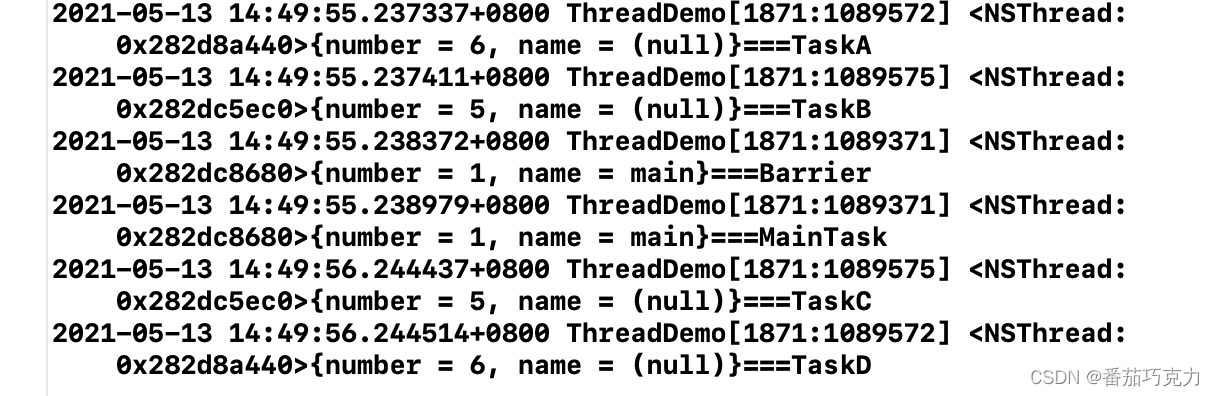
基于barrier的这种特性,很容易实现一个读写锁;栅栏内为write,栅栏外为read;这样同样能实现读任务能异步执行,写任务只能同步执行;同时在写操作时,不允许读操作;
dispatch_queue_t queue = dispatch_queue_create("concurrent_queue", DISPATCH_QUEUE_CONCURRENT);for (int i = 0; i < 3; i ++) {dispatch_async(queue, ^{sleep(1);NSLog(@"%@===read",[NSThread currentThread]);});}for (int i = 0; i < 3; i ++) {dispatch_barrier_async(queue, ^{sleep(1);NSLog(@"%@===write",[NSThread currentThread]);});}for (int i = 0; i < 3; i ++) {dispatch_async(queue, ^{sleep(1);NSLog(@"%@===read",[NSThread currentThread]);});}
性能问题
空循环加锁解锁:
| 方法 | 时间(1000) | 时间(10000) | 时间(100000) |
|---|---|---|---|
| OSSpinLock | 0.06 ms | 0.72 | 5.87 ms |
| dispatch_semaphore | 0.09 ms | 0.96 ms | 9.26 ms |
| pthread_mutex | 0.16 ms | 1.54 ms | 9.39 ms |
| pthread_mutex(recursive) | 0.22 ms | 1.85 ms | 5.94 ms |
| NSLock | 0.27 ms | 2.73 ms | 6.03 ms |
| NSCondition | 0.31 ms | 2.96 ms | 12.76 ms |
| @synchronized | 0.51 ms | 2.64 ms | 10.80 ms |
| NSRecursiveLock | 0.51 ms | 2.80 ms | 6.70 ms |
| NSConditionLock | 0.99 ms | 6.28 ms | 13.35 ms |
参考文档:
细数iOS中的线程同步方案
本文来自互联网用户投稿,文章观点仅代表作者本人,不代表本站立场,不承担相关法律责任。如若转载,请注明出处。 如若内容造成侵权/违法违规/事实不符,请点击【内容举报】进行投诉反馈!