Unity程序联动rs485可编程开关
开发工具:Unity2018.3.7
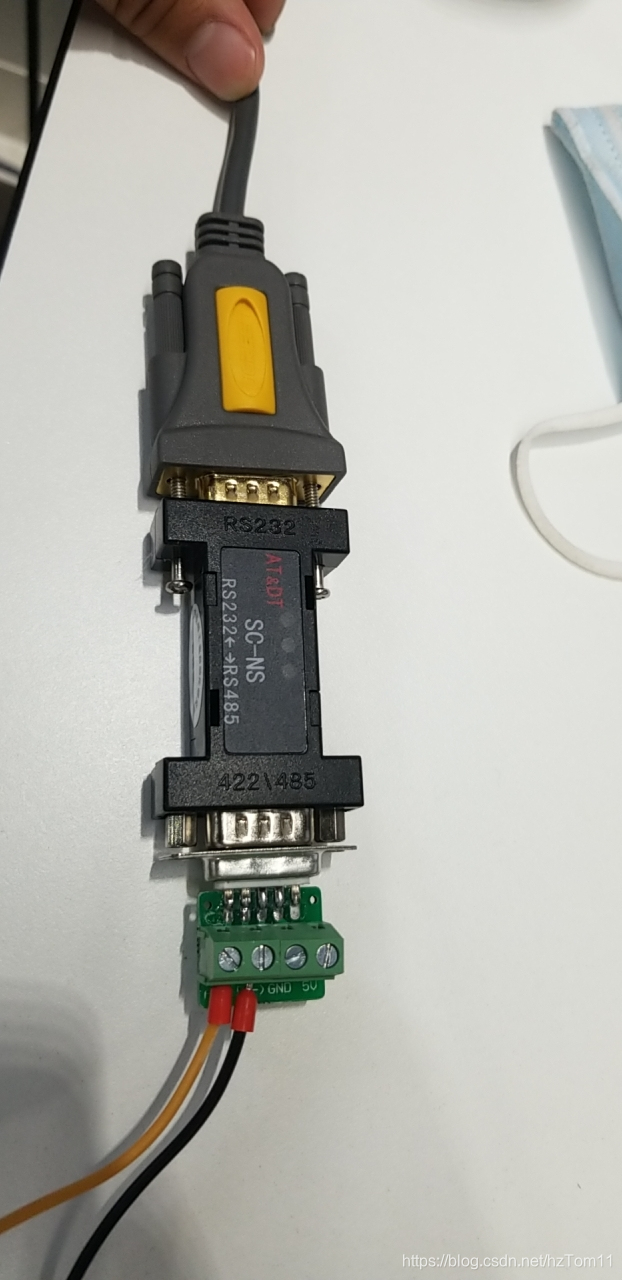
需要设备:rs485可编程开关,rs485信号转rs232信号转换头,usb串口线,12伏电源
编程开关类似下面:

转换器和串口线:
最近公司许多项目用到了串口通讯联动,比如rs485开关面板控制程序影片,网络继电器控制模型启动开关,还涉及了关于Unity打包ipad测试程序,写个博客记录一下,本篇主要是记录rs485开关面板控制程序联动这块。
因为之前是开发Unity程序这块,对串口通讯不太清楚,本篇也只是记录联动开关的用法,具体原理就不深究
首先程序需求为开关面板三个按钮控制pc端程序视频的开始,暂停,播放,播放结束回到待机界面,程序很简单,用的是avproVideo插件里面内置的方法来完成对视频的操作,接着Unity要进行简单的串口通讯需要引入命名空间System.IO.Ports;
这里有一点需要注意,需要将PlayerSettings中Other Settings中Api Compatibility Level改为.NET 4.x,不然会找不到该引用。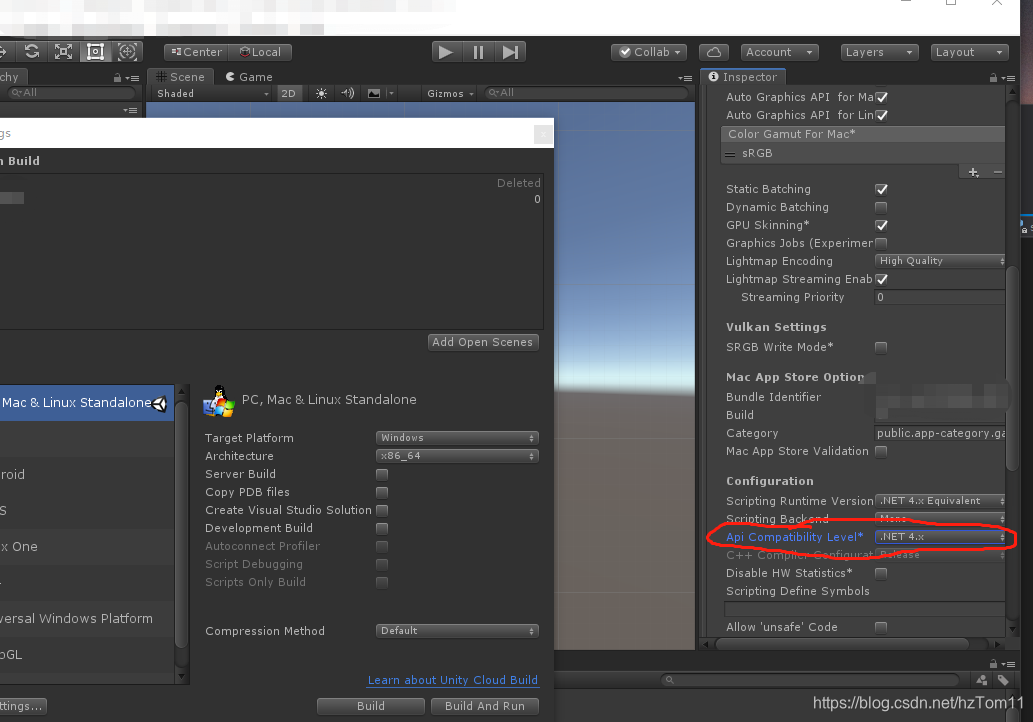
接下来是XMl配置文档,用来在外部修改串口号,控制影片是否循环,也方便更改不同可编程开关的触发代码
然后是读取xml的脚本:
using UnityEngine;
using System.Xml;public class Config_XuTing : MonoBehaviour
{private string configPath;[HideInInspector]public string play_code;[HideInInspector]public string pause_code;[HideInInspector]public string replay_code;[HideInInspector]public string com;[HideInInspector]public bool loop;[HideInInspector]public string port;public static Config_XuTing instance;private void Awake(){instance = this;configPath = Application.streamingAssetsPath + "/config.xml";ReadXml();}void ReadXml(){XmlDocument doc = new XmlDocument();XmlReaderSettings settings = new XmlReaderSettings();settings.IgnoreComments = true;//忽略文档里面的注释XmlReader reader = XmlReader.Create(configPath, settings);doc.Load(reader);//doc.LoadXml(configPath);XmlNode root = doc.SelectSingleNode("root");loop = ((XmlElement)root.SelectSingleNode("video")).GetAttribute("loop") == "1";play_code = ((XmlElement)root.SelectSingleNode("play")).GetAttribute("code");pause_code = ((XmlElement)root.SelectSingleNode("pause")).GetAttribute("code");replay_code = ((XmlElement)root.SelectSingleNode("replay")).GetAttribute("code");com = ((XmlElement)root.SelectSingleNode("port")).GetAttribute("com");}
}
接下来是串口通讯的base类
using System.Collections;
using System.Collections.Generic;
using UnityEngine;
using System.IO.Ports;
using System.Threading;
using UnityEngine.Events;public class RelayBase : MonoBehaviour
{private SerialPort sp;private string com;private Thread recvThread;private string recvStr = "";private UnityAction recvAction;private int recvLen;protected int requestLen;public string RecvStr{get { return recvStr; }set{recvStr = value;}}protected virtual void Start(){recvThread = new Thread(Recv);recvThread.Start();}private void Update(){if (recvAction != null)recvAction.Invoke(RecvStr);}private void OnApplicationQuit(){sp.Close();if (recvThread != null){recvThread.Interrupt();recvThread.Abort();}}void Recv(){byte[] recvBuf = new byte[16];string str = "";while (true){if (sp.IsOpen)recvLen = sp.Read(recvBuf, 0, 16);if (recvLen > 0){for (int i = 0; i < recvLen; i++){str += recvBuf[i].ToString("X2");}if (str.Length < requestLen)continue;RecvStr = str;recvAction += delegate (string s){Debug.Log(s);ReceivedCallBack(s);recvAction = null;};str = "";sp.DiscardInBuffer();//Thread.Sleep(150);}}}protected virtual void ReceivedCallBack(string s){}protected void InitSerialPort(string com){sp = new SerialPort(com, 9600, Parity.None, 8, StopBits.One);try{sp.Open();}catch{Debug.Log("串口打开失败");}}}
然后是继承RelayBase的脚本,用来接收面板发出的信号:
public class Relay_xuTing : RelayBase
{protected override void ReceivedCallBack(string s){if (s == Config_XuTing.instance.play_code)SystemManager_XuTing.instance.PlayClick();else if (s == Config_XuTing.instance.pause_code)SystemManager_XuTing.instance.PauseClick();else if (s == Config_XuTing.instance.replay_code)SystemManager_XuTing.instance.ReplayClick();//else if (s == Config_XuTing.instance.stop_code)//    SystemManager_XuTing.instance.StopClick();}protected override void Start(){InitSerialPort(Config_XuTing.instance.com);requestLen = Config_XuTing.instance.play_code.Length;base.Start();}
}
最后就是UI脚本了SystemManager_XuTing,UI用了AVProVideo插件来播放视频
一个背景UGUI用来播放待机画面的视频,另外一个用来播放主视频,根据收到的串口信号,调用SystemManager_XuTing中播放,暂停和重播方法。
主要脚本都在上面,其中需要将xml文件和需要播放的视频放在StreamingAssets文件夹下,这样打包出来可以随时修改。
本文来自互联网用户投稿,文章观点仅代表作者本人,不代表本站立场,不承担相关法律责任。如若转载,请注明出处。 如若内容造成侵权/违法违规/事实不符,请点击【内容举报】进行投诉反馈!