利用Python和PCV 进行 SIFT特征匹配 的流程
利用Python和PCV 进行 SIFT特征匹配 的流程
我的运行环境是 win10, Python3.8
主要是记录一下出现 调用sift.process_image片段时保存sift特征文件大小为0字节的问题或没有文件的问题。
OSError: out_sift.sift not found.
return f[:,:4],f[:,4:] # feature locations, descriptors
IndexError: too many indices for array: array is 1-dimensional, but 2 were indexed
1、配置PCV库
参考文献:https://blog.csdn.net/lishu14/article/details/100752181
源代码下载:https://github.com/Li-Shu14/PCV
将下载的文件解压
打开cmd,执行如下指令:
cmd
activate ‘自己的环境’
E:
cd E:\tpz\software\PCV-master
python setup.py install
2、配置VLFeat
参考文献:
https://blog.csdn.net/weixin_43848274/article/details/88604963
https://blog.csdn.net/weixin_41651715/article/details/107637041
https://blog.csdn.net/weixin_42424674/article/details/88621791?utm_medium=distribute.pc_relevant.none-task-blog-BlogCommendFromMachineLearnPai2-6.channel_param&depth_1-utm_source=distribute.pc_relevant.none-task-blog-BlogCommendFromMachineLearnPai2-6.channel_param
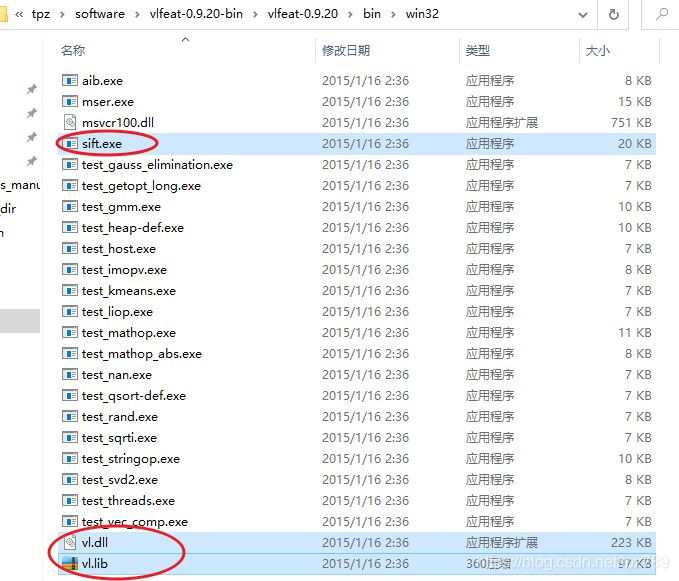
在使用sift算法进行实验前,我们首先要准备一个VLFeat工具包:https://www.vlfeat.org/,利用其提供的二进制文件进行计算特征。当前版本为VLFeat 0.9.21,但出现了.sift文件为空的问题,因此我在https://www.iteye.com/resource/lyunx123-9372308 下载了VLFeat 0.9.20版的。
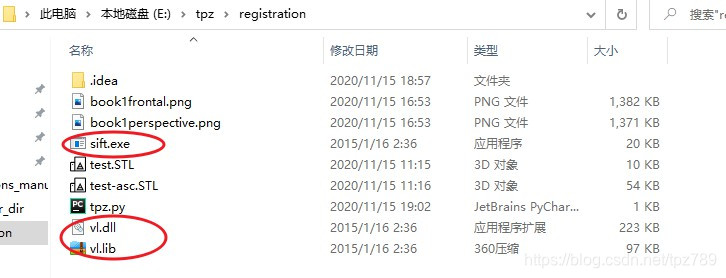
解压完后,我们从其中的bin文件夹里找到如下图所示的蓝色选中文件,这里需要注意的是,我最初选的是win64文件夹中的,但.sift文件依然为空,于是依照https://blog.csdn.net/weixin_42424674/article/details/88621791?utm_medium=distribute.pc_relevant.none-task-blog-BlogCommendFromMachineLearnPai2-6.channel_param&depth_1-utm_source=distribute.pc_relevant.none-task-blog-BlogCommendFromMachineLearnPai2-6.channel_param 里提到的办法,选择win32文件夹中的三个文件,运行成功。复制后,放到当前工程文件夹下。
如下图所示:
输入代码:
# -*- coding: utf-8 -*-
from PIL import Image
from pylab import *
import sys
from PCV.localdescriptors import siftif len(sys.argv) >= 3:im1f, im2f = sys.argv[1], sys.argv[2]
else:im1f = 'book1frontal.png'im2f = 'book1perspective.png'im1 = array(Image.open(im1f))
im2 = array(Image.open(im2f))sift.process_image(im1f, 'out_sift_9.txt')
l1, d1 = sift.read_features_from_file('out_sift_9.txt')
figure()
gray()
subplot(121)
sift.plot_features(im1, l1, circle=False)sift.process_image(im2f, 'out_sift_10.txt')
l2, d2 = sift.read_features_from_file('out_sift_10.txt')
subplot(122)
sift.plot_features(im2, l2, circle=False)matches = sift.match_twosided(d1, d2)
print('{} matches'.format(len(matches.nonzero()[0])))figure()
gray()
sift.plot_matches(im1, im2, l1, l2, matches, show_below=True)
show()
然后单击代码中的: process_image

跳转到:
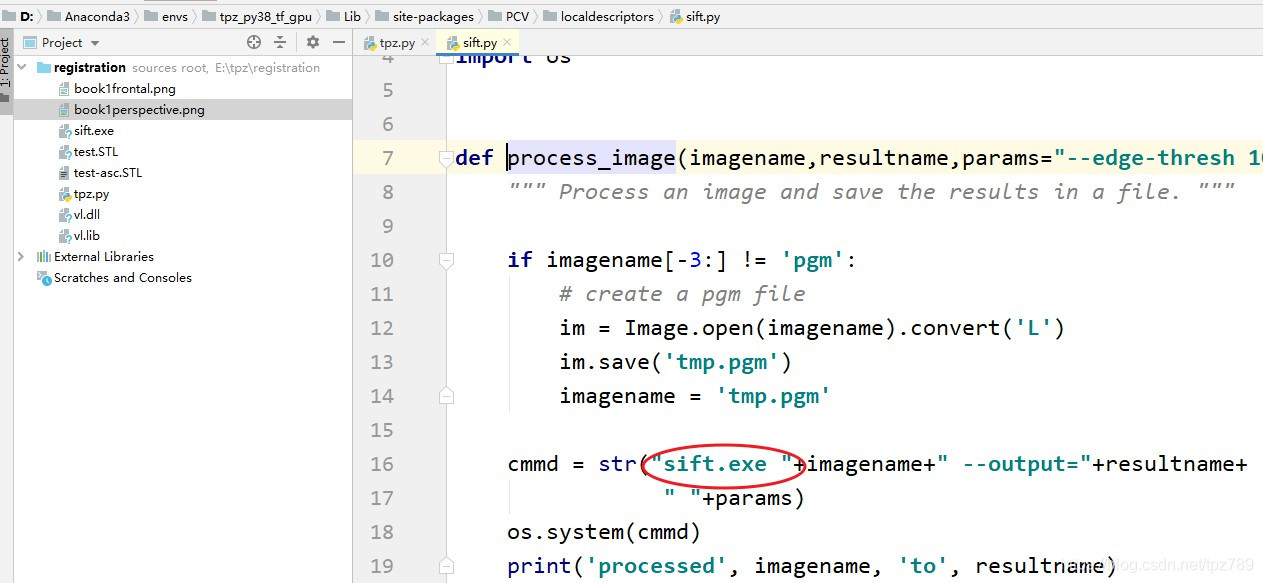
将原cmmd改为:cmmd = str(“sift.exe “+imagename+” --output=”+resultname+
" "+params), 注意sift.exe后面有一个空格。
然后运行代码即可成功。
结果:

本文来自互联网用户投稿,文章观点仅代表作者本人,不代表本站立场,不承担相关法律责任。如若转载,请注明出处。 如若内容造成侵权/违法违规/事实不符,请点击【内容举报】进行投诉反馈!