HTML与CSS——按钮鼠标悬浮动态效果和按钮自动轮播图(不用JavaScript+完整源码)
今天,我们来学习按钮自动轮播图,并给按钮加一些小特效。
话不多说,先上特效:
好,那么接下来,我来说一下我的思路
- 先写好基本的框框(包括,按钮外面的框,按钮以及按钮的布局和大小)
- 为按钮的总体加上动画(一行一行按钮向上翻)
- 为小按钮加上小特效(鼠标放到按钮上,颜色缓慢变化)
第一步
那么,要想写好第一步,就要知道这个动画是怎么进行的
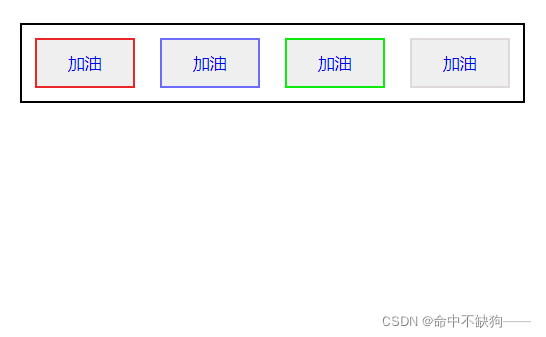
首先,我们要写一个播放框,也就是按钮动画外面的大黑框框,然后再写一行一行的按钮,如下图

这里,我们给外面的黑框框加上 overflow:hidden (超出隐藏) 效果之后,下面的三行按钮就会被隐藏,简化界面,这样就可以写动画了,如下图
第一步,具体代码如下:
HTML代码
命中不缺狗————
CSS代码
* {text-decoration: none;list-style: none;margin: 0 0;padding: 0 0;
}/* 一个按钮大小的播放屏幕 */
.big-box {width: 400px;height: 60px;position: relative;overflow: hidden;margin: auto;margin-top: 500px;border: 2px solid black;
}
.button-box {position: relative;display: flex;text-align: center;width: 400px;height: 60px;line-height: 60px;
}
.button1 {margin: auto;width: 80px;height: 40px;border: 2px solid rgb(236, 38, 38);cursor: pointer;
}
.button2 {margin: auto;width: 80px;height: 40px;border: 2px solid rgb(109, 109, 252);cursor: pointer;
}
.button3 {margin: auto;width: 80px;height: 40px;border: 2px solid rgb(11, 235, 11);cursor: pointer;
}
.button4 {margin: auto;width: 80px;height: 40px;border: 2px solid rgb(223, 218, 218);cursor: pointer;
}
第二步
好的,接下来,我们来写第二步,那就是给一行一行的按钮加上动画,然后使每行按钮向上移动。
这里,我们使用 animation:move 10s ease 1s infinite(创建动画,名字为move,共10秒,延迟一秒,循环播放),代码如下
.button-box {position: relative;display: flex;text-align: center;width: 400px;height: 60px;line-height: 60px;//创建动画效果animation: move 10s ease 1s infinite;
}
transform:translate(x,y) (在x轴与y轴上移动指定的距离),在这里,因为我们每行按钮的高度为60px,故我们不移动x坐标,y轴移动-60px,代码如下
/* 动画效果轮播效果 */
@keyframes move {0% {transform: translate(0, 0px);}33.3% {transform: translate(0, -60px);}66.6% {transform: translate(0, -120px);}100% {transform: translate(0, -180px);}
}
暂停动画 ,使用 animation:none (动画消失)来暂停,当我们的鼠标放到按钮自动轮播界面,轮播就会暂停,代码如下
/* 暂停动画 */
.big-box:hover .button-box {animation: none;
}到这里,第二步就基本结束了,但是,这时,有的友友就问了,为什么你要在第四行多写一行加油按钮?问题很好,这个主要是为了使动画更连贯
去掉第四行加油按钮
是不是感觉坚强直接变为加油有点僵硬了,再来看看不去掉第四行的,是不是很流畅了
HTML代码不变,CSS代码变化:
* {text-decoration: none;list-style: none;margin: 0 0;padding: 0 0;
}/* 一个盒子大小播放屏幕 */
.big-box {width: 400px;height: 60px;position: relative;overflow: hidden;margin: auto;margin-top: 500px;border: 2px solid black;
}/* 用来装四个盒子的按钮 */
/* .big-box {width: 400px;height: 240px;} */
.button-box {position: relative;display: flex;text-align: center;width: 400px;height: 60px;line-height: 60px;animation: move 10s ease 1s infinite;
}/* 动画效果轮播效果 */
@keyframes move {0% {transform: translate(0, 0px);}33.3% {transform: translate(0, -60px);}66.6% {transform: translate(0, -120px);}100% {transform: translate(0, -180px);}
}
/* 暂停动画 */
.big-box:hover .button-box {animation: none;
}/* 按钮效果 */
.button1 {margin: auto;width: 80px;height: 40px;border: 2px solid rgb(236, 38, 38);cursor: pointer;
}
.button2 {margin: auto;width: 80px;height: 40px;border: 2px solid rgb(109, 109, 252);cursor: pointer;
}
.button3 {margin: auto;width: 80px;height: 40px;border: 2px solid rgb(11, 235, 11);cursor: pointer;
}
.button4 {margin: auto;width: 80px;height: 40px;border: 2px solid rgb(223, 218, 218);cursor: pointer;
}
第三步
装饰按钮,使按钮的颜色逐渐改变,最后变为纯色
这里,我们只需要让背景颜色在鼠标放到按钮上时发生变化就行
用到了 transition:all 1.25s(all表示所有属性,1.25s表示从旧属性到新属性的过渡时间)
HTML代码不变,CSS代码如下
* {text-decoration: none;list-style: none;margin: 0 0;padding: 0 0;
}/* 一个盒子大小播放屏幕 */
.big-box {width: 400px;height: 60px;position: relative;overflow: hidden;margin: auto;margin-top: 500px;border: 2px solid black;
}/* 用来装四个盒子的按钮 */
/* .big-box {width: 400px;height: 240px;} */
.button-box {position: relative;display: flex;text-align: center;width: 400px;height: 60px;line-height: 60px;animation: move 10s ease 1s infinite;
}/* 动画效果轮播效果 */
@keyframes move {0% {transform: translate(0, 0px);}33.3% {transform: translate(0, -60px);}66.6% {transform: translate(0, -120px);}100% {transform: translate(0, -180px);}
}
/* 暂停动画 */
.big-box:hover .button-box {animation: none;
}/* 按钮效果 */
.button1 {margin: auto;width: 80px;height: 40px;border: 2px solid rgb(236, 38, 38);cursor: pointer;transition: all 1.25s;
}
.button1:hover {background-color: rgb(236, 38, 38);
}
.button2 {margin: auto;width: 80px;height: 40px;border: 2px solid rgb(109, 109, 252);cursor: pointer;transition: all 1.25s;
}
.button2:hover {background-color: rgb(109, 109, 252);
}
.button3 {margin: auto;width: 80px;height: 40px;border: 2px solid rgb(11, 235, 11);cursor: pointer;transition: all 1.25s;
}
.button3:hover {background-color: rgb(11, 235, 11);
}
.button4 {margin: auto;width: 80px;height: 40px;border: 2px solid rgb(223, 218, 218);cursor: pointer;transition: all 1.25s;
}
.button4:hover {background-color: rgb(223, 218, 218);
}
全部代码如下
HTML代码
命中不缺狗————
CSS总代码
* {text-decoration: none;list-style: none;margin: 0 0;padding: 0 0;
}/* 一个盒子大小播放屏幕 */
.big-box {width: 400px;height: 60px;position: relative;overflow: hidden;margin: auto;margin-top: 500px;border: 2px solid black;
}/* 用来装四个盒子的按钮 */
/* .big-box {width: 400px;height: 240px;} */
.button-box {position: relative;display: flex;text-align: center;width: 400px;height: 60px;line-height: 60px;animation: move 10s ease 1s infinite;
}/* 动画效果轮播效果 */
@keyframes move {0% {transform: translate(0, 0px);}33.3% {transform: translate(0, -60px);}66.6% {transform: translate(0, -120px);}100% {transform: translate(0, -180px);}
}
/* 暂停动画 */
.big-box:hover .button-box {animation: none;
}/* 按钮效果 */
.button1 {margin: auto;width: 80px;height: 40px;border: 2px solid rgb(236, 38, 38);cursor: pointer;transition: all 1.25s;
}
.button1:hover {background-color: rgb(236, 38, 38);
}
.button2 {margin: auto;width: 80px;height: 40px;border: 2px solid rgb(109, 109, 252);cursor: pointer;transition: all 1.25s;
}
.button2:hover {background-color: rgb(109, 109, 252);
}
.button3 {margin: auto;width: 80px;height: 40px;border: 2px solid rgb(11, 235, 11);cursor: pointer;transition: all 1.25s;
}
.button3:hover {background-color: rgb(11, 235, 11);
}
.button4 {margin: auto;width: 80px;height: 40px;border: 2px solid rgb(223, 218, 218);cursor: pointer;transition: all 1.25s;
}
.button4:hover {background-color: rgb(223, 218, 218);
}
如果,大家觉得好的话,可以给我点个赞
谢谢阅读!
本文来自互联网用户投稿,文章观点仅代表作者本人,不代表本站立场,不承担相关法律责任。如若转载,请注明出处。 如若内容造成侵权/违法违规/事实不符,请点击【内容举报】进行投诉反馈!